
The Decode pane (aka detail pane) is a post-process display that provides a detailed decode of each frame transaction (sometimes referred to as a frame). The decode is presented in a layered format that can be expanded and collapsed depending on which layer or layers you are most interested in. By default, the layer selected in the Summary Pane is the only opened layer in Decode Pane, however, you can set a default option for any layer by expanding/collapsing it. Click on the right arrow to expand the layer. The right arrow changes to a down arrow. Click on the down arrow to collapse a layer. Layers retain their expanded or collapsed state between frames.
-
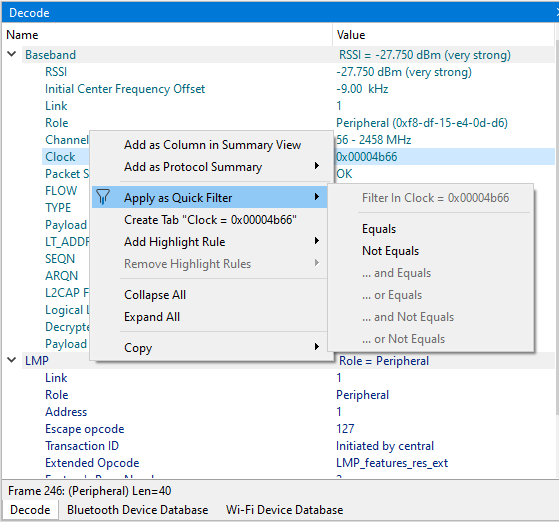
Add as Column in Summary View: Adds selected field to the Summary View. An alternative way of adding columns to Summary View is to drag and drop them from Decode Pane.
-
Add as Protocol Summary: Ability to manually add the desired field values to the root lines so that you can see the data without expanding the branch across sessions.
-
Apply as Quick Filter: Allows to quickly build a query for query-based filter using selected field and its value. The new query will be added to the filter input and executed. See 5.8 for more details on query-based filtering. There are several predefined options to build the query.
Equals – creates a query to filter in all frames where the field value equals to the selected filed value. The query will replace current query in the filter input (see 5.8).
Not Equal - creates a query to filter in all frames where the field value does not equal to the selected filed value. The query will replace current query in the filter input (see 5.8).
…And Equals – combines the ‘Equals’ query with the existing query in the filter input using AND logical operator.
…Or Equals – combines the ‘Equals’ query with the existing query in the filter input using OR logical operator.
…And Not Equals – combines the ‘Not Equal’ query with the existing query in the filter input using AND logical operator.
…Or Not Equals – combines the ‘Not Equal’ query with the existing query in the filter input using OR logical operator.
-
Create Tab: Creates a unique custom tab based on the selected field and value. See 5.9.1 for more details on Custom Tabs.
-
Add Highlight Rule – Adds a unique frame highlighting based on the selected field and value. See 5.7.4 for more details on Frame Highlighting.
-
Remove Highlight Rules - Remove the applied frame highlighting. See 5.7.4 for more details on Frame Highlighting.
-
Collapse All: Collapse Decode Pane tree.
-
Expand All: Expand Decode Pane tree.
-
Copy: Copy selected data to clipboard. Copy menu includes such items:
-
All selection: allows to copy Field Name and Value
-
Field Name: allows to copy Field Name
-
Value: allows to copy Field Value
-
In a USB transaction, all messages that comprise the transaction are shown together in the Detail pane. The color coding that is applied to layers when the detail pane displays a single message is applied to both layers and messages when the detail pane displays a transaction. To keep the distinction between layers and messages clear, each header of each message in the detail pane ends with the word “Message” or “Messages”. The latter is used because data and handshake messages are shown as a single color-coded entry.
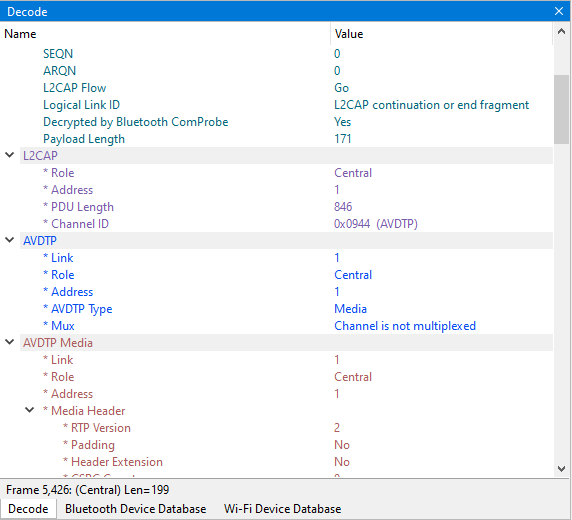
Each protocol layer is represented by a color, which is used to highlight the bytes that belong to that protocol. The fields which do not represent the frame itself, but represent metadata, are represented in a gray color.
When a payload in particular packet is reconstructed, the legend (* means that the data were reconstructed) is displayed at the top of the Decode Pane after the Frame Number. The asterisk character is also displayed in front of each field when the content of that particular field is coming from a previous packet. The reconstruction is dependent on the protocol and can be due to number of reasons such as reassembly, fragmentation/defragmentation or encryption/decryption.
Consider the following example.
-
Packet #1 has layers A and B where B’s payload contains the first fragment ‘f1’ (0x112233).
-
Packet #2 has the same layers A & B, where B’s payload contains the last fragment ‘f2’ (0x445566).
Then B’s payload in packet #2 will be reconstructed and f2 will be transformed to f1+f2 (0x112233445566). The fields that are decoded and part of fragment f1 will bear an asterisk in front of it (Example: *f1_field1: 0x11) because these fields are not part of packet #2 but is required for the complete decoding of Layer B.
The Raw Data Pane also exhibits the same behavior. In the above example, if you click on Packet #2 and Layer A, all the original octets transmitted in this packet shall be displayed in the Raw Data Pane. The moment you click on Layer B, the octets in the Raw Data Pane is transformed and the reconstructed octets are shown instead.
In the case of certain specific protocols, an encrypted payload (for example) 0x2233445566 maybe decrypted as (for example) 0x1111111111. Since the entire payload is transformed, all the fields will bear an asterisk implying that they were reconstructed.