eExcursion Data Capture Mode
To enable and configure eExcursion Data Capture Mode, follow the steps in eExcursion Mode Configuration.
Start Capturing Data in eExcursion Mode
To capture in eExcursion Mode, disconnect the hardware from the computer.
-
Apply power to the analyzer with external power or using the battery power (X500/X500e). See below for applying power.
-
Once the analyzer is powered up, ensure the Host USB cable is disconnected, and press the Capture button on the front panel (right side). The Capture LED will illuminate steady blue when capturing data.
Stop Capturing Data in eExcursion Mode
To stop capturing data:
-
Press the Capture button on the analyzer's front panel (right side).
-
After a brief delay, the Capture LED will turn off. The capture file is saved to the hardware. Starting a new capture will save the captured data in a new capture file.
Each capture collected in eExcursion Mode (a start/stop sequence) is stored as a separate date and timestamped capture file in the hardware. Each capture file can be selectively analyzed upon reconnecting to the Wireless Protocol Suite, (see following section).
Analyzing Data from Internal Storage
The procedure for protocol analysis of data captured in eExcursion Mode involves connecting the analyzer to a computer, recording a capture that was previously stored on that hardware unit, and analyzing the data using the Wireless Protocol Suite.
-
Connect the analyzer that contains the eExcursion Mode capture to a computer.
-
Apply power to the hardware.
-
Open the Wireless Protocol Suite.
-
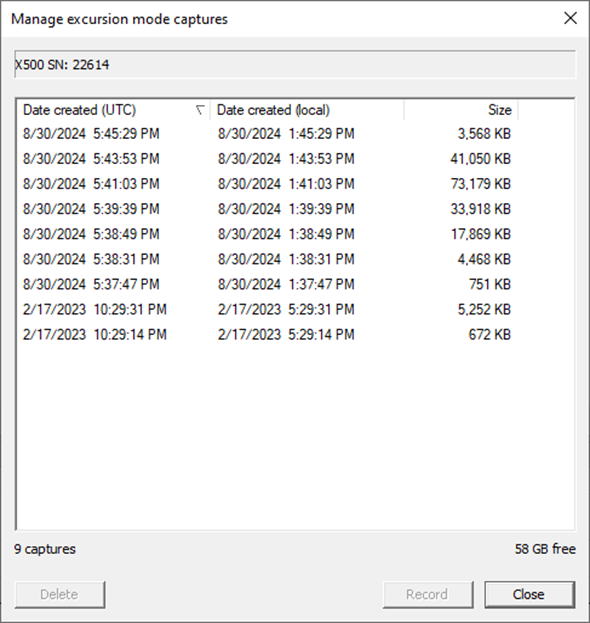
When the Main application window opens, press Manage eExcursion Mode captures button on the analyzer toolbar. See the figures below.

The list of files recorded during eExcursion Mode is shown below.
-
When the Manage eExcursion Mode captures... dialog opens, select a capture to analyze. Click on the Record button, and the dialog will close. The hardware will begin behaving identically to how it handles a live capture. The Device Database View and Security View will populate with information from the selected eExcursion Mode capture.
-
Follow the procedures in Selecting Devices for Analysis.
-
Follow the procedures in Record: Begin Capture.
Analyzing Data from External Storage
When capturing to external storage, use Wireshark to capture on the ethernet adapter connected to the analyzer.
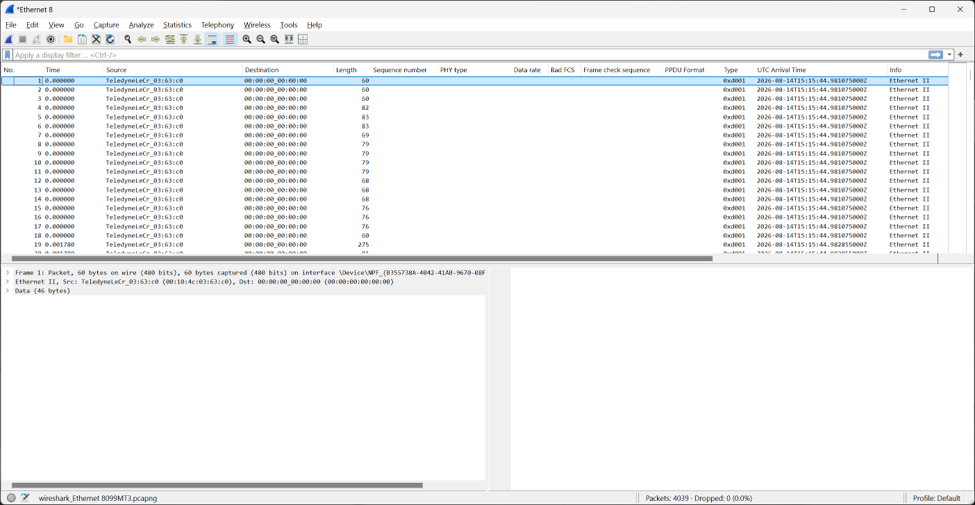
You will see packets with the Source field indicating “Teledyne” (e.g. TeledyneLeCr_03:63:c0 in above screenshot) and Type field indicating “0xd00x” where x is:
|
Type |
Analyzer |
|---|---|
|
0xd001 |
X240 |
|
0xd002 |
X500 |
|
0xd003 |
X500e |
|
0xd004 |
X240i |
|
0xd005 |
X700 |
After you stop capturing with Wireshark, do a Save Capture File as operation. Note that it is important to select the Save as file type of “Wireshark/tcpdump/… - pcap” shown as follows. The Save as file type “Wireshark/… pcapng” is NOT the format that WPS will be able to load.
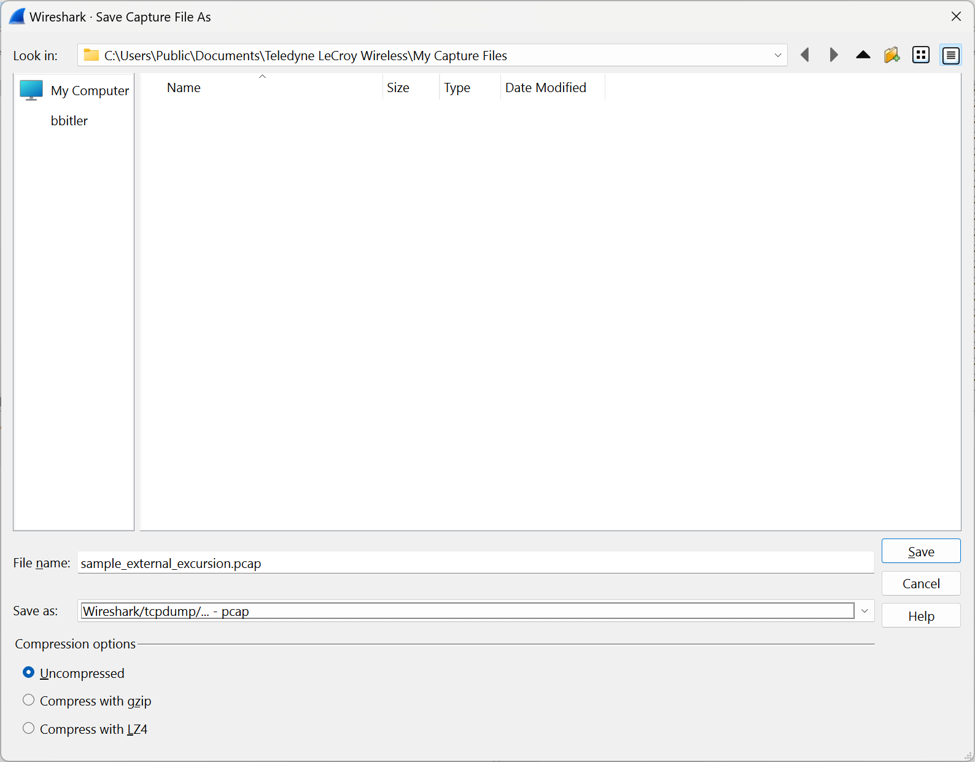
Once you have saved the file in Wireshark, you can run WPS and do an Open Capture File operation from the Start Page. Note, you will select the file type of “Excursion Capture Files (*.pcap)” shown below:
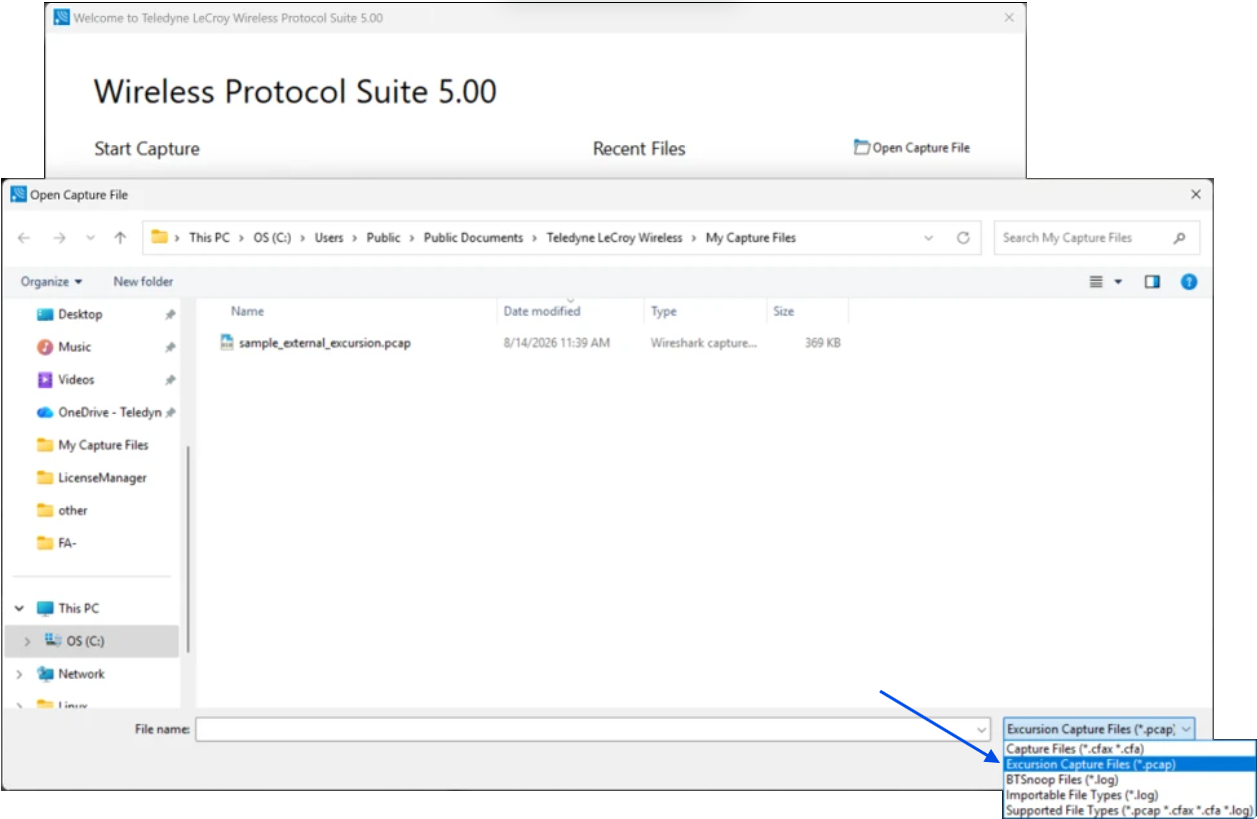
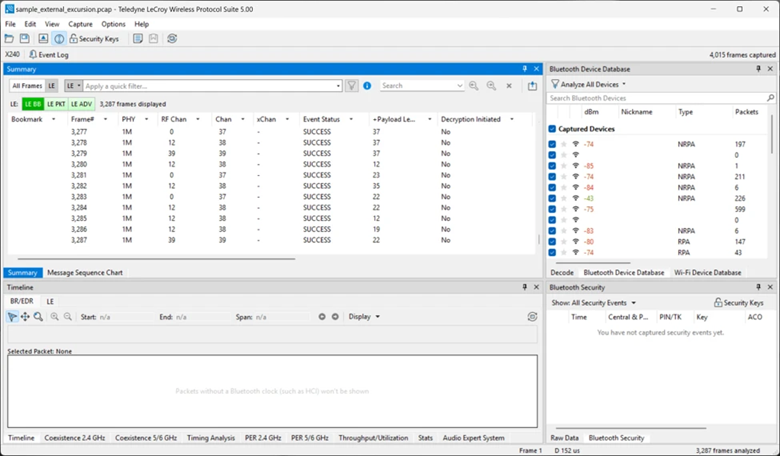
Once you open the .pcap file, you will see the captured frames as follows: