
The File menu options are defined below.
|
Menu Option |
Description |
|
New Project |
Creates a new project. |
|
Open |
Opens an existing trace or trace files.* |
|
Resume Session |
Resumes an existing session.* |
|
Save Trace |
Saves an existing trace or trace files.* |
|
Save Trace As |
Saves an existing trace or trace files with a different name or directory.* |
|
Save All Traces |
Saves all trace files.* |
|
Save Project |
Saves the current project.* |
|
Save Project As |
Saves the current project with a different name or directory.* |
|
Edit Project Notes |
Opens a text window where you can save notes about a project.* |
|
Batch |
Runs batch scenarios (see Infusion Batch Test Scenarios). Available only after a project is open.* |
|
Project RTT Pairs |
Allows you to choose which port pairs to use to calculate the round-trip time. |
|
Close Trace |
Closes the current trace.* |
|
Close Project |
Closes the current project.* |
|
Export Trace |
|
|
Print Trace |
Prints the current Trace.* |
|
Recent Trace Files |
Lists recent trace files to open.* |
|
Recent Projects |
Lists recent projects to open.* |
|
Exit |
Exits the application. |
-
These functions assume that you have already connected to an analyzer and recorded a trace (see Recording Configuration with Real Time Traffic). You also can use these options with projects and traces that ship with the analyzer in the Examples folder to learn how to use the analyzer.
Resume Session
Use Resume Session when you want the analyzer to continue recording data traffic. At a later point in time, you may want to re-start the application, which is still recording data. To do this, select Resume Session.
Resuming a session assumes the following:
-
That you have already connected to an analyzer and started a Recording (Recording Settings Pane)
-
That you have closed the project
-
That you have exited the application
To Resume a Session
-
Select File > Resume Session.
-
You will first be prompted for the analyzer you were using during your session.
-
If you changed host machines to open the application, you will be prompted for the Session Key that you entered when you closed the project or exited the application.
-
If you select Resume while you are still working on the same host machine, the application will remember the Session Key, so you will not be prompted to enter it.
-
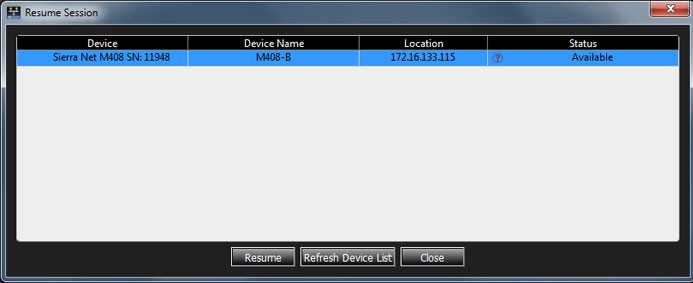
-
Enter the Session Key, if needed. This is stored in Preferences.
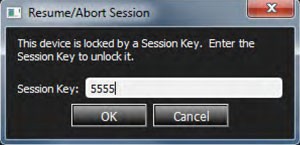
-
Click OK to continue your recording session. The following prompt appears.
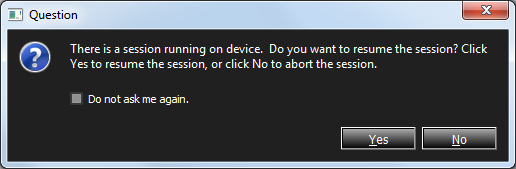
-
Click Yes. The session you were recording pops up. By default it is called RecoveryProject.

Once the session has resumed, you can continue recording without losing any data traffic.
Save Trace As
This function has several capabilities:
-
Save a Trace to a File
-
Save All events
-
Save part of a Trace between two Markers
-
Save Displayed Events
To save a Trace as one of the available options, do the following:
-
Click File > Save Trace As. The following window appears:
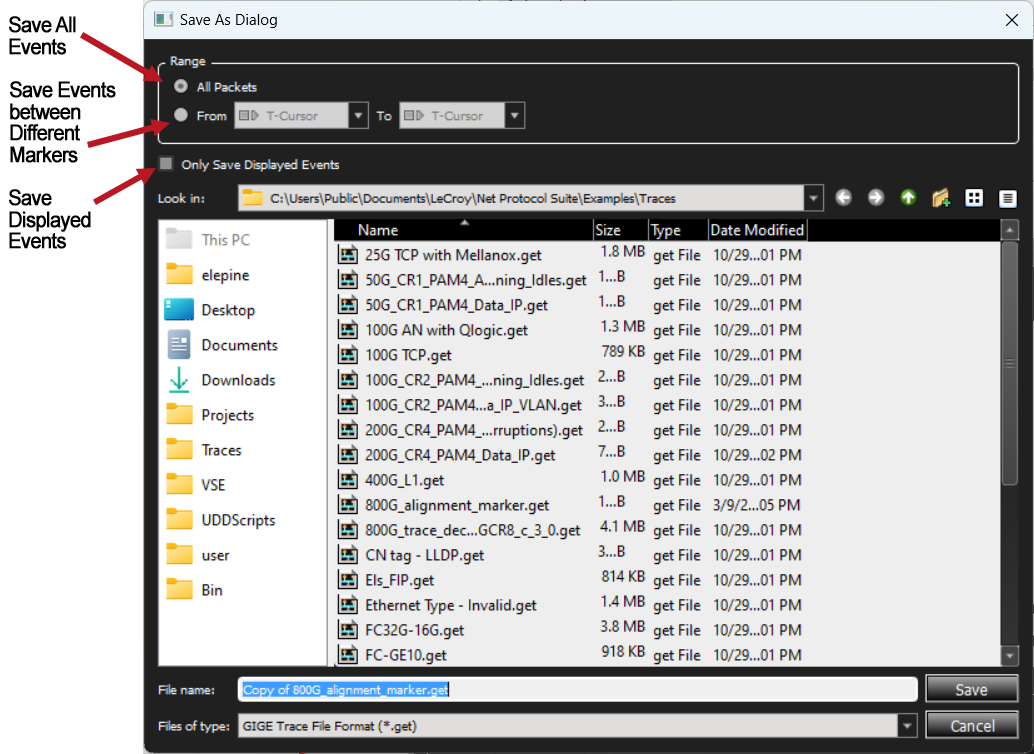
Save Trace As Window
-
Select the option you need, then select the range between Markers. For more information, see Markers.
-
Click Save.
Save Events Between Markers
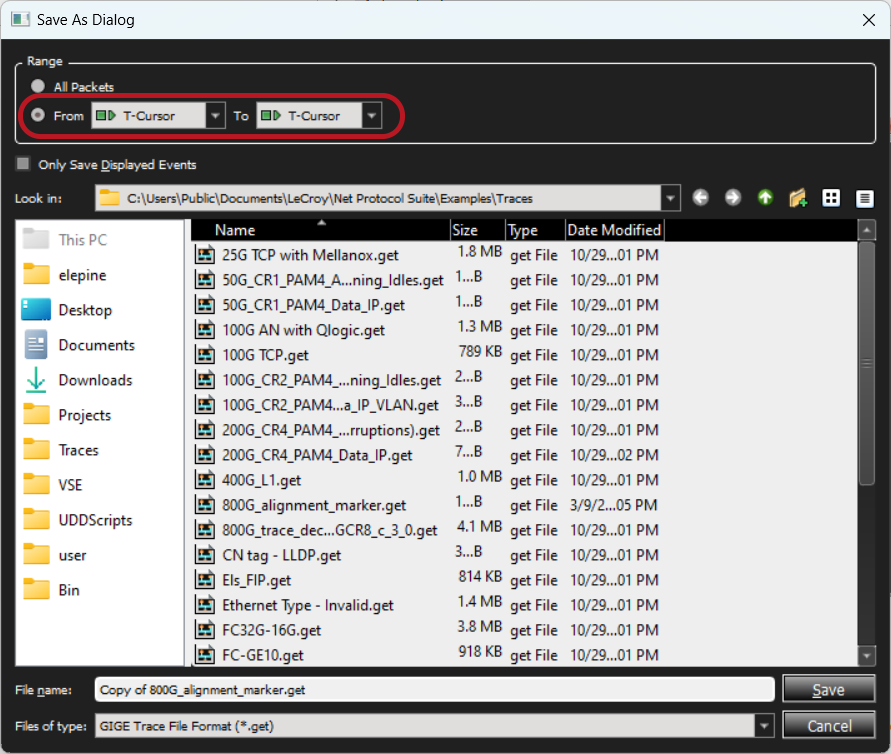
-
Click the arrows in the From and To boxes to select Markers (see Markers for definition and generation of Markers).
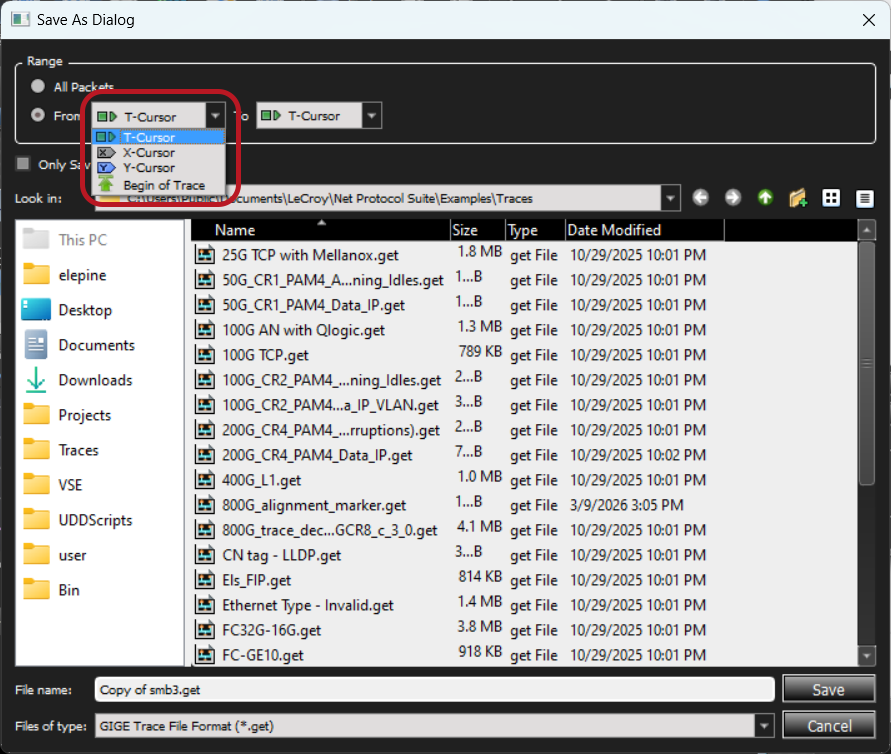
Save Partial Trace
-
After selecting From and To markers, Save the partial Trace.
Save Project As
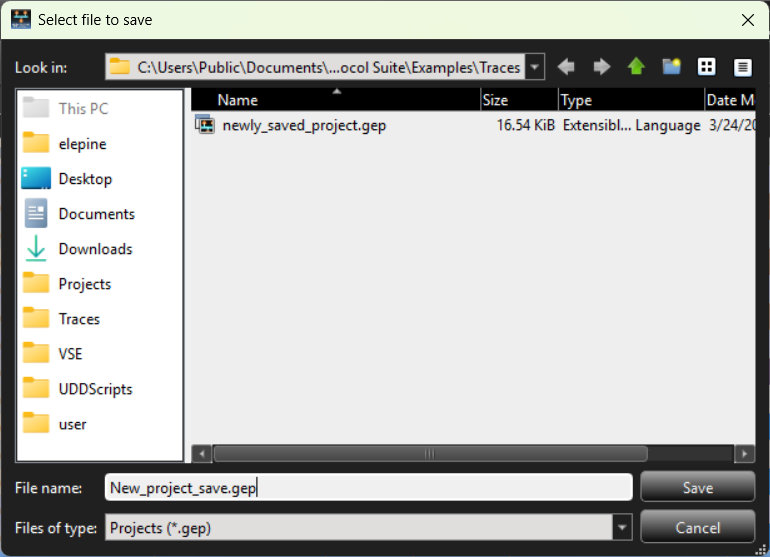
Use Save Project As to save a project with a different name.
A window appears where you can save the project in a specific location and with a specific name.
Project Notes
To add notes to a Project, do the following:
-
Select File > Edit Project Notes. A text window opens where you can add notes to the project.
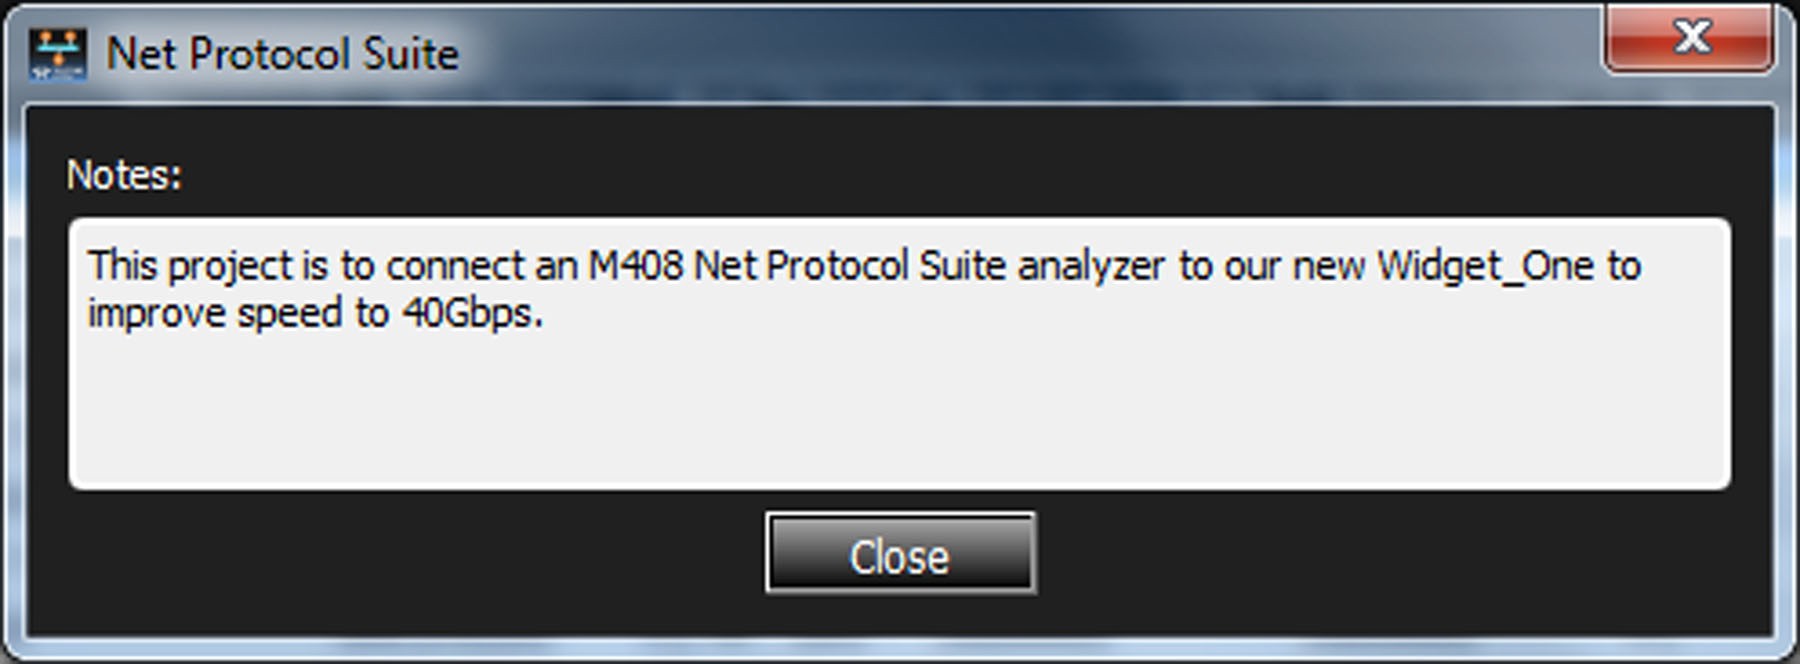
-
Enter the project note. When you are finished, click Close.
-
To continue adding notes, repeat steps 1 and 2.
Project RTT Pairs
Project RTT Pairs allows you to choose which port pairs to use to calculate the round-trip time.
Round-trip time (RTT), also called round-trip delay, is the time required for a signal pulse or packet to travel from a specific source to a specific destination and back again. In this context, the source is the computer initiating the signal and the destination is a remote computer or system that receives the signal and retransmits it.
These assignments remain in effect as long as you are in a given project.
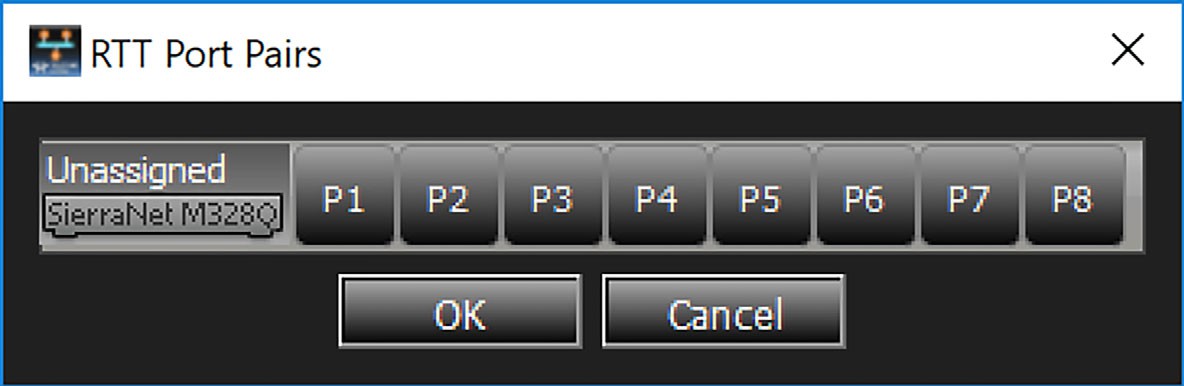
In the following diagram adjacent ports have been paired for RTT analysis:
-
Port 1 and Port 2
-
Port 3 and Port 4
-
Port 5 and Port 6
-
Port 7 and Port 8
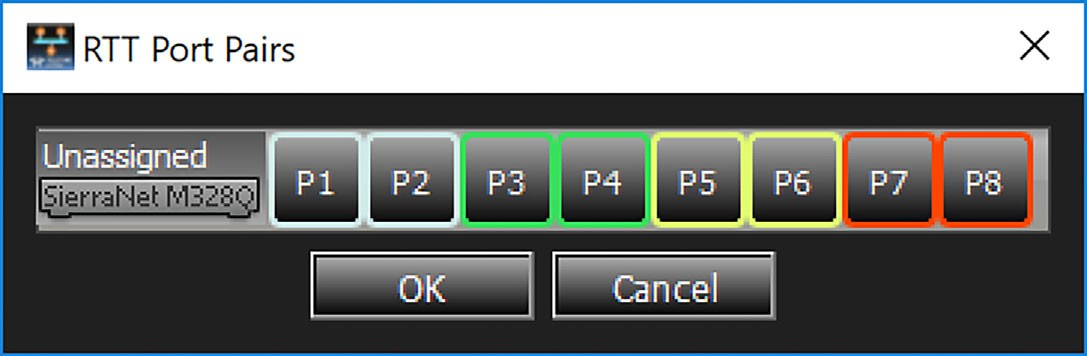
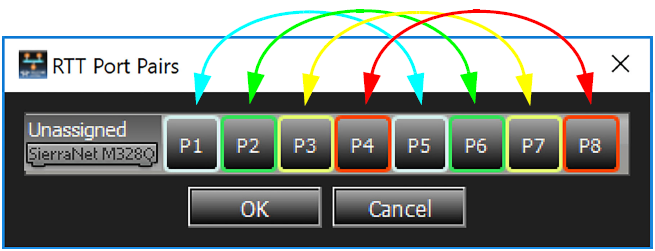
However, depending on the topology of your system, you can select any port to be paired with any other port for RTT analysis. An example diagram is shown below.
-
Port 1 is paired with Port 5
-
Port 2 is paired with Port 6
-
Port 3 is paired with Port 7
-
Port 4 is paired with Port 8
For a more detailed description of how to use the RTT function see RTT Pairs.
Close Trace
To close a Trace, perform the following steps:
-
Select File > Close Trace. A warning dialog box opens.
-
Choose whether to Save, Discard, or Cancel.
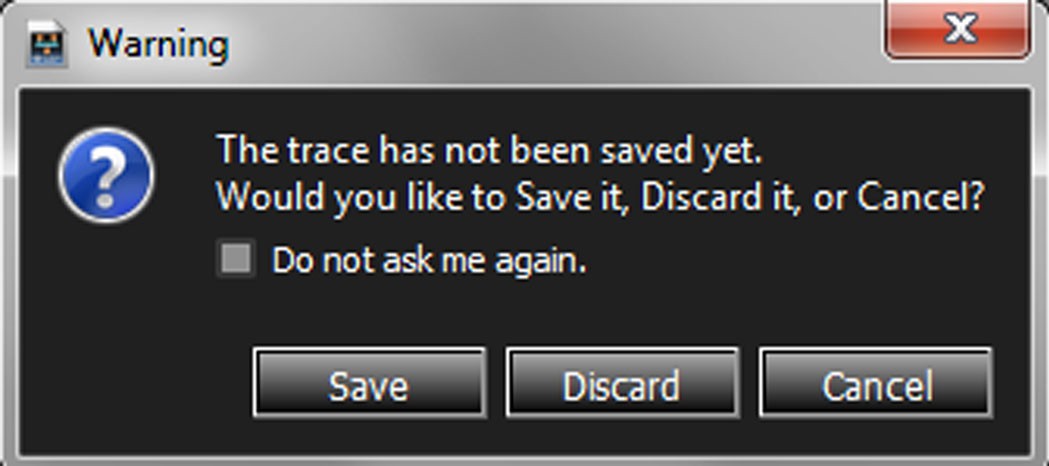
Discard Trace – Upload Manager
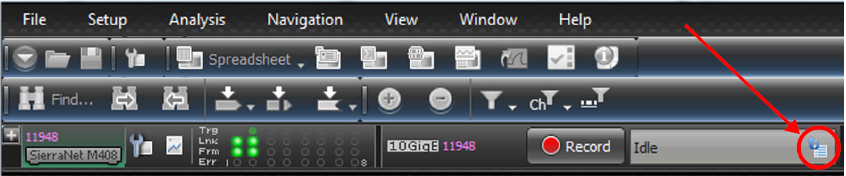
If you choose to discard the trace, but haven’t closed the project, you can still retrieve part or all of the trace with Upload Manager, shown below.
-
Click on the text icon in the Idle window. The Upload Manager dialog box appears.

-
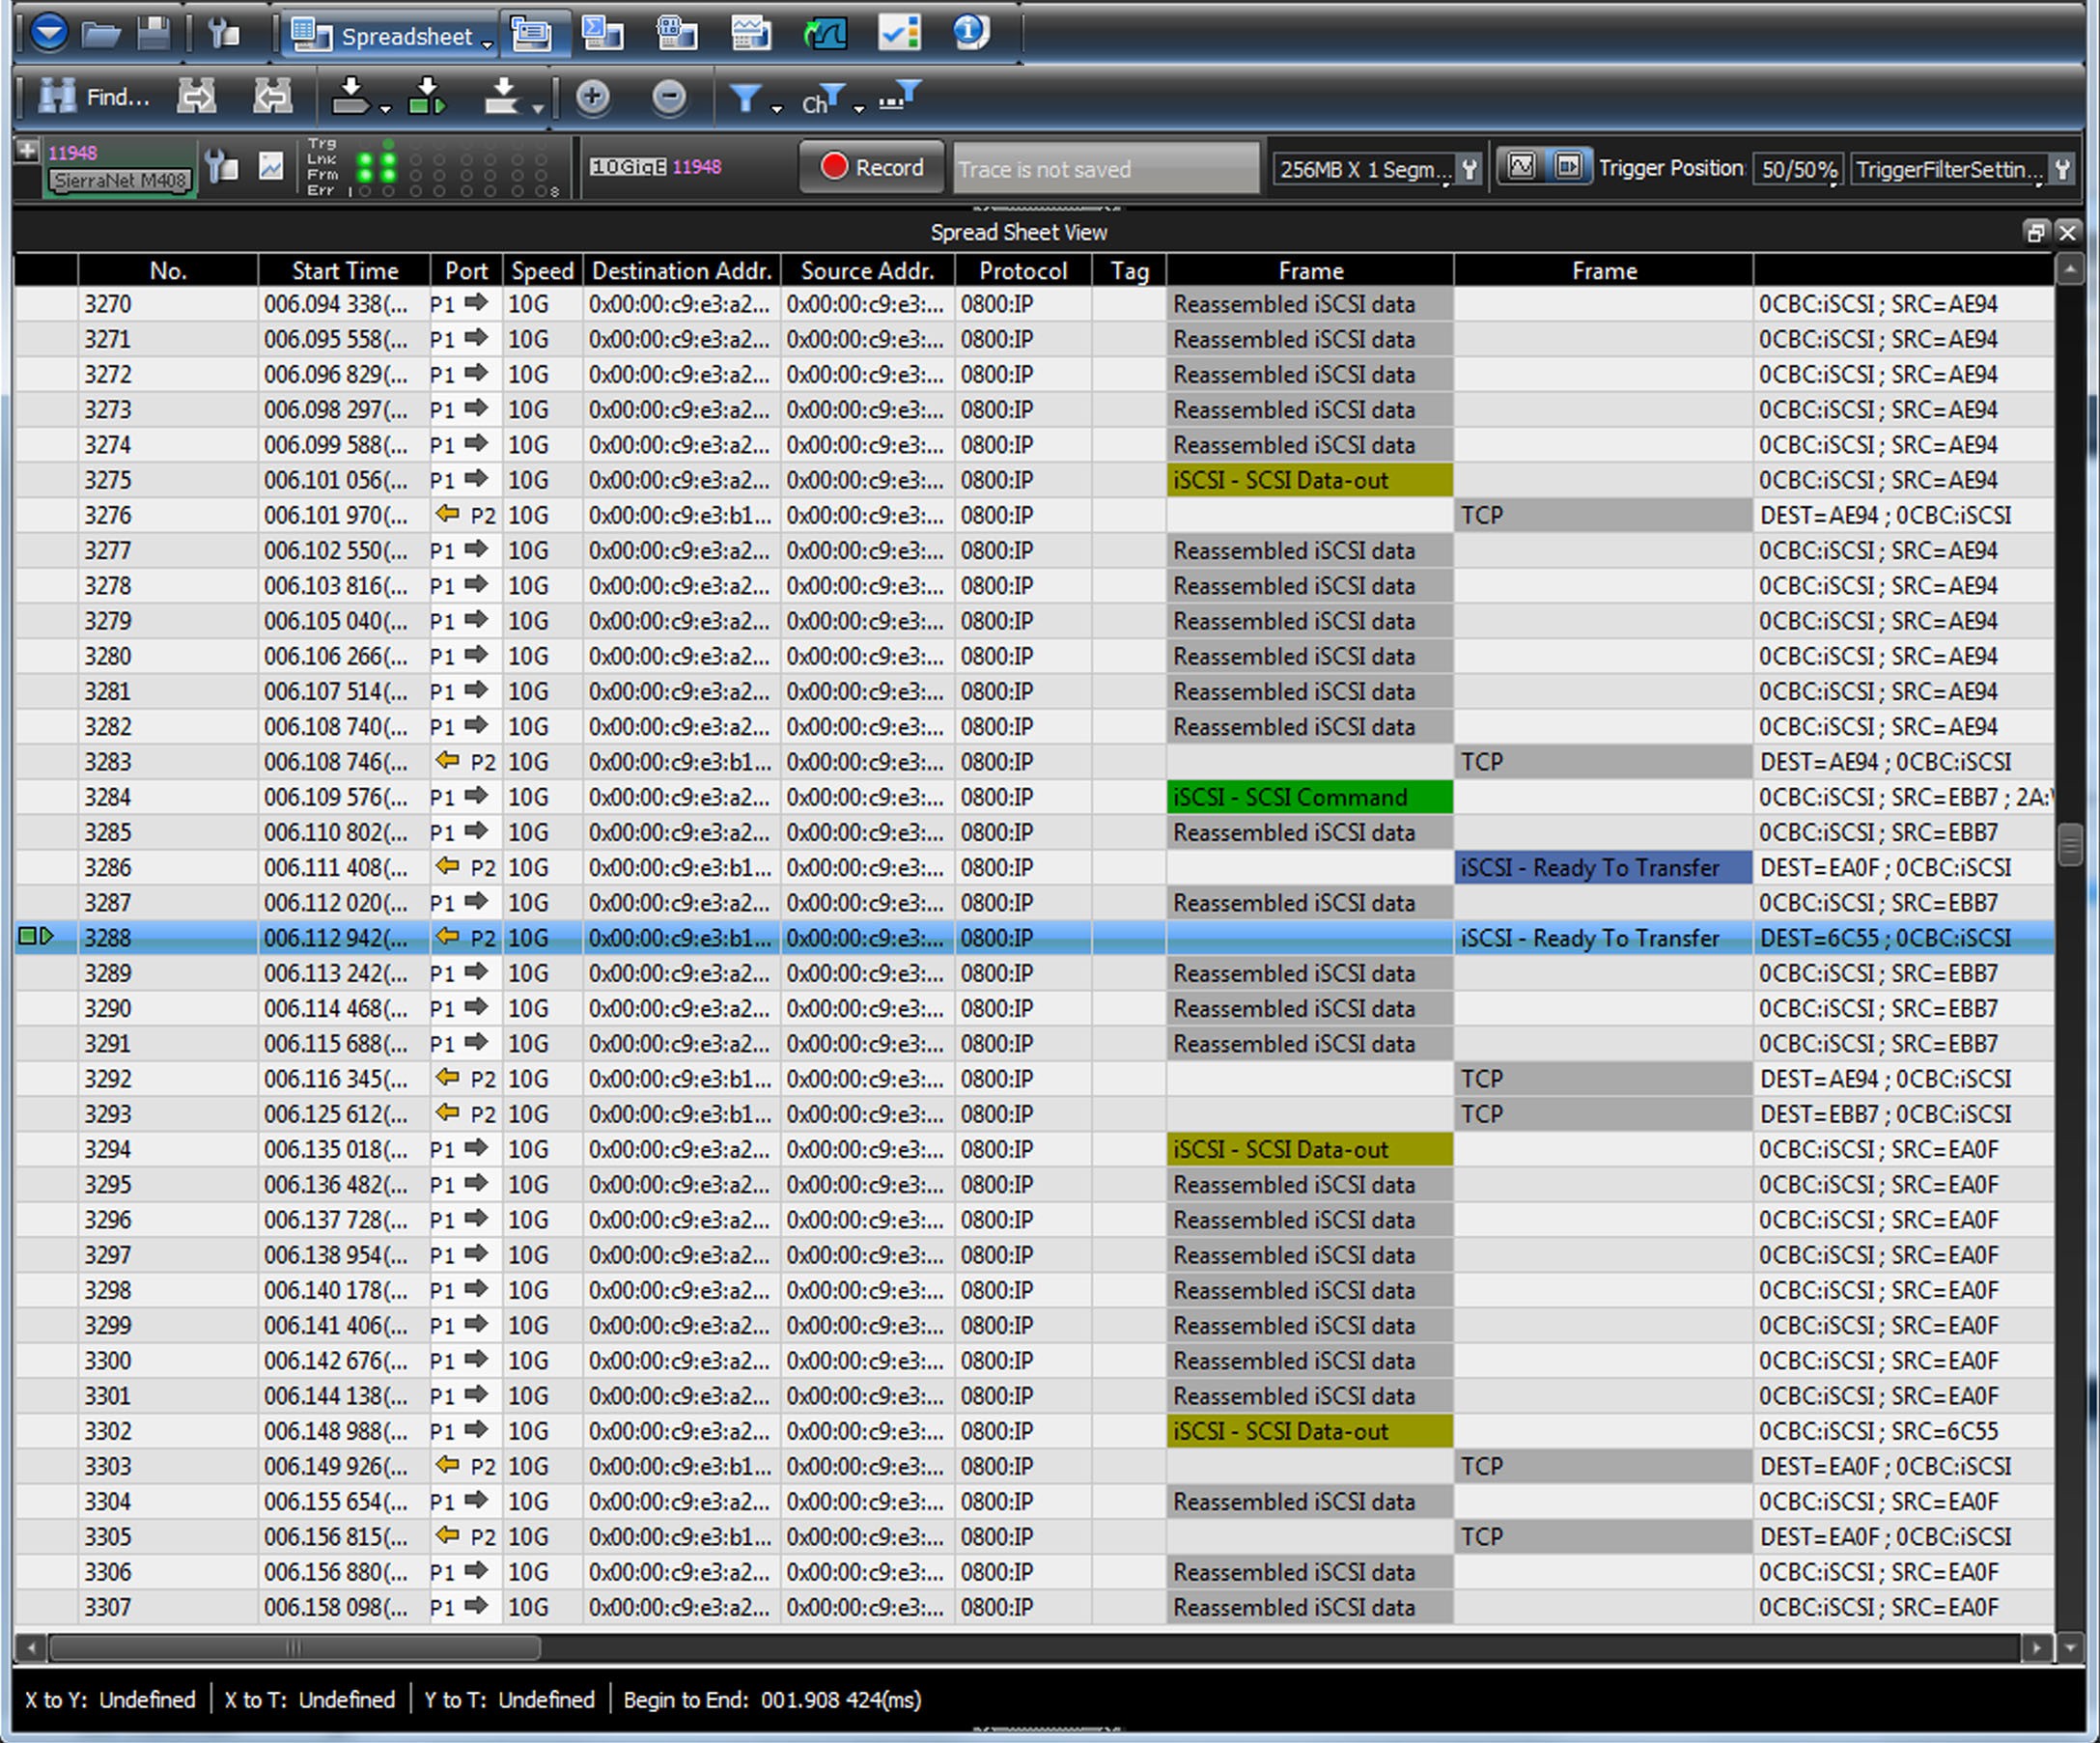
You can upload the entire trace file (in this case 256MB) or customize the size of the trace. Place the mouse pointer over the beginning or ending of the trace, grab the edges, and drag them in toward the trigger point.


-
You can continue making the trace smaller, so that it is concentrated around the trigger point, or you can slide the section of the trace you want to recover from the beginning to the end of the trace.


-
Click Upload Selected. The section of the original trace you outlined is uploaded.
Close Project
If you decide to Close the Project, one of three different events will occur:
-
No Changes to the Project have Occurred since it was last Saved.
If you haven’t made any changes to the Project since it was last Saved, the Project will simply close and the Application will remain Open.
-
Not Recording Data Traffic.
-
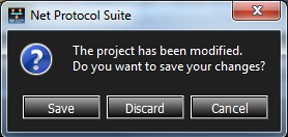
If you are not actively recording data traffic, but have modified the Project, the following warning message will pop up:
Close Project (but not Record Data) -
You can then decide to Save or Discard any changes you’ve made to the Project. In either case the Application remains Open.
-
-
Actively Recording Data Traffic
-
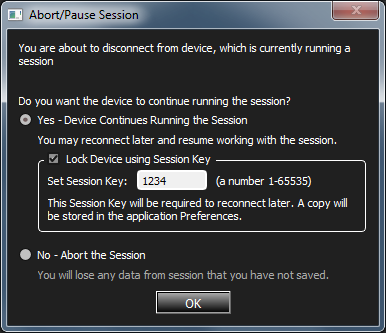
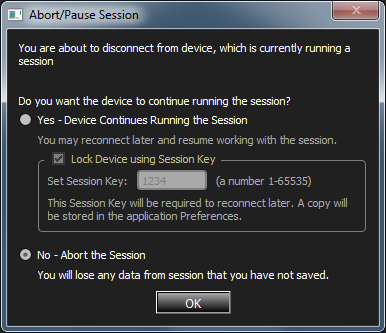
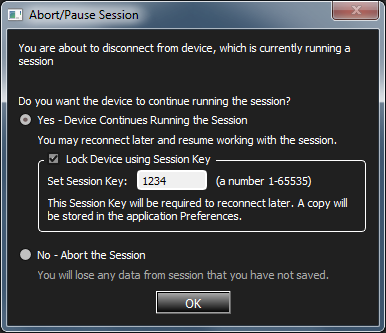
If you are Recording Data Traffic, the Abort/Pause Session dialog pops up.
-
At this point you can decide to either:
-
Close the Project but continue Recording Data Traffic and return to the Session in the future.
OR -
Close the Project, Abort the Recording of Data Traffic entirely, and lose any Data Traffic that has not already been saved.
-
-
-
-
If you click Yes in the context of “Close Project”, the project closes, but data traffic continues to be recorded. The application remains open and the project can be recovered. See Resume Session.
-
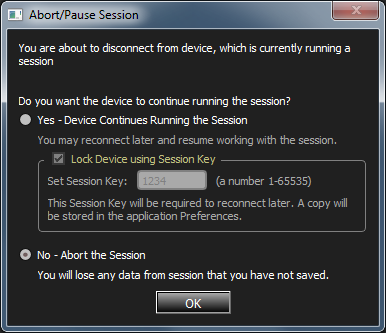
If you click No in the context of “Close Project”, the project closes and any data traffic not already saved will be lost. The application remains Open, but the project cannot be recovered.
Export and Open with Wireshark
To Export and Open with Wireshark, do one of the following:
-
Select File > Export > Export and Open with Wireshark
OR
-
Click the Export to Wireshark icon

-
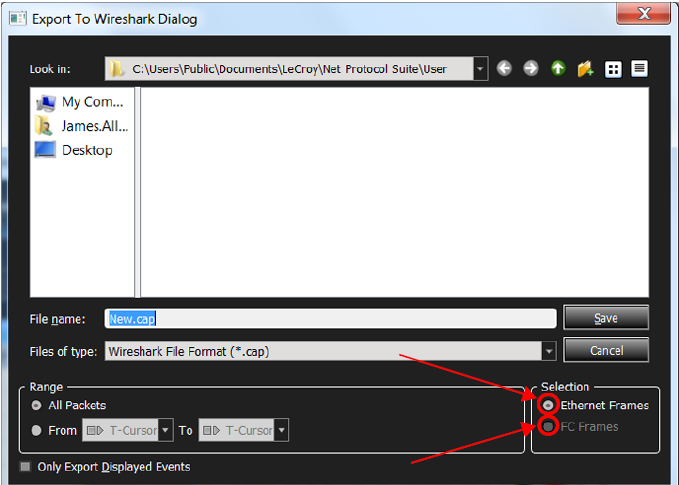
The Export to Wireshark window has an option to choose between Ethernet and FC export. This option is only available if the trace contains both protocols. Only the selected protocol frames will be exported.
-
To get both types of files, you must perform the export twice.
Export Project to API Script
This option exports the currently open project to the Python API.
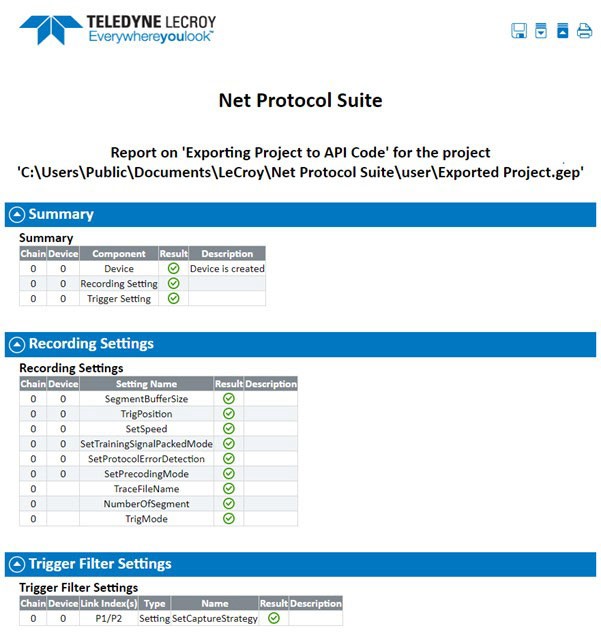
Select File > Export Project to API Script, then select a Python file to export. The Net Protocol Suite then exports the project. The Exporting Project to API Code report opens when the export is complete. Check the export report for any errors or warnings before you run the API script.
There are some limitations to this feature:
-
It cannot export Exerciser settings.
-
It cannot export Advanced Sequencer settings.
-
It cannot export External Trigger settings.
Exit the Application
There are two ways to exit Net Protocol Suite:
-
Go to File > Exit
OR
-
Click the X in the upper right corner of the Main Menu
Several different sequences can occur, depending on what had been opened (project or trace) and whether you want to continue recording or not. A few of those sequences are described in more detail below.
Not Recording Data Traffic
-
If the project has not been modified, the application closes.
-
If the project has been modified, the following dialog appears:
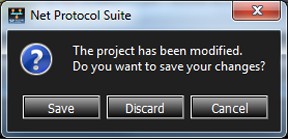
Choose whether to Save or Discard any changes made to the Project. Once you make your selection, the application closes.
Actively Recording Data Traffic
If you are still recording data traffic upon Exit, the Abort/Pause Session dialog box appears.
-
You can:
-
Exit the application, continue recording data traffic, and return to the session in the future.
OR -
Exit the application, abort the recording of data traffic, and lose any unsaved data traffic.
-
-
Select Yes. The application exits, but data traffic continues to be recorded and the project can be recovered. See Resume Session.
-
Select No. The application exits and any unsaved data traffic is lost. The project cannot be recovered.