
Introduction
When decoding RoCEv2 packets either TCP RDMA or RoCE RDMA (for our subject matter), there are some decoding steps that might be necessary if a captured trace does not seem to decode correctly. When working with RoCE RDMA traces, there are two major ways that the analyzer “learns” of the information that it needs to know to decode the packets so that they are readable to the analyzer/user. The information that makes it readable to the analyzer is the NVMe QP ports. These NVMe QP ports with RoCEv2 can be read in a “natural” way during connection of the Initiator and Target that the analyzer uses to learn about the QP ports so it can decode the NVMe packets and then there are manual ways to enter these QP ports that might be necessary after connections have already taken place. When working with TCP RDMA traces, the only thing that must be present is the “NVMe/TCP ports” that usually already exist in the decoder which we will discuss further below. However, starting with release 4.40 we have made the steps for NVMe decoding much easier to ensure your trace can be decoded as an NVMe type trace or have the analyzer ready in advance to “Record” traces as NVMe traces without having to know anything about what your NVMe QP ports are. We will discuss the ease added for the release with version 4.40 decoding first and then cover the steps that must be done pre-4.40 for NVMe decoding.
Setting NVMe Decoding Starting with Release 4.40
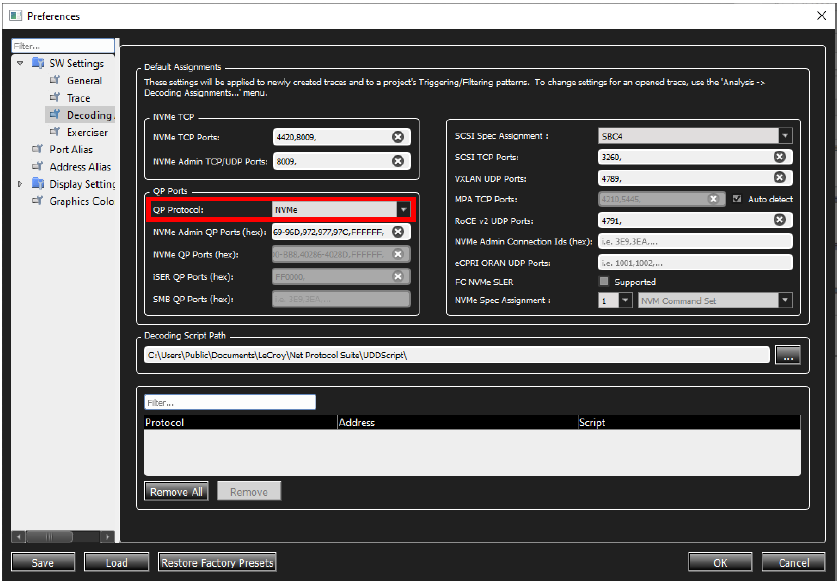
Due to the complexities of ensuring every time a customer wanted to decode an NVMe trace or wanted to make sure the decoding was setup correctly no matter if the RoCE_V2-MAD packets had been captured (which was the only way we could load the decoding tables before), NVMe decoding can now be activated prior to starting a “Recording” by going to the Setup > Preferences > SW Settings > Decoding Assignment Page.
Under this page, there is a setting for “QP Protocol:” with a drop down for NVMe. After this is set, all traces taken by new Recordings or old traces that are loaded are all properly decoded as NVMe traces. This takes care of all the NVMe QP port settings and thus the customer does not have to remember any frame Destination QP port hex settings, which makes it much easier.
If you have already executed a “Record” and you have a RoCE Trace that you want to be decoded as an NVMe trace (and you have not already performed the steps above to set the analyzer in NVMe mode):
-
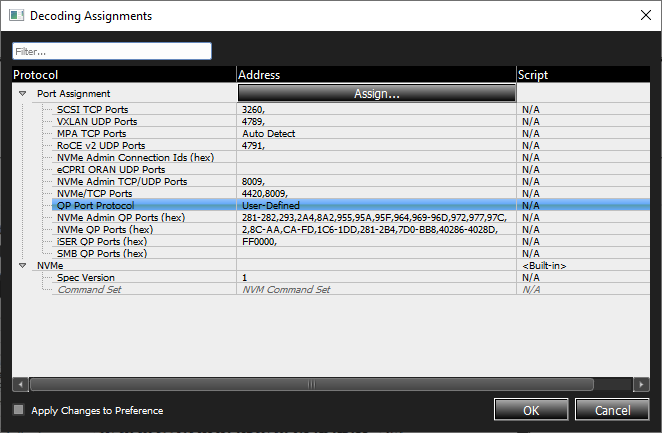
Go to the “Analysis” tab and select Decoding Assignments. A list will be displayed.
-
You must only choose NVMe within the QP Port Protocol field (highlighted below) and select the “Apply Changes to Preference” tab.
This brings up a final message stating that the Quick View traces will be saved.
-
Select Yes. The Trace (and all subsequent RoCE Traces) will be decoded as NVMe Trace.
This is all that is needed to get your analyzer decoding NVMe, either prior to Recording or after Recording, starting with Release 4.40.
Capturing a Decoded Trace Using RoCE RDMA – Pre-4.40 Releases
If the recording is started before the connection is made to the Target, this is when certain packets are exchanged that automatically load the decoding table. This makes it much easier, since all decoding is already being done as shown below.
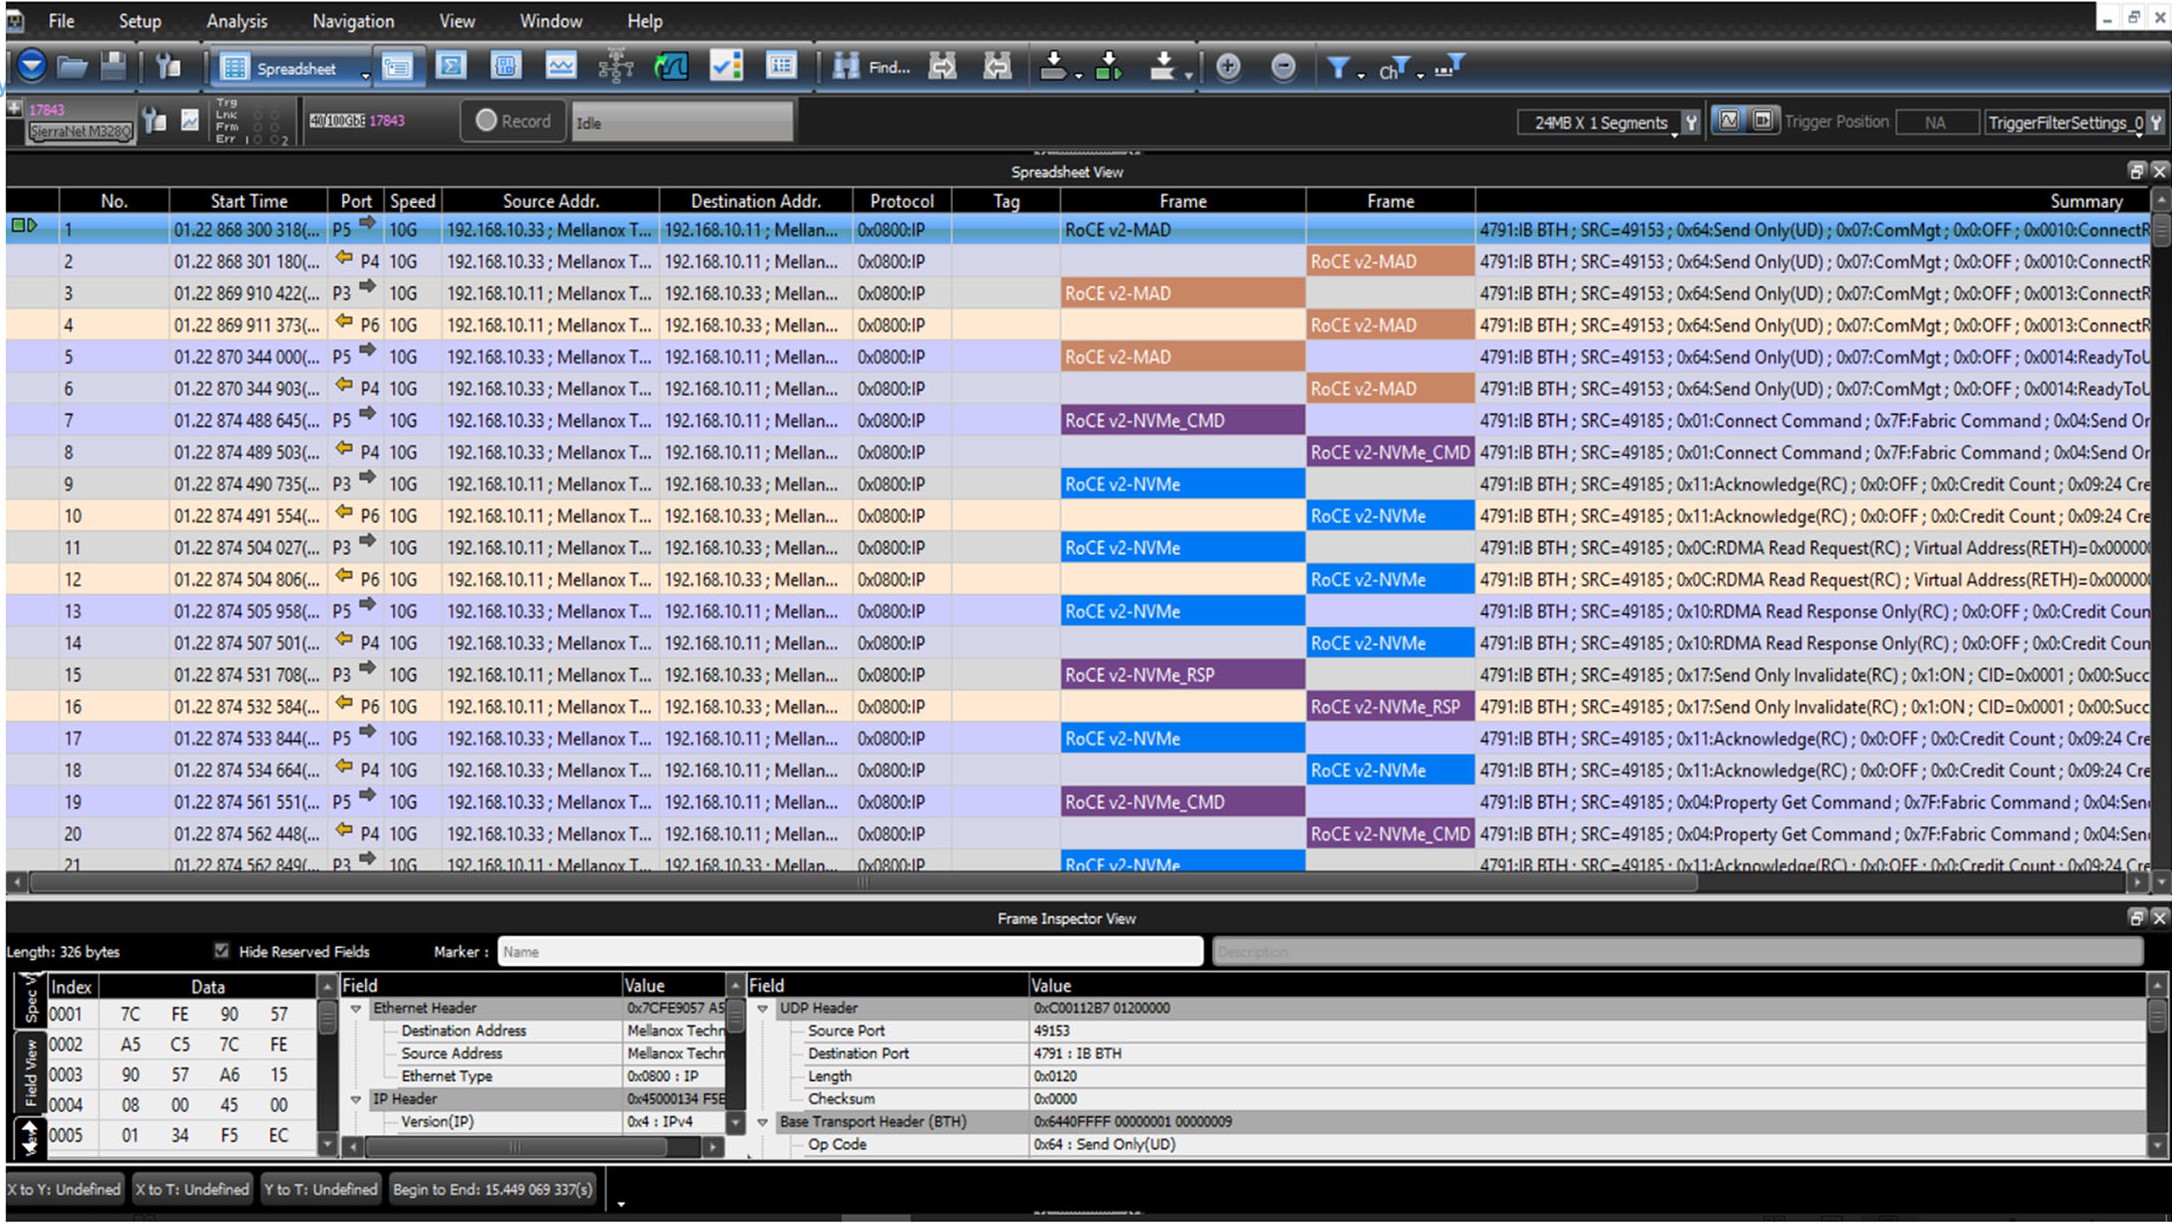
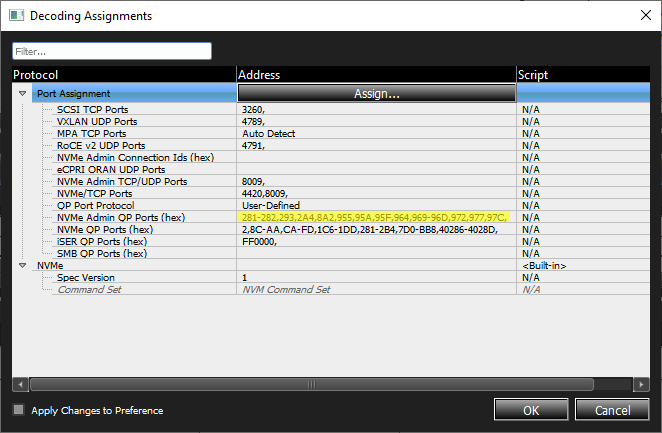
As you can see, the NVMe packets have been translated and correctly identified. This is because the decoding table has been prepopulated with the “NVMe/QP ports” that are necessary for all the packets to be translated. The decoding table shown below contains the “NVMe QP ports” in the table after it has been automatically populated. The decoding table will be discussed further in the following sections.
Capturing a Non-Decoded trace using RoCE RDMA – Pre-4.40 releases
If you have just recorded a Trace that looks like the table below and when the RDMA is set to RoCE, there are steps you can take to allow this trace to show in a decoded state. Since this trace was taken after the connection sequence between Initiator and Target (missing the automatic NVMe port setup packets), the decoding must be fixed manually if packet decoding is desired.
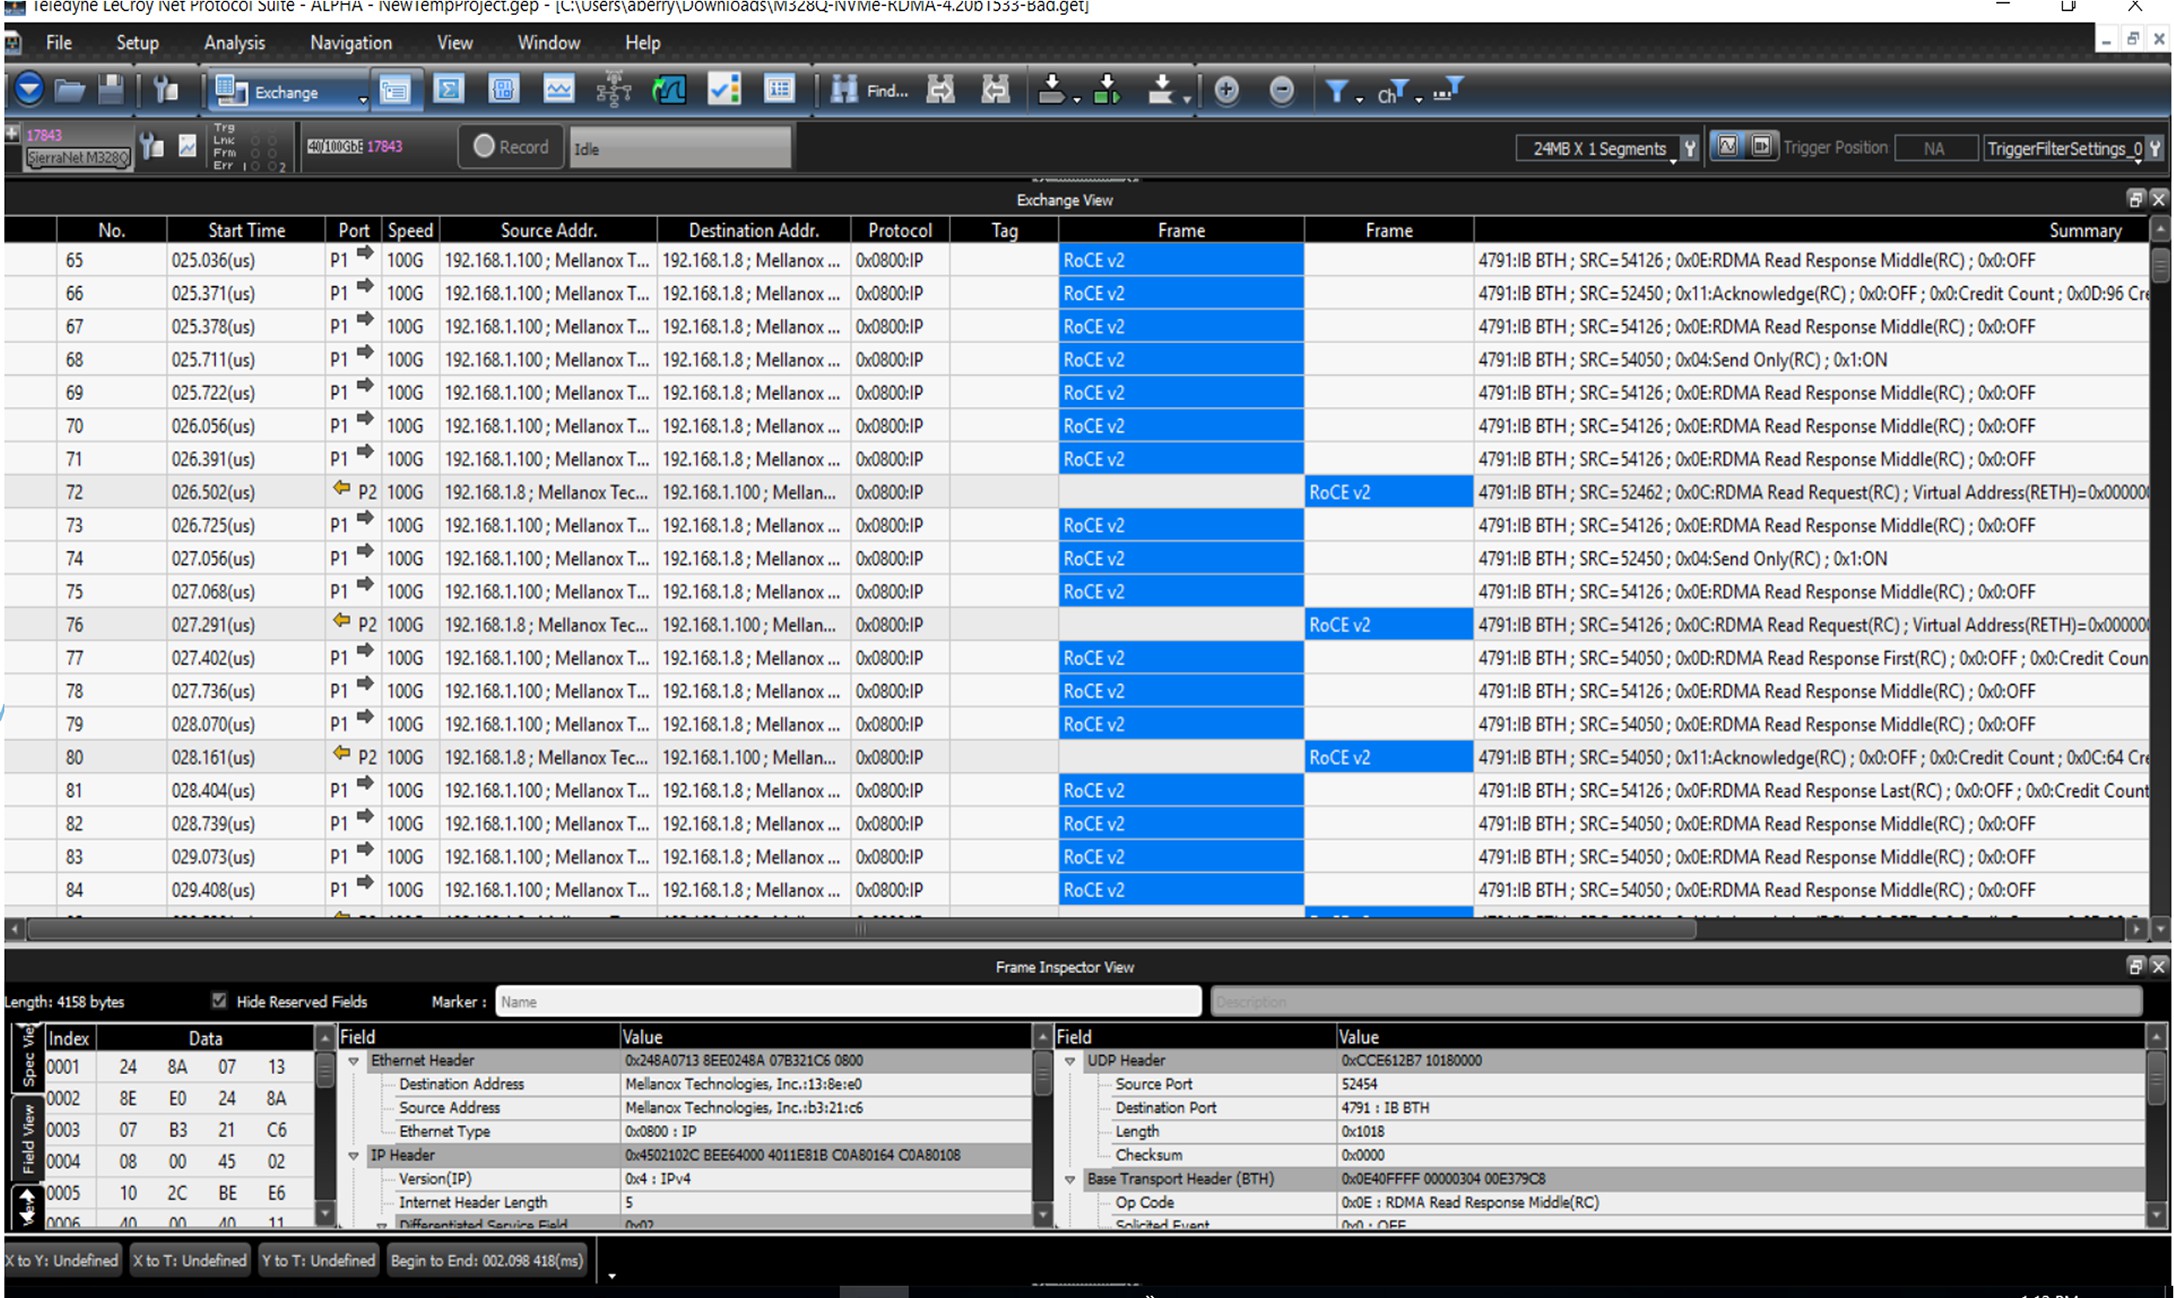
To manually change the decoding:
-
Go to the Analysis tab and click Decoding Assignments. Before any “NVMe QP ports (hex)” have been learned or added, the table could look something like the example below.
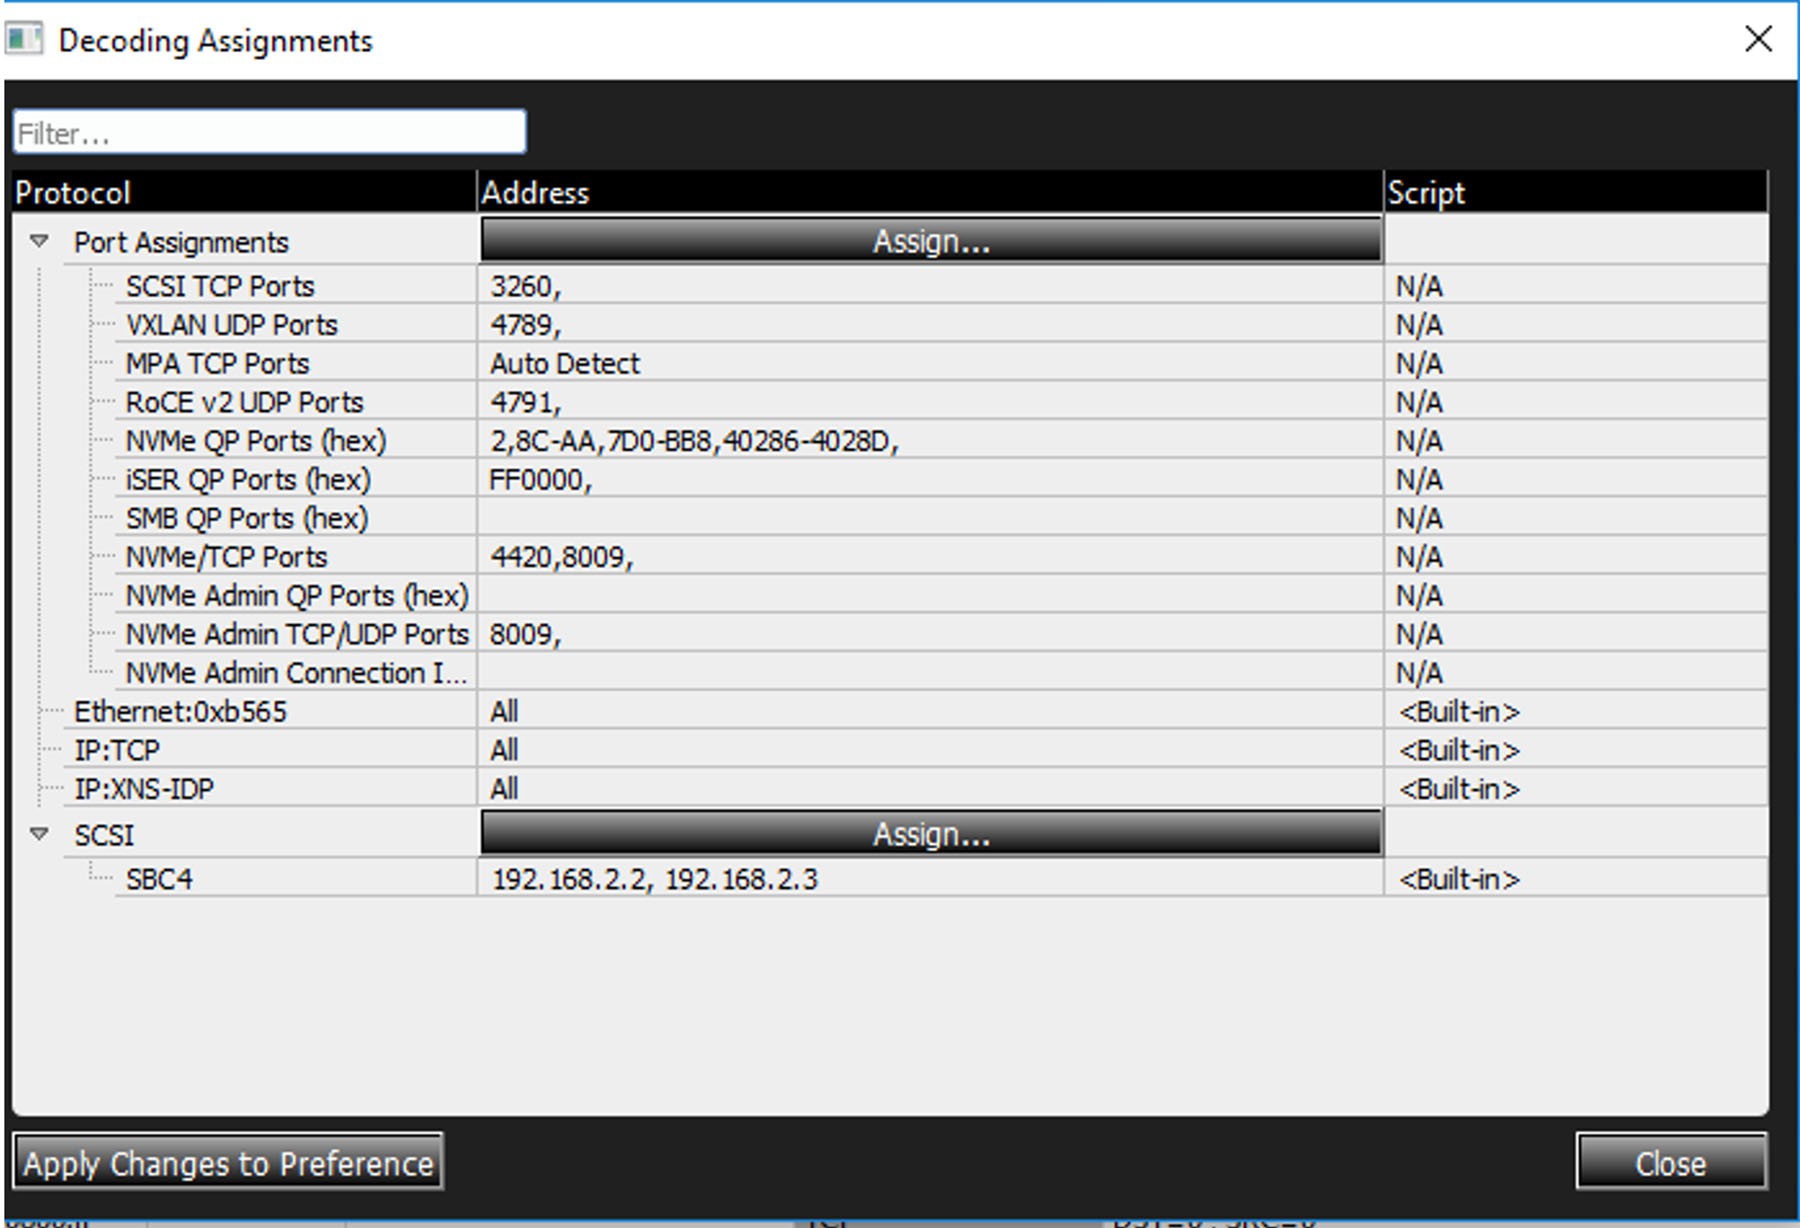
-
To get each packet to decode correctly, inspect (open and use the Frame Inspector View) each packet for the “Destination QP” field under the “Base Transport Header” main field.
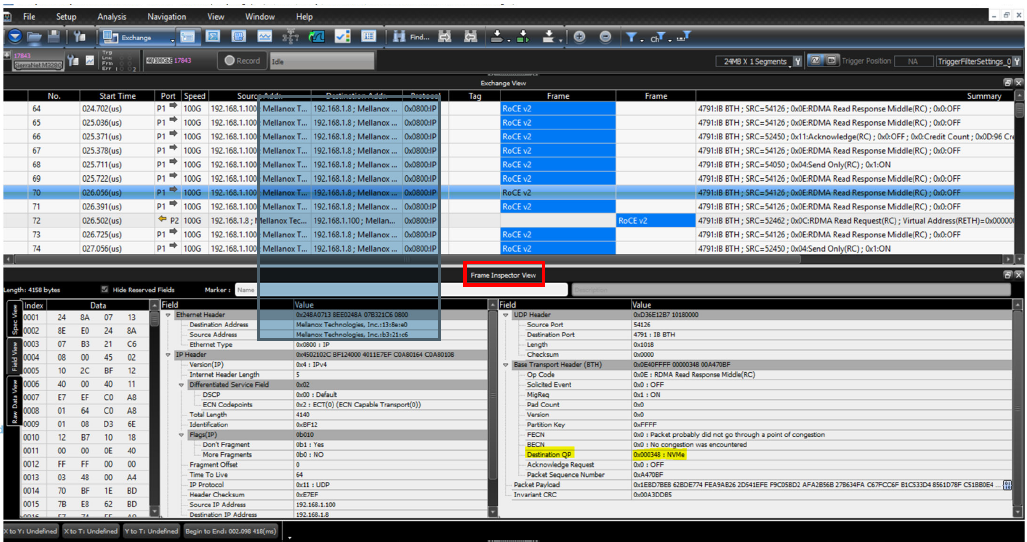
-
Make a note of the number, and return to the “Decoding Assignments” window, which is under the “Analysis” tab.
-
Add the Hex 348 to the line “NVMe QP Ports (hex)” field.
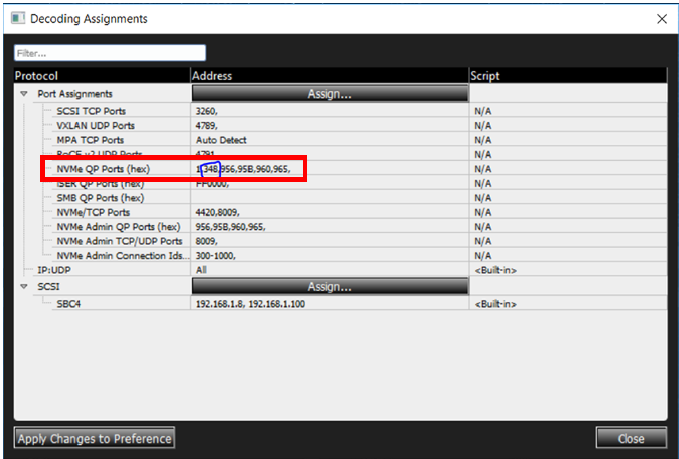
-
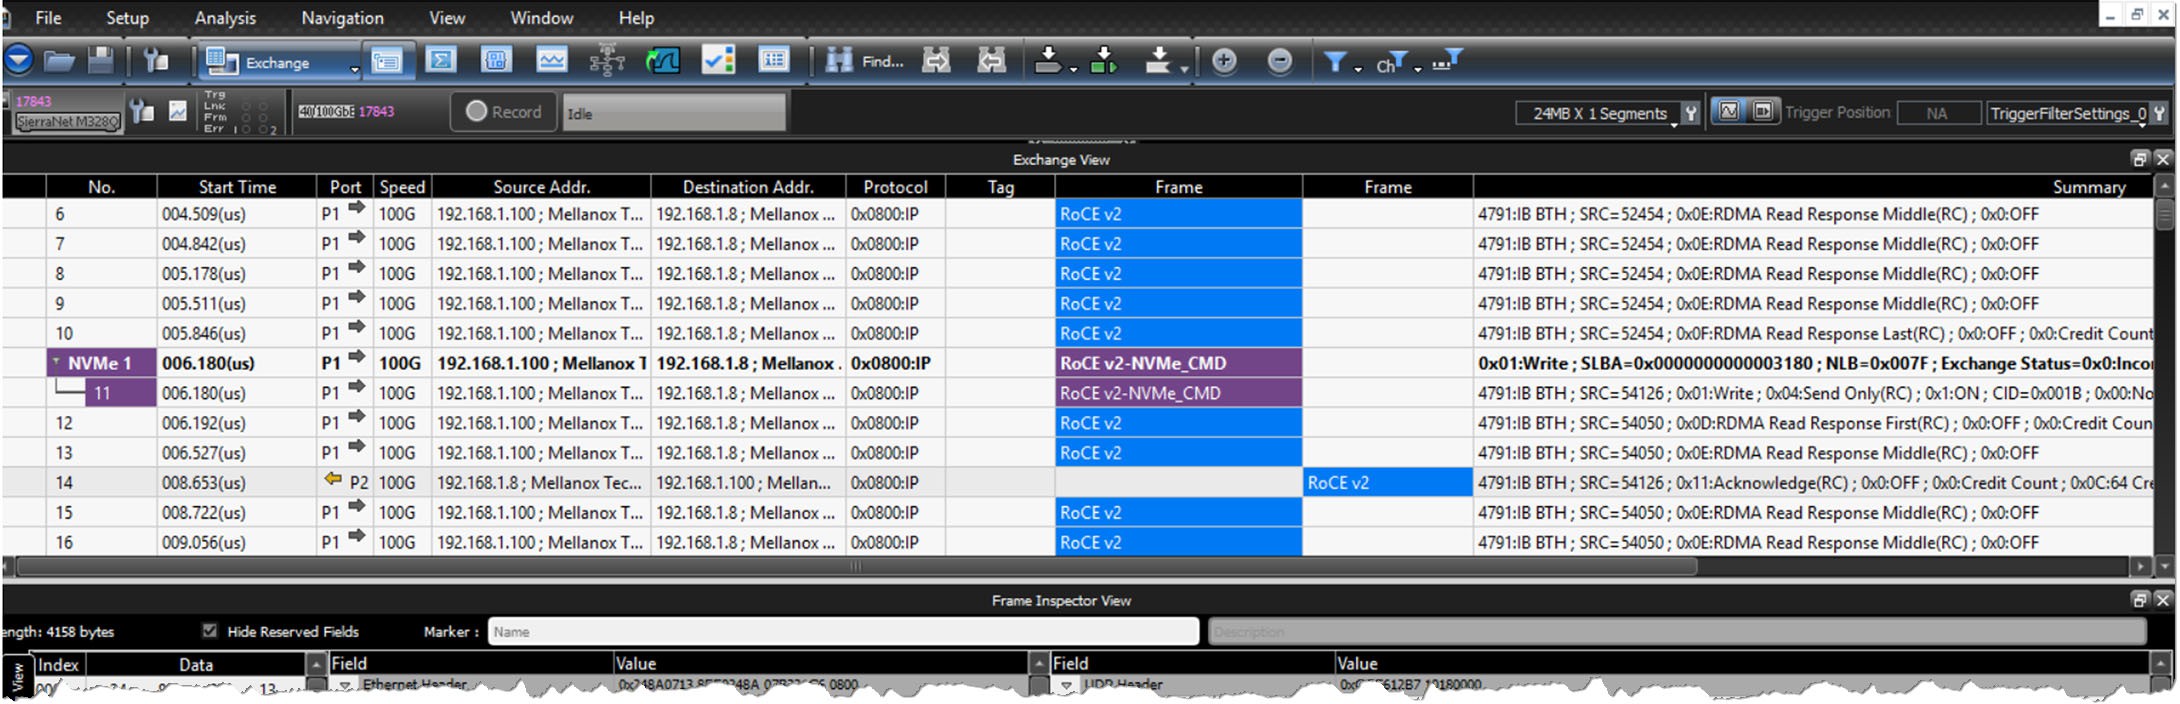
Press the Apply Changes to Preference button on the Decoder, then click Close. The analyzer adds your changes the Trace. An example of the new Trace with changes is shown below.
-
Note that it only decoded a few of the packets with that particular NVMe QP port. However, there will be some grouping of the NVMe QP ports so that you can add a large group of NVMe QP ports at one time.
-
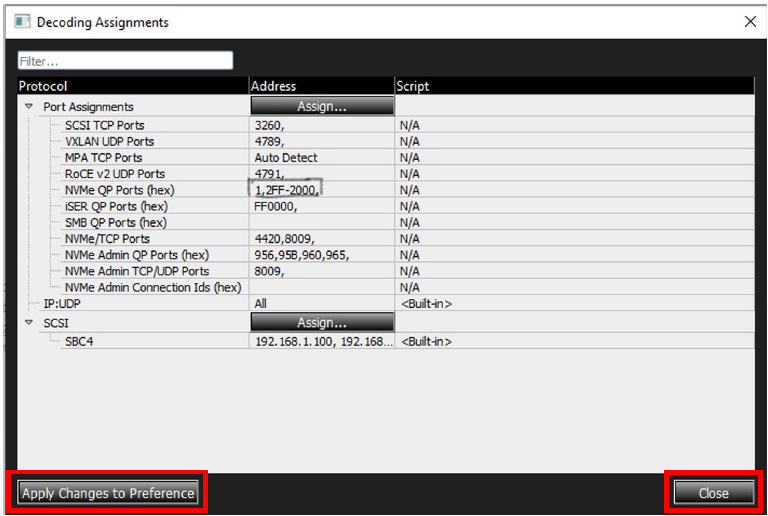
For example, this one has a NVMe Destination QP port of hex 348, but another packet has a Destination QP port of hex 304. Therefore, it is usually better to translate many packets at once by adding a large sequence of “NVMe Destination QP ports”.
-
As shown below, 2FF-2000 was added to accommodate a large group of NVMe QP ports so that a larger number of packets will be translated in this trace.
-
Click Apply Changes to Preference on the Decoder, then click Close. The analyzer adds the changes to the Trace.
-
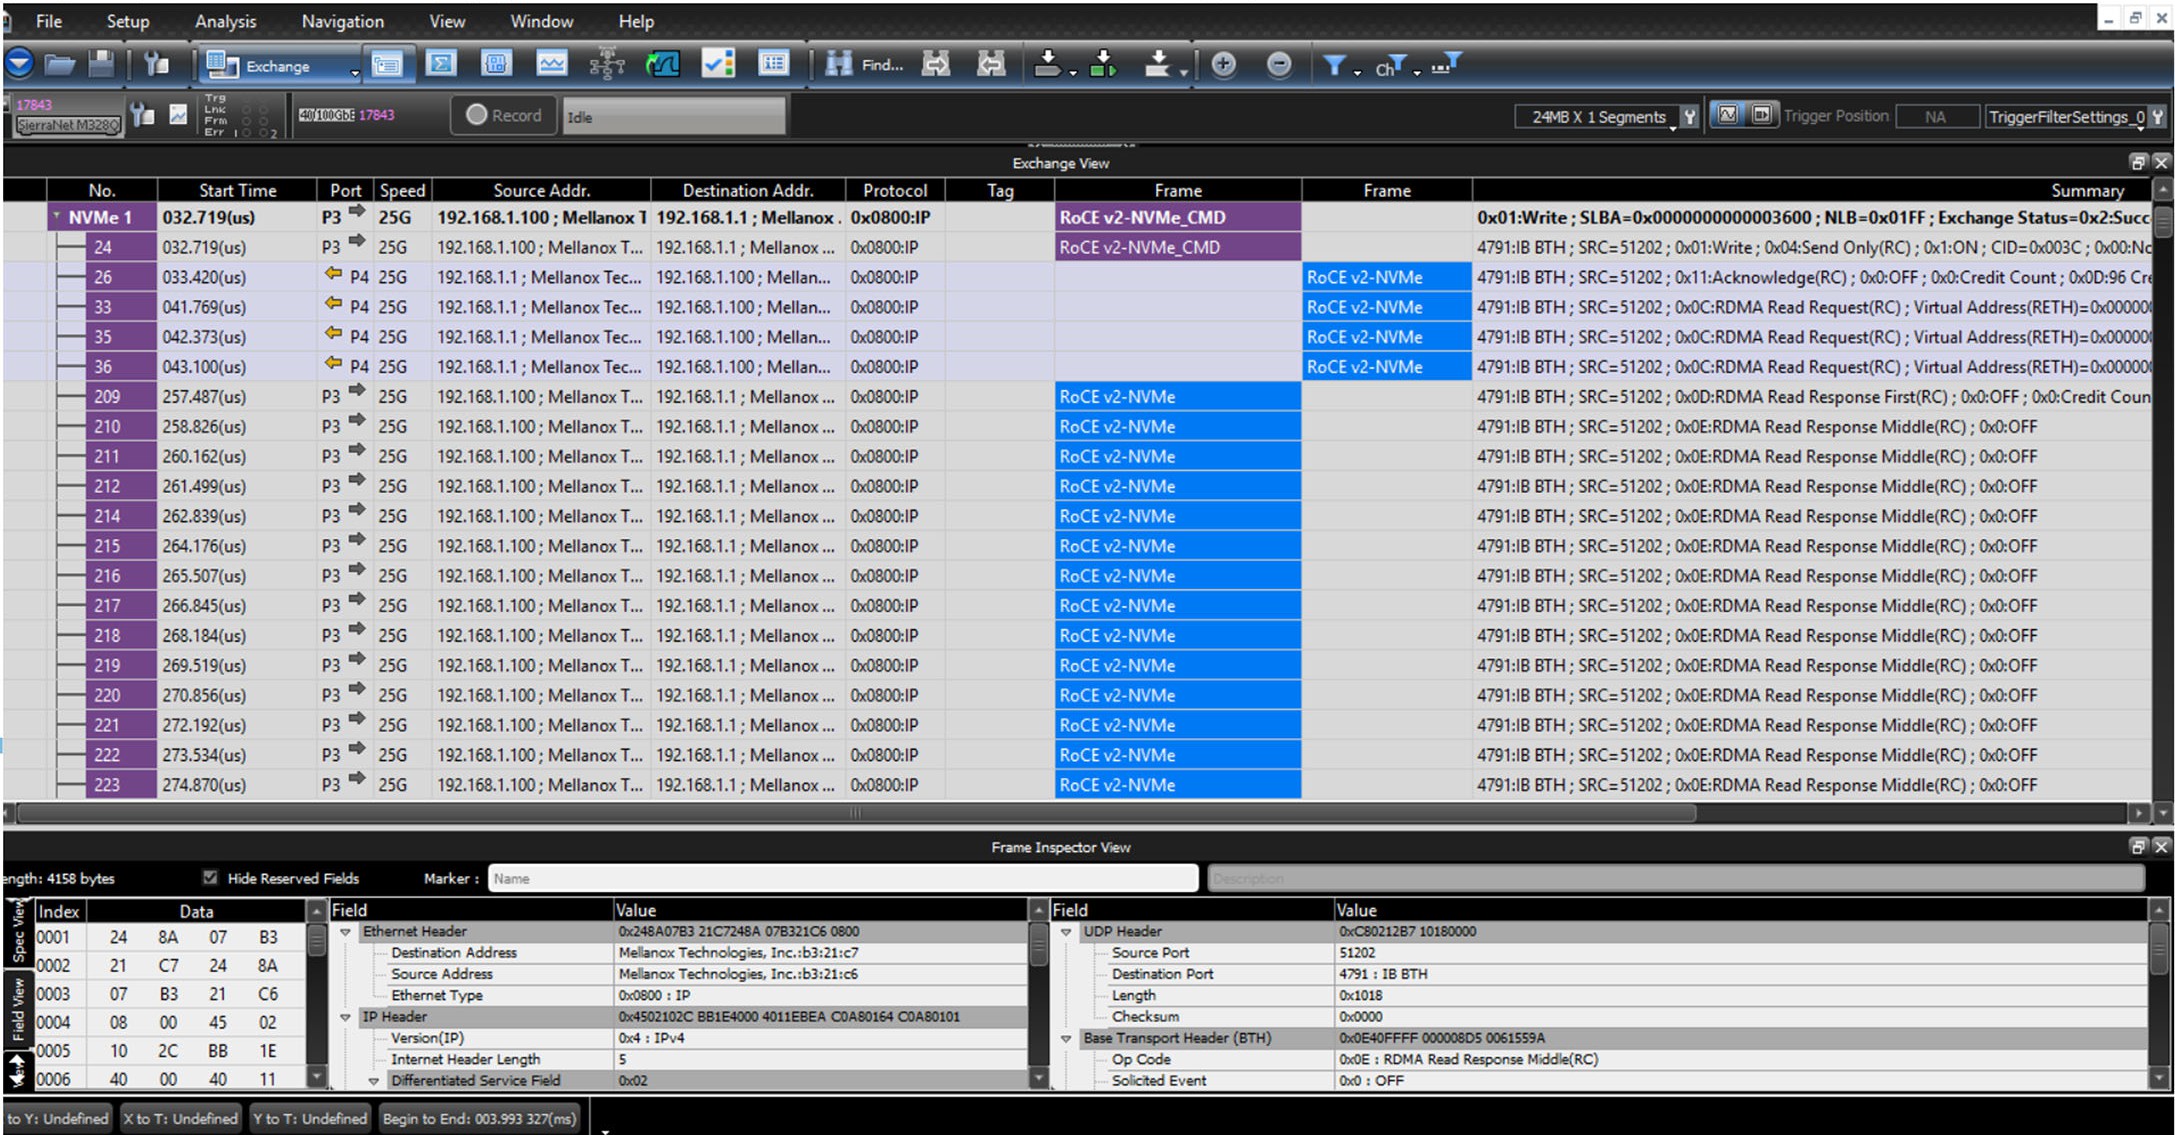
See below for an example of a new Trace with changes.
-
-
Note that most, if not all, of the RoCEv2 packets have been translated to NVMe and the analyzer shows the proper decoding.
Capturing a Decoded trace using TCP RDMA – Pre-4.40 releases
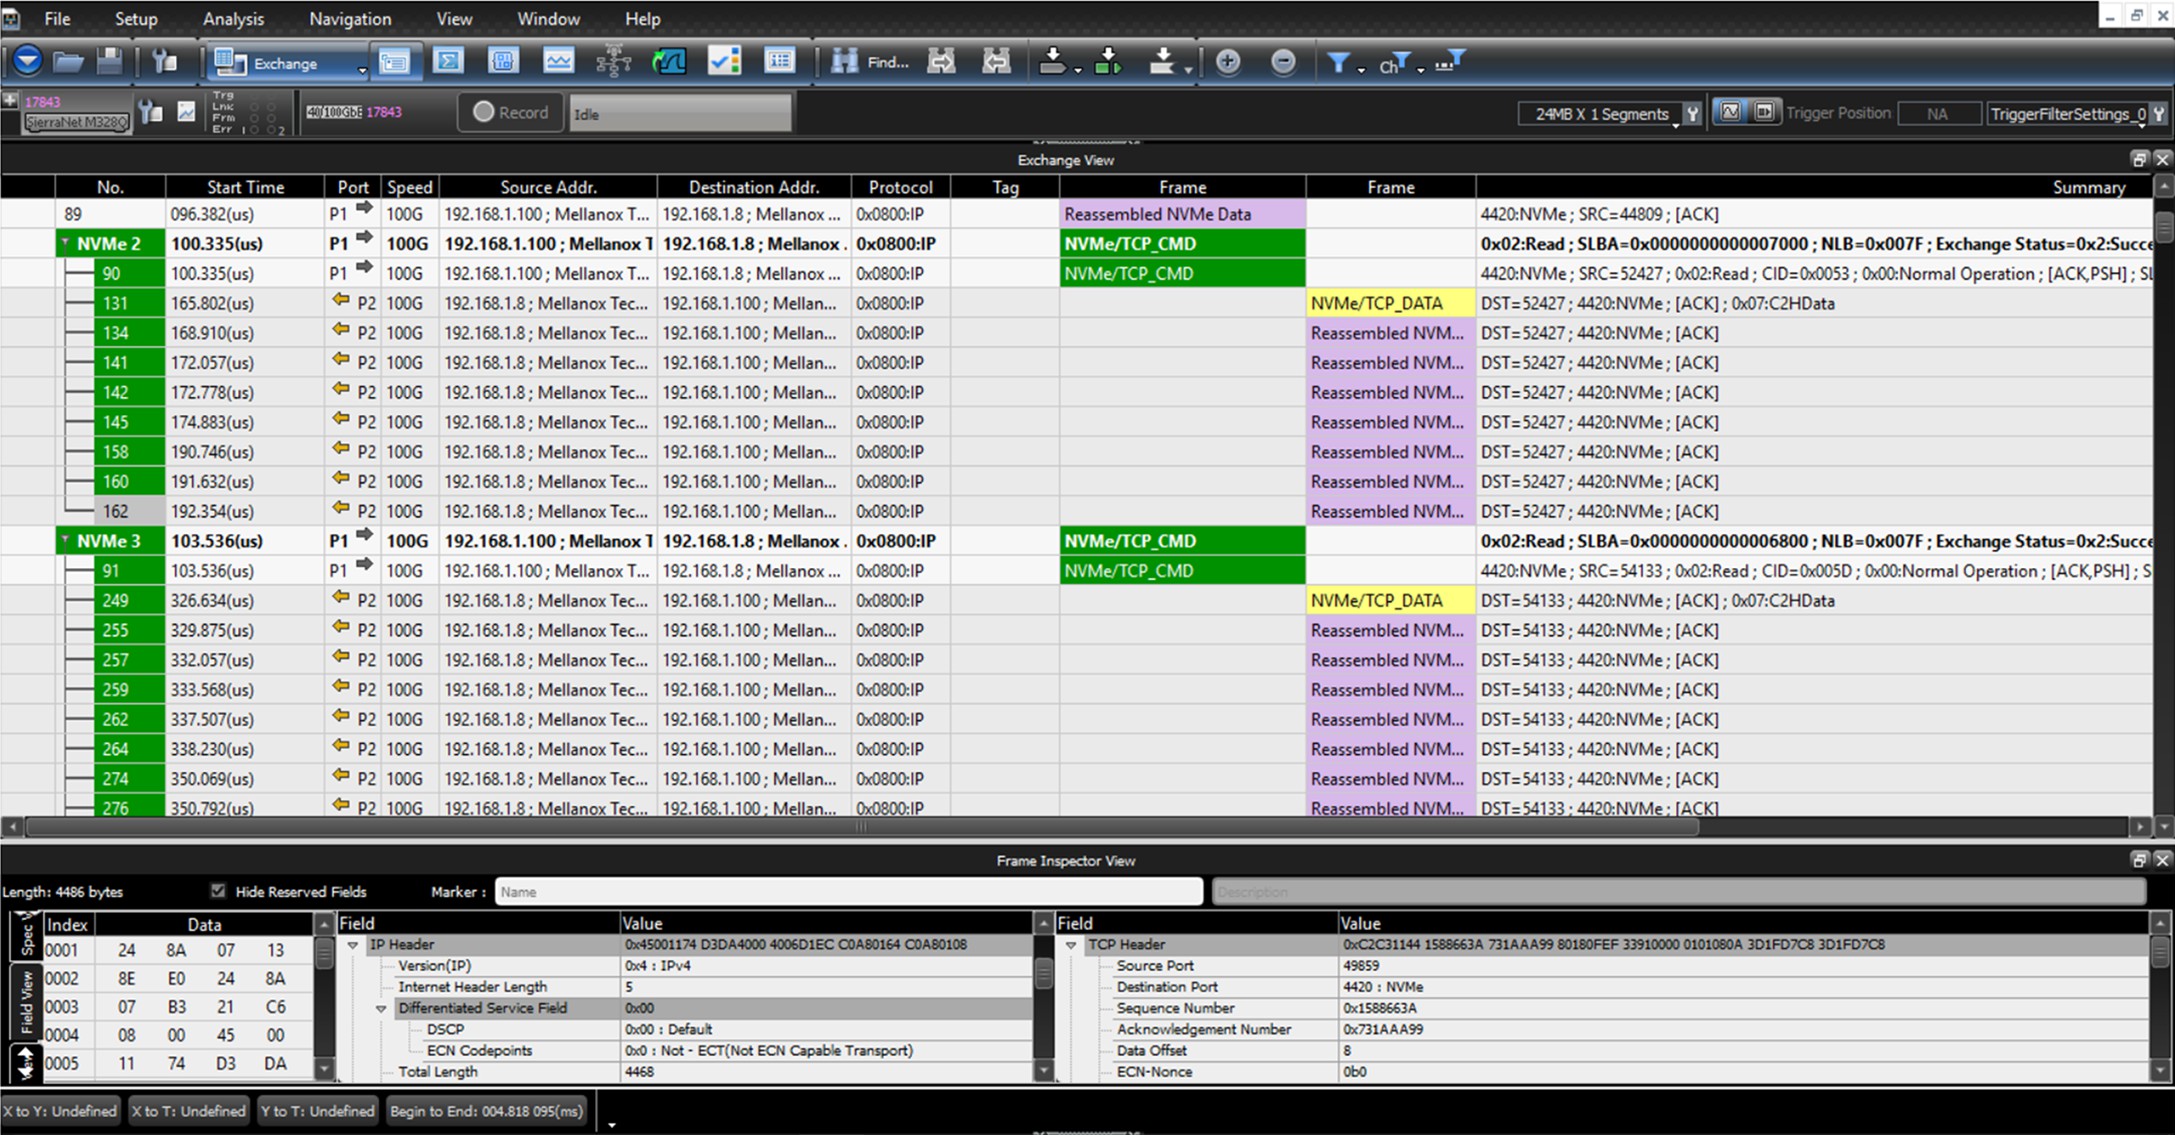
When using TCP with RoCEv2 the decoding is far less complex since most of the decoding depends on the “NVMe/TCP Ports”, which are usually a standard equal to 4420 used by most when connecting to the Target.
So, when the NVMe with a Source or Destination port of 4420 is seen under the TCP header, the decoding happens automatically.
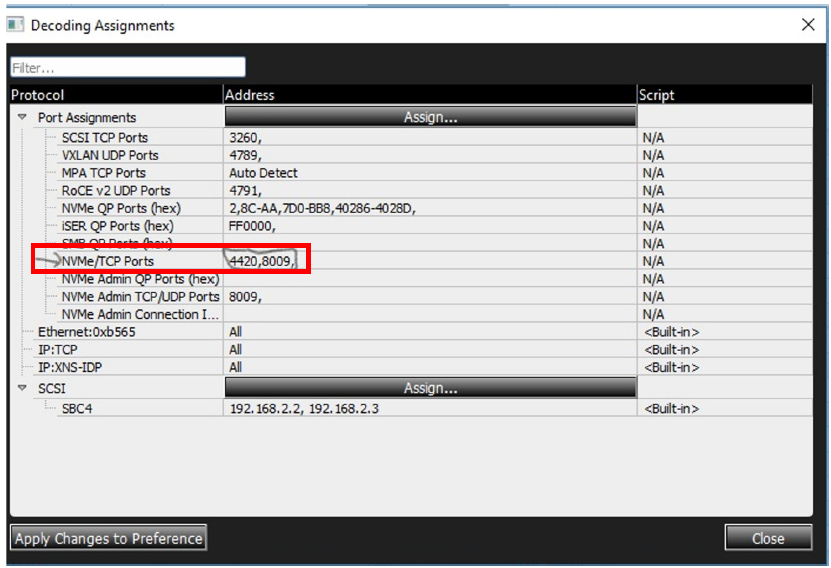
The image below shows a RoCEv2 TCP Trace that has Destination and Source ports of 4420 and thus all ports are being decoded correctly.
Getting Out of NVMe Decoding Mode
There are several ways you can get out of the NVMe decoding mode, some are accidental and some are intentional.
-
The accidental ways usually happen when there is a downgrade or the decoding infor-mation is manually overwritten the for some reason.
In Pre-4.40 versions, changing or removing the HEX numbers in the decoder (the Analysis > Decoding Assignments page) will not allow the NVMe decoding that is taking place in the analyzer, thus removing NVMe decoding either accidentally or intentionally.
When downgrading to an older release, the release may not support the newer 4.40 settings or may erase all decoding settings altogether for any release.
-
The intentional ways to get out of NVMe mode is to unset the NVMe setting for 4.40 under the Setup > Preferences > SW Settings > Decoding Assignment window to another setting, such as “User-Defined”, “iSER” or “SMB”.
Before the 4.40 release, only the NVMe QP ports must be removed from the Analysis > Decoding Assignments window (the decoder), which are important to each Trace. The NVMe decoding will not take place properly anymore.