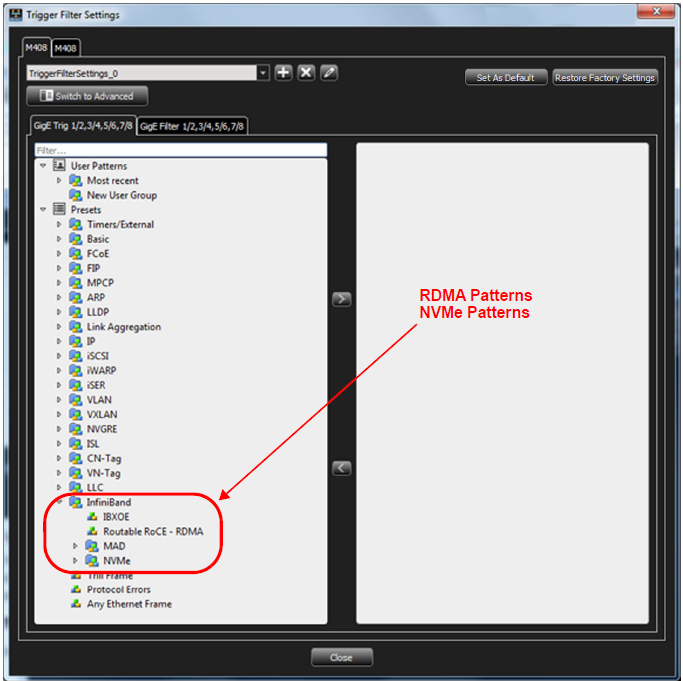
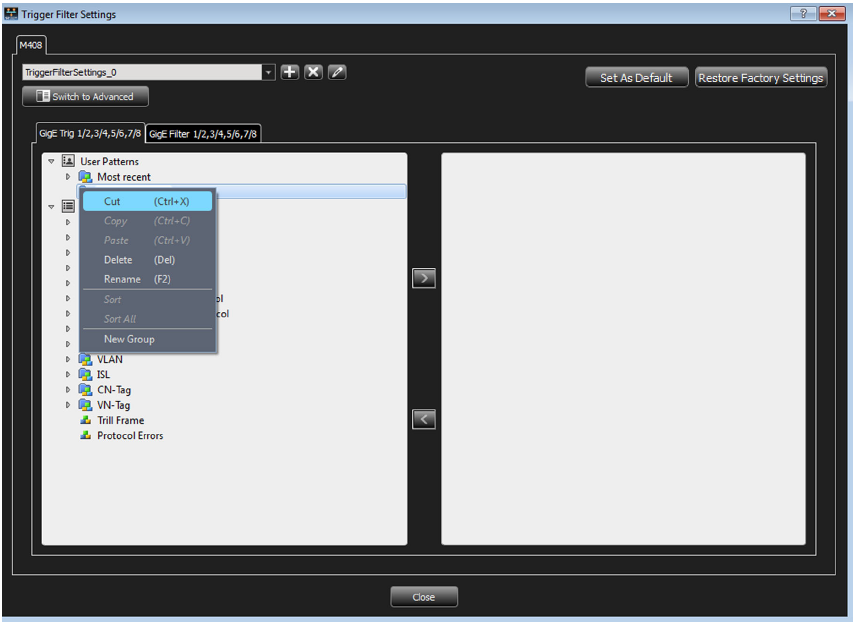
Refer to the image below to learn more about the Trigger Filter Settings.
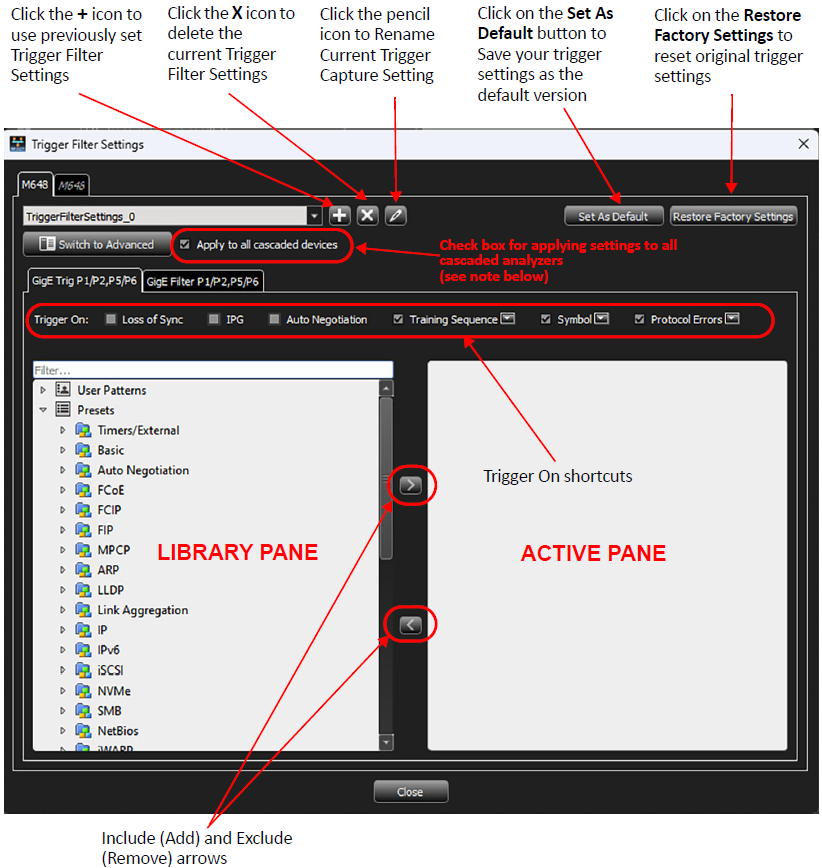
Note: The Apply to all cascaded devices checkbox: When checked, the Trigger/ Filter settings applied to the first analyzer are also applied to any other analyzers which have been cascaded together. In this case, the settings for the M648 will be applied to the M646.
Trigger On Shortcuts
The Trigger On: section provides trigger shortcuts.
FCOE Options
-
Loss of Sync
-
IPG
-
Auto Negotiation
-
Training Sequence: NRZ/PAM4 options (both selected by default).
-
Symbol: All the symbols are listed here, among which only two can be selected at any time.
-
Protocol Errors: The protocol-errors are grouped as "Any/Frame/Symbol/Auto Negotiation/Training Sequence" for easy selection, ("Any error" is selected by default).
FC Options
-
Connect/Disconnect: Connect or Disconnect options options available (both selected by default).
-
Training Sequence: NRZ/PAM4 options (both selected by default).
-
Protocol Error: The protocol-errors are grouped as "Any/Frame/Symbol/Training Sequence" for easy selection, ("Any error" selected by default.)
Patterns
-
Choose a pattern for capture from any of the categories.
-
Drill down through the category in the Library pane by double-clicking until reaching a filter.
-
Click the

-
To remove a filter, highlight it in the Active Pane and either click the Remove button (<) or press the delete key on the keyboard. A dialog will display asking if you want to remove the pattern. Click Yes.
Trigger Tab
Drag and drop patterns from the Trigger Library Pane into the Active Pane. Use the Add and Remove arrows to move patterns between the Patterns Library and the Active pane.
Setting an Event Trigger
-
With the Trigger Filter Settings open, select a pattern of interest. For example, FCOE-FCP_CONFIRM.
-
Click the
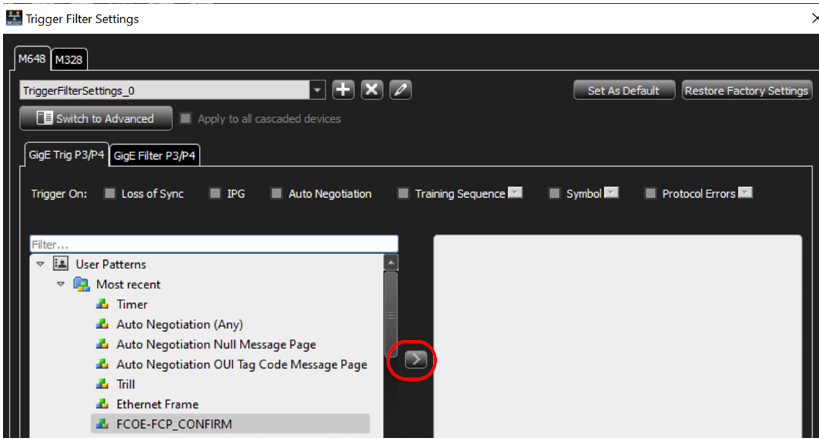
The FCOE-FCP_CONFIRM window displays.
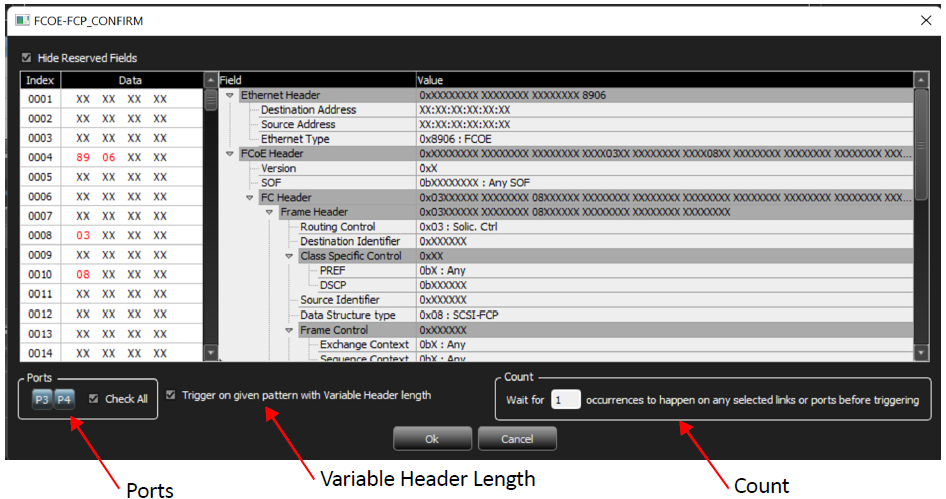
Select the following:
-
Ports: Select which ports (links) to trigger on (or click Check All for all ports)
-
Variable Header Length: Trigger on given pattern with Variable Header length
-
Count: Set the analyzer to trigger on the number of occurrences on each link. This specifies the number of times that the pattern must occur before triggering. The events on each link are counted independently, causing a trigger whenever the number of occurrences on any link equals the specified value.
Once complete, click the OK button to return to the Triggering Filter Settings window. Notice that the FCOE-FCP-CONFIRM pattern now displays in the Active Pane.
Filter Tab
Drag and drop patterns from the Filter Library pane into the Active Pane. Select the pattern and use the Add and Remove arrows to move patterns between the Patterns Library and the Active pane.
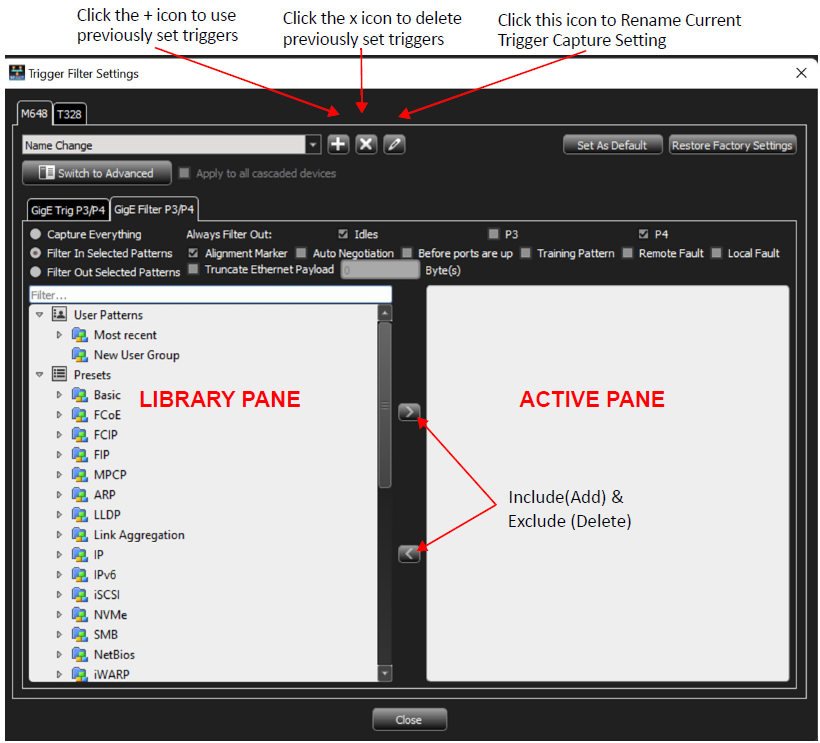
The following filtering shortcuts are available:
Capture Everything: Captures everything on the bus and the disables the Pattern Library.
Filter in Selected Patterns: Includes the selected patterns in the trace capture.
Filter Out Selected Patterns: Excludes the selected patterns in the trace capture.
Always Filter Out: Exclude Idles and/or specific channels in the trace capture.
Note: Capturing a full buffer requires capturing the traffic with all ports. Using four ports captures only half the system memory. Note that the size of the system memory is based upon the purchased license.
Auto Negotiation: Always filter out Auto Speed Negotiation traffic.
Truncate Fibre Channel Over Ethernet (FCoE) Payload: Truncates FCoE payloads after x-number of DWORD(s).
Note: For iSCSI events, payload truncation may not truncate at the specified value as some events could come out of sequence.
-
For Ethernet frames, the CRC and Termination will also be truncated, but for FC frames, the CRC and Termination will be kept.
Patterns and Data Capture Setup
Refine data capturing by choosing Pattern and then selecting specific patterns for capture. Additionally, define a different set of patterns to capture after trigger.
The Trigger and Filter settings window allows you to set the parameters for triggering on selected triggers and filtering in (including) or filtering out (excluding) selected patterns.
Trigger and Filter Preset Patterns (RDMA and NVMe)