
Advanced Mode expands Analysis capability by allowing you to program complex triggering and data capture projects.
The Advanced Mode is a state machine. You can program each state individually to:
-
Trigger on a different Event or trigger unconditionally.
-
Capture Everything, Nothing, or a user-defined pattern.
-
Include up to three ELSE IF statements, allowing a jump to any other state based on a user definition.
-
Use up to three timers, which you can set to a maximum value of 4294900 ms or over one hour.
-
If you enter a value larger than 42494900ms a warning pop-up displays: Invalid value! Please enter a value between 0 and 4294900.
-
You can set a timer in the state or continue the timer set in the previous state.
-
-
Output an external trigger High or Low.
Working in Advanced Mode
Note: Some analyzers have different options in Advanced Mode.
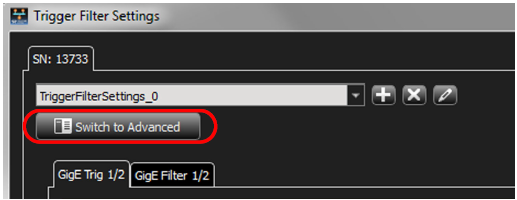
To start working in the Advanced Mode, click Switch to Advanced mode in the Trigger Filter Settings.
You can:
-
Display the state definition
-
Set Output Trigger level
-
Select up to three timers
-
Define the If condition and up to three Else If conditions
-
Set number of occurrences before trigger
-
Set captured data
-
Set excluded data
-
Go to next state
-
Add state
-
Choose link for Sequencer setup
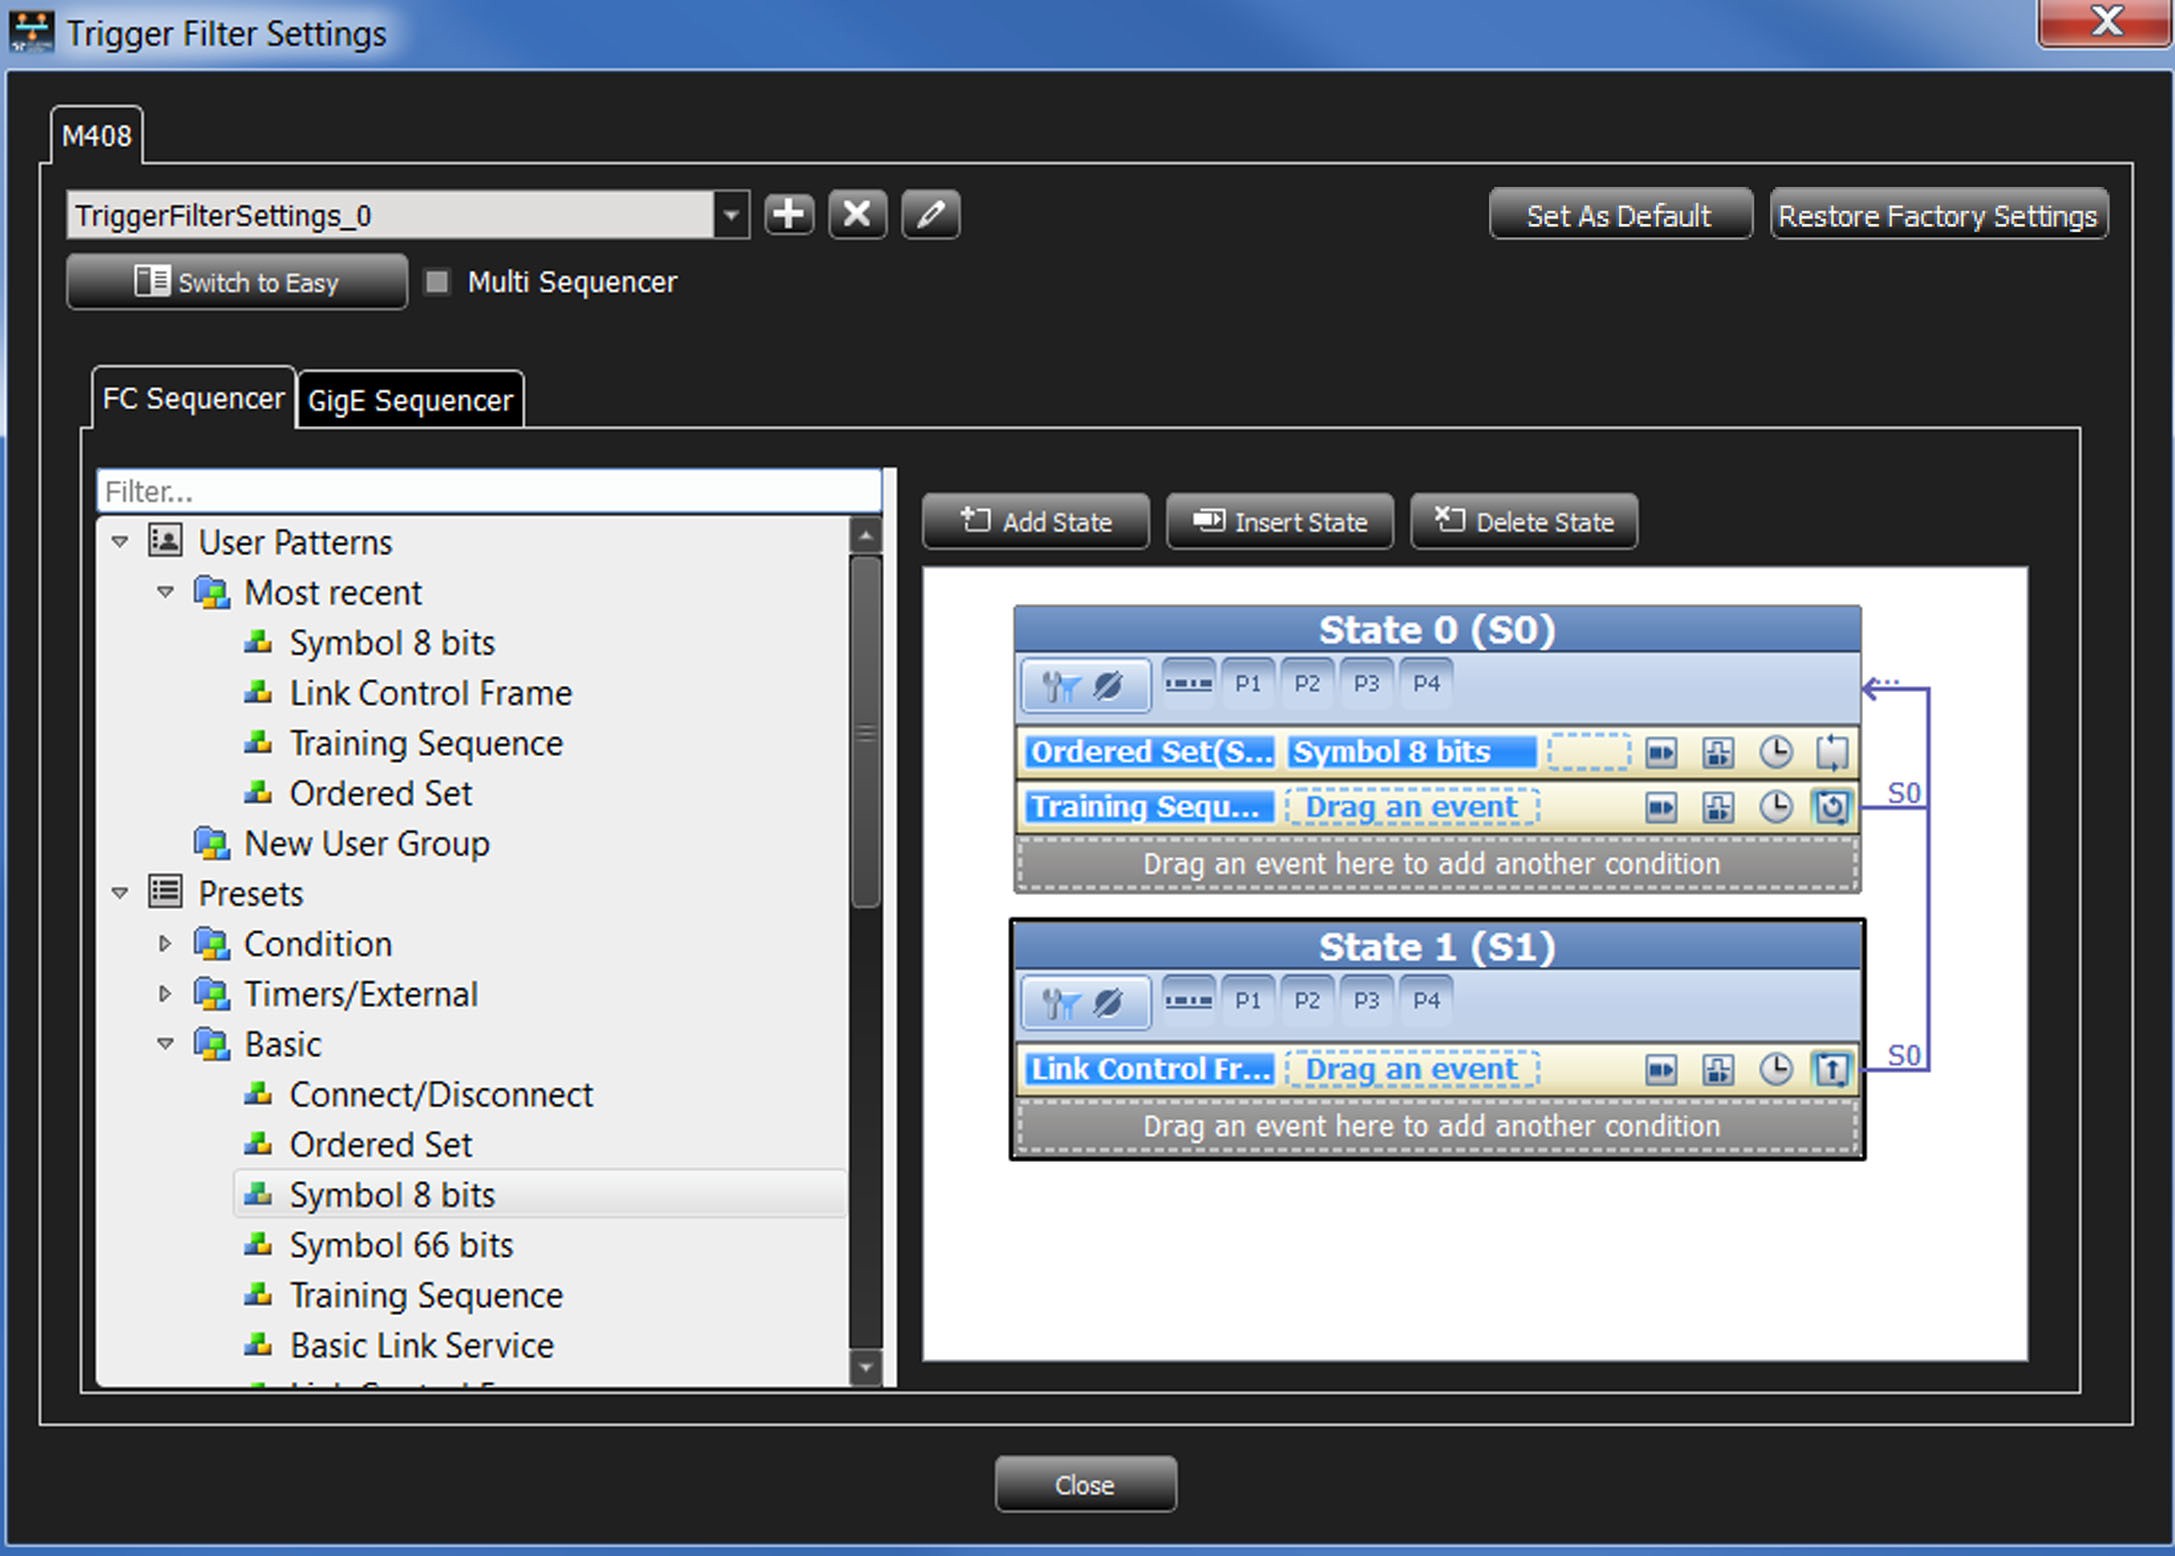
Figure 4.138: State Programming Window
Add State
Click the Add State 
Insert State
Select a State and click the Insert State 
Delete State
Select a State and click on the Delete State 
Copy/Cut and Paste States
You can copy and paste states within a Sequence.
-
Right-click in the blue title area of the State you want to copy and select Copy State (or Cut State if applicable).
-
Right-click in the white workspace of the desired target Sequence and select Paste State.
Copy/Cut and Paste Conditions
You can copy and paste Conditions within and between States.
-
Right-click in the empty yellow space of the Condition you want to copy and select Copy Condition (or Cut Condition if applicable).
-
Right-click in the gray placeholder area (i.e. in the area that says “Drag an event here ”) of the desired target State and select Paste.
Copy/Cut and Paste Events
You can copy and paste Events within and between States.
-
Right-click on the Event you want to copy and select Copy (or Cut if applicable).
-
Right-click in the empty yellow space of the desired target Condition or in the gray placeholder area (i.e. in the area that says “Drag an event here”) of the desired target State and select Paste.
Adding Patterns to a State
-
Drag a pattern from the list of patterns displayed in the left panel and drop it in the State to add it. The application displays Drag an event or Drag an event here to add another condition, to indicate the location to drop events in a State. Drag/Drop events between states will copy/paste the event.
-
Define each selected pattern in the same way as in Easy Mode, as described in Trigger and Filter Preset Patterns (RDMA and NVMe). To use a timer, define it first.
Note: You can copy a frame from the spreadsheet view and paste it for triggering.
-
You can set a timer for any If or Else If condition.
-
Enter a value for the number of occurrences before trigger in the Count field, up to a maximum of 65535 occurrences.
Setting Triggers
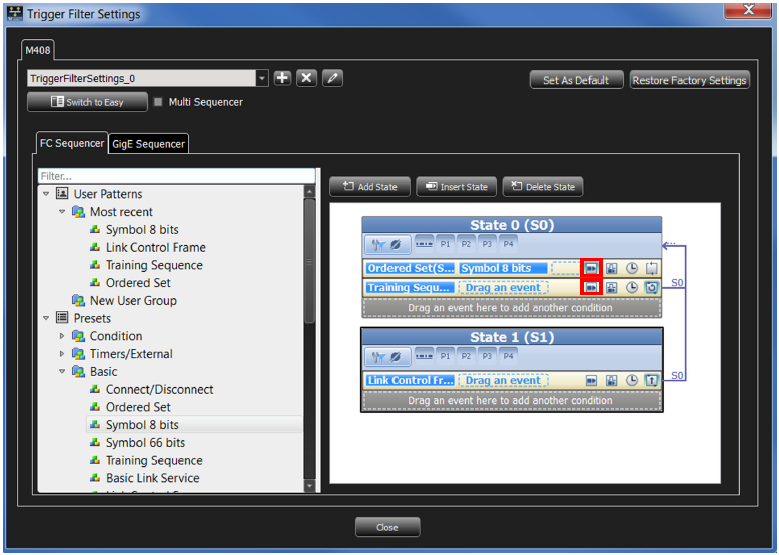
The trigger icon toggles between a blue outline and no outline, activating and deactivating it. Click the Trigger icon 

Note: When the Timer is in “Advanced Trigger” mode, it does not work in single state. When the Timer elapses, you must branch to a new state that performs the Trigger.
External Output Trigger
The external output trigger icon toggles between a blue outline and no outline, activating and deactivating it. The External Output Trigger icon (no outline) 

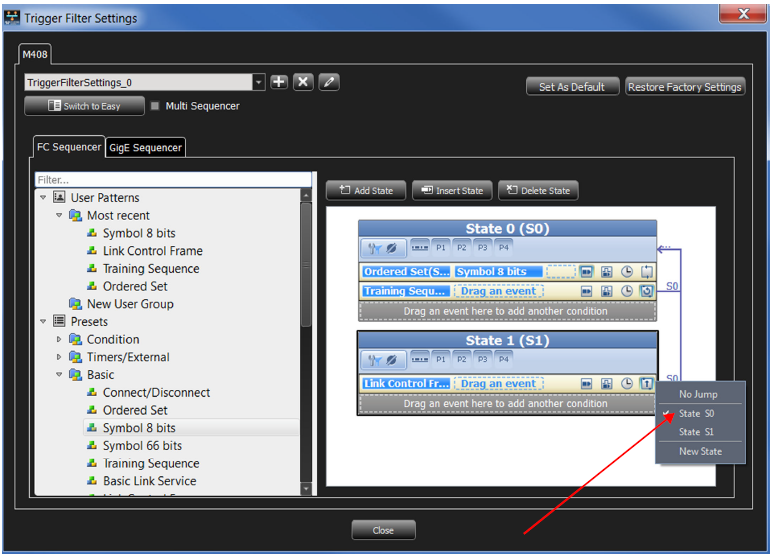
Setting State Transitions
Click on the State Transition 
Settings Capture Filters
-
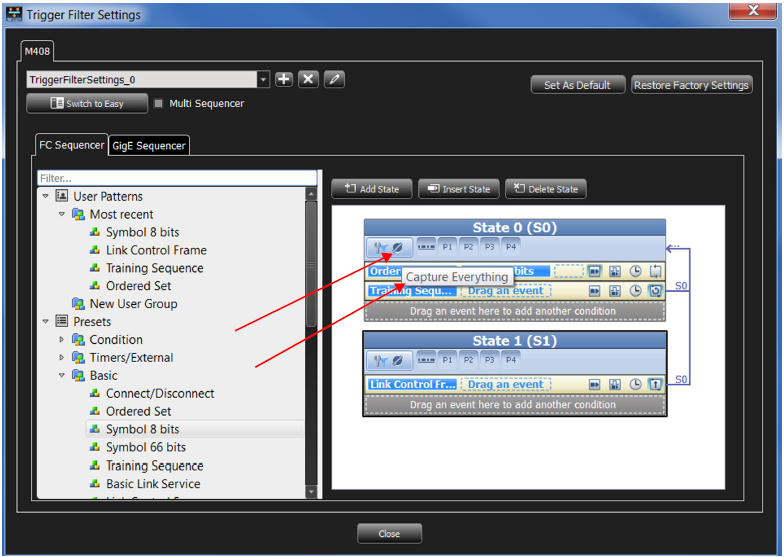
Choose a capture option by clicking on the Capture Everything

-
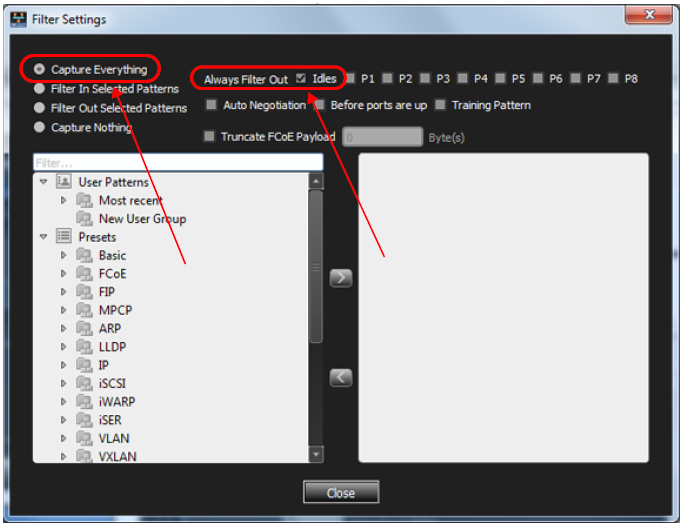
If you choose Capture Everything, you can select options for exclusion.
-
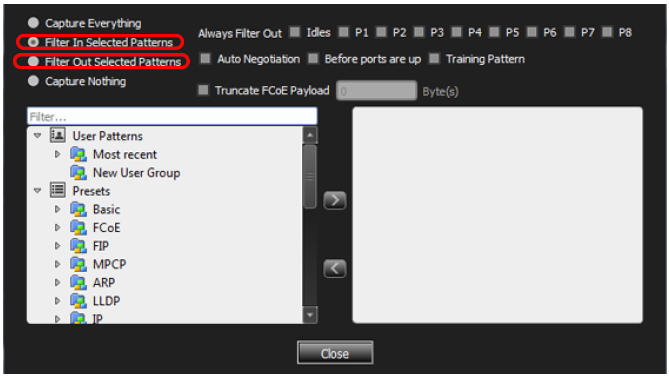
Select Filter In Selected Patterns or Filter Out Selected Patterns to select patterns for inclusion or exclusion. See Trigger and Filter Preset Patterns (RDMA and NVMe).
-
Choose pattern(s) and click the

-
Click Capture Nothing to run the state without capturing anything.
-
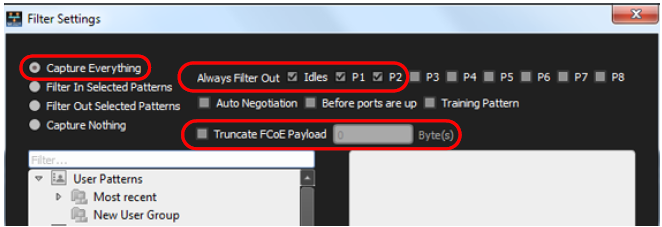
Select the checkboxes to Capture Everything, Always Filter Out specified options.
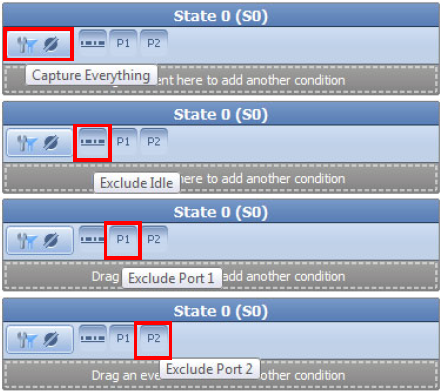
-
Select ARBFF, NOS, VC_RDY, Before ports are up, or Training Pattern. ARBff, NOS and VC_RDY are ordered sets that show up frequently and are of little use in most cases, and selecting allows you to specifically filter them out. Before ports are up will filter everything before the ports are up, to save buffer space and allow to concentrate on the parts important to the user. Training Pattern will similarly filter out all Training Patterns.
-
Check the Truncate Payload option to truncate payload after x-number of Dword(s) 0 bytes.
Multi-Link Triggering
Note: This applies only to the SierraNet M408 and SierraNet M168 analyzers.
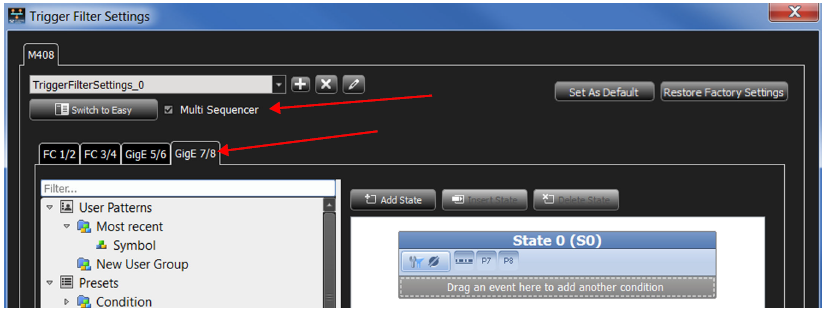
You can set different triggering for each link. To set different trigger conditions for a link, check the Multi Sequencer check box and select the link for setup from the Port tabs. When you select this option, you can define a sequencer per link (pair port). These sequencers are independent from each other and will be run separately on each link.
Set Timers
You can set and use up to three Timers for triggering. You can set each Timer for each state, or continue from a Timer set in the previous state. The Timer defined for a particular state starts when entering that state. To set Timers:
-
Click the Timer

-
Define timer in the Timer Setting window.
-
Repeat the above steps for each state.
Note: Each Timer action must reside in a separate state (Set and Start).
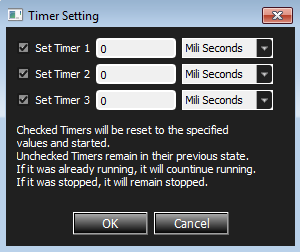
You must set and start each timer before continuing to the next timer. For example, start Timer 1, continue it, then set Timer 2 in order to continue it. It will not allow you to continue Timer 2 until you first set it.
Enable Fast State Switching
Prior to 4.80, Fast State Switching was disabled and not available in Advanced Trigger mode. Because the M648 analyzer needs around 3.5 us between Sequencer State transitions, if the next several consecutive jumps happen faster than this time period, the analyzer forces a trigger without waiting for the set trigger point. This resulted in an Internal Error.
The new option, Enable Fast State Switching, will counter the timing limitations. When this option is checked, the minimal back-to-back events (Sequencer transitions) duration is reduced to 100 ns.
The trade-off and the reason this is not the default setting is that, if the events are less than 100 ns apart, the second event will be missed, which will result in a malfunction of the Sequencer state machine as programmed.
To summarize, you must be aware of the advantages and the disadvantages of using this feature.
-
When Enable Fast State Switching is not selected (default):
-
Advantage: All events will be detected and transitioned correctly, even if less than 100 ns apart.
-
Disadvantage: If a few events in a row happen less than 3.5 ns apart, the analyzer will force a trigger and report an Internal Error.
-
-
When Enable Fast State Switching is selected:
-
Advantage: If state switching happens less often than every 100 ns, state switches can happen infinitely.
-
Disadvantage: When the time difference between the event(s) in back-to-back states is less than 100 ns, the second event in the 100 ns window will not be registered, leading to an incorrect final trigger.
-
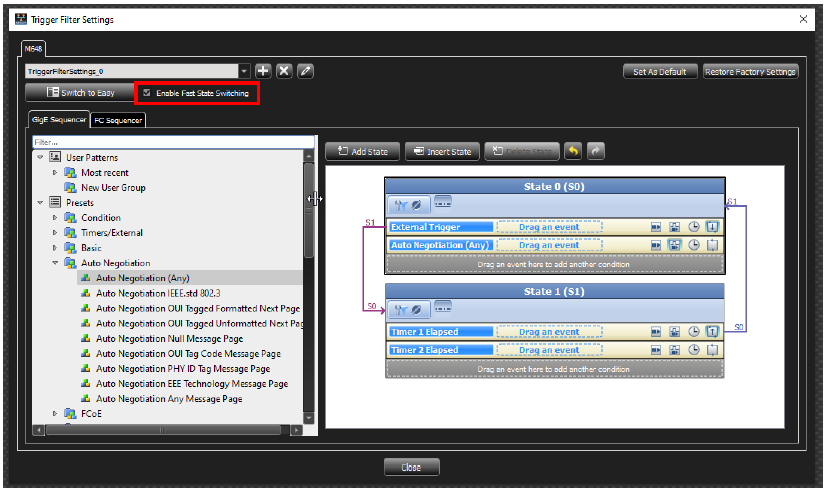
To enable Fast State Switching follow the instructions below.
Note: This assumes you have already configured State 0 and State 1.
-
Click the

-
Click the Switch to Advanced tab.
-
Check Enable Fast State Switching.
-
Start recording as usual.