
The Ethernet connection can have any of these configurations:
-
Analyzer connected to the host computer (machine running the application software), using a switch, Gigabit Ethernet interface, or similar device.
-
Analyzer connected directly to the host computer using an Ethernet crossover cable. To connect via USB, refer to Connecting Via USB.
Connecting to a Network
When connected to a network, the Analyzer can communicate with the DHCP server to obtain its IP address configuration. The client needs to send a request to the DHCP server to obtain an IP. The server sends only one reply, but does not necessarily send the available IP address.
The SierraNet products use the following ports:
-
TCP Ports: 3999 – 4003
-
UDP Ports: 4033 – 4035
Note: To use the Dual User support, you must open the following TCP Ports on your network firewall: 5000 to 5003; 6000 to 6003.
Ask your IT department to add the above ports to your firewall exceptions.
Connecting using a Switch or Similar Device
If the Analyzer and the host PC on which the application is running are on the same Ethernet subnet, the application automatically detects the SierraNet M408 Analyzer. If the Analyzer and the host PC are located on different subnets, then the IP address of the Analyzer needs to be configured manually in the application.
To add the IP address to the Select Device dialog, use the Add Device button (see Add Device).
Connect Analyzer Directly to Host Machine with Crossover Ethernet Cable
SierraNet M408 Systems are designed to connect to host PCs using a network connection, which allows the user to control the SierraNet M408 System from a local or remote host system. When connected to the host machine using a crossover Ethernet cable, the Analyzer must be given a static IP address such that it will reside on the same subnet as the Ethernet interface of the host computer.
Ethernet Connectivity Through a Different Subnet
The default discovery mechanism relies on broadcast messaging, which typically does not traverse between different subnets. Thus, alternate mechanisms are required to discover devices on different subnets. This section describes two methods: Automatic Subnet Scanning and adding a device manually (Connecting Manually).
Automatic Subnet Scanning
The software can be configured to automatically discover devices on other subnets. This section describes how to add subnets so that the software will scan them for available devices. To do this, you must specify which subnets you would like the software to scan.
Manage Additional Subnets
-
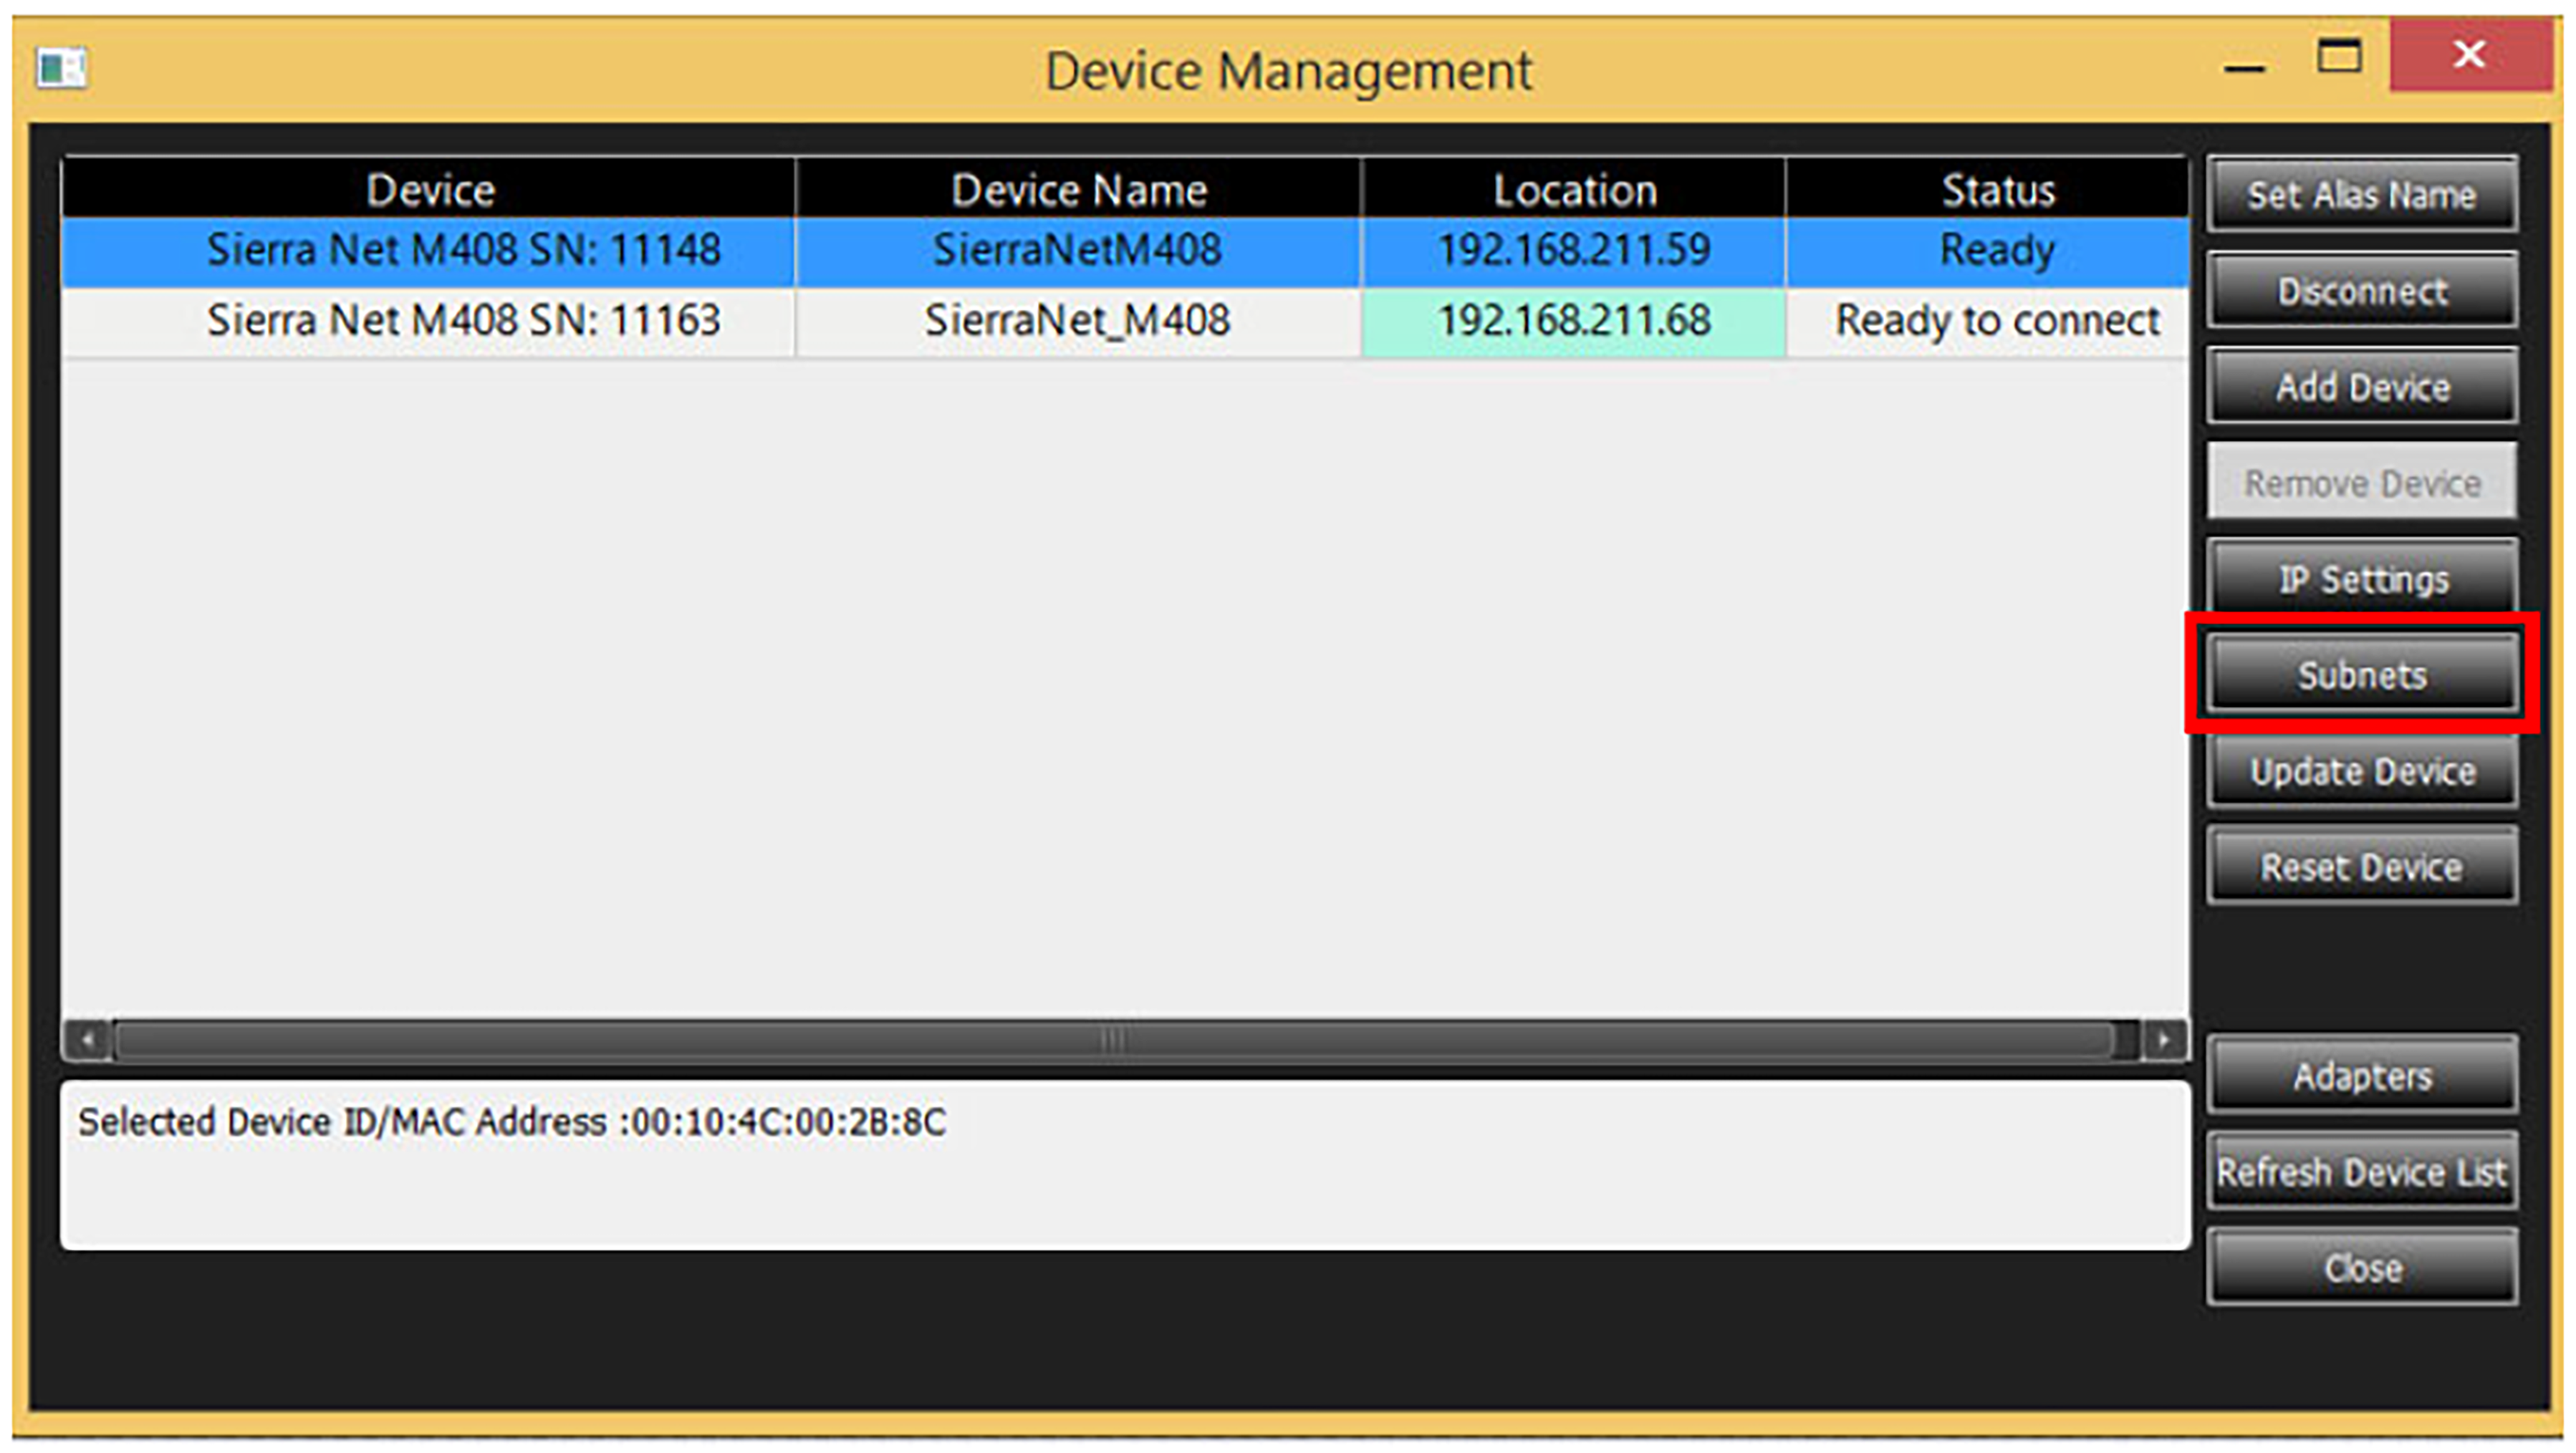
From the Main Toolbar, select Setup > Device Management. The Device Management window opens.
-
Click the Subnets button.
-
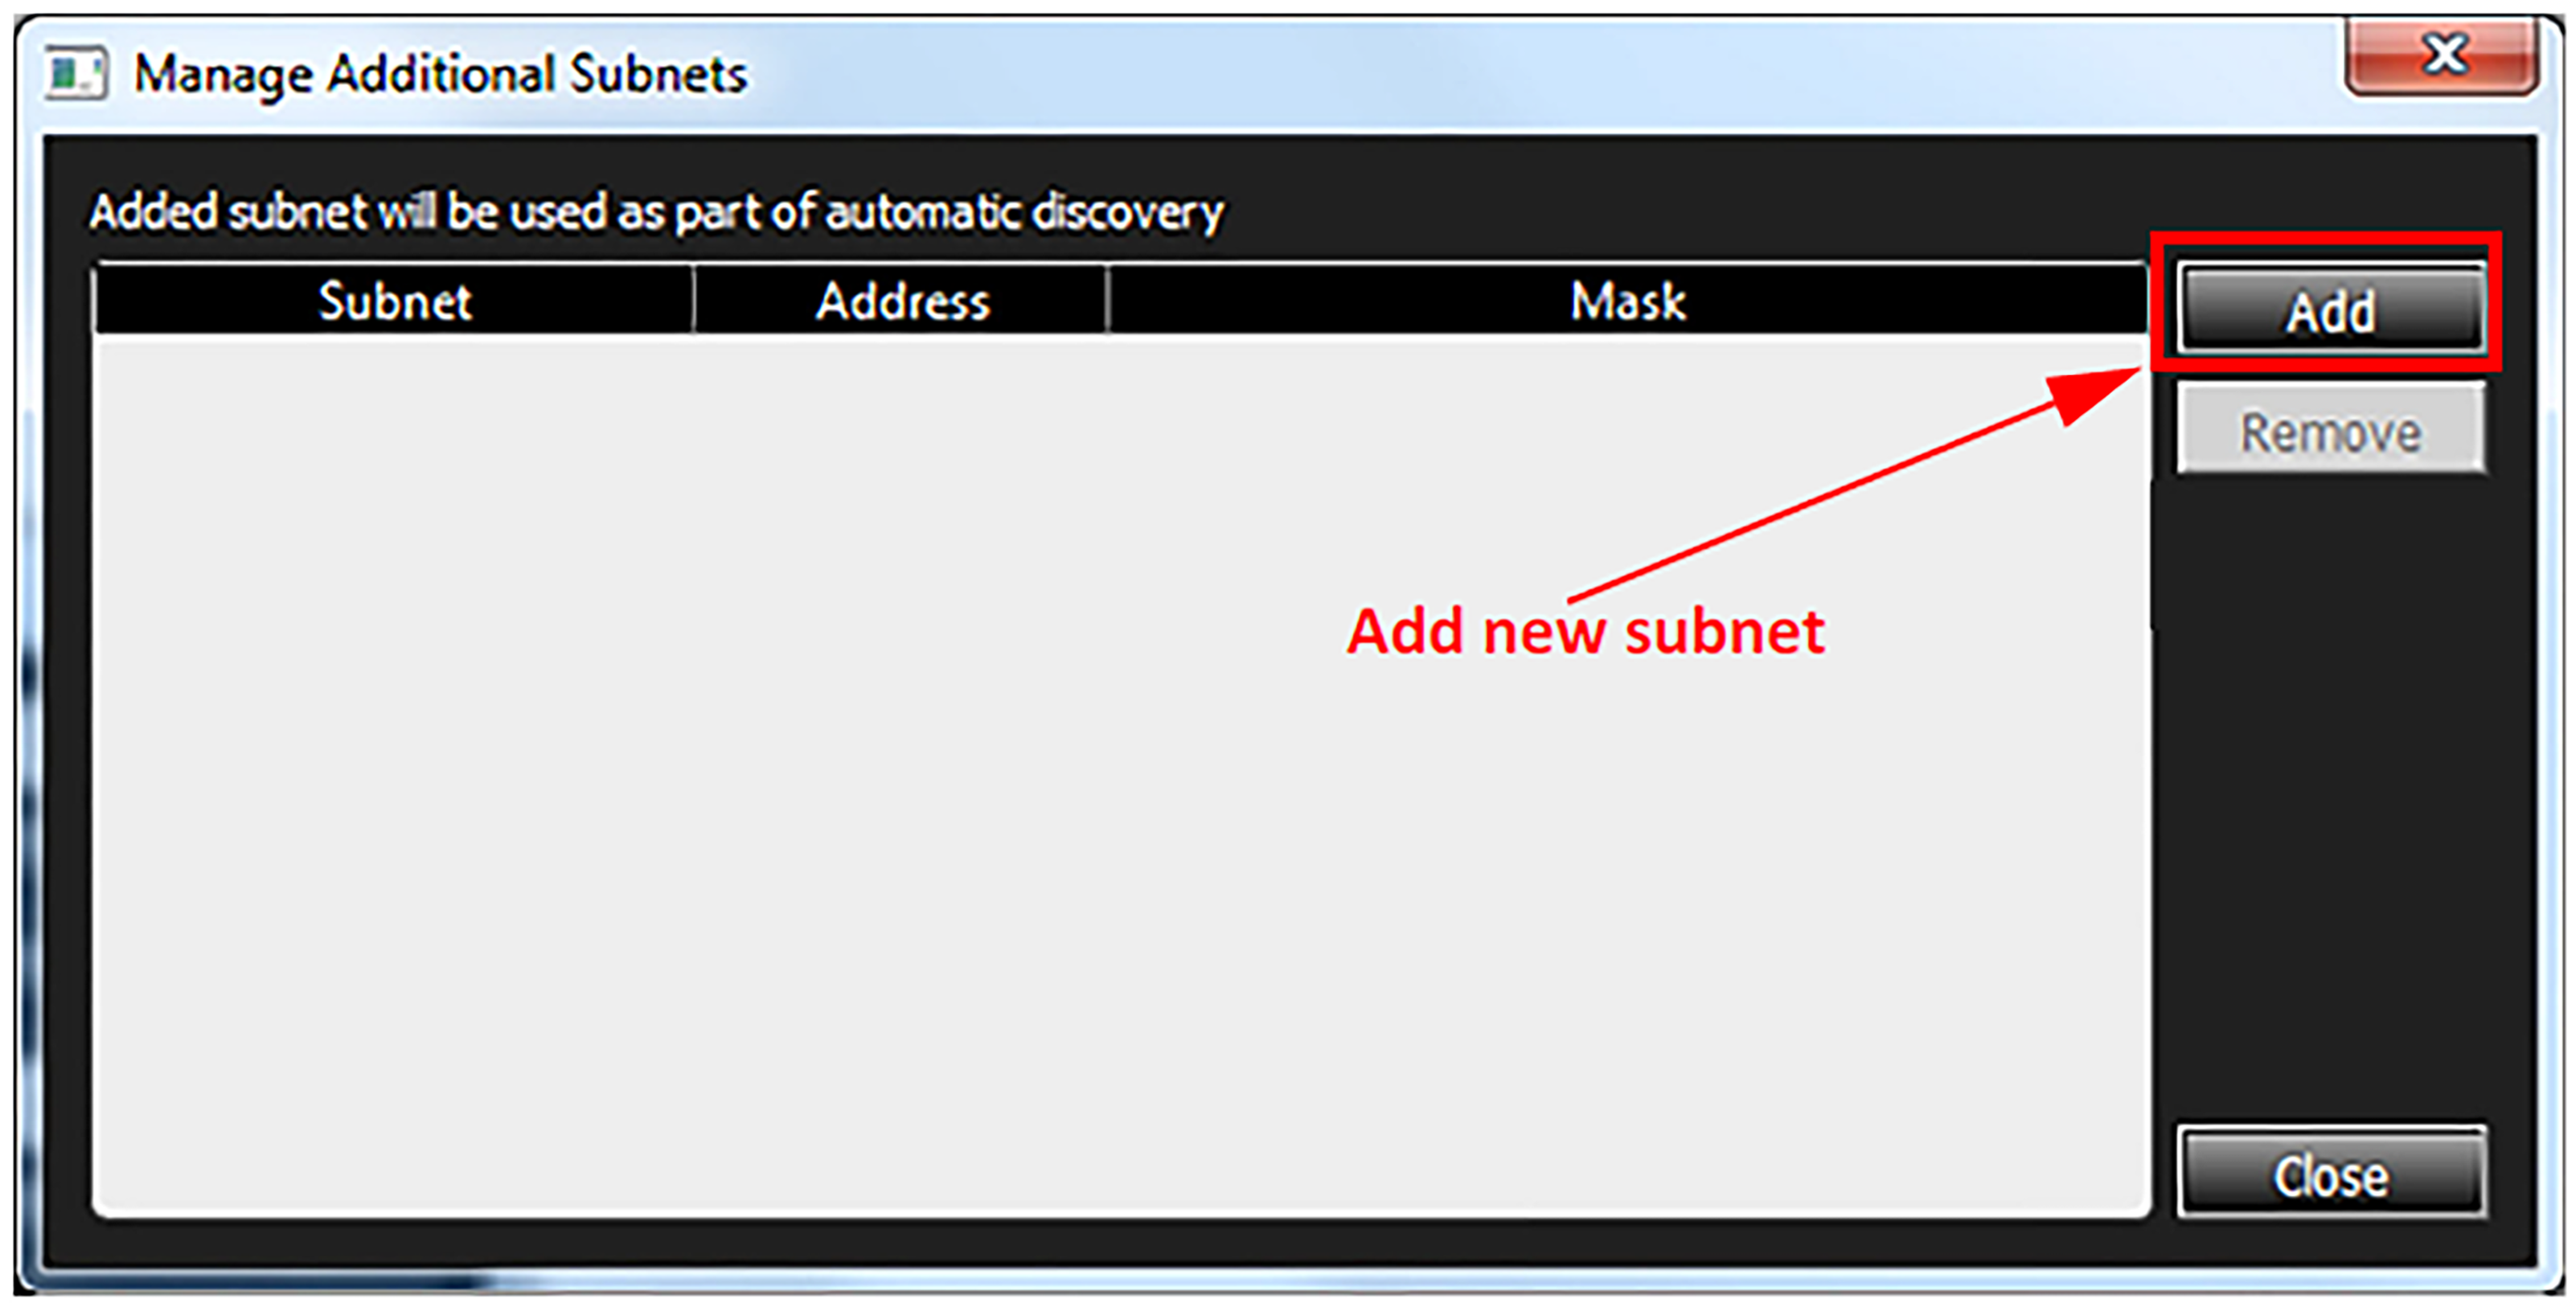
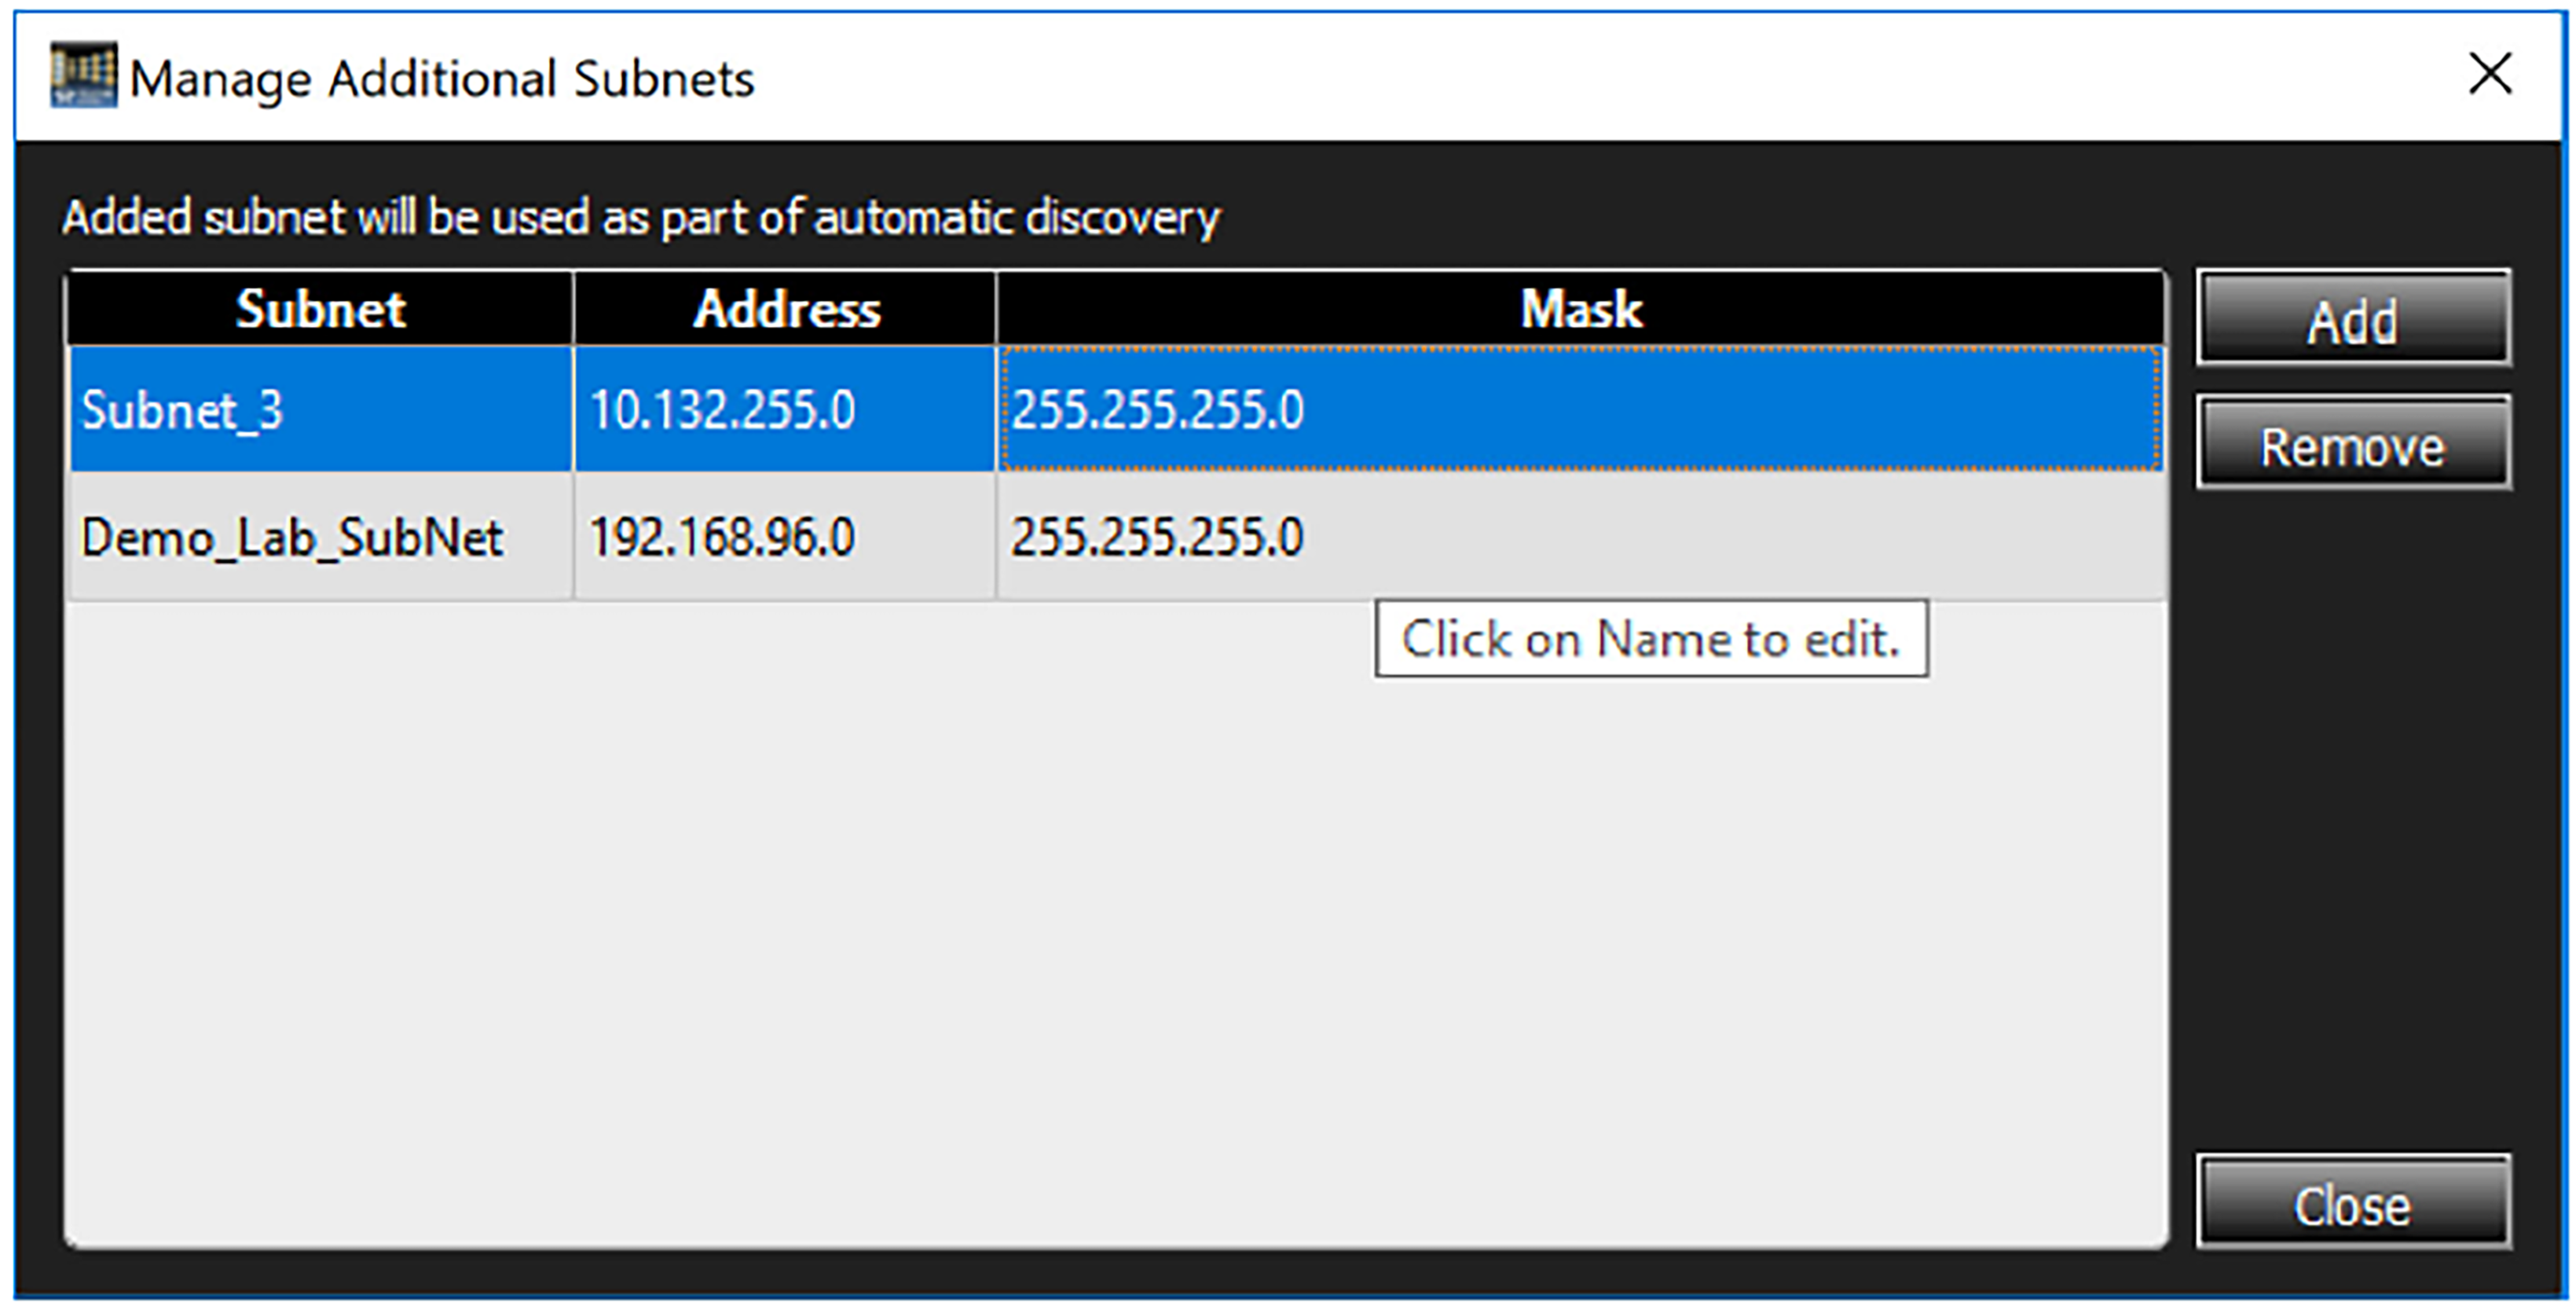
The Manage Additional Subnets window appears, which shows the existing subnets and allows you to add or remove them.
-
Subnets in this list will be saved (e.g., to the Windows registry).
-
-
Click the Add button to add another subnet.
-
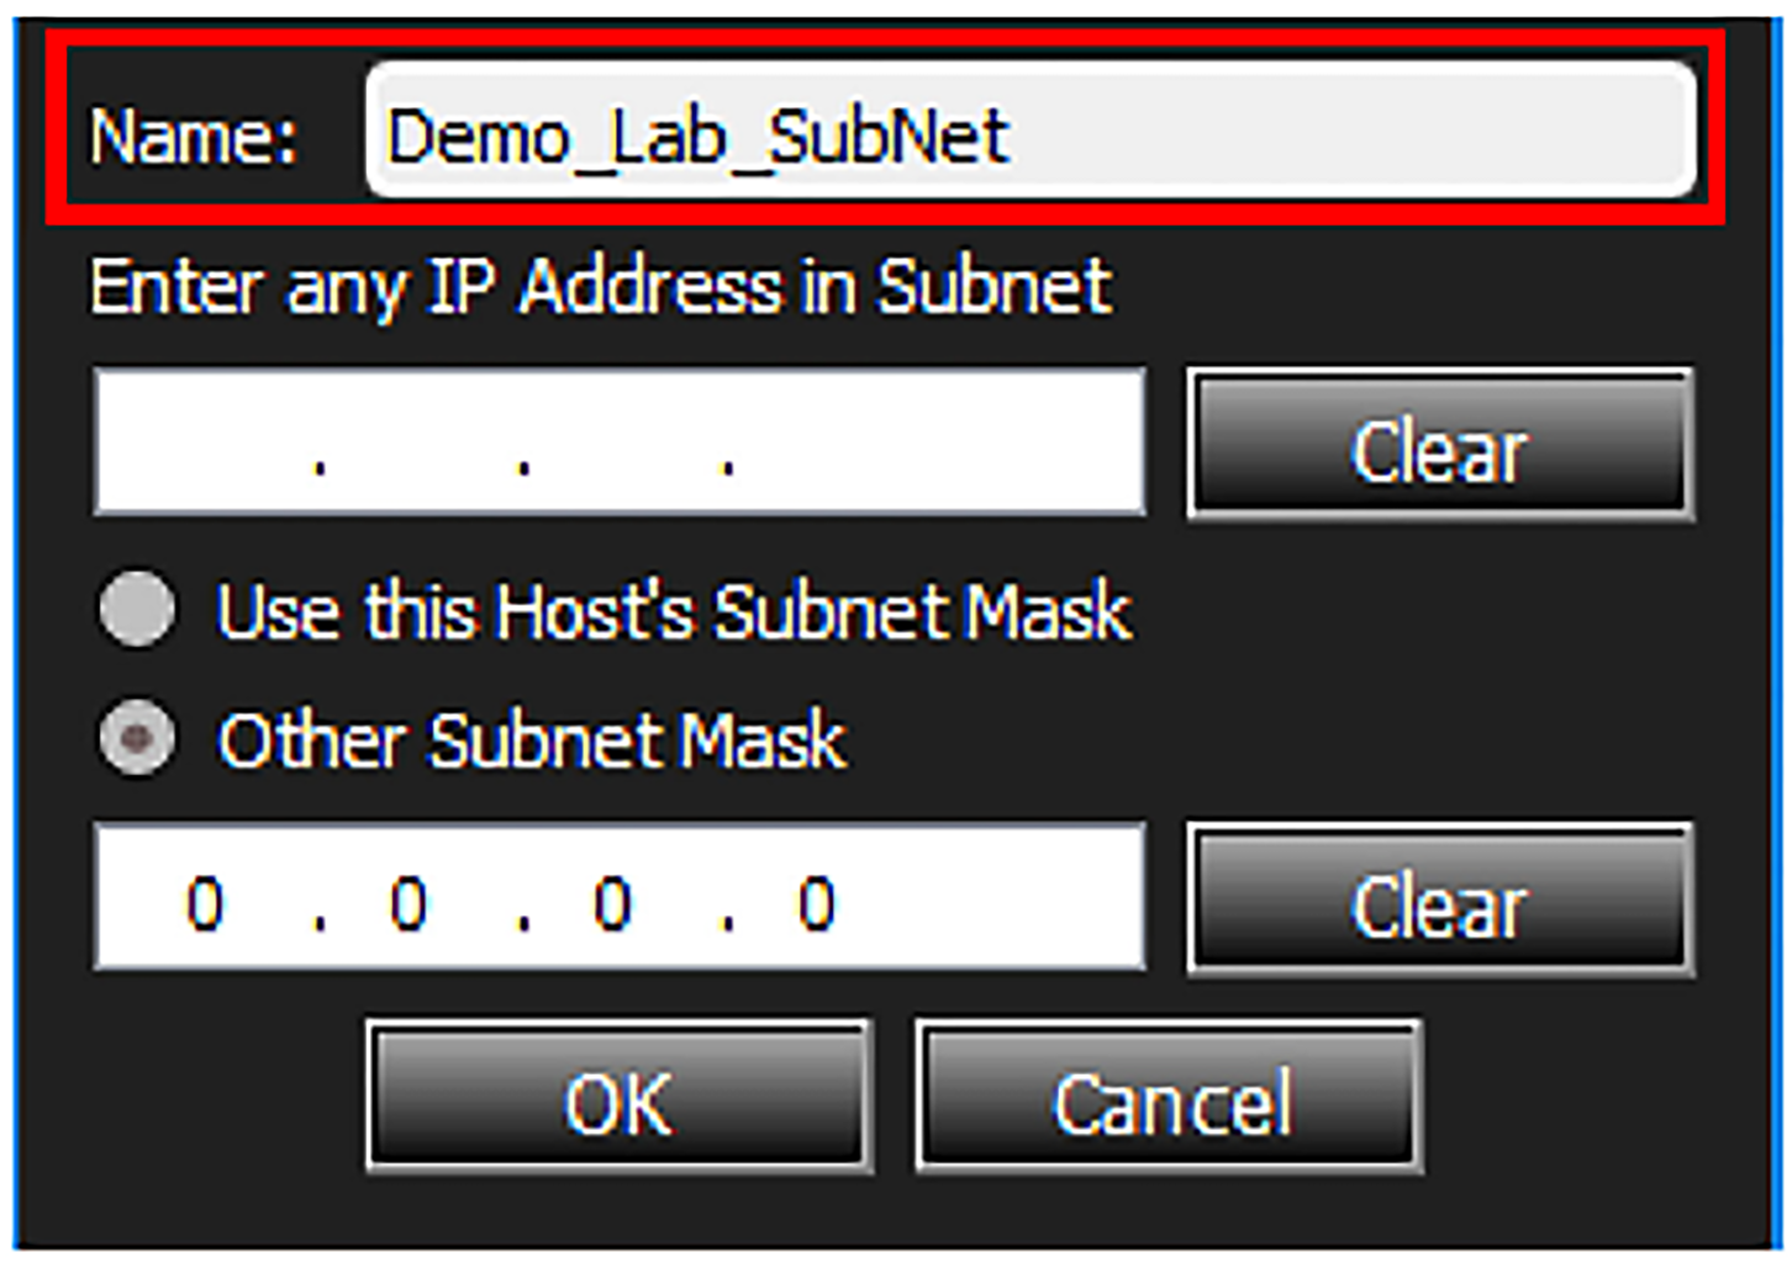
Add a Meaningful Name to the Subnet:
-
Type the new name into the subnet Name field.
-
b. Enter an IP Address for the Subnet).
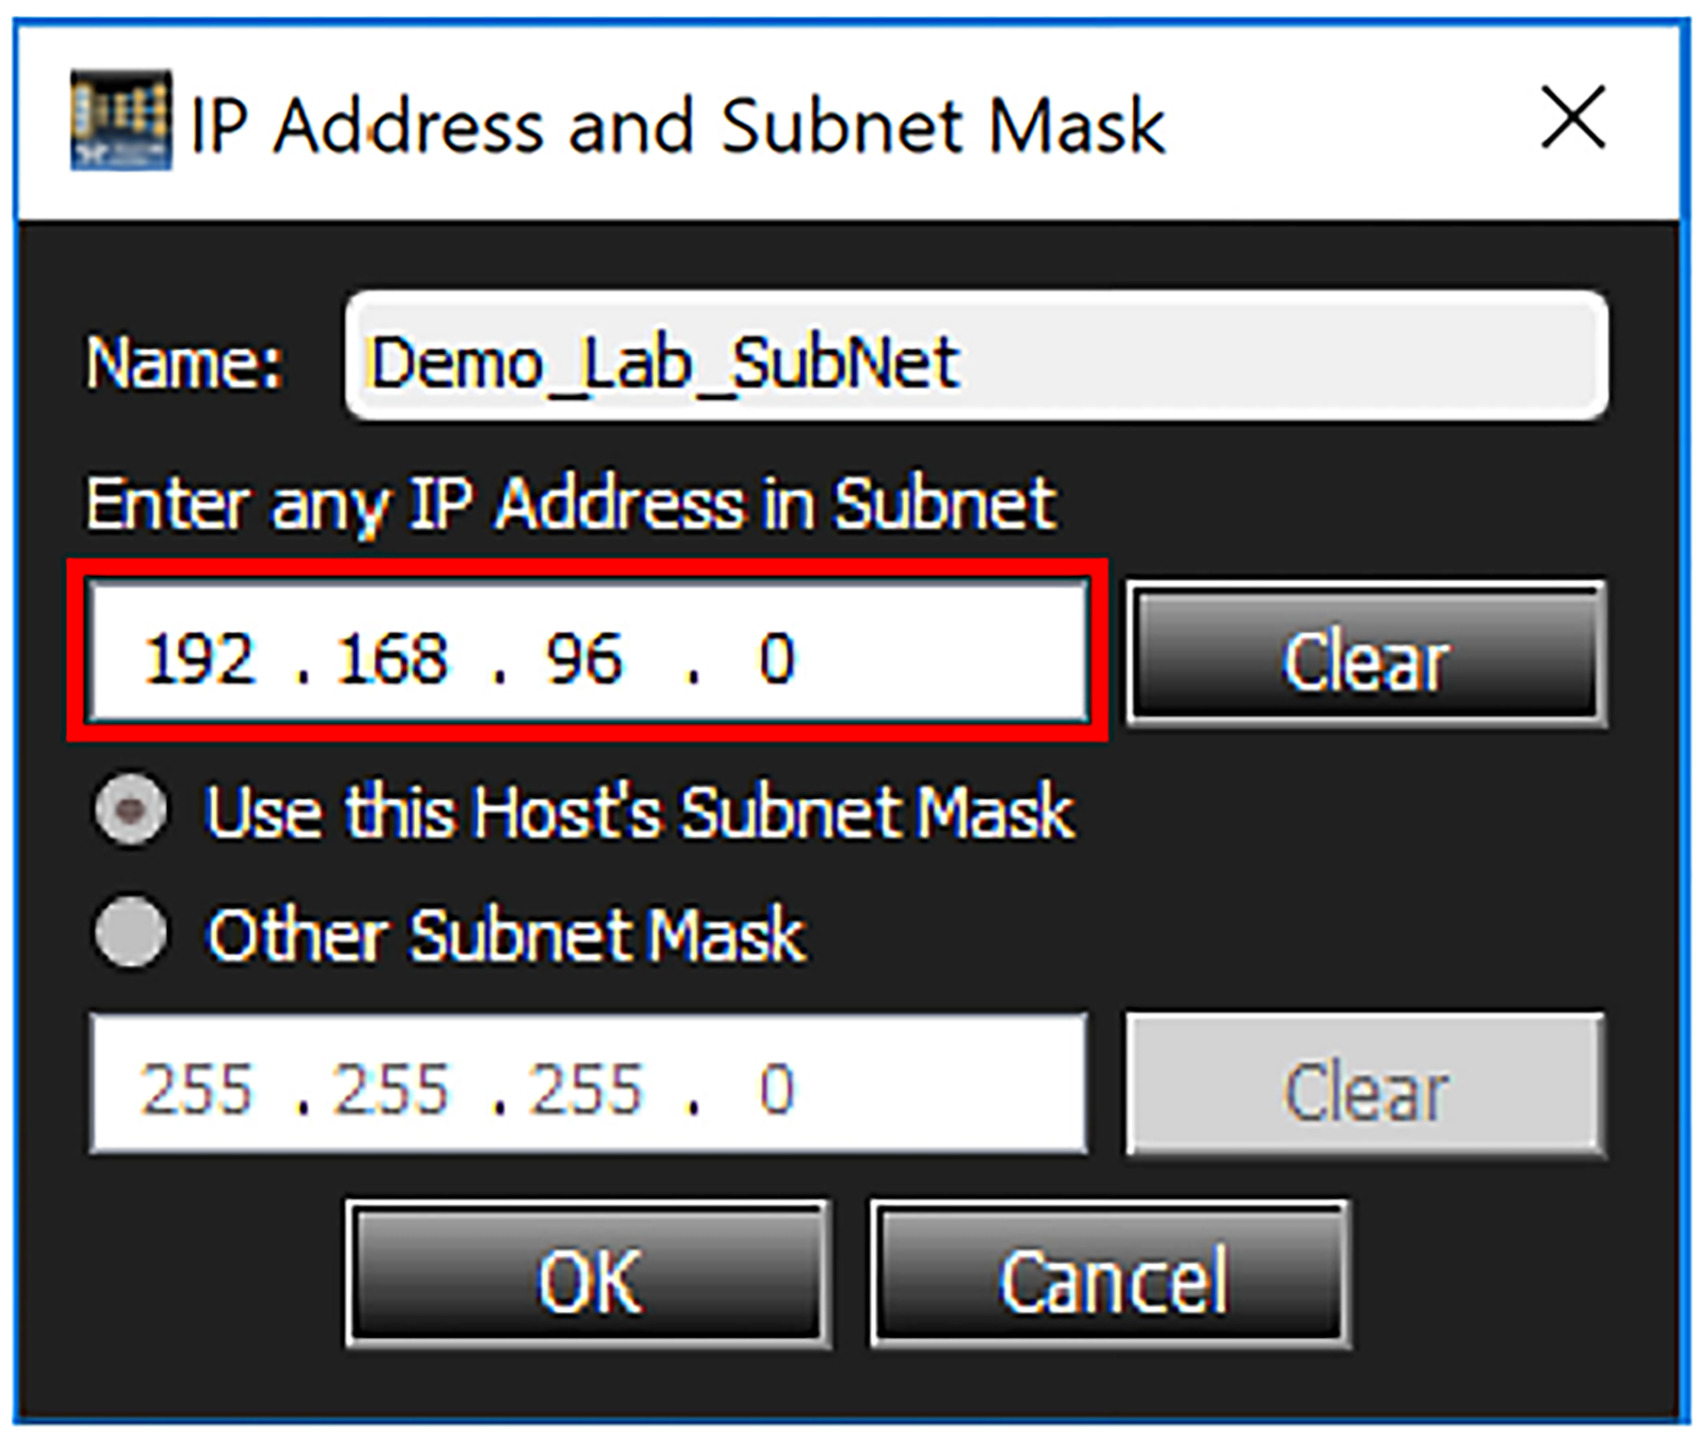
By default, the Host subnet mask is used since it is very likely that, in enterprise environments, different subnets will still have the same mask. However, the option to provide another subnet mask is provided.
Note: A subnet is identified by a network IP address and a subnet mask, so both parameters must be specified.
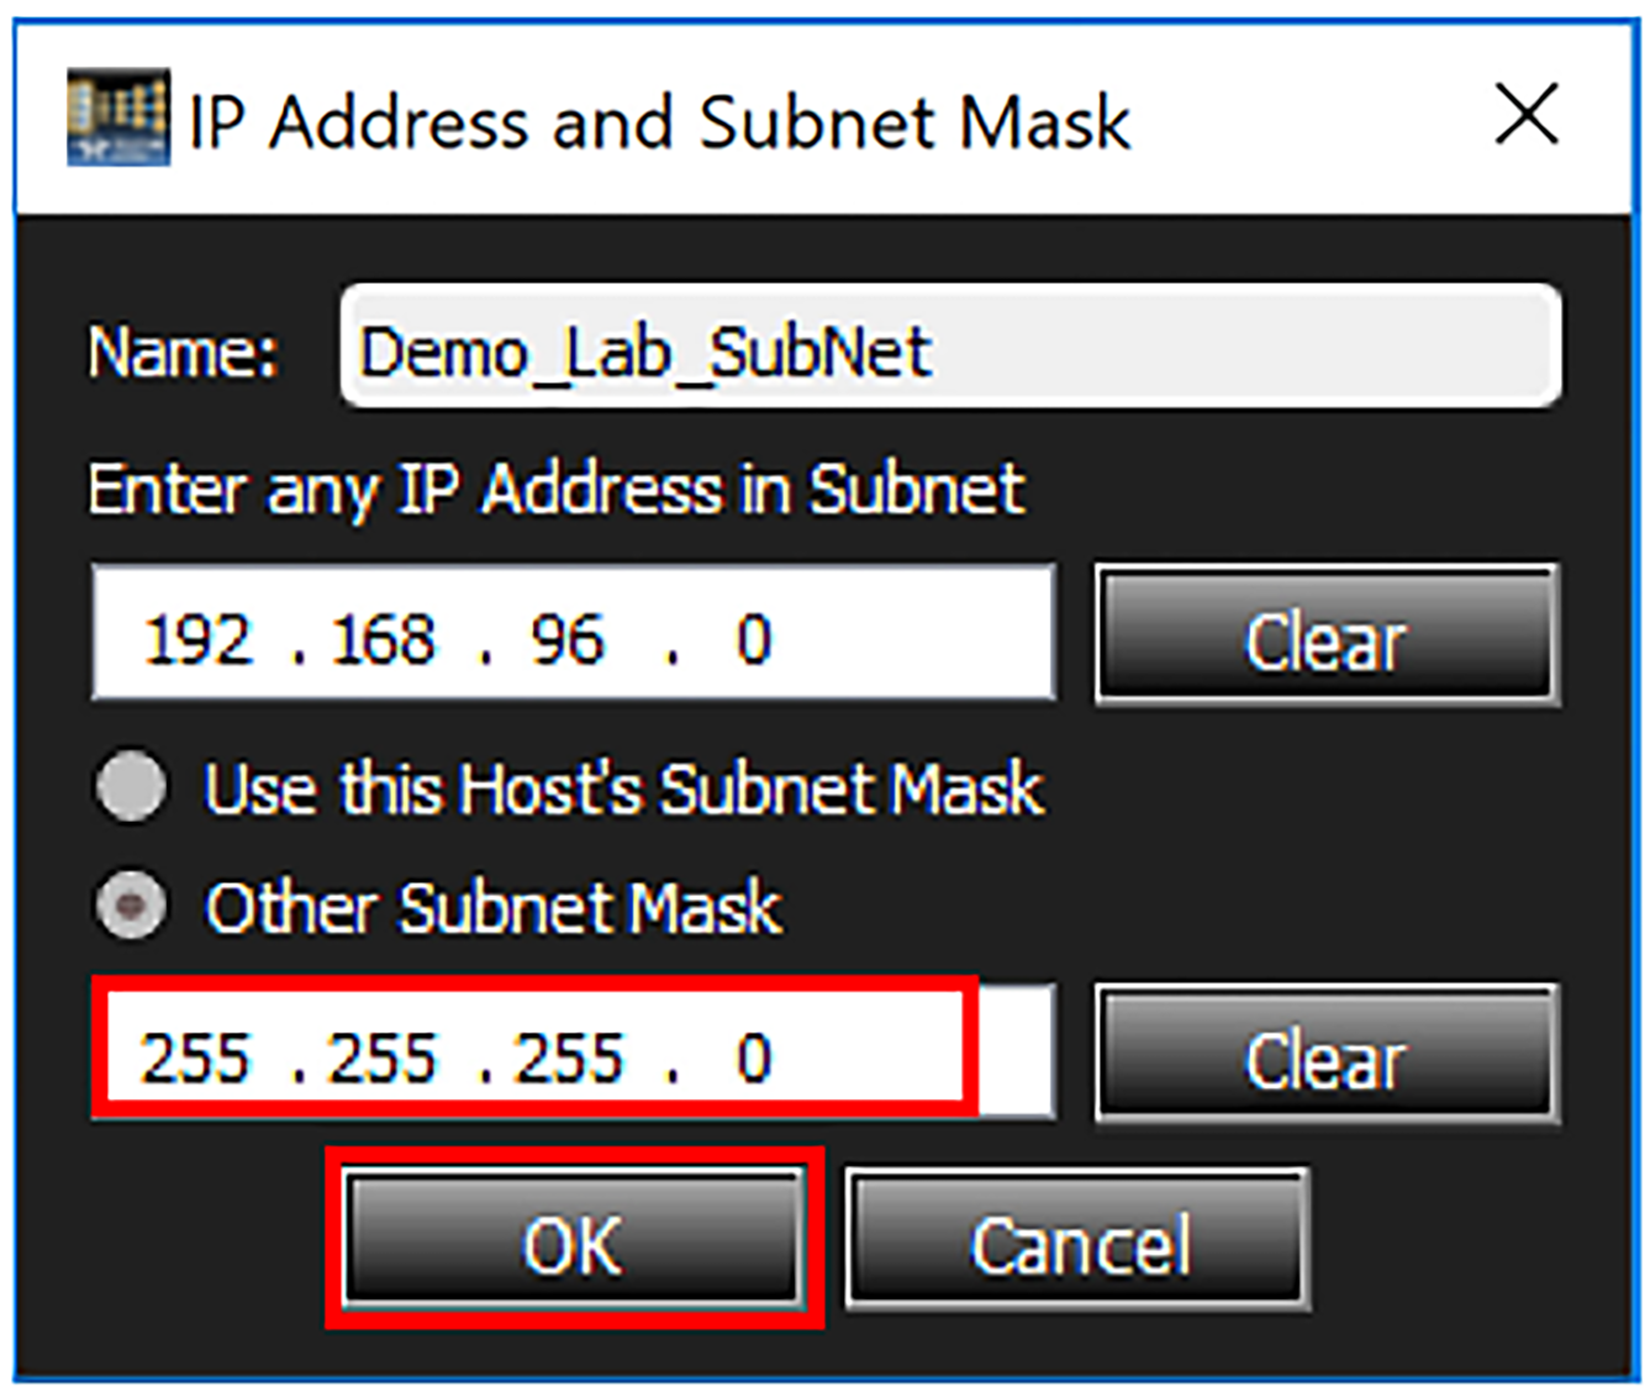
The software will validate the subnet to ensure it is not the same as the Host subnet.
-
Click OK to add the new Subnet to the network (Figure 2.67).
Change the Name of a Subnet
-
From the Main Toolbar, select Setup > Device Management. The Device Management window opens.
-
Click the Subnets button to open the Manage Additional Subnets window.
-
To change the name of the Subnet, select the Subnet and type a new name.
-
To change the Address and Mask of the Subnet, select the Subnet you want to change, then do the following:
-
Click Remove.
-
Click Add and enter the new Name, Address, and Mask.
-
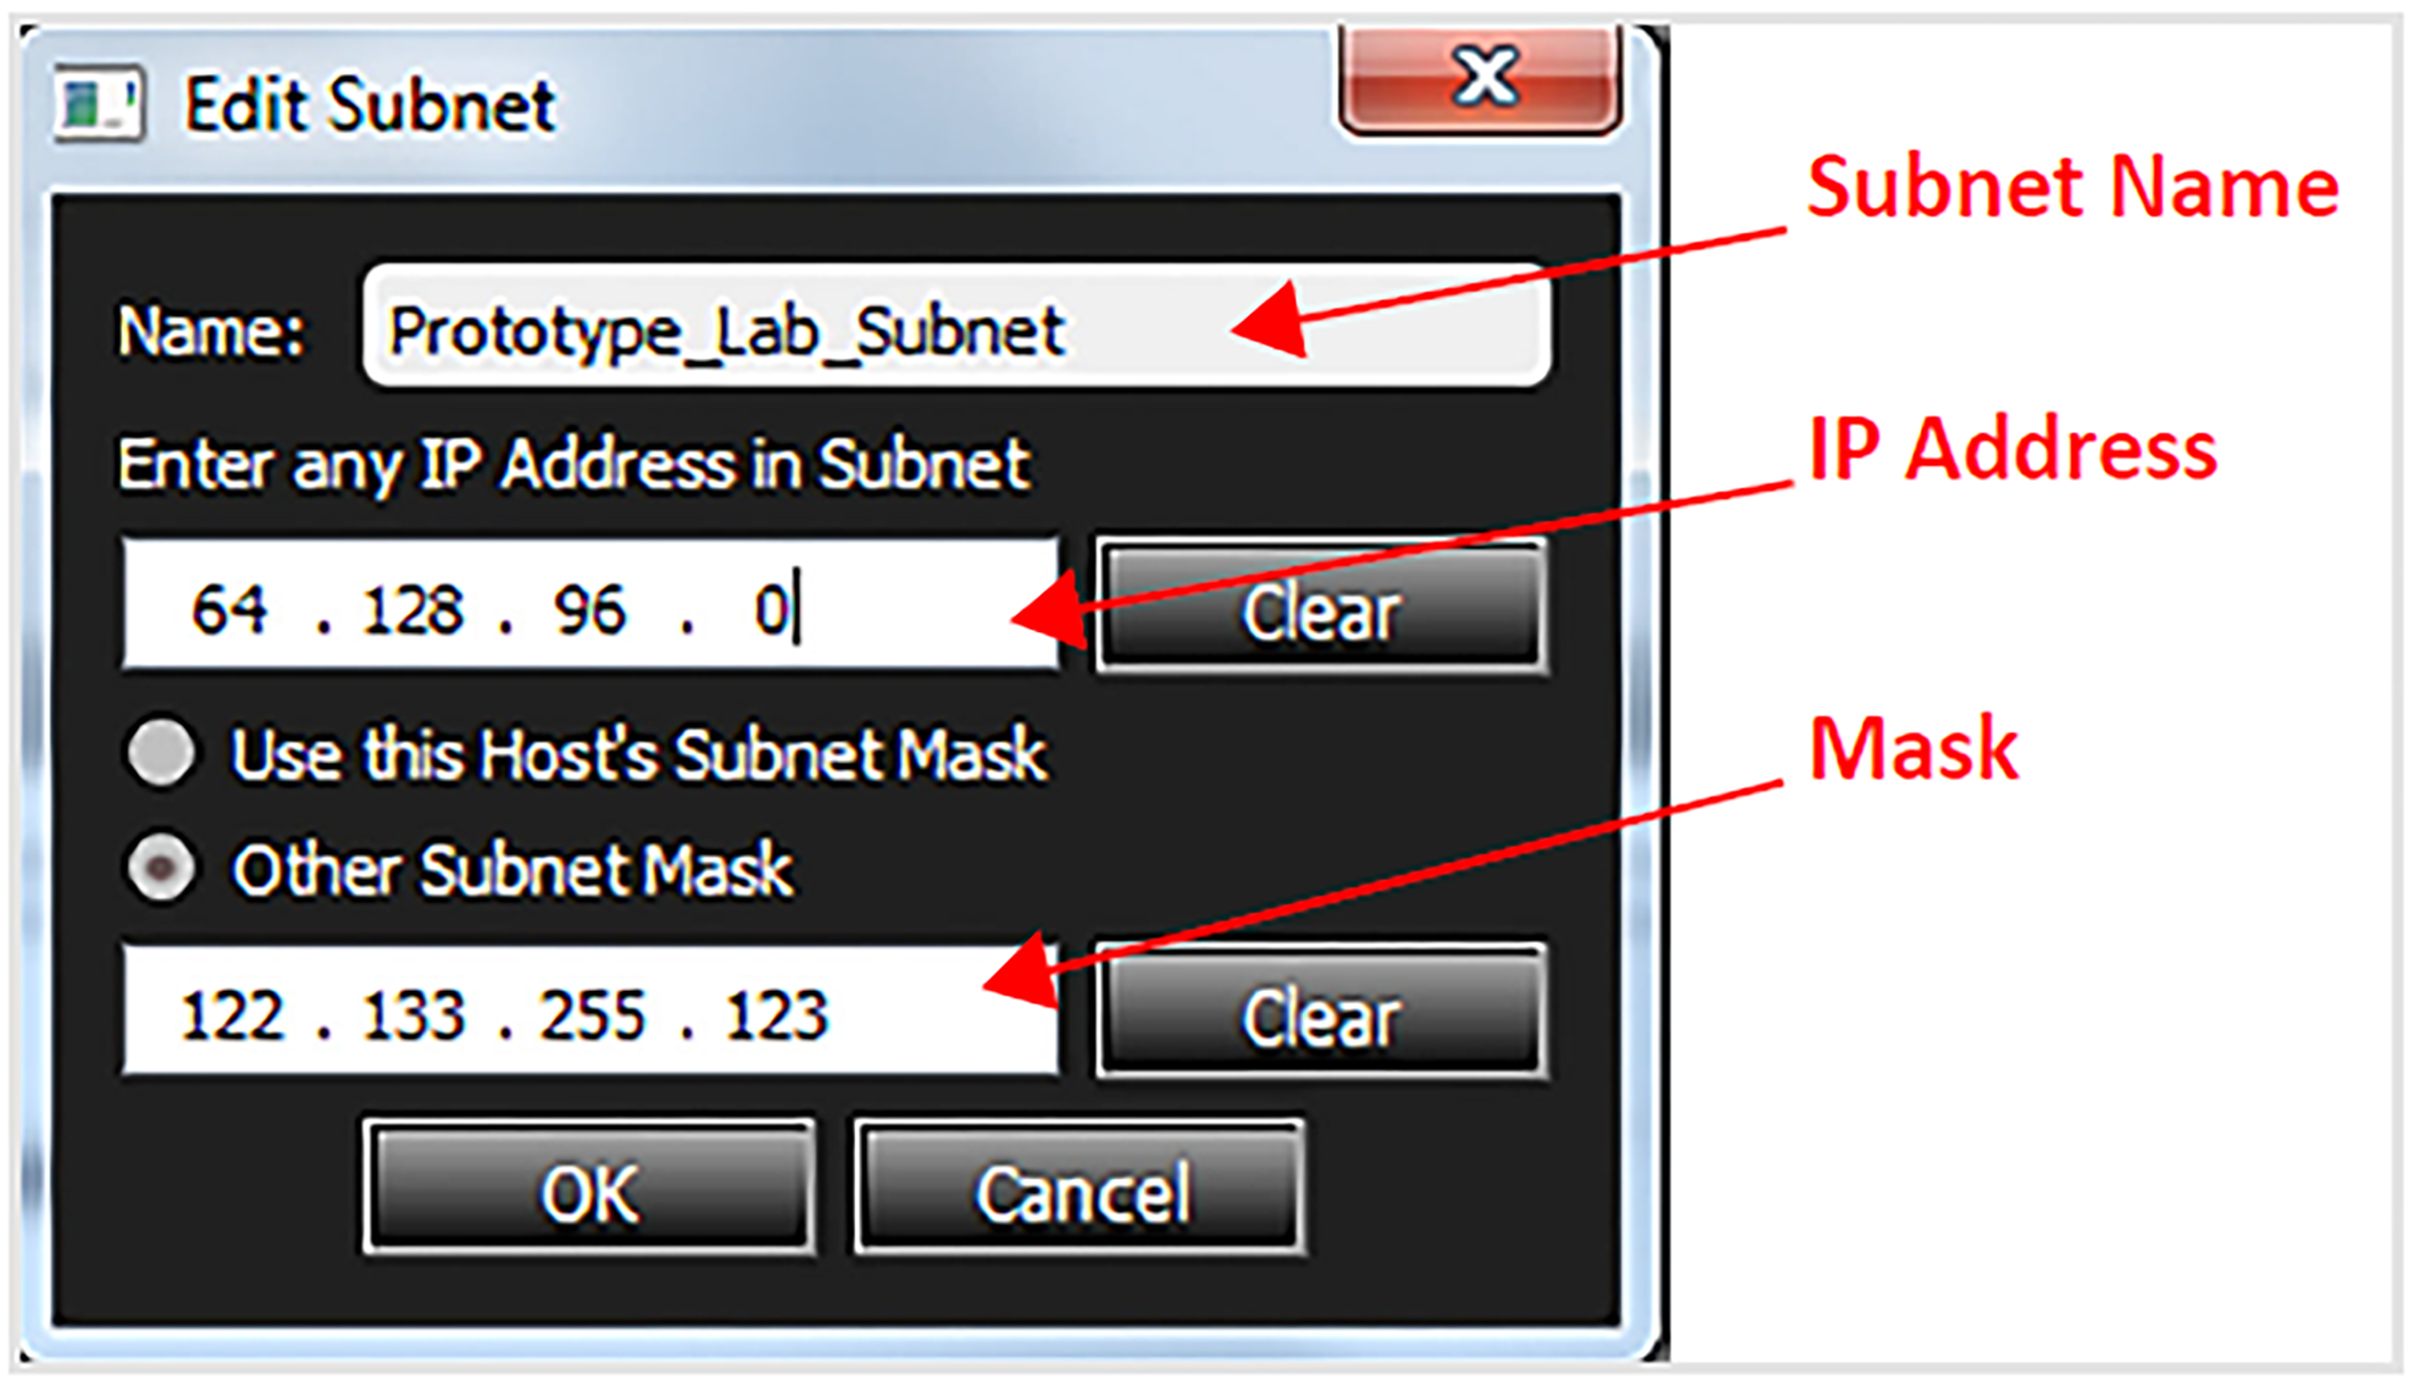
c. Once you have completed the changes, click OK.
Connecting Manually
If the device cannot be discovered through Automatic Discovery, you can find it directly if you know its IP address. In this case, the SierraNet M408 IP address must be added manually. To do this, perform the following steps:
-
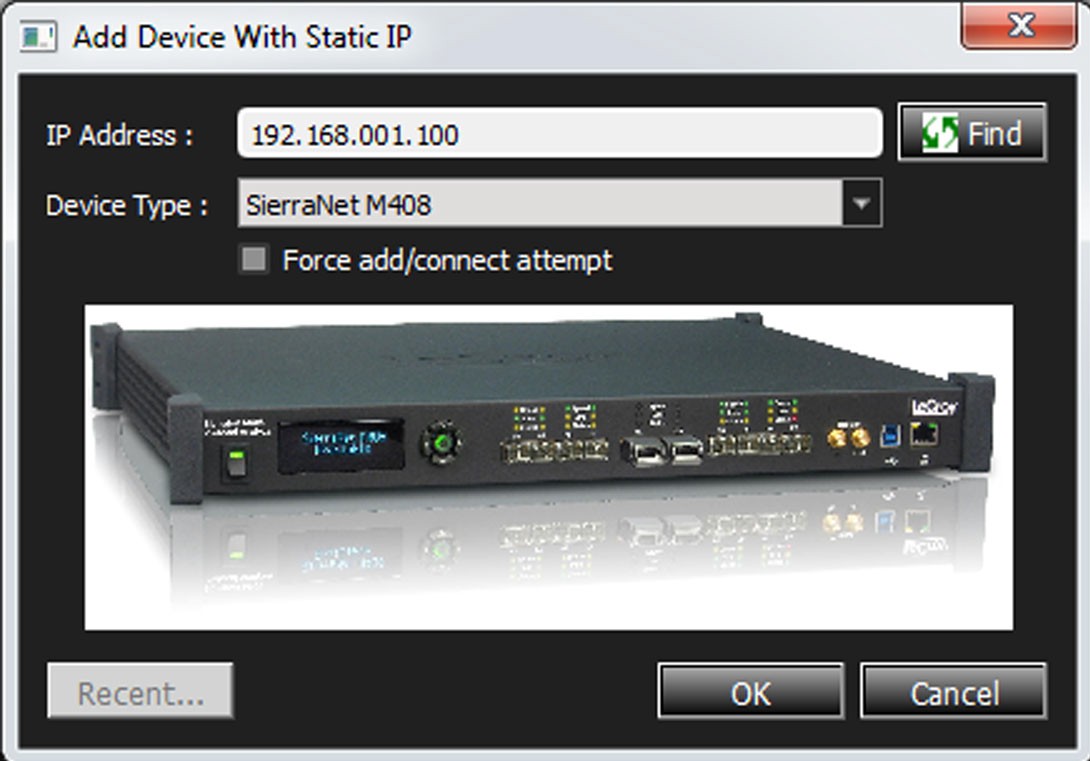
From the Main Toolbar, select Setup > Device Management > Add Device. The Add Device With Static IP dialog window appears.
-
Enter the IP address of the device you need to add.
-
Click OK.
When the IP address is added, the application sends a connection request to that IP address to connect to the SierraNet M408 System.
Set Up the IP
This section describes how the SierraNet M408 System is connected (see IP Settings).
Ethernet Configuration
There are two ways to configure the SierraNet M408 for network connectivity:
-
DHCP automatically assigns an IP address. DHCP is the default.
-
Static IP prompts you to enter a specific IP address.
The SierraNet M408 can be configured from the unit itself using the five buttons and the LCD display on the front panel of the Analyzer. For additional information, see LCD Display and Button Functions for Analyzer Host Connection Setup.
Dynamic Configurations
Dynamic configuration uses DHCP (Dynamic Host Configuration Protocol).
Under DHCP, SierraNet M408 will issue a broadcast to any DHCP Server requesting configuration. If a DHCP server is present on the network, it will assign an IP address, Subnet Mask, and a default GATEWAY (a router port IP address) to the SierraNet M408. The Gateway port will be used by SierraNet M408 to forward events to IP addresses that do not reside within the same subnet.
When using the dynamic configuration, the front panel display will only update the IP address.
The subnet mask and gateway address will remain at the last values programmed.
(000.000.000.000 by default, or whatever was last programmed in the static configuration). While in dynamic mode, these parameters will have been programmed within the IP STACK inside the SierraNet M408, but are not displayed in the LCD.
To change from DHCP to Static IP, select Setup > All Connected Devices > IP Settings from the menu bar.
Note: If you are connected to the device using Ethernet, changing the IP Address will cause the connection to drop. You will need to reconnect using the new IP Address.
If the gateway is not configured properly, you must manually change the setting with the front panel configuration buttons.
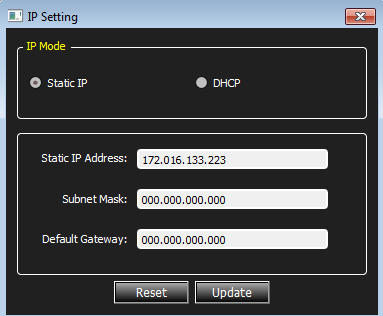
The IP Setting dialog box appears. For IP Mode, two radio buttons are available: Static IP and DHCP. DHCP is the default (see below).
Static Configurations
Within static configurations, SierraNet M408 must be manually programmed with an IP address, Subnet Mask, and a default Gateway.
Once SierraNet M408 has been programmed with the static network configuration, it will broadcast a UDP message on its own subnet stating that is on line and available for connection.
Note: This broadcast is only on the subnet that includes the SierraNet M408 System.
When the application is started on the host machine, it will broadcast a UDP message on its own subnet asking all SierraNet M408s available to identify themselves.
Note: This broadcast is only on the host machine subnet.
If the host machine and the SierraNet M408 System reside on the same subnet, they will see each others’ broadcasts and the application will automatically populate the Select Device list.
To change to a Static IP:
-
In the IP Setting dialog box, click the Static IP radio button.
-
Enter the Static IP Address.
-
Enter the Subnet Mask.
-
Click Update. A pop-up box with a Warning Message appears.
-
Click Yes. If the change is successful, a confirmation pop-up message appears.
-
Click OK. The message closes and the device resets.
-
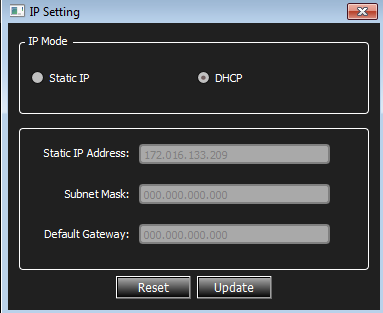
To return to DHCP, in the IP setup dialog, click the DHCP radio button, then click Update. The Warning pop-up box appears.
-
To continue with changing back to DHCP, click Yes.
-
When the Success confirmation appears, click OK.
Note: You can also click Reset.