System Settings
Changing Default File Locations
The analyzer saves user files in specific locations by default. Capture files are placed in the My Capture Files directory and configurations are put in My Configurations. These locations are set at installation.
For macOS installations, the Wireless Protocol Suite directory locations are available via a link that is created in the Documents shortcut in your Finder window within a “Teledyne LeCroy Wireless” folder.
Follow the steps below to change the default locations.
-
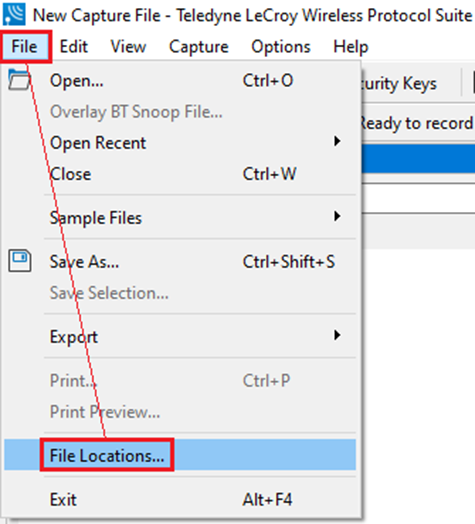
Select File > File Locations from the main menu. See figure below.
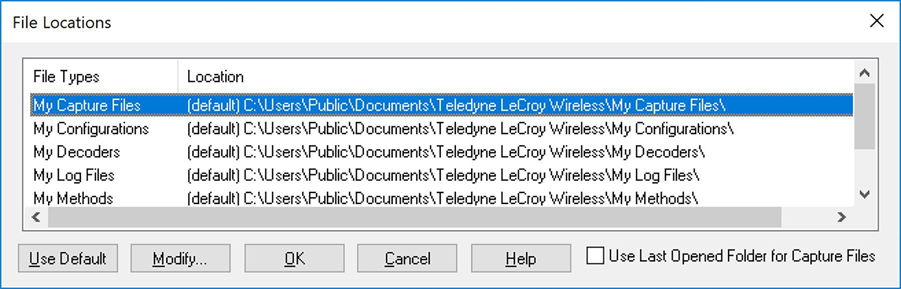
This will pop up a menu with all the locations of the Capture Files, Configurations, Decoders, Log files, etc. See figure below.
-
Select the default location you wish to change.
-
Click Modify.
-
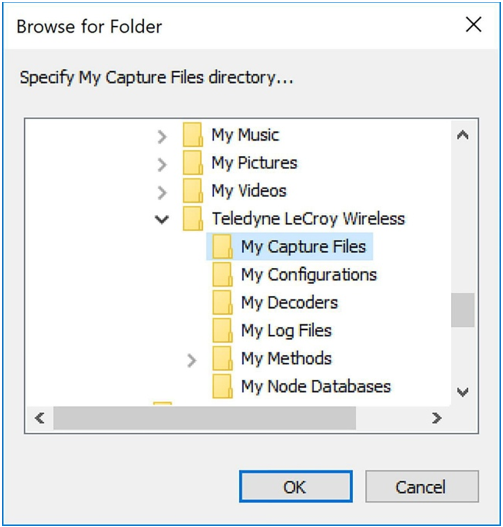
Browse to a new location.
-
Click OK.
-
Click OK when finished.
If a user sets the My Decoders directory such that it is up-directory from an installation path, multiple instances of a personality entry may be detected, which causes a failure when trying to launch the Wireless Protocol Suite.
For example, if a Frontline product is installed at C:\Users\Public\Public Documents\Teledyne LeCroy Wireless\My Decoders\ then "My Decoders" cannot be set to any of the following.
-
C:\ My Decoders\
-
C:\Users\ My Decoders\
-
C:\Users\\Public\My Decoders\
-
C:\Users\Public\Public Documents\My Decoders\
-
or to any directory that already exists in the path C:\Users\Public\Public Documents\Teledyne LeCroy Wireless\My Decoders\
For macOS installations, the Wireless Protocol Suite directory locations are available via a link that is created in the Documents shortcut in your Finder window within a “Teledyne LeCroy Wireless” folder.
Default Capture File Folder Checkbox
If the Use Last Opened Folder for Capture Files checkbox is checked, the system automatically changes the default location for saving capture files each time you open a file from or save a file to a new location. For example, the default location for saving capture files is Drive A > Folder A. Now you select the Use Last Opened Folder for Capture Files checkbox. The next time you open a capture file from a different location, for example, Folder B > Removable Flash Drive. When you save the capture file, it will be saved to Folder B > Removable Flash Drive. Also, all following files will be saved to that location until a file is opened or saved to a file in a different location.
There is one caution to this scenario. If you select Use Last Opened Folder for Capture Files is selected and opened a file from a location other than the default directory, all following capture files will be saved to that location. Suppose the next time you want to save a capture file, the new file location is not available because the directory structure has changed: a folder has been moved, a drive has been reassigned, a flash drive has been disconnected, etc. In the case of a "lost" directory structure, subsequent capture files will be saved to the default location. Wireless Protocol Suite software will always try to save a file to the folder where the last file was opened from or saved to, if Use Last Opened Folder for Capture Files is checked. If the location is not accessible, files are saved to the default directory that is set during installation.
If the checkbox is unchecked, the system will default to the directory listed in the File Locations dialog.
BT Snoop File Overlay
BT Snoop files may be overlaid onto captured files to see those HCI frames interleaved with the captured frames. The starting time of the overlaid file may be adjusted to change the alignment in time of overlaid frames with the captured frames. The overlaid files may be removed from the capture.
Overlay A BT Snoop File
To overlay a BT Snoop file onto a captured file, select and open the desired capture file (.cfa/.cfax).
-
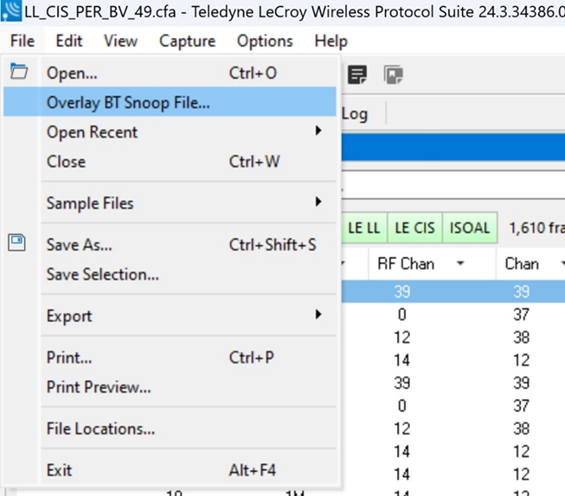
Select “File” menu.
-
Select “Overlay BT Snoop File…”.
-
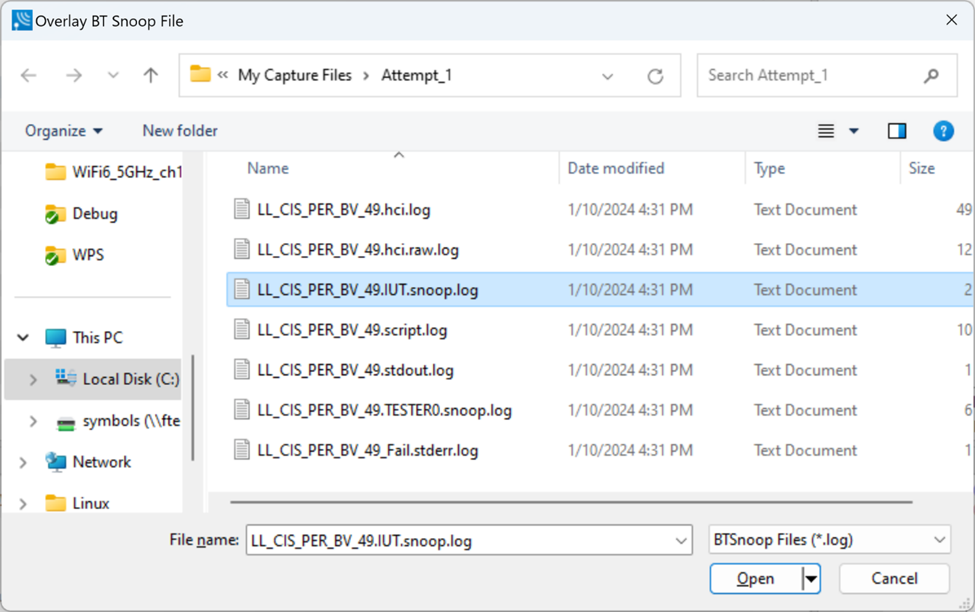
Select the desired file to overlay and select “Open BT Snoop File…”.
-
A progress dialog will be displayed.
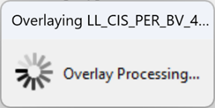
A technology tab and associated protocol tabs for HCI data will be added for the overlaid frames. If there were HCI data in the captured file, the overlaid frames would be displayed on the existing HCI protocol tabs. The “All Frames” tab will show the HCI data interleaved with the captured data.
Adjust Overlay Starting Timestamp
In some cases, the starting time of an overlaid file may need to be adjusted. For instance, the case of a different time refence between the captured frames and the BT Snoop frames due to time zone. The start time of the overlaid files(s) may be adjusted to change the frame alignment. The starting time of an overlaid file may be adjusted either during the initial overlay session or for a capture file that was saved with overlaid files.
-
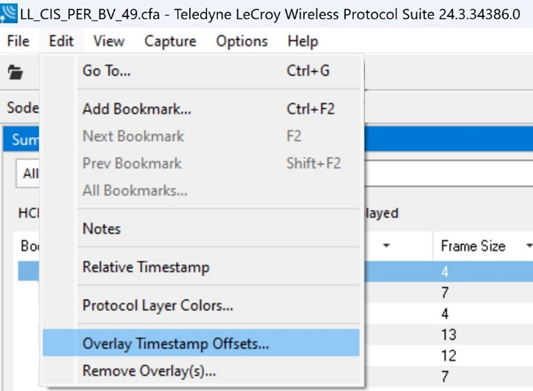
Select “Edit” menu.
-
Select “Overlay Timestamp Offsets…”.
-
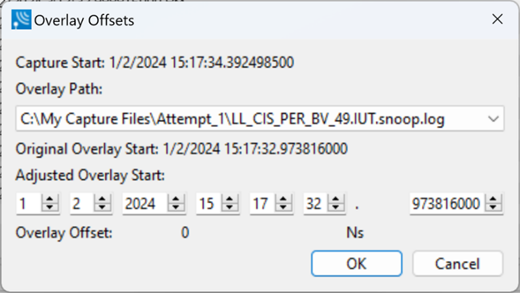
The Overlay Offsets dialog will be displayed.
-
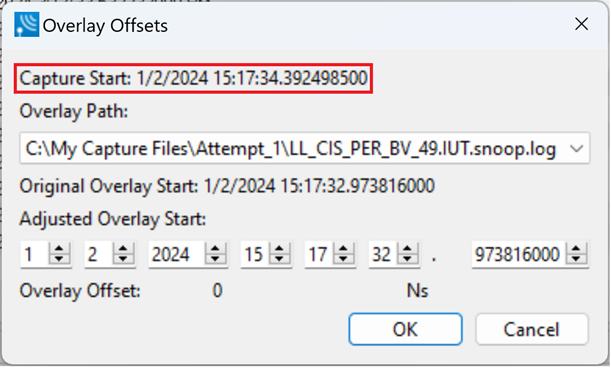
The dialog shows the starting time of the original capture file.
-
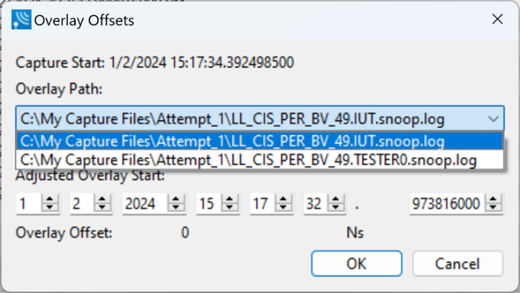
The “Overlay Path” control contains the paths to the current overlaid files. Select the dropdown to select each overlay for which a start-time offset is required.
-
The “Original Overlay Start” shows the date and time of the start of the selected overlaid file.
-
The “Adjusted Overlay Start” initially shows the original overlay start distributed across controls for adjustment of month, day, year, hour, minute, second and fraction of second. Those controls may be manipulated to move the start time of the selected overlay backwards or forwards in time.
-
The “Overlay Offset” control is a display of the cumulative overlay offset relative to the original overlay start.
-
Select the “Cancel” button to discard overlay offset changes.
10. Select the “OK” button to commit the overlay offset changes.
11. A progress dialog will be displayed.
12. The captured and overlaid frames will be displayed with the adjusted starting timestamps for the overlays.
Remove Overlaid Files
Overlaid files may be removed from a capture either during a session or from a capture file that was saved with overlaid files.
-
Select “Edit” menu.
-
Select “Remove Overlay(s)…”.
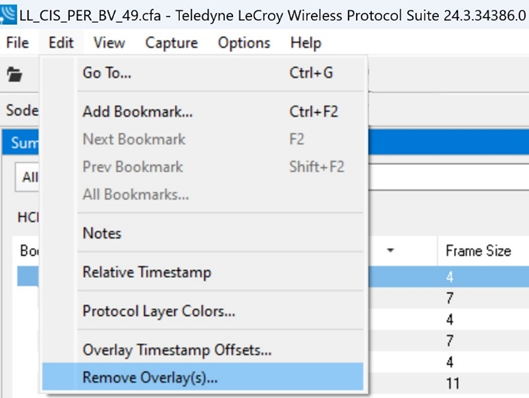
-
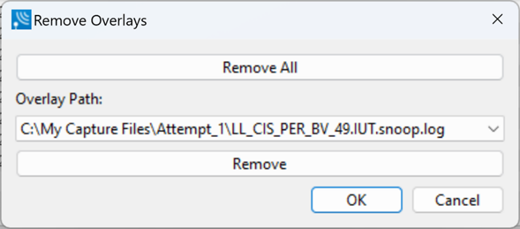
The “Remove Overlays” dialog will be displayed.
-
The “Remove All” button will cause all overlays to be removed. All overlay paths will be removed from the “Overlay Path” control and the “Remove” button will be disabled.
-
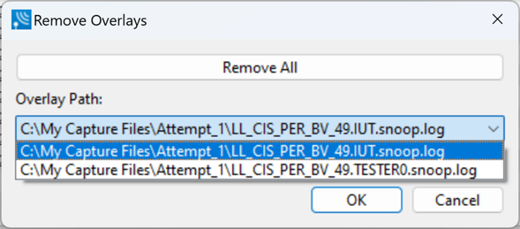
The “Overlay Path” control contains the paths to the current overlaid files. Select the dropdown to select each overlay that should be removed.
-
To remove an overlay, select the corresponding path and select the button “Remove.”
-
Select the “Cancel” button to discard all changes.
-
Select the “OK” button to commit the changes.
-
A progress dialog will be displayed.
10. If all overlays were removed, any technology and protocol tabs associated with the overlays will be removed.
Automatic Overlay Removal
Operations that change the underlying capture file will cause overlays of BT Snoop files to be discarded. For instance:
-
Reloading of decoders could cause a change in the number or ordering of compiled frames.
-
Setting security keys could cause all frames to be recompiled.
-
Reanalyze could remove frames for the devices represented by the BT Snoop files.
-
Clear would clear all frames.
-
Starting a capture session.
-
Changes to GATT cache.
After such an operation, the relevant BT Snoop overlays may be reapplied.
Automatic Security View Updates from Keys
The HCI commands in the BT Snoop file overlay might include link keys or long-term keys. These are found in HCI commands such as HCI_Link_Key_Request_Reply and HCI_LE_Enable_Encryption.
If a key completes a security event in the Security view, then the Wireless Protocol Suite software uses the key automatically. The software decrypts the packets associated with the key. The software reanalyzes the packets such that the packets it decrypts are shown in the Summary pane.
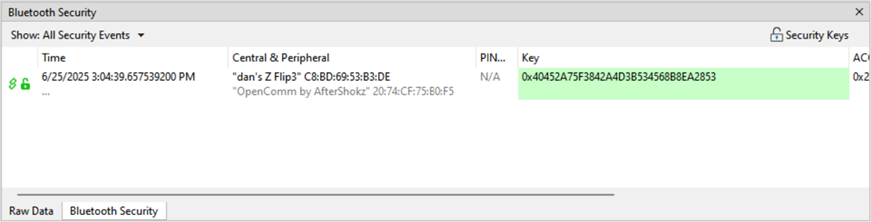
For example, in Security view below, the peripheral address is not complete. The link key is missing.
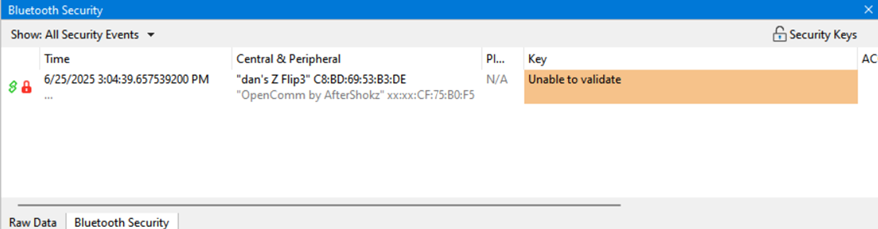
After applying a BT Snoop file overlay, the software updates the partial address and link key.