
Setting Up for Synchronized X240 Capture (2 units)
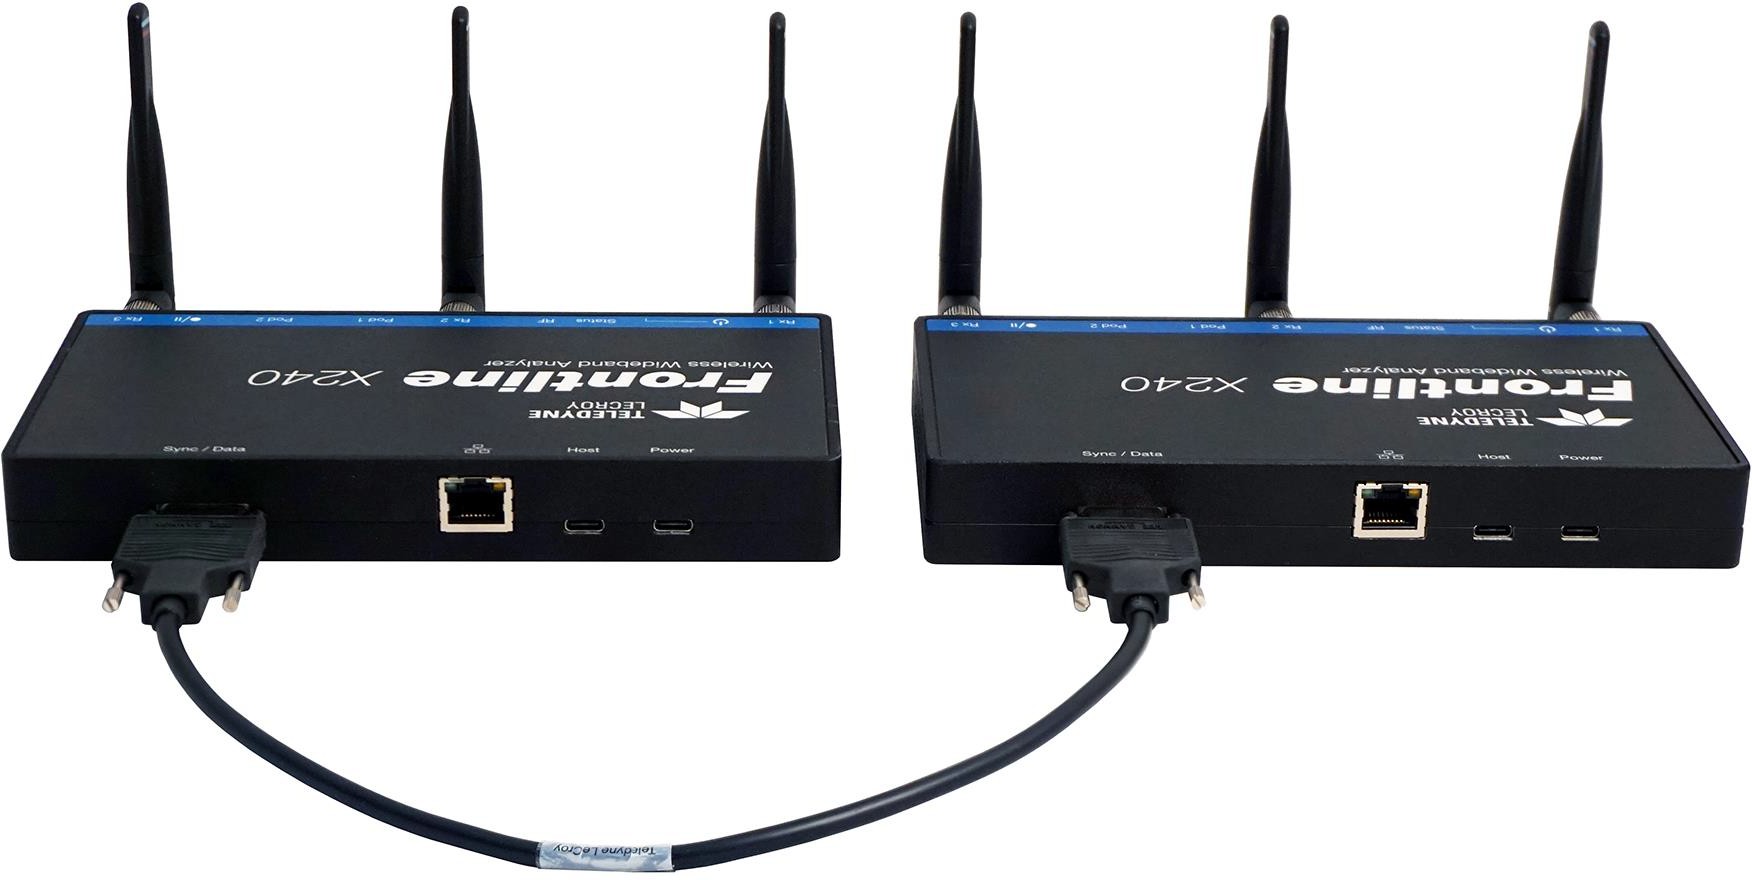
The Frontline X240 hardware allows for synchronization of X240 hardware clocks and timestamping. The CATC Sync cable connected to the MicroD25 connectors on the backs of two X240 hardware allows both the X240 hardware to run off a common clock, ensuring precise timestamp synchronization while capturing multiple wireless technologies such as Bluetooth BR/EDR and Bluetooth LE.
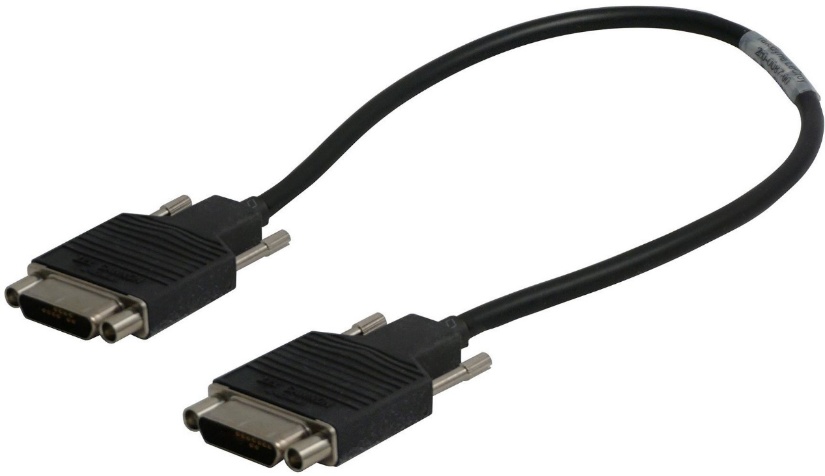
Connect one end of the CATC Sync Cable to the MicroD25 port on the back of one X240 and the other end of the CATC Sync Cable to the MicroD25 port on the back of the other X240.
Troubleshooting
If the X240 indicates that synchronization cables are not properly connected, follow these steps to reestablish synchronization:
-
Reseat the MicroD25 cable on the back of each X240.
-
Reboot each X240.
Setting Up for Synchronized X240 Capture (3 units)
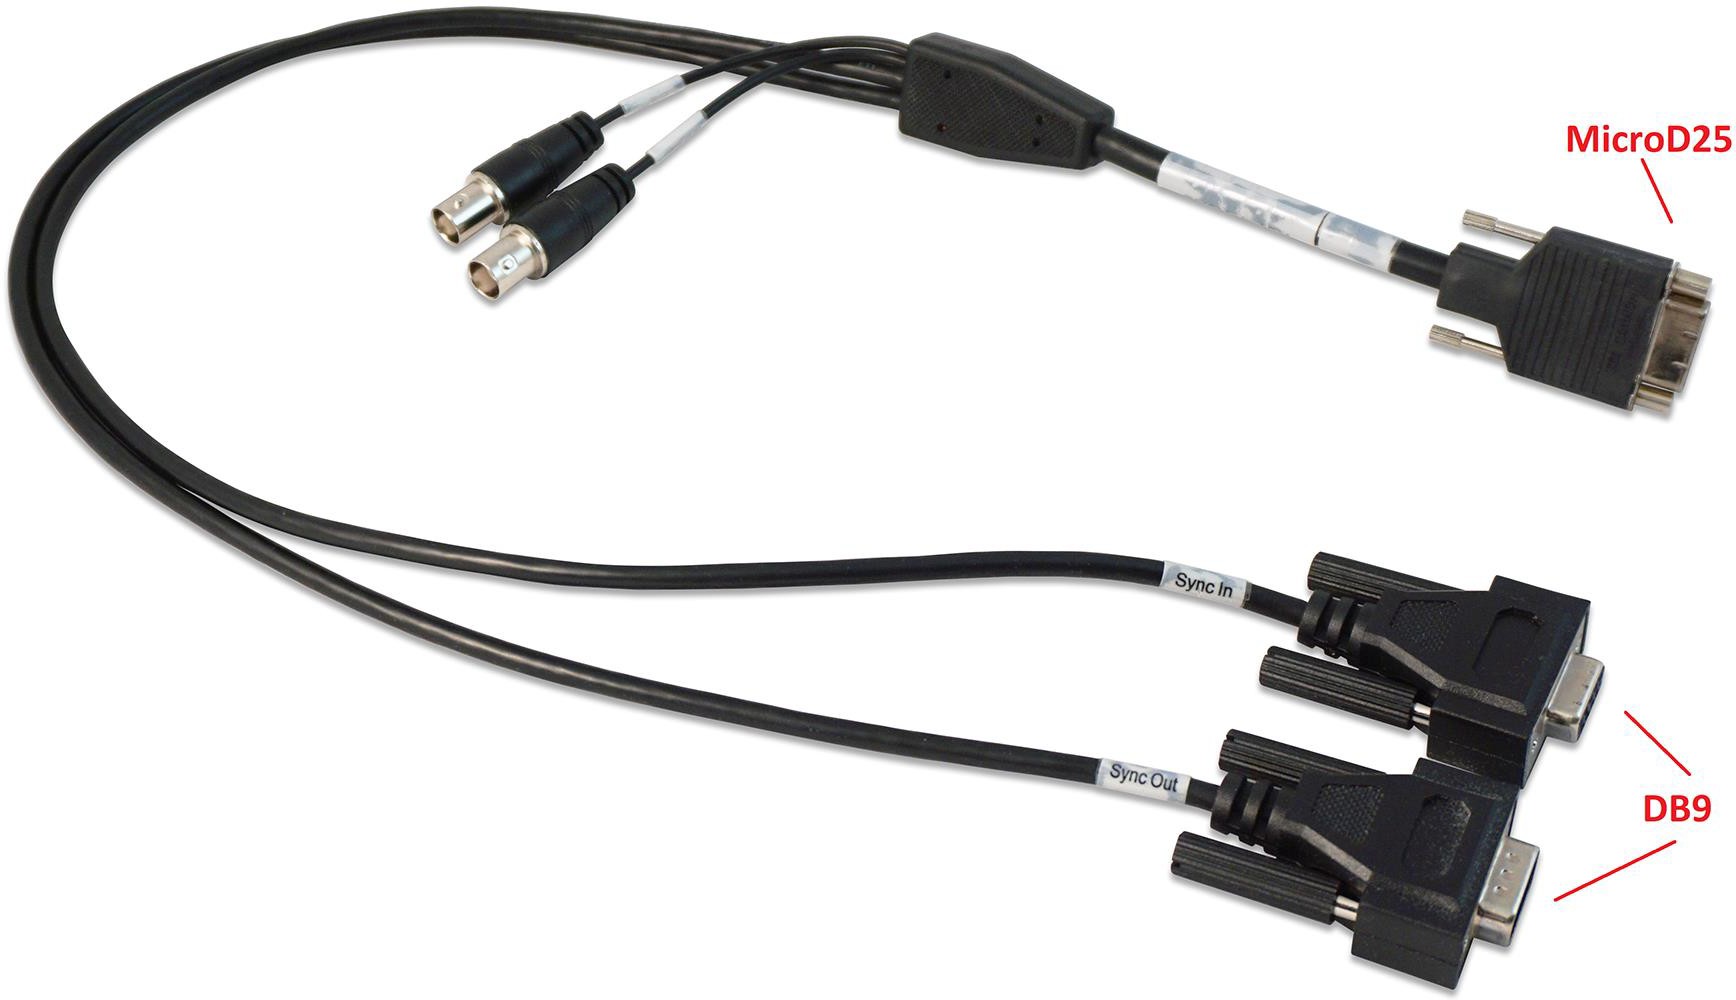
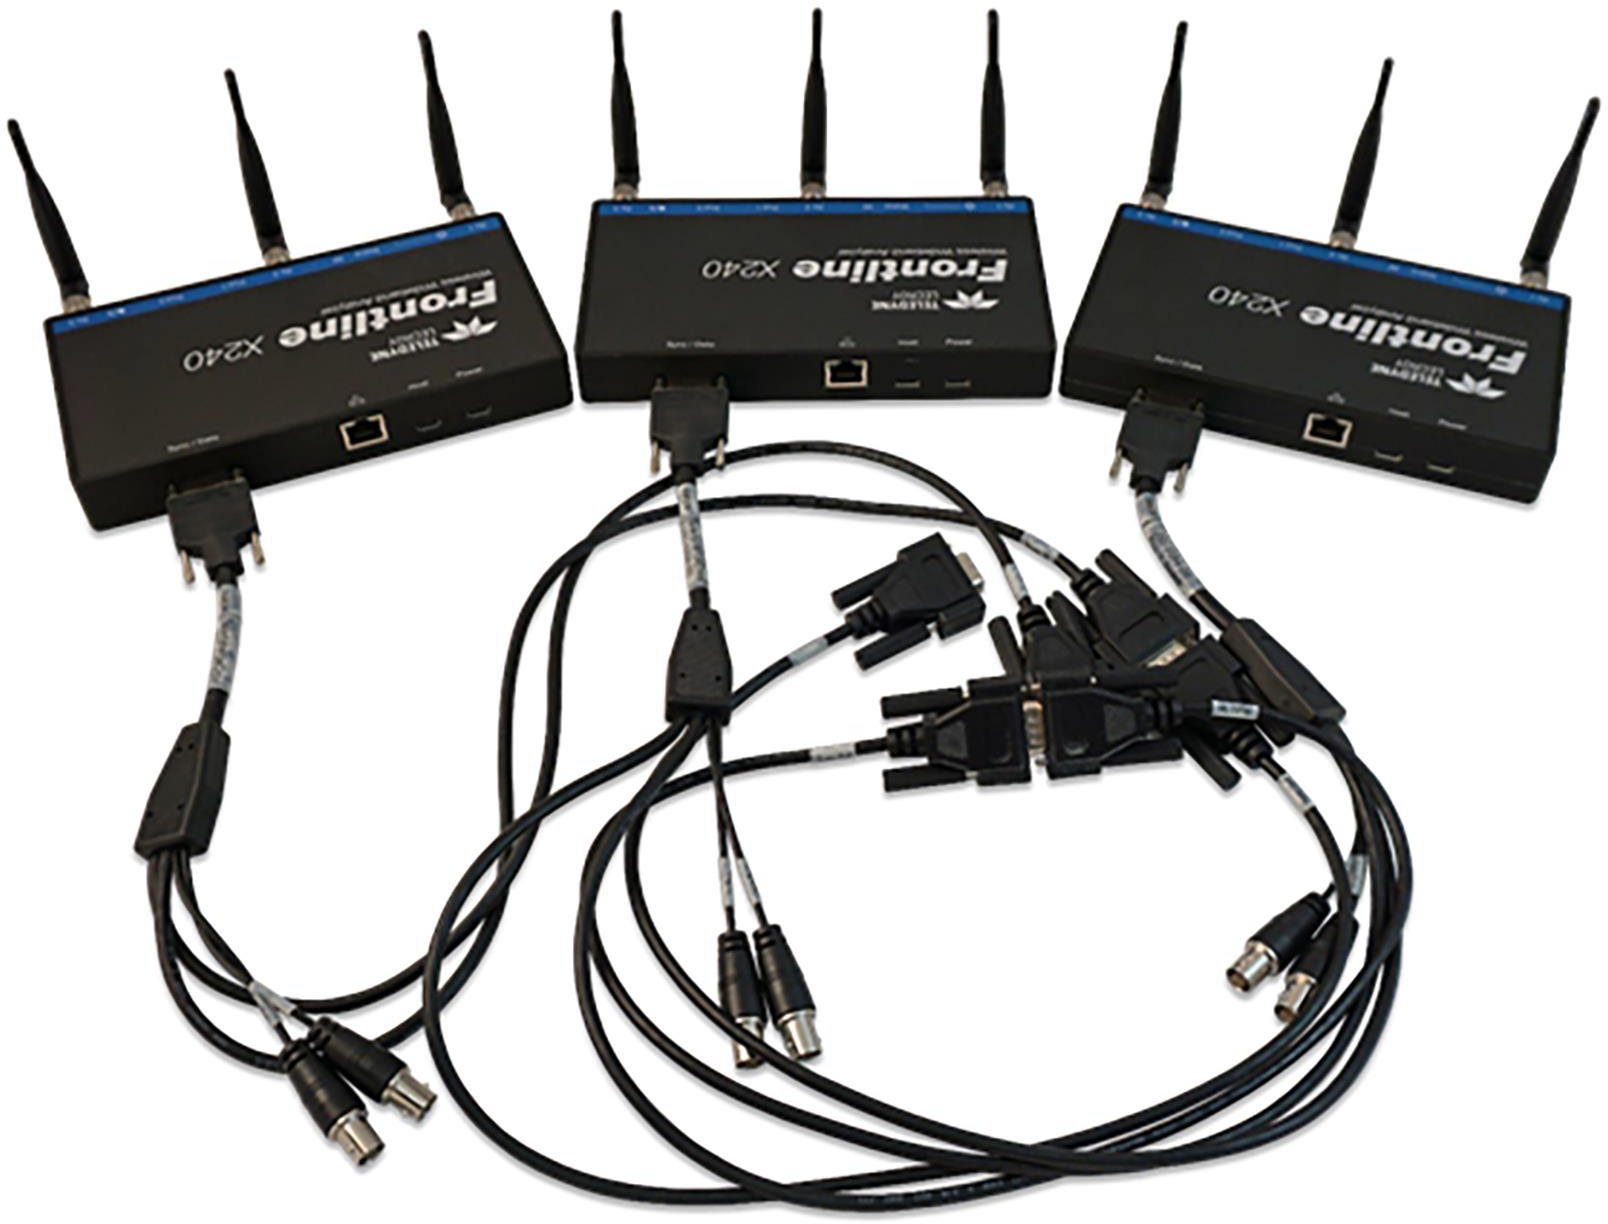
The Frontline X240 hardware allows for synchronization of X240 hardware clocks and timestamping. The CATC Sync cable kit connected to the MicroD25 connectors on the backs of three X240 hardware allows all the X240 hardware to run off a common clock, ensuring precise timestamp synchronization while simultaneously capturing three wireless technologies, Bluetooth (Le, Classic or Dual mode), Wi-Fi and 802.15.4.
-
Connect the 3 CATC Sync Cable Kits together by connecting the DB9 Sync Out connector of one kit to the DB9 Sync In connector of the second kit.
-
Connect the DB9 Sync Out connector of the second kit to the DB9 Sync In connector of the third kit.
-
Connect MicroD25 connector of the first CATC Sync Cable kit to the MicroD25 port on the back of one X240.
-
Connect the MicroD25 connector of the second kit to the MicroD25 port on the back of the second X240.
-
Connect the MicroD25 connector of the third kit to the MicroD25 port on the back of the third X240.
The three X240s are now ready for synchronized capture.
Troubleshooting
If the X240 indicates that synchronization cables are not properly connected, take these actions to reestablish synchronization:
-
Reseat the MicroD25 cable on the back of each X240.
-
Reseat the DB9 connections between the CATC Sync Cable kits.
-
Reboot each X240.