This section describes how to load Teledyne LeCroy Wireless Protocol Suite software, and how to select the data capture method for your specific application.
Opening Wireless Protocol Suite
On product installation, the installer creates a folder on the windows desktop labeled "Wireless Protocol Suite <version #>".
-
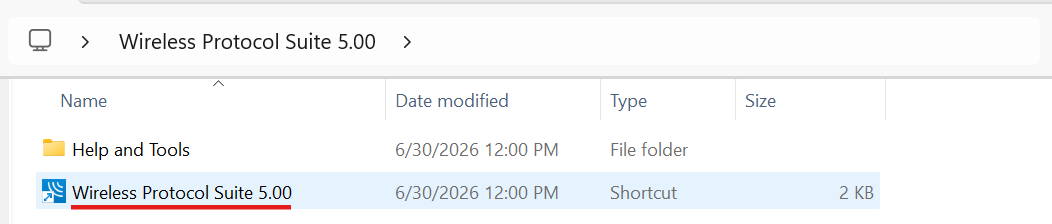
Double-click the " Wireless Protocol Suite <version #>" desktop folder. This opens a standard Windows file folder window.
-
Double-click on Wireless Protocol Suite and the system displays the Start Page dialog.
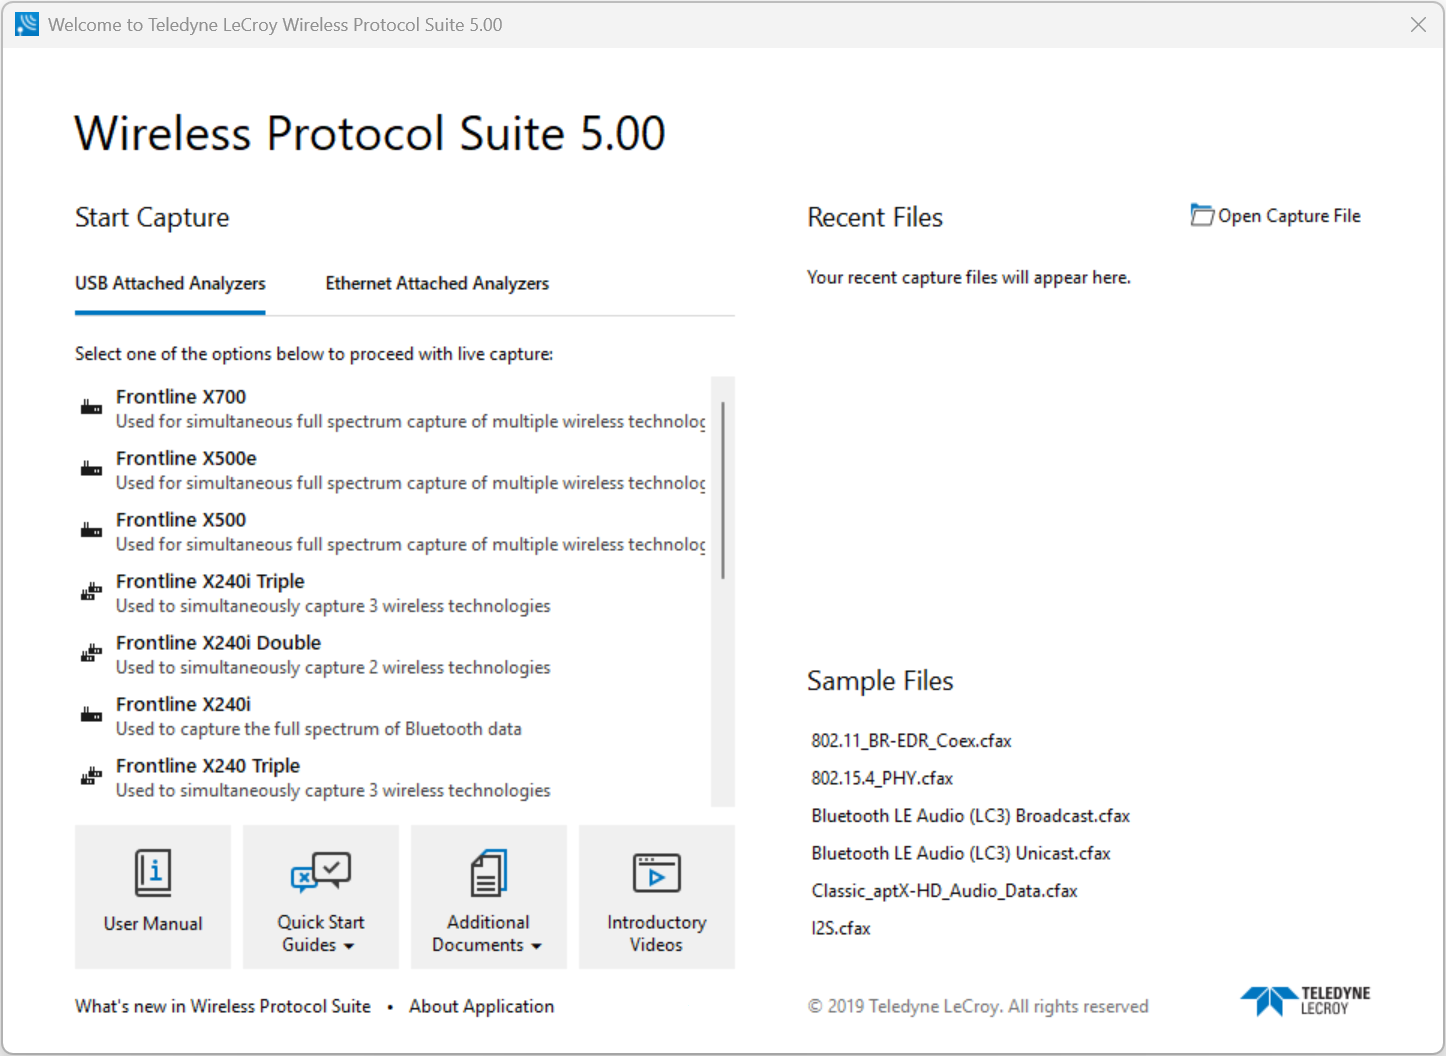
You can also access this dialog by selecting Start > All Programs > Teledyne LeCroy Wireless > Wireless Protocol Suite<version #>
-
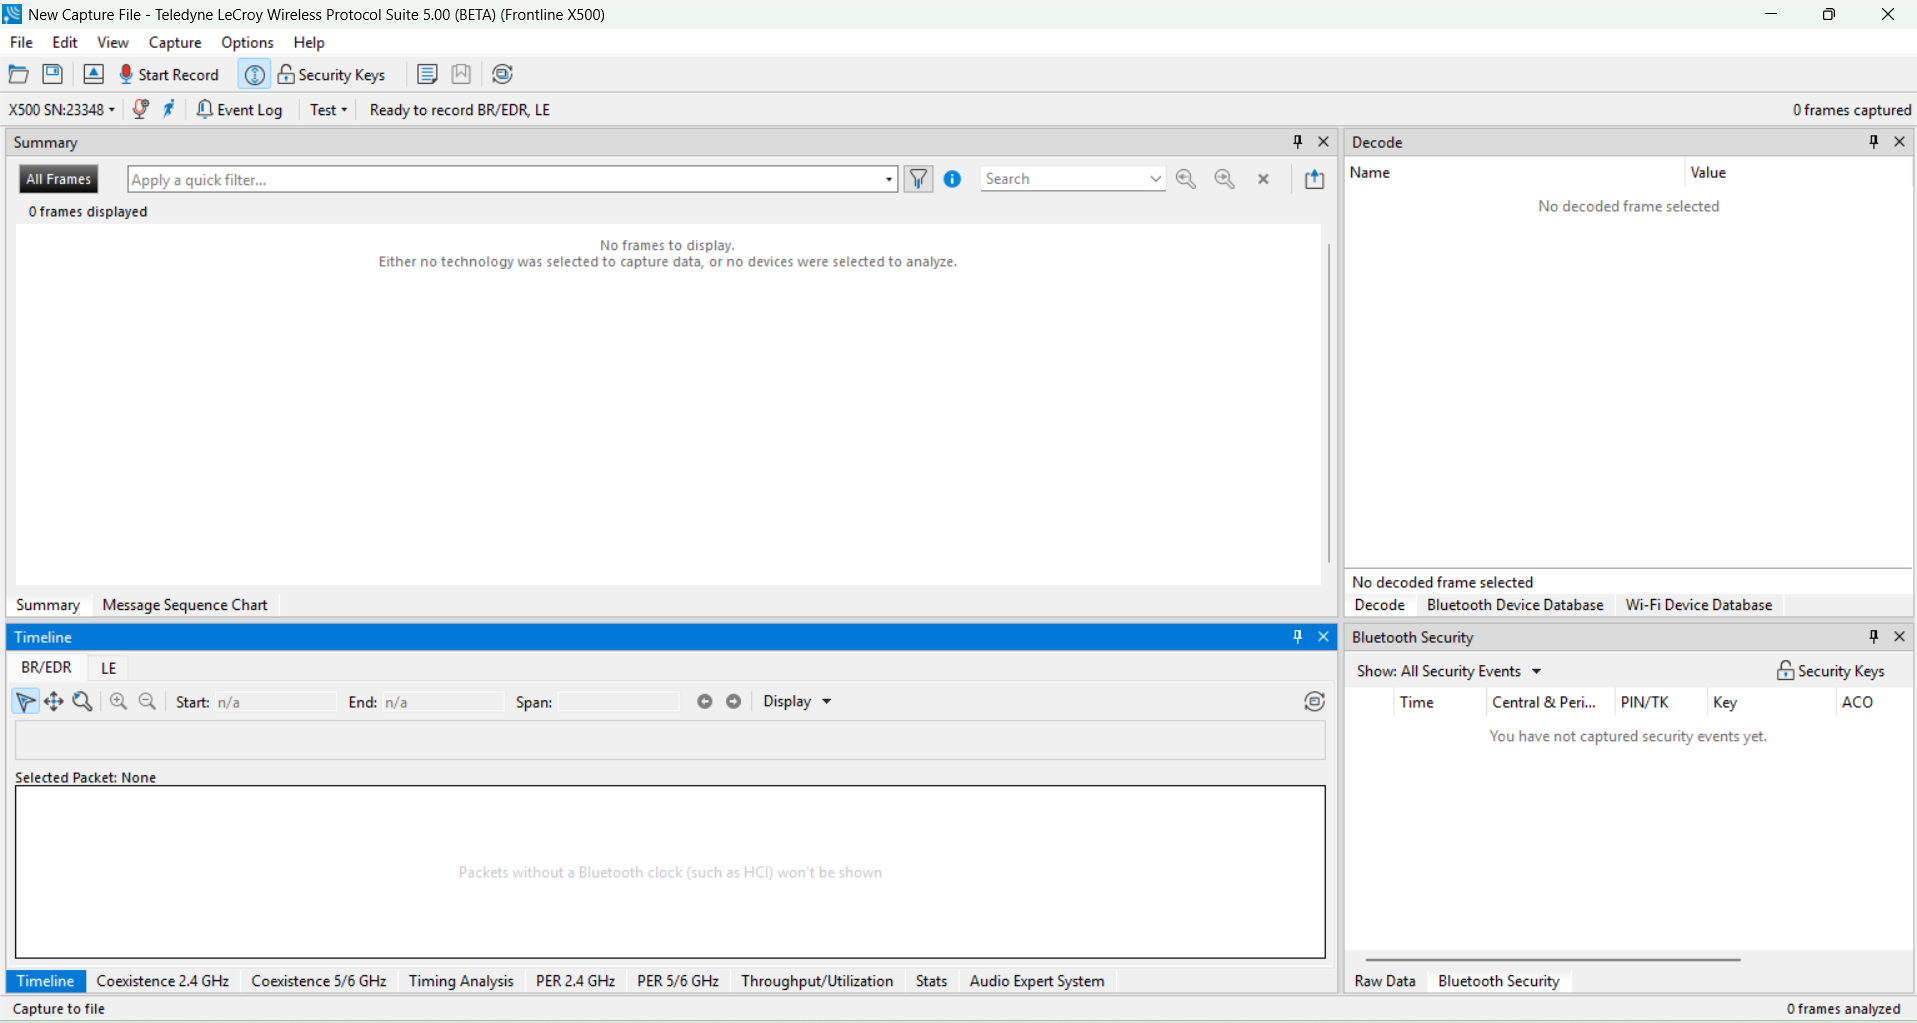
Select the analyzer and the Main Application Window will be displayed.
Supporting Documentation
The Wireless Protocol Suite <version #>directory contains supporting documentation for development (Automation, DecoderScript™, application notes), user documentation (Quick Start Guides and the Wireless Protocol Suite User Manual), and maintenance tools.
For macOS installations, the Wireless Protocol Suite directory locations are available via a link that is created in the Documents shortcut in your Finder window within a “Teledyne LeCroy Wireless” folder.
X240 Data Capture Method
The X240 can be set up for a single technology capture or with two or three X240 units for synchronized capture of multiple technologies.
Single Technology Capture, Single X240
Connect a USB C cable to the USB connector labeled Host on the rear of the X240 and the other end of the cable to the Host PC. When the X240 Analyzer is connected to the Host PC running the Wireless Protocol Suite, the Start Page window will display the X240 option.
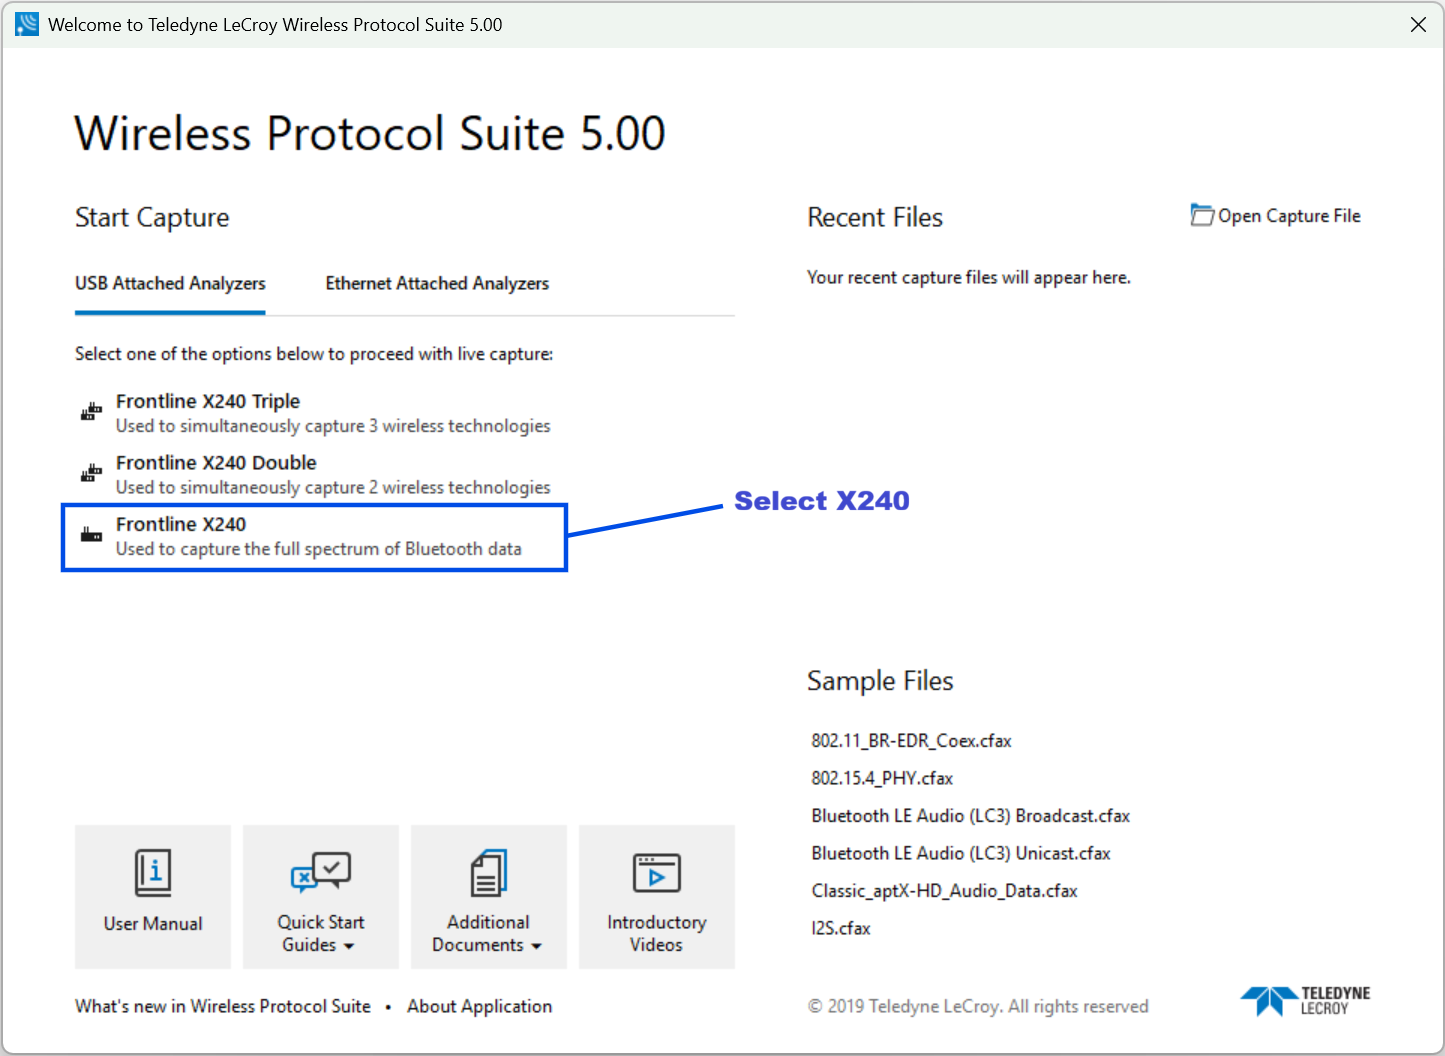
Select X240 to bring up the X240 Main Window. When the Main Window is displayed, you will see Toolbars with the following functions:

To begin recording Bluetooth traffic, click on the Start Record button. Addresses of captured Bluetooth devices will appear on the Device Database View. The view is accessible via Main menu View.
Synchronized X240 Data Capture Method (2 units)
On both X240 Analyzer units, connect a USB C cable to the USB connector labeled Host on the back of the X240 and the other end of the cable to the Host PC. Connect the CATC Sync cable to the MicroD25 port on the back of each X240. See Setting Up for Synchronized X240 Capture (2 Units).
When the X240 Analyzers are connected to the Host PC running the Wireless Protocol Suite the Start Page window will display the Synchronized X240 (2) option.
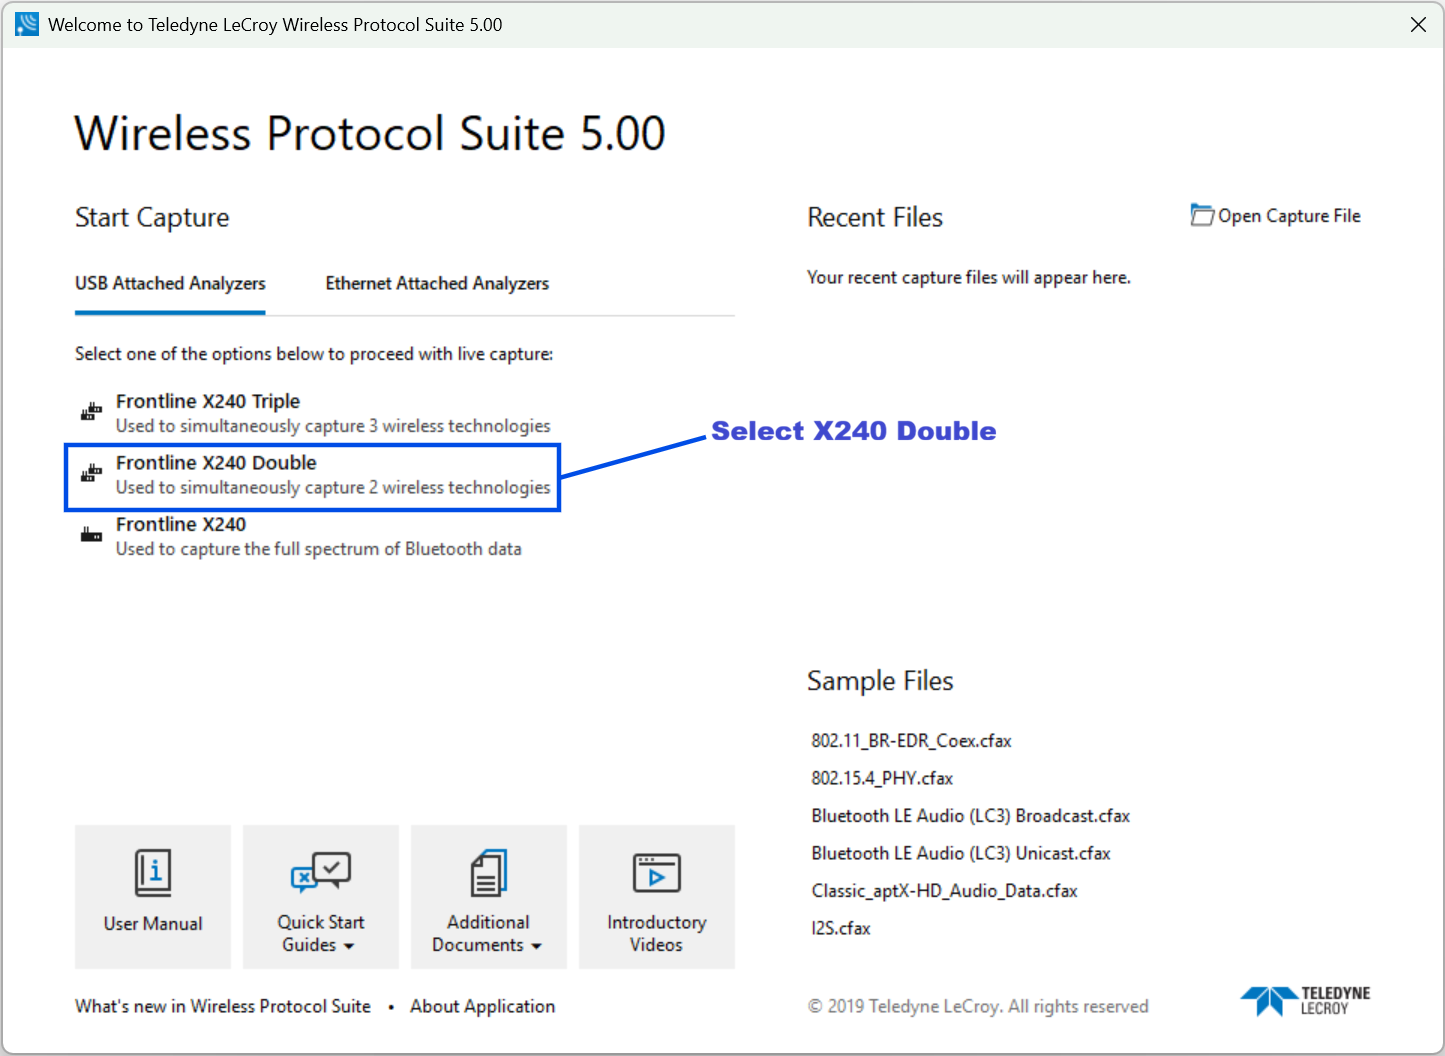
Select Synchronized X240 (2) to start the Wireless Protocol Suite using both X240 Analyzer units. Each X240 will be represented by an Analyzer Toolbar in the Wireless Protocol Suite from which it can be configured.

When using Synchronized X240 (2), each X240 should be configured to conform to the following rules of synchronized capture.
|
Synchronized X240 (2) Capture Configuration Rules |
|
No X240 can have eExcursion Mode enabled. |
|
Only one X240 can have Logic Signals and HCI enabled. |
|
Only one X240 can have Spectrum enabled. |
|
Only one X240 can have Low Energy (LE) Bluetooth enabled. |
|
Only one X240 can have Classic (BR/EDR) Bluetooth enabled. |
|
Only one X240 can have Wi-Fi enabled. |
|
Only one X240 can have 802.15.4 enabled. |
To begin recording Bluetooth traffic, click on the Start Record button in the Wireless Protocol Suite.
If any rule of synchronized capture is not followed in the capture configuration of the X240 Analyzer units, an error message is displayed detailing each rule that is not followed. The capture configuration of the X240 Analyzer units must be changed to conform to the synchronization rules. The Start Record button in the Wireless Protocol Suite must be clicked again to begin recording.
If the Event Log of either X240 indicates that the synchronization cable is not properly connected, refer to Setting Up for Synchronized X240 Capture (2 Units).
Synchronized X240 Capture Modes (2 units)
The X240 can be configured for either LE or BR/EDR or Dual mode or Wi-Fi or 802.15.4. This offers the opportunity to capture with two X240s in these configurations or modes.
-
LE and BR/EDR
-
LE and Wi-Fi
-
LE and 802.15.4
-
BR/EDR and Wi-Fi
-
BR/EDR and 802.15.4
-
Dual mode (BR/EDR and LE) and Wi-Fi
-
Dual mode (BR/EDR and LE) and 802.15.4
-
Wi-Fi and 802.15.4
Spectrum capture can be enabled on any one X240 in each of the above modes.
Synchronized X240 Data Capture Method (3 units)
Connect three X240 units using three CATC Sync Cable kits as described in Setting Up for Synchronized X240 Capture (3 units).
When the X240 Analyzers are connected to the Host PC running the Wireless Protocol Suite, the Start Page window displays the Synchronized X240 (3) option.
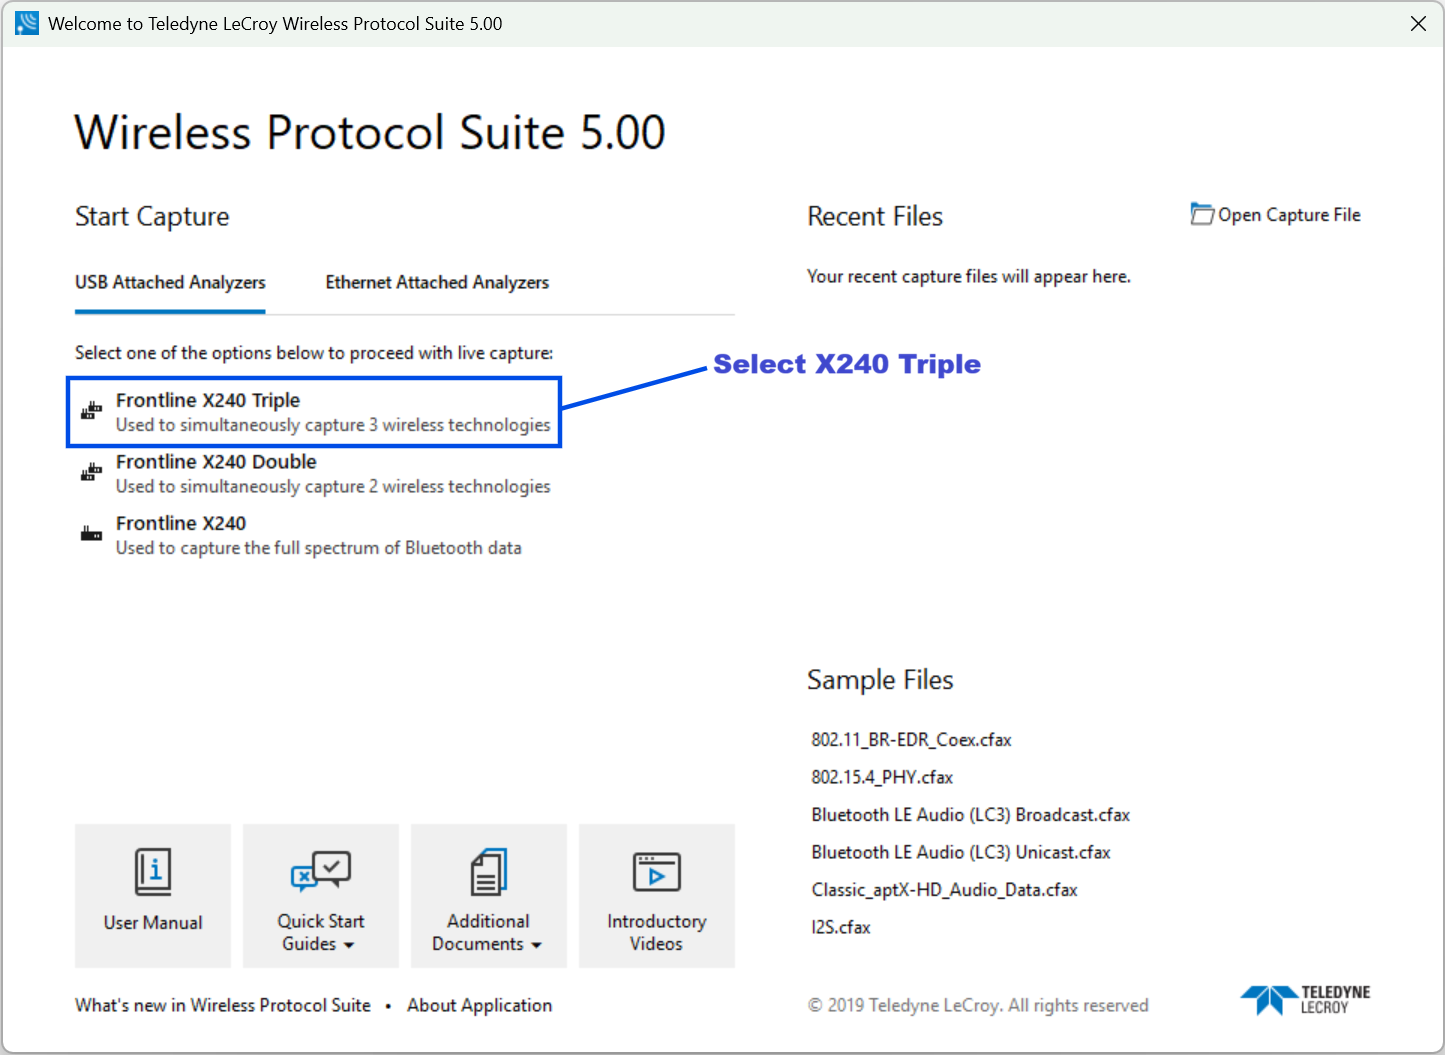
Select Synchronized X240 (3) to start the Wireless Protocol Suite using three X240 Analyzer units. Each X240 will be represented by an Analyzer Toolbar in the Wireless Protocol Suite from which it can be configured.
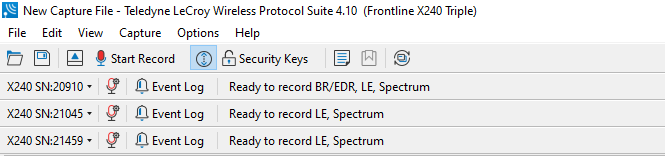
When using Synchronized X240 (3), each X240 should be configured to conform to the following rules of synchronized capture.
|
Synchronized X240 (3) Capture Configuration Rules |
|
No X240 can have eExcursion Mode enabled. |
|
Only one X240 can have Logic Signals and HCI enabled. |
|
Only one X240 can have Spectrum enabled. |
|
Only one X240 can have Low Energy (LE) Bluetooth enabled. |
|
Only one X240 can have Classic (BR/EDR) Bluetooth enabled. |
|
Only one X240 can have Wi-Fi enabled. |
|
Only one X240 can have 802.15.4 enabled. |
To begin recording Bluetooth traffic, click on the Start Record button in the Wireless Protocol Suite.
If any rule of synchronized capture is not followed in the capture configuration of the X240 Analyzer units, an error message is displayed detailing each rule that is not followed. The capture configuration of the X240 Analyzer units must be changed to conform to the synchronization rules. The Start Record button in the Wireless Protocol Suite must be clicked again to begin recording.
If any X240 indicates, in its Event Log window, that the synchronization cable is not properly connected, refer Setting Up for Synchronized X240 Capture (3 units).
X500/X500e Data Capture Method
When the X500/X500e Analyzer is connected to the Host PC running the Wireless Protocol Suite the Start Page window displays the X500 and X500e options.
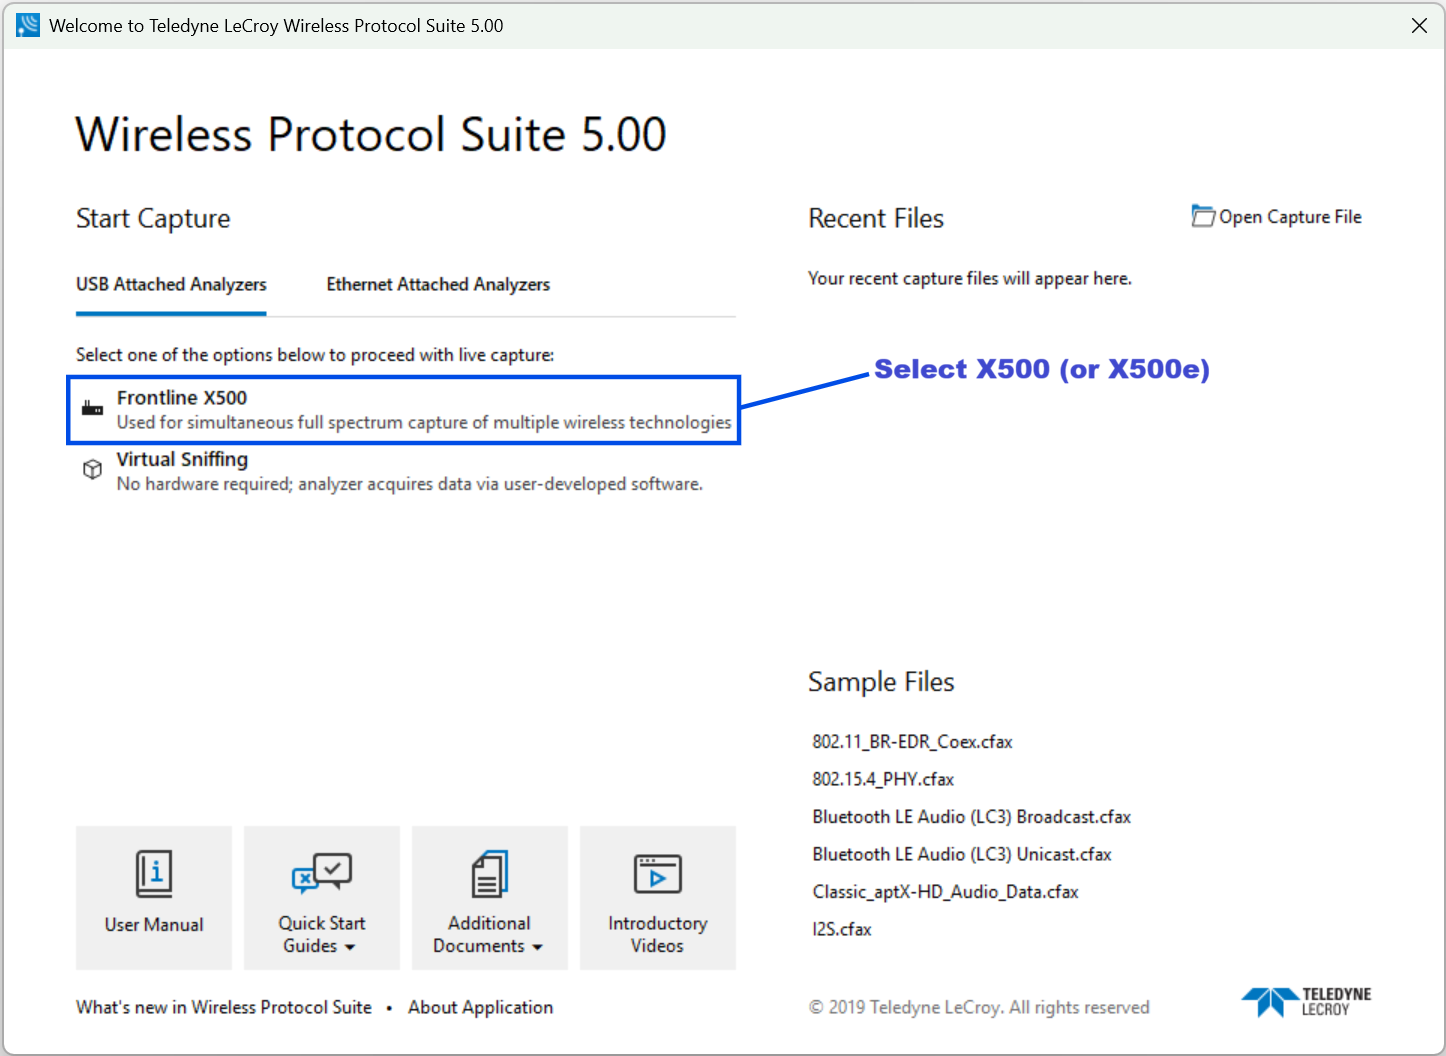
Select Frontline X500 or X500e to bring up the Wireless Protocol Suite window. The Wireless Protocol Suite Application icon is placed in your taskbar at the bottom of your screen.

X700 Data Capture Method
When the X700 analyzer is connected to the Host PC running the Wireless Protocol Suite the Start Page window displays the X700 options.
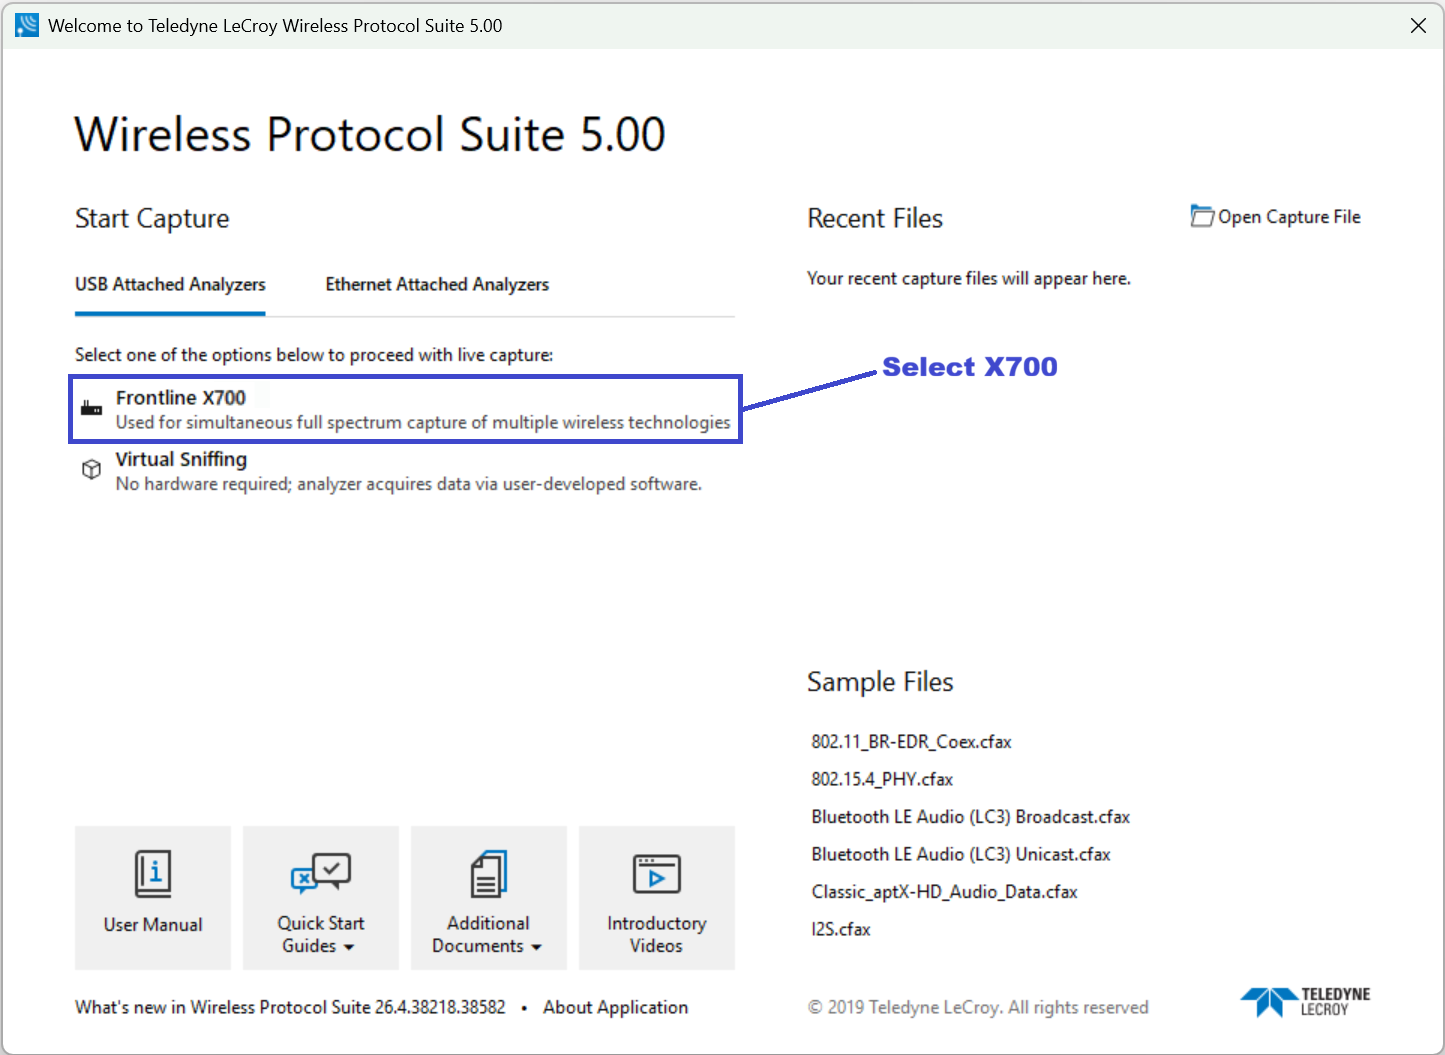
Data Capture over Ethernet
The Wireless Protocol Suite fills the list with analyzers discovered on the Ethernet network under the “Ethernet Attached Analyzers” tab on the Start Page. The discovery mechanism works for all network subnets.
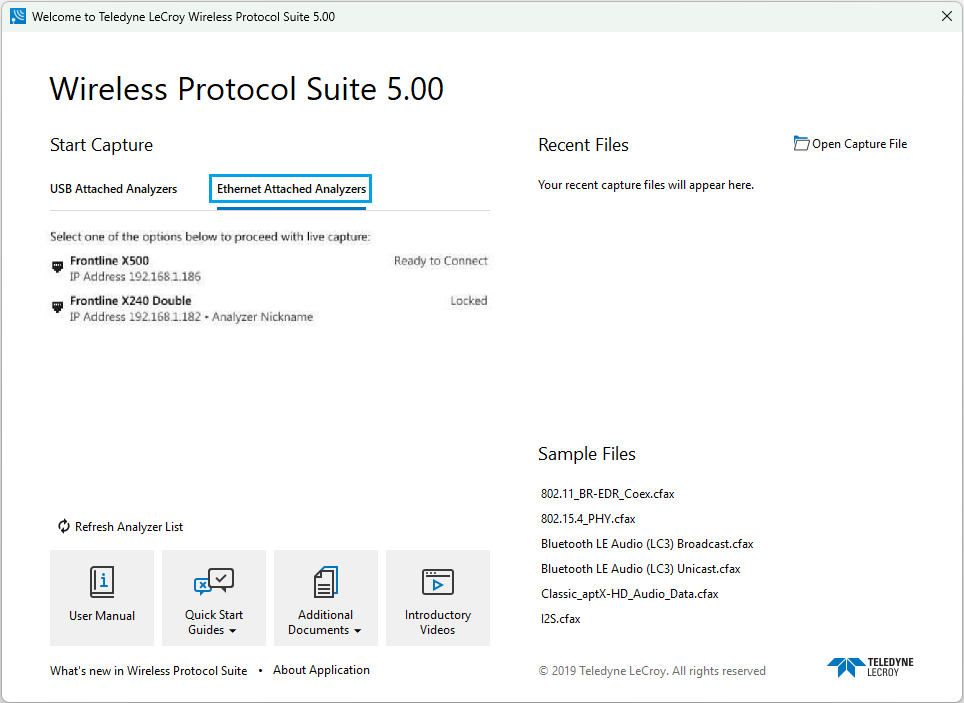
The list of connected devices is automatically updated when you select Ethernet Attached Analyzers. The analyzers in the list are marked:
-
Locked: Analyzer already in use
-
Ready to Connect: Available to use
If an analyzer is marked Ready to Connect, you can select that analyzer to execute the connection procedure. After the connection is established, an Ethernet icon appears on the Analyzer Toolbar.
The analyzer displays its IP address and nickname (if specified at the time of connection setup).
To resolve the specific error "Cannot connect to 127.0.0.1:55477" when starting the software, set an environment variable to NO_PROXY=127.0.0.1.
Using Sample Capture Files
There are several sample capture files in the Wireless Protocol Suite installation.
Each file has a self-descriptive name regarding used device and traffic type. You can open these files using the Samples section in the Start Page.
Wireless Protocol Suite software treats sample files the same way as other user recorded capture files, i.e. it preserves all your changes in the original sample file. You may make a copy of the desired file and save it before any experiment that may corrupt it.
By default, sample files stored in the Public Documents folder:
Users > Public > Public Documents > Teledyne LeCroy Wireless > Samples
You can find the precise path from the path hint.
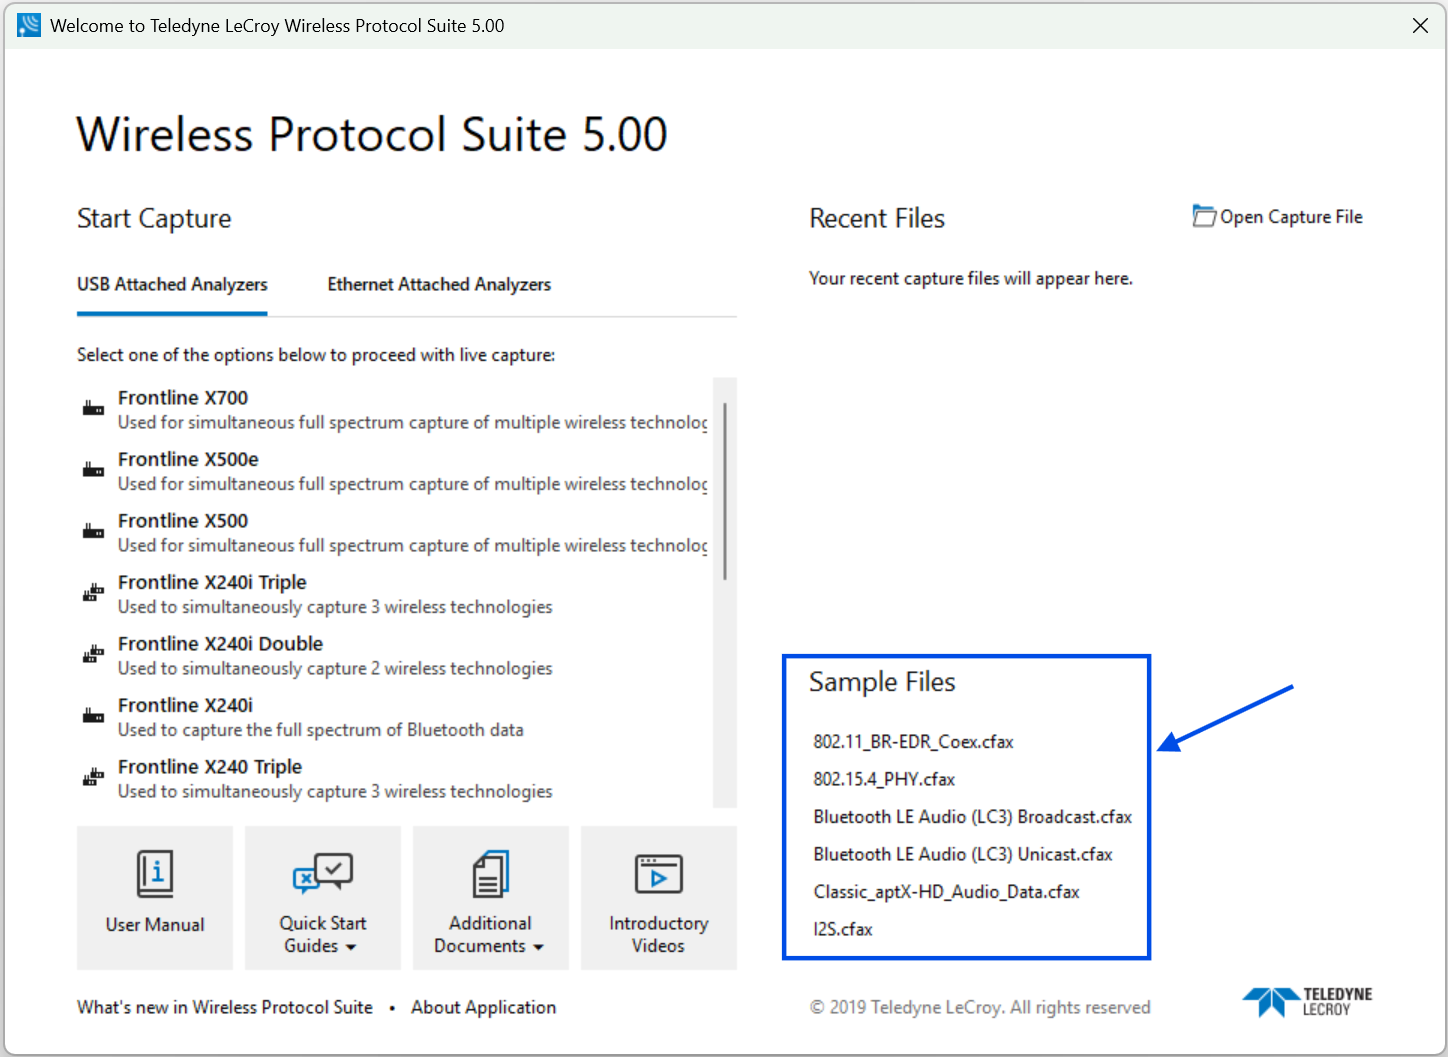
Click on the file name and the main application window of the Wireless Protocol Suite software will open with the Captured File loaded.
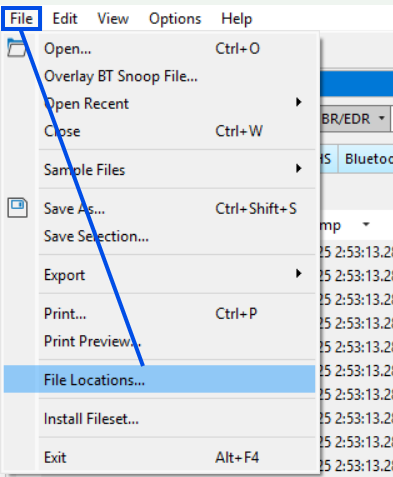
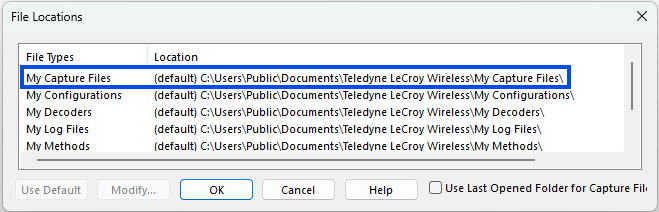
You can also discover the path to "My Captured Files " by selecting File > File Locations from the Main Page.