
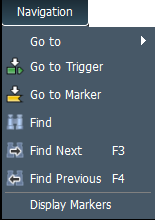
The Navigation menu option enables the user to navigate the application. You can go to the trigger, marker or where any cursor is located. Markers can also be added and removed. Find menu options are available as shown in the screen capture below.
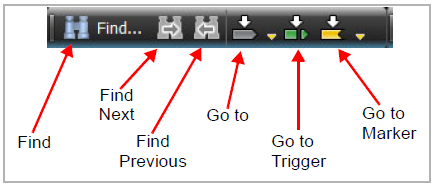
The Navigation Toolbar has the same options:
-
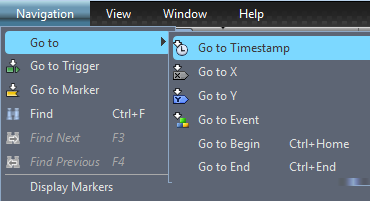
Go To: Locates cursors or specific events: Timestamp, X Position, Y Position, Event, Begin, and End. See below.
-
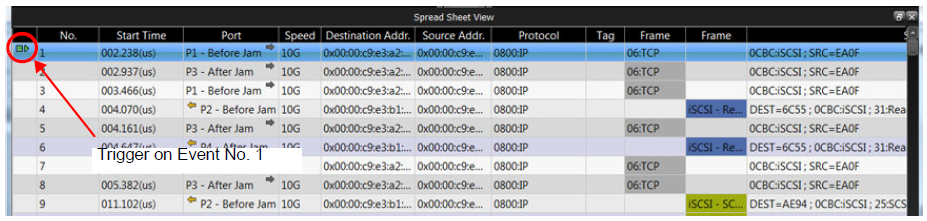
Go to Trigger: Go to the trigger point in the trace.
-
Go to Marker: Go to a specific Marker (see Markers).
-
Find: Examine any data capture file to quickly locate an event or data pattern (see Find).
-
Find Next: Search for the next instance (see Find).
-
Find Previous: Search for the previous instance (see Find).
-
Display Markers: Displays the list of markers (see Markers).
Find
The Find menu and toolbar options enable you to examine any data capture file to quickly locate the event or data pattern.
Select Navigation > Find or click Find 
Note: Only items captured in the trace file are searchable.
Quick Find

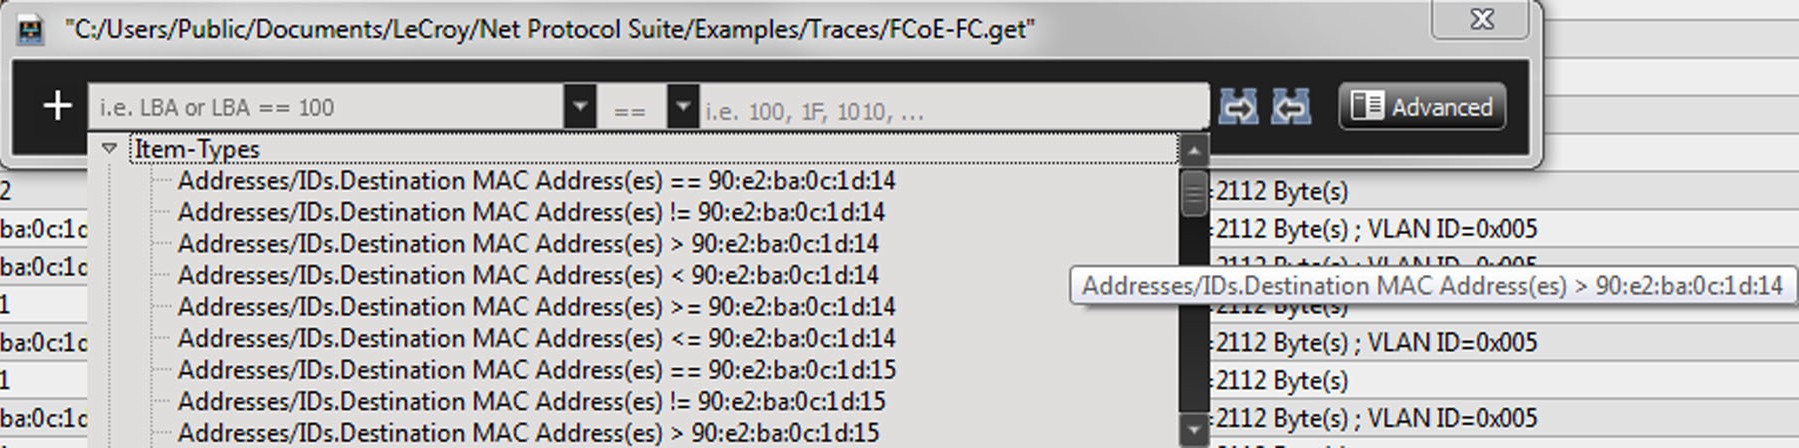
Click inside the first gray box and a dialog will pop up with Item-Types, Addresses, events, and Fields of interest that occurred in the Trace.
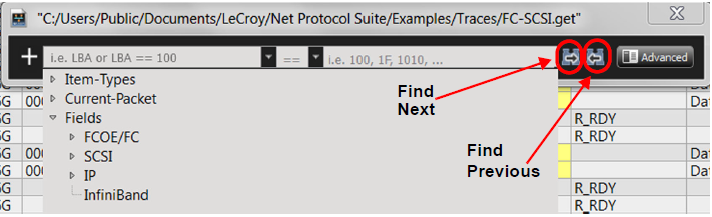
The Find function populates Item-Types with addresses and commands that occurred in the Trace.
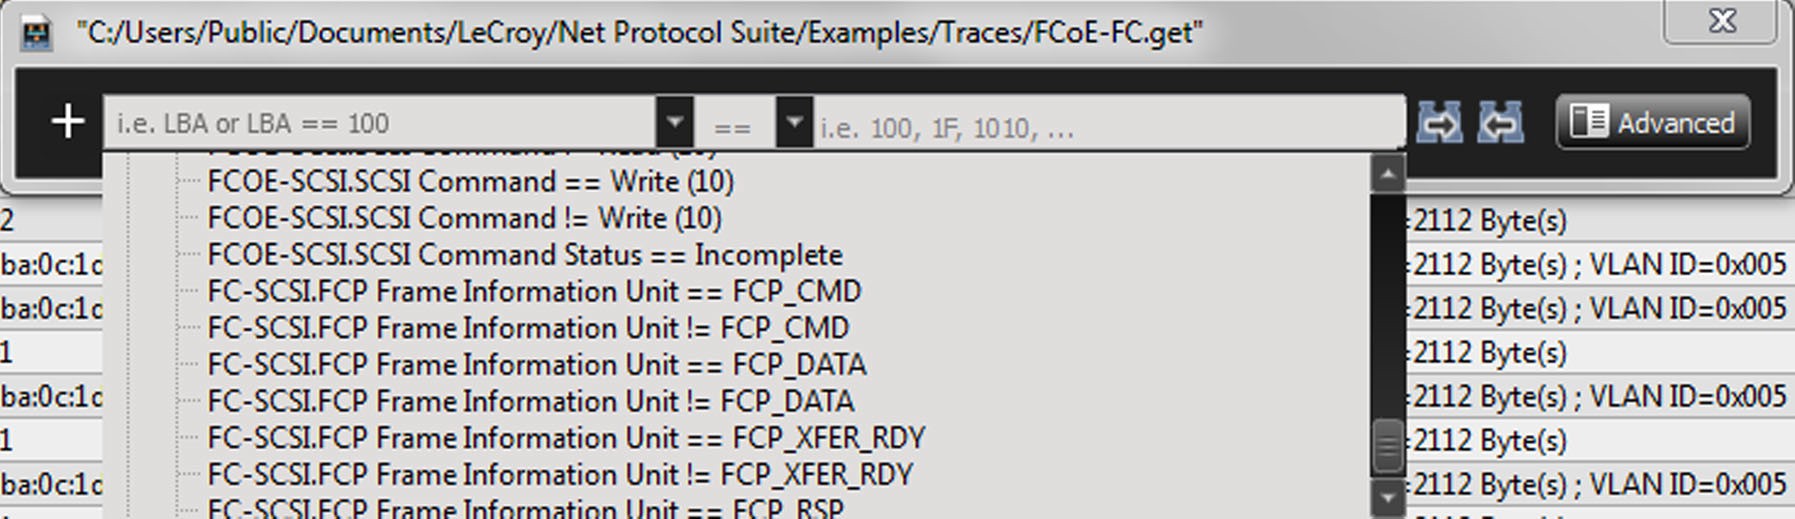
Click the == symbol in the middle of the screen to define a function (equal to, not equal to, greater than, less than, greater than or equal to, less than or equal to).

Click on the third gray window to set the data value to compare against.
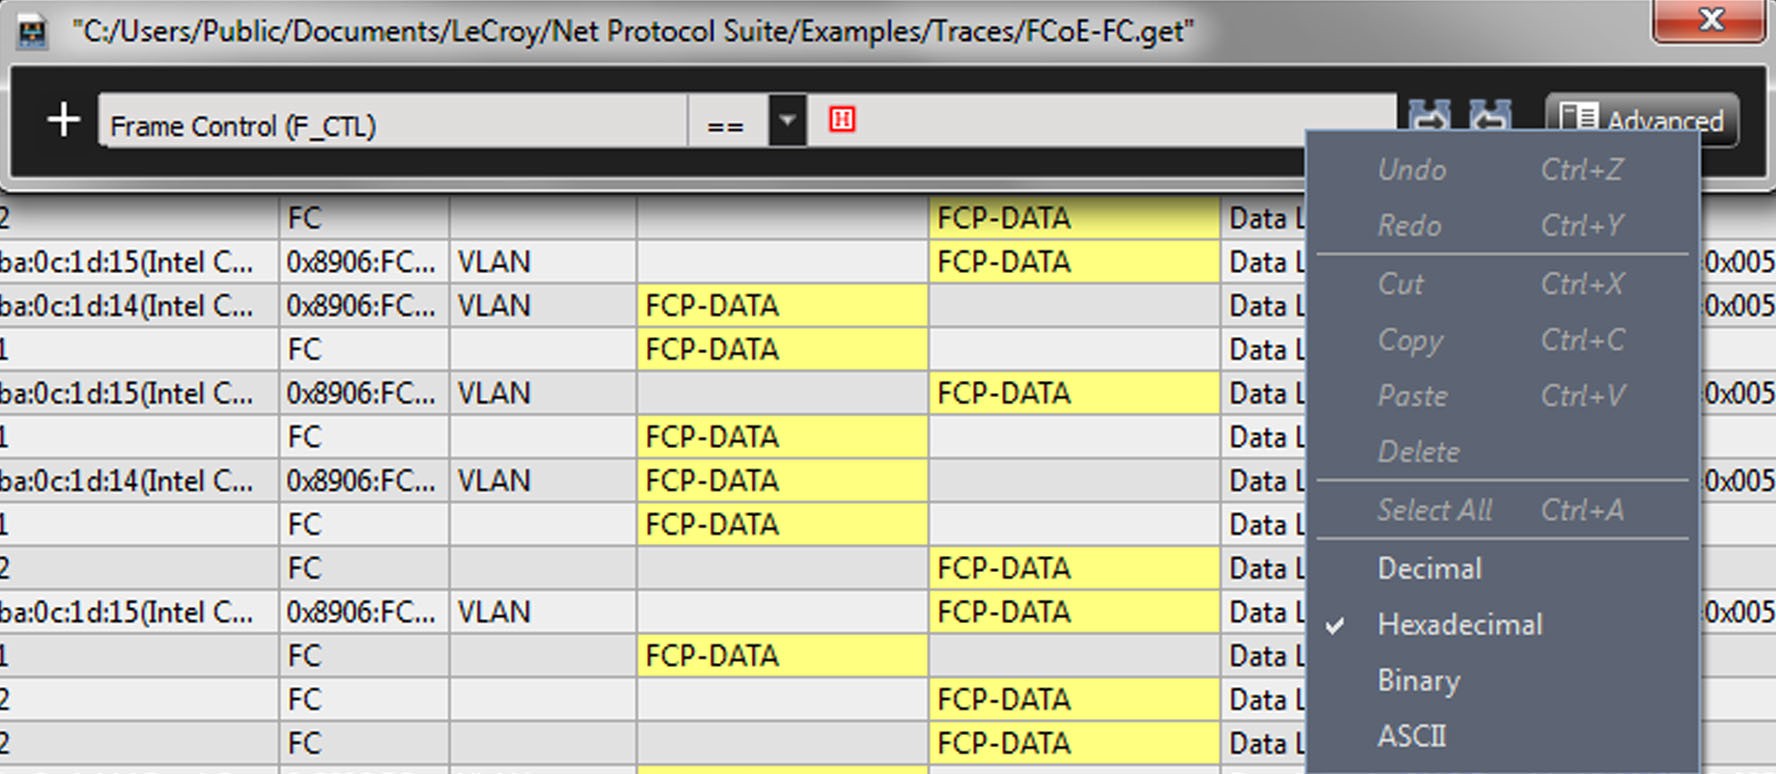
Click the red format button to toggle between Decimal, Hexadecimal, Binary, and ASCII input formats; or right-click in the third window to select the input format from the popup menu.
Advanced Find
-
You can access Advanced Find in one of two ways:
-
Click Find


Quick Search > Advanced
-
OR
b. In the Spreadsheet View window, right click in a column/line of a Trace and select Quick Search from the drop-down menu, then click Advanced.
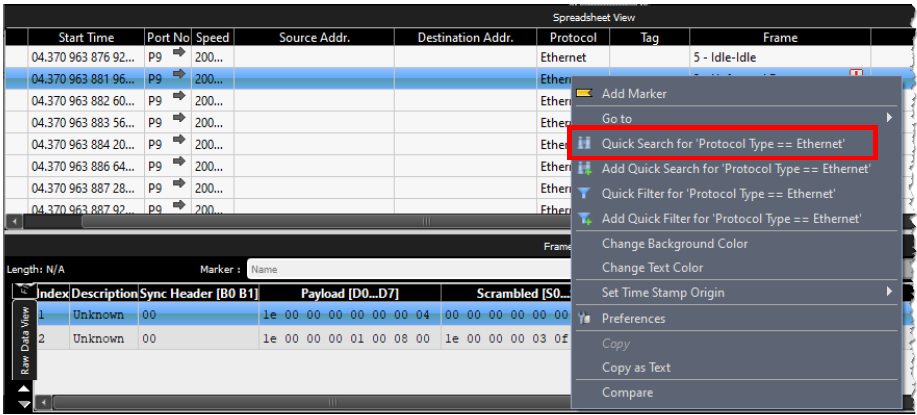
Note: If you click in an area containing data, the Quick Search menu will show that data for filters and searches.
-
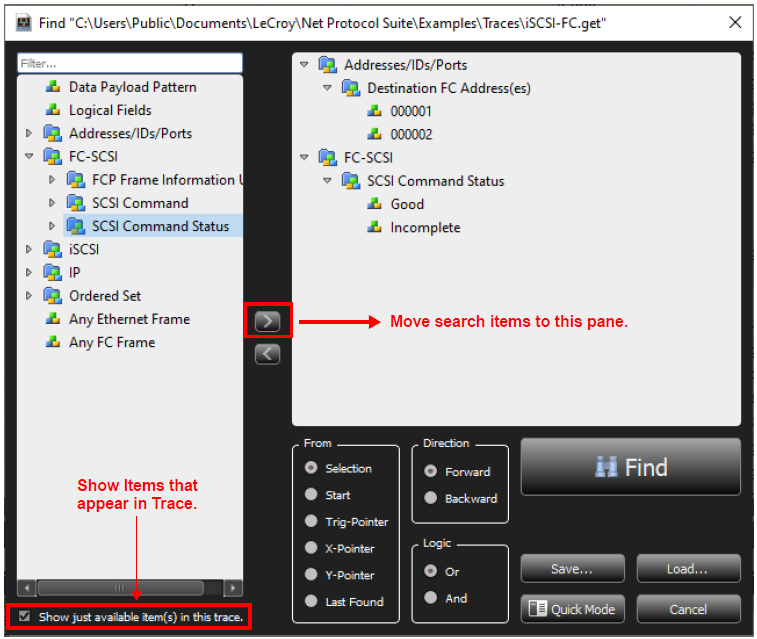
Highlight an item in the left pane, then click the left arrow to move it to the search pane.
Tip: Double-click an item in the left pane to move it to the Search pane.
-
Click Find. Results (if any) are displayed in Spreadsheet and Frame Inspector views.
Find Large or Repeating Data Payload Patterns
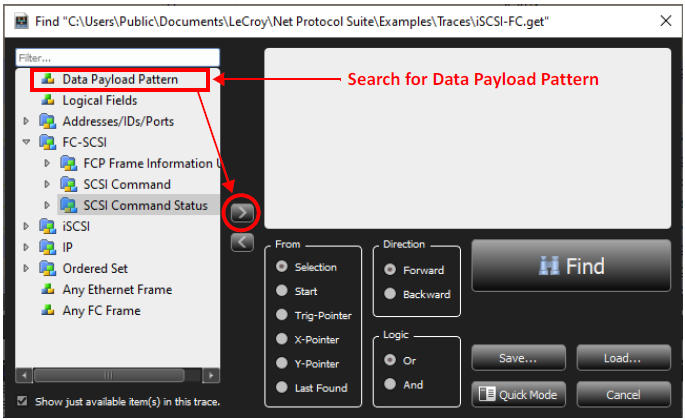
The Advanced Find feature allows you to define a large or repeating data payload to search for.
-
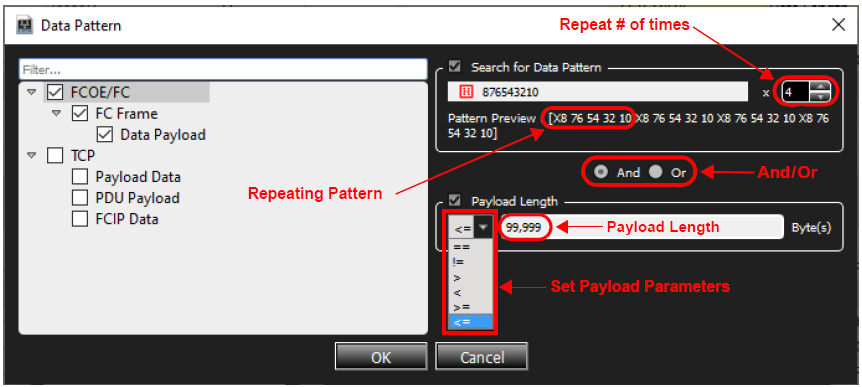
Select the Data Payload Pattern and click the > to move it to the search window. The Data Pattern window appears in which you can define a repeating pattern and/ or a very large pattern.
-
Use the Up/Down arrows to set the number of Repeats.
-
Click the radio button for either And or Or.
-
To set the Payload Length, check the box and enter the length.
-
Once you are satisfied with your settings, click OK.
The example below shows the Data Pattern set to Repeat 4 times. That is 876543210 is repeated 4 times or a payload length of <99,999. The maximum payload length is 99,999. The maximum number of data patterns you can repeat is 256.
Find Specific Event
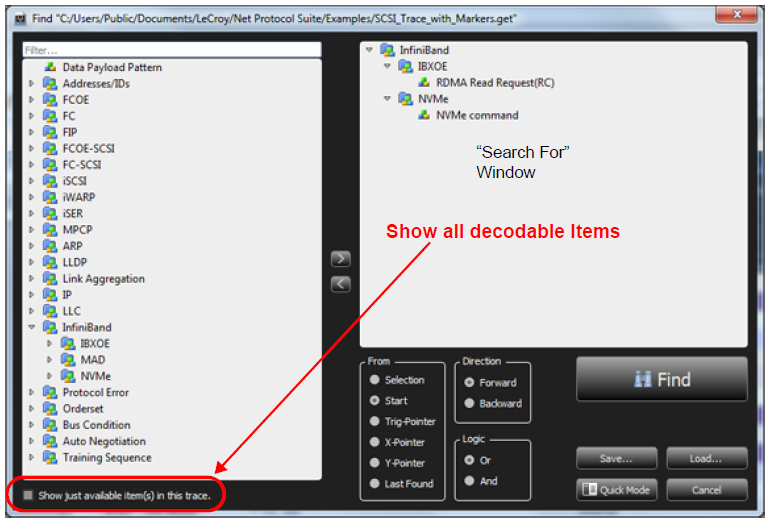
You can build up a specific type of event you want to Find and then Save it for later analysis of a Trace by clearing the Show just available item(s) in this trace checkbox.
Filter
Select a type of event you want to search for from the list on the left. Use the >> arrows to move it into the “Search For” window on the right. To choose a different type of event simply select the current event type in the “Search For” window and use the << arrows to remove it. Then select a new event type.
Find
You can find specific events by selecting one and clicking the Find button 
You can continue to search the output file using Find Next (F3) or Find Previous (F4) for the same pattern, until you redefine the data capture search parameters. You can also click the Find Next 

Save
After you have set up a Filter configuration, you can save it as a Filter file by clicking Save.
Load
You can use a previously saved filter by clicking Load in the Filter dialog.
Save Find Setup
After you have set up a Find configuration, you can save it as a Search configuration file by clicking Save. You can then use it on a different capture by clicking Load in the Find dialog.
Search From
Choose a starting point to begin or continue a search:
-
Selection (you select a event to be the starting point for the search)
-
Start of the trace file
-
Trigger Pointer
-
X Pointer
-
Y Pointer
-
Last Found
Find Direction
Choose either Forward or Backward direction in which to perform the find.
Find Logic
The default setting is Or. With this setting, clicking Find Next locates all selected items in turn. If you choose And, you can set a logical AND combination of items to find. Both options allow setting Advanced find features.
Finding LUNs and LBAs
Perform the following steps to find LUNs and LBAs:
-
Click the Find icon

-
Click Advanced to display the Find dialog.
-
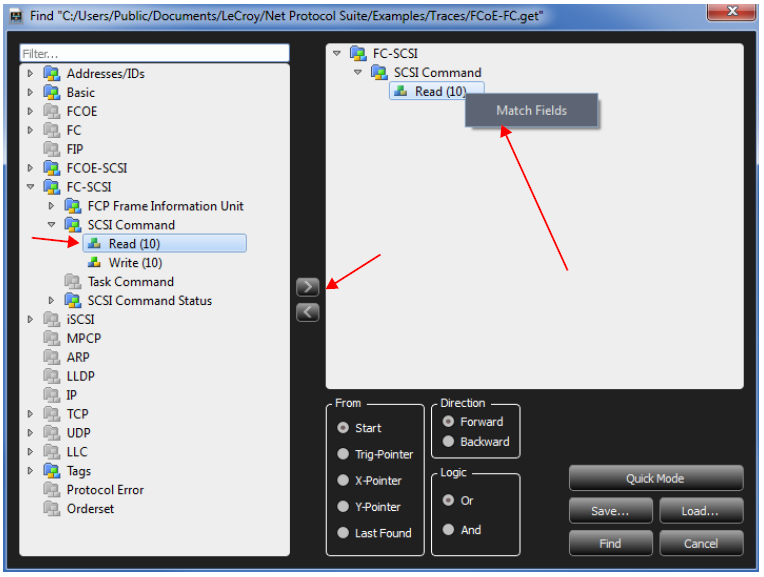
Select FCP_CMD in the left pane and drag it in to the right pane or click the right arrow.
-
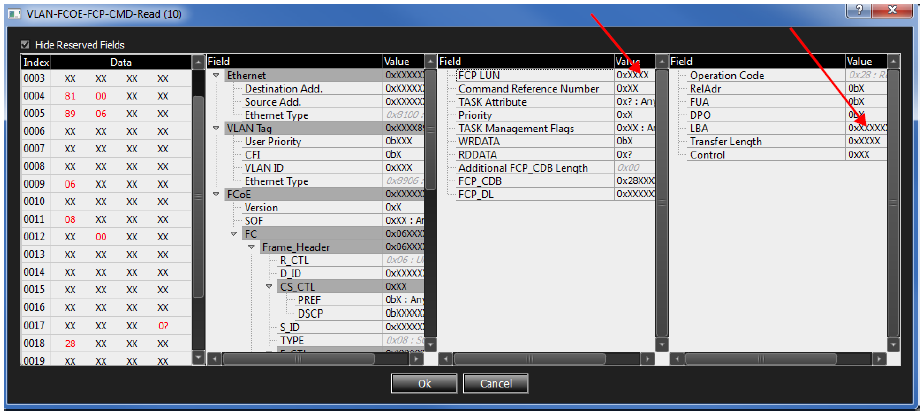
Select the command, double-click or right-click, and select Match Fields. The following dialog displays.
-
Enter the values in the fields.
-
Click OK twice.
NVMe Command Search
You can search for a specific kind of NVMe command. This example demonstrates a search for an NVMe Discover Command.
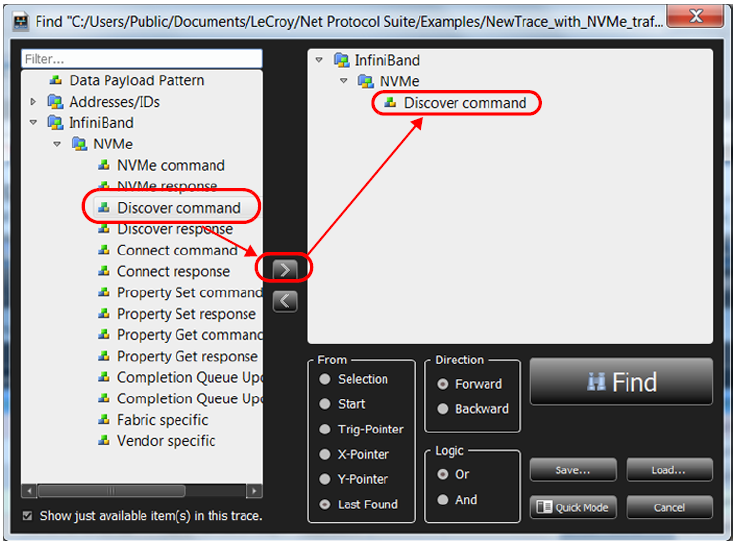
Click on the Find button and the event with the NVMe Discover Command will pop up to the top of the Spreadsheet View.
Data Pattern Search
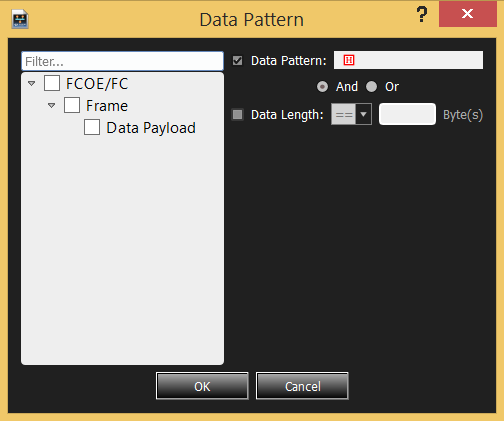
From the Advanced Find/Filter dialog, there is a Data Pattern item available.
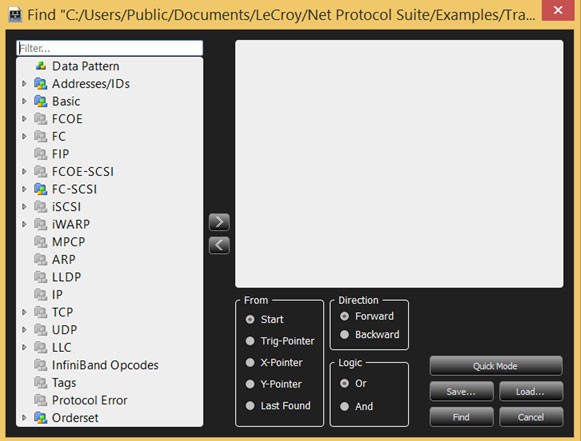
You can use this feature to set criteria based on Data Patterns in the frame payloads.
-
From the tree list on the left, select the types of payloads you want to search/filter against.
-
Check the boxes next to Data Pattern and Data Length to set whether you check based on those criteria or not.
-
If you check both the Data Pattern and Data Length boxes, also select the And/Or radio button to set whether you want to combine the criteria with AND or OR logic.
-
If Data Pattern is checked, enter the pattern you wish to match against. You may specify any size of pattern in this field. Click the red format button to toggle between different input format modes:
-
Hex
-
Binary
-
ASCII
-
Decimal
-
-
If Data Length is checked, enter the length in bytes you wish to match against, and set the desired comparison operator:
-
== (equal)
-
!= (not equal)
-
> (greater than)
-
< (less than)
-
>= (greater than or equal)
-
<= (less than or equal)
-
Decode MAD Headers
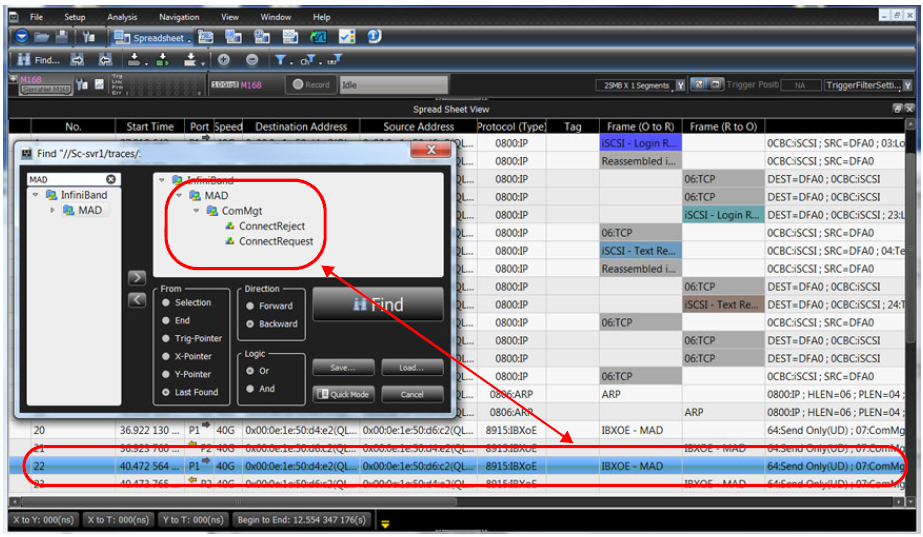
Another example of using the Find function would be to locate a specific type of decoded header. In this example we’re looking for an MAD header.
Open the File function from the Main toolbar, click on Advanced and type in MAD in the filter window. If the trace has any MAD headers they will be shown in the Spreadsheet View.
Decode iSER Headers
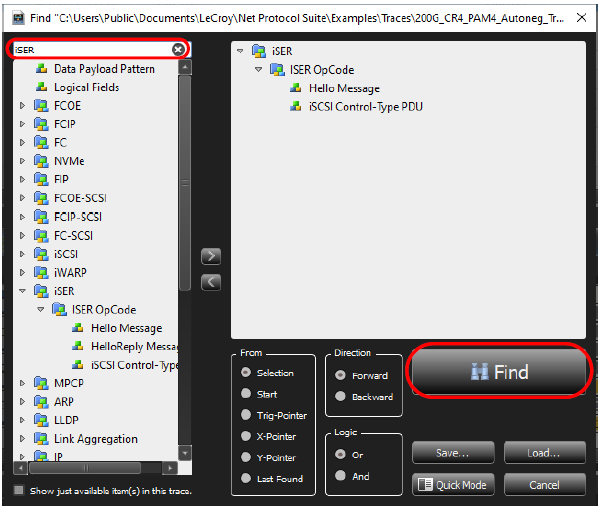
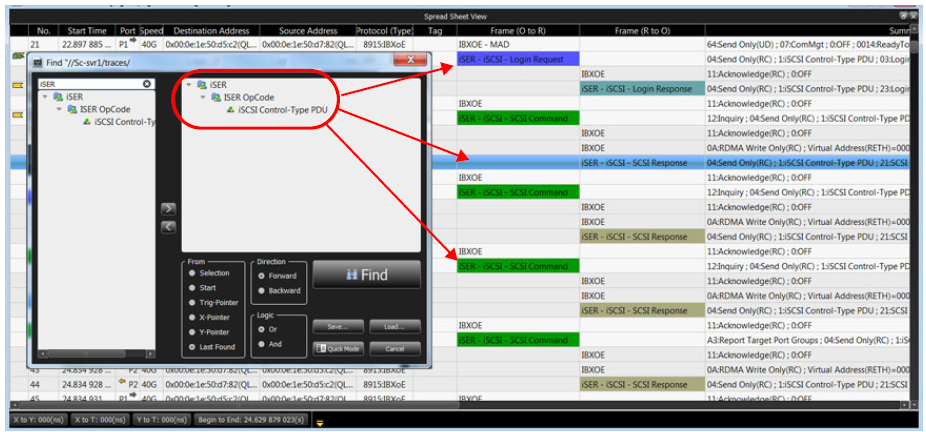
In this example, a search for an ISER header is performed:
-
Click the Find button on the Main Toolbar.
-
Select Advanced and enter iSER in the filter field at the top of the left pane.
Advanced Find – iSER
If the trace has any iSER headers they will be shown in the Spreadsheet View.
Go To Event
Select the large white down arrow/Go to icon 
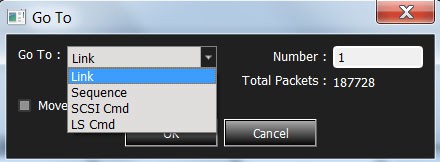
Select a particular Event you are interested in and click OK. The Spreadsheet View moves to that event.
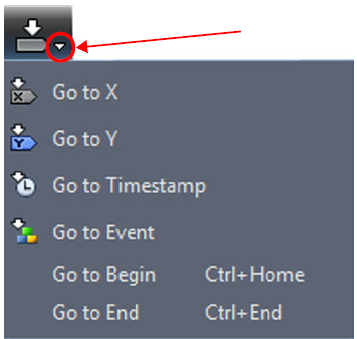
Select the small arrow next to the Go To Icon to open menu below:
-
Go to X: Takes you to the X-Cursor
-
Go to Y: Takes you to the Y-Cursor
-
Go to Timestamp: Takes you to the specified time
-
Go to Event: Choose which type of Event and Number to go to
-
Go to Begin: Takes you to the first Event in the Trace
-
Go to End: Takes you to the last Event in the Trace
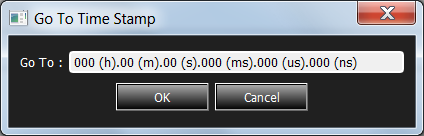
Enter a specific time you are interested in and click OK. The Spreadsheet View will move to that time.
Go to Trigger
Select the Go to Trigger icon 
Go to Marker
Select the large white down arrow/Go to Marker icon 
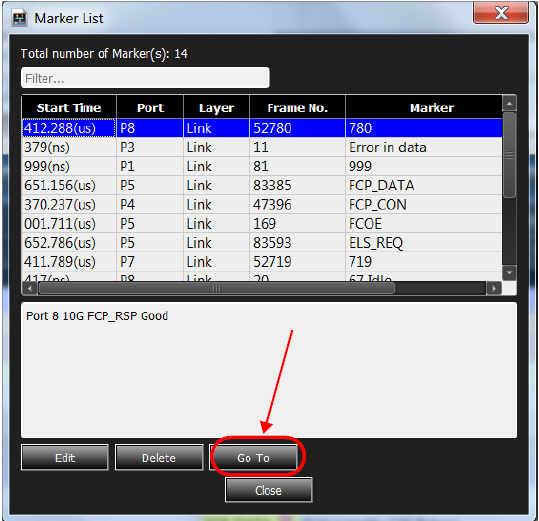
Select a Marker and click Go To to move the Spreadsheet View to that point. Select the small white triangle to the right of the icon to open the list of markers.
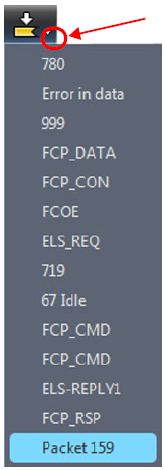
Selecting a marker from the list moves that event to the top of the Spreadsheet View.