
Executing a Scenario

If you use a library as a Scenario archive, then the process of executing a Scenario is as follows:

Select a Scenario

Do one of the following:

  • From the Project Library, click File > Open to open an existing File Library. The File Library displays all saved Scenarios in that library.
project_library.png
Project Library
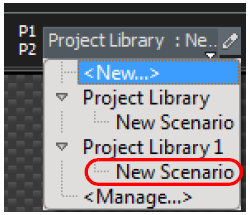
  • From a saved Scenario, select the desired Scenario from the drop-down list and click Start Session.

infusion_control_interface.png
InFusion Control Interface Menu

The InFusion Control interface has the following controls:

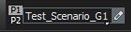
Scenario drop-down list: att_0_for_550764584.jpeg . This is a drop-down list that lets you assign a scenario from the Project’s library to the specified ports. Each port-pair has its own drop-down list and is assigned independently. The text on the left side of the drop-down list indicates the port-pair to which the scenario is assigned. The highlighted port label indicates the direction of jamming, which can be changed from the Scenario Manager interface (see section Traffic Modification Direction).
Execute the Scenario from the Start/Stop Button

Start/Stop Session button: att_1_for_550764584.jpeg . This is a toggle button that starts or stops the session on the specified ports. Each port-pair has its own button and is controlled independently. The text on the bottom half of the button indicates the port-pair controlled by the button.

Log File of Scenario

Once the Scenario is complete or stopped, the Output panel displays the Port, Time, Event, Action duration, and value.

output_panel.png
Output Panel Displaying Session Started and Stopped

Note: If the Output panel is closed, it can be reopened from the Window menu.