
Main windows - Byte Export
The captured frames can be exported as raw bytes to a text file.
-
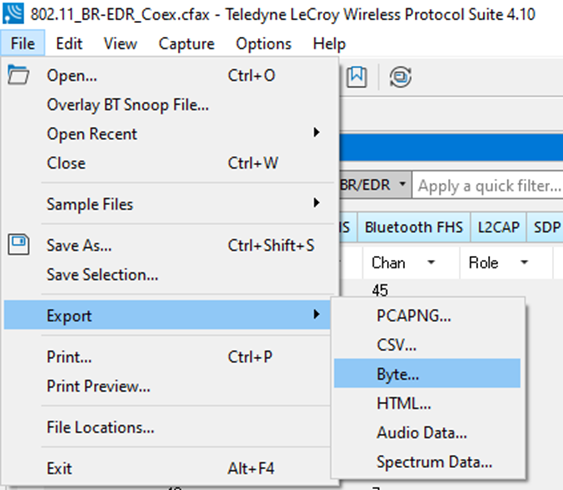
From the From the File > Export sub-menu select Byte. See figures below.
-
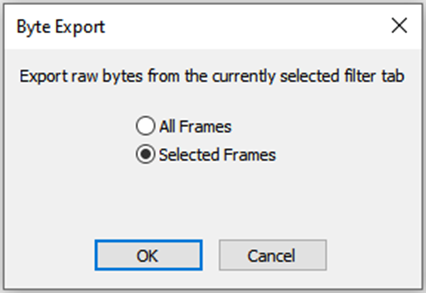
From the Byte Export window, specify the frames to export.
a. All Frames exports all filtered-in frames including those scrolled off the Summary pane. Filtered-in frames are dependent on the selected Filter tab above the Summary pane. Filtered-out frames are not exported.
b. Selected Frames export is the same as All Frames export except that only frames selected in the Summary pane will be exported.
-
Click the OK button to save the export. Clicking the Cancel button will exit Byte Export.
-
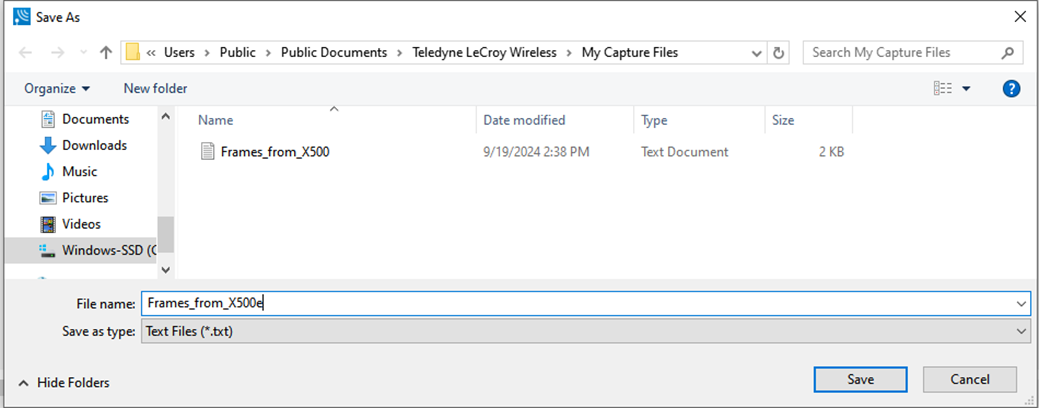
The Save As dialog will open. Select a directory location and enter a file name for the exported frames file.
-
Click on the Save button.
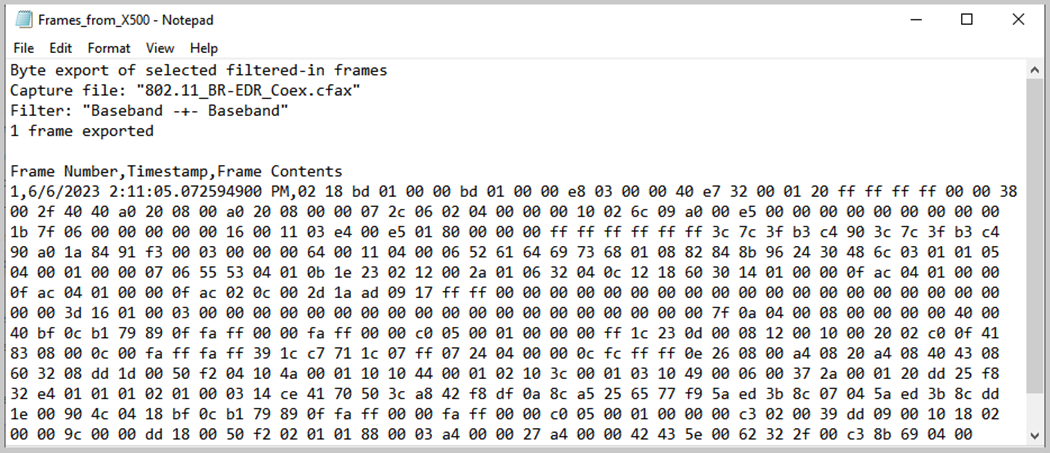
The exported frames are in a text file that can be opened in any standard text editing application. The header shows the export type, the capture file name, the selected filter tab, and the number of frames. The body shows the Frame Number, the Timestamp, and Frame Contents in the same format shown in the Summary Pane and the frame contents as raw bytes.
Export
You can dump the contents of the Summary pane into a Comma Separated File (.csv). You have the option to select which frames and columns you would like to export from the currently displayed tab in Summary Pane.
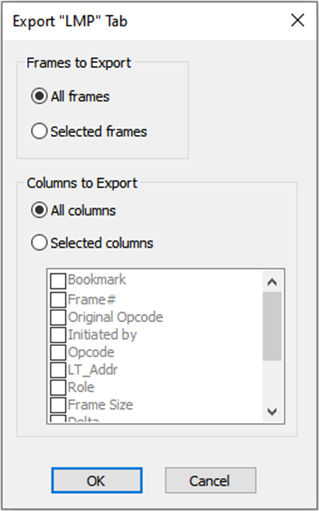
To access this feature:
-
Right click on the Summary pane or open the File menu.
-
Select the Export… menu item.
-
Select whether to export all frames or the frames currently selected.
-
Select whether to export all columns displayed or select the specific columns.
-
Select a storage location and enter a File name.
-
Select Save.
Export to PCAPNG Format
The captured frames can be exported to a PCAPNG file.
-
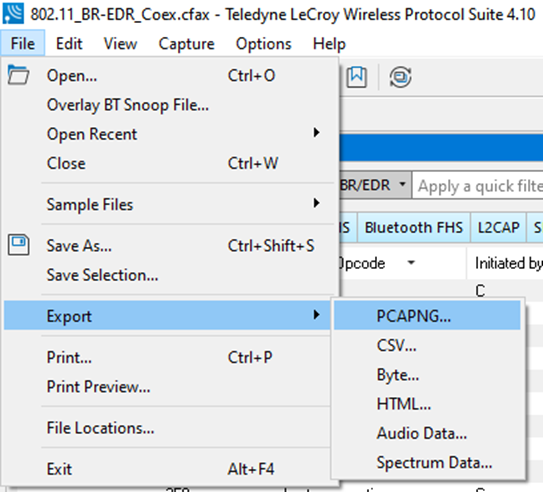
From the File menu click Export then select PCAPNG.
-
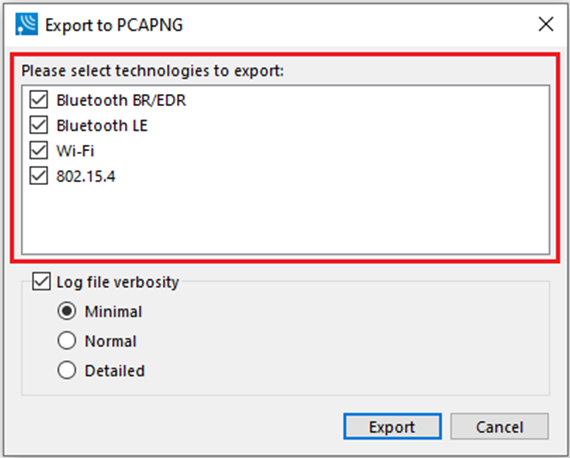
From the Export to PCAPNG window specify the technologies to export.
Currently, only Bluetooth BR/EDR, LE, Wi-Fi and 802.15.4 packet conversion is supported.
-
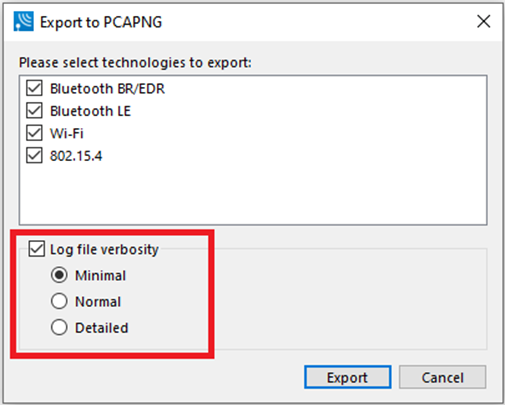
From the Export to PCAPNG window specify the log verbosity. Possible options include
a. Off
b. Minimal
c. Normal
d. Detailed
to disable logging, uncheck Log file verbosity.
-
Click Export to confirm settings of the export or click Cancel to exit the Export to PCAPNG dialog.
-
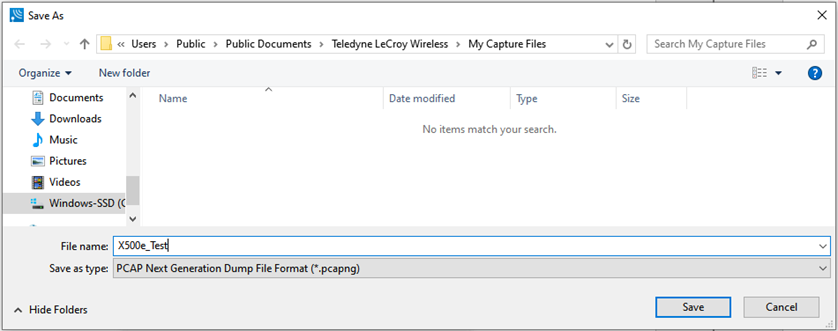
The Save As dialog appears. Select a directory location and enter a file name.
-
Click Save.
CfaToPcapNG Conversion Utility
CfaToPcapNG is Teledyne LeCroy command line utility that converts a .cfa capture file to Wireshark's .pcapng file. You can find the utility in the following location - C:\Program Files (x86)\Teledyne LeCroy Wireless\Wireless Protocol Suite 1.50\Executables\Core\CfaToPcapNG.exe.
The utility converts Cfa BR/EDR, LE baseband, Wi-Fi and 802.15.4 packets to .pcapng frames of the following link types.
|
CFA Packet |
Corresponding pcapng link type |
|
BR/EDR baseband |
LINKTYPE_BLUETOOTH_BREDR_BB |
|
LE baseband |
LINKTYPE_BLUETOOTH_LE_LL_WITH_PHDR |
|
Wi-Fi 802.11 |
LINKTYPE_IEEE802_11 |
|
Wi-Fi Radiotap |
LINKTYPE_IEEE802_11_RADIOTAP |
|
802.15.4 |
LINKTYPE_IEEE802_15_4_TAP |
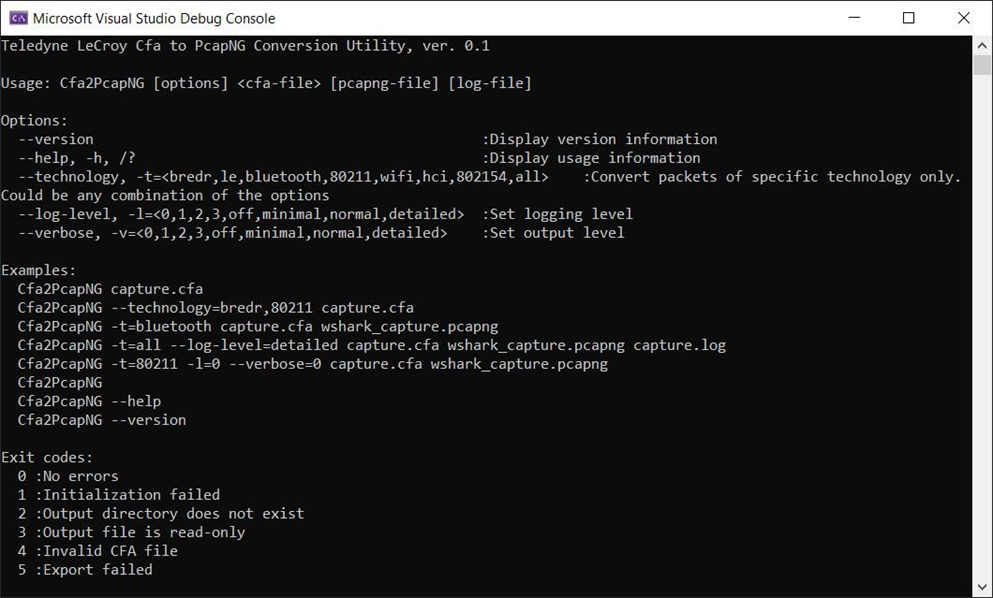
The utility accepts the following command line arguments:
-
[cfa-file name] - input CFA file, optional
-
[pcapng-file name] - output PcapNG file, optional
-
[log-file name] - conversion log, optional
-
[options] - additional parameters that control the conversion process, optional:
|
CLI options |
Meaning |
|
--version |
Displays application title with version information. |
|
--help, -help, -h, /?, no arguments |
Displays full help with version info, usage options, usage samples, and exit codes. |
|
--technology, -t |
Specifies the technologies to export from an input fiLE. PossibLE options include: bredr, le, bluetooth, 80211, hci, 802154, all, as well as any combination of the above. Only bredr, le, 80211, and 802154 options are supported in the current version of the utility. |
|
--log-level, -ll |
Sets conversion logging level. Possible options include:
|
|
--verbose, -v |
Sets console output level. Possible options include:
|
Below is the help screen from the utility.
Known Issues and Limitations
-
The utility currently supports conversion of the Bluetooth BR/EDR, LE and Wi-Fi packets only.
-
The timestamps of the converted packets as displayed in Wireshark do not match the timestamps displayed in the WPS. Wireshark internally applies local time as set in Windows, macOS, or Linux
,and displays the timestamps in local time instead of UTC.
Spectrum Export
The captured Spectrum 2.4 GHz can be exported to a CSV file. Export Spectrum RSSI samples for each Bluetooth channel.
Spectrum 2.4 GHz must be selected in the Wireless tab under the Record Options dialog.
-
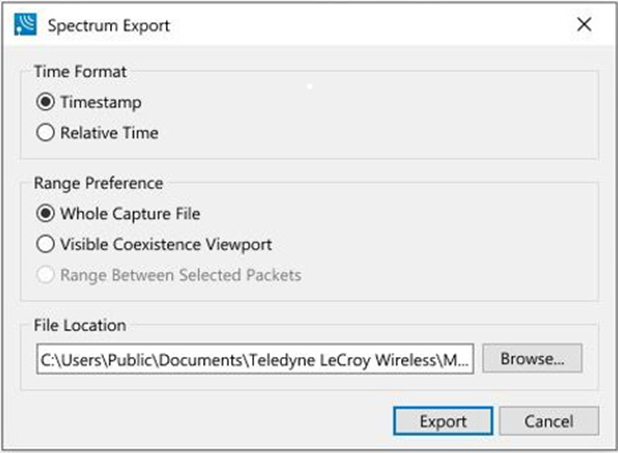
Select Export > Spectrum data from the main File menu or Export icon on the Coexistence Toolbar to open the Spectrum Export dialog.
-
Select the desired time format (Timestamp or Relative).
-
Select one of the three export range options.
a. Whole capture file
b. Visible Coexistence Viewport (the timeline that is visible on the Coexistence View)
c. Range Between Selected Packets (if there are no selected packets, last option would be disabled)
-
Click Export to confirm settings of the export or click Cancel to exit the dialog.