
This section describes the use of internal decoding for sending packets and getting fields from LRF.
SendFrame
You can define a SendFrame and send it without defining its Frame template. It uses internal decoding for sending packets.
To invoke SendFrame, do one of the following:
-
Drag the SendFrame Keyword to open the pop-up menu, then click Insert Frame.
OR
-
Drag and drop SendFrame from code snippets, then click Insert Frame.
Once Insert Frame is selected, the following code is added to the script:
RawFrame "Frame_Name"
{
  LinkData = "Raw Data String"
  #Field[start:end] = field value #Field Name1 = Field1 value/option value
  #Field[start:end] #Field Name2 = Field2 value/option value #SendCRC
  Prolog = SOFi3 #(any SOF) Epilog = EOFn #(any EOF)
}
-
SendFrame: This Keyword is used to identify the packet Decoding.
-
Frame_Name: Shows the protocol stack and frame name, which is needed for the inserted Packet to decode. For example, for FCP Data Frame, it will be “FCP Frame Information Unit(Data)-FCP_DATA”.
Note: You must not change this value; otherwise, it will not produce the expected result.
-
LinkData: Frame raw data.
Note: You must not change this value; otherwise, it will not produce the expected result.
-
Fields: All fields that have been changed in the frame are shown with their value/ Option, but they are commented. If you to assign new values by a constant or a variable, you must update each individual field with the following format:
Field[Start:End] = field value (while Field value can be a constant or a variable)
-
Send: Use this to Send a pattern (Fixed/Incremental or PRBS11) after the LinkData and before CRC. The format is the same as the Send command inside SendData Block and has the same format:
Send(@var64_name, SEND_INCREMENTAL, repeat_count)
Note: When using this command inside the SendFrame, an idle is inserted before the Prolog to avoid padding LinkData with trailing zeros (before the pattern) when it is QWORD aligned.
-
SendCRC: If Recalculate CRC is checked, SendCRC will be sent.
-
Prolog: You can assign any predefined orderedset.
-
Epilog: You can assign any predefined orderedset. This an example related to FCP Data frame:
-
SendFrame "FCP Frame Information Unit(Data)-FCP_DATA"
{
  LinkData = "010000000000001F080000000000000000000000000000000000000000000000"
  #Field[0:7] = 0x01 # Routing Control = 0x01: Solic. Data #Field[40:63] = 0x00001F # Source Identifier = 0x00001F #Field[64:71] = 0x08 # Data Structure type = 0x08: SCSI-FCP SendCRC
  Prolog = SOFi2 Epilog = EOFa
}
LRF Fields
You can select a LRF field visually using built-in decode.
-
To select a field, drag the LRF to the script body in the middle pane. This opens the dialog window.
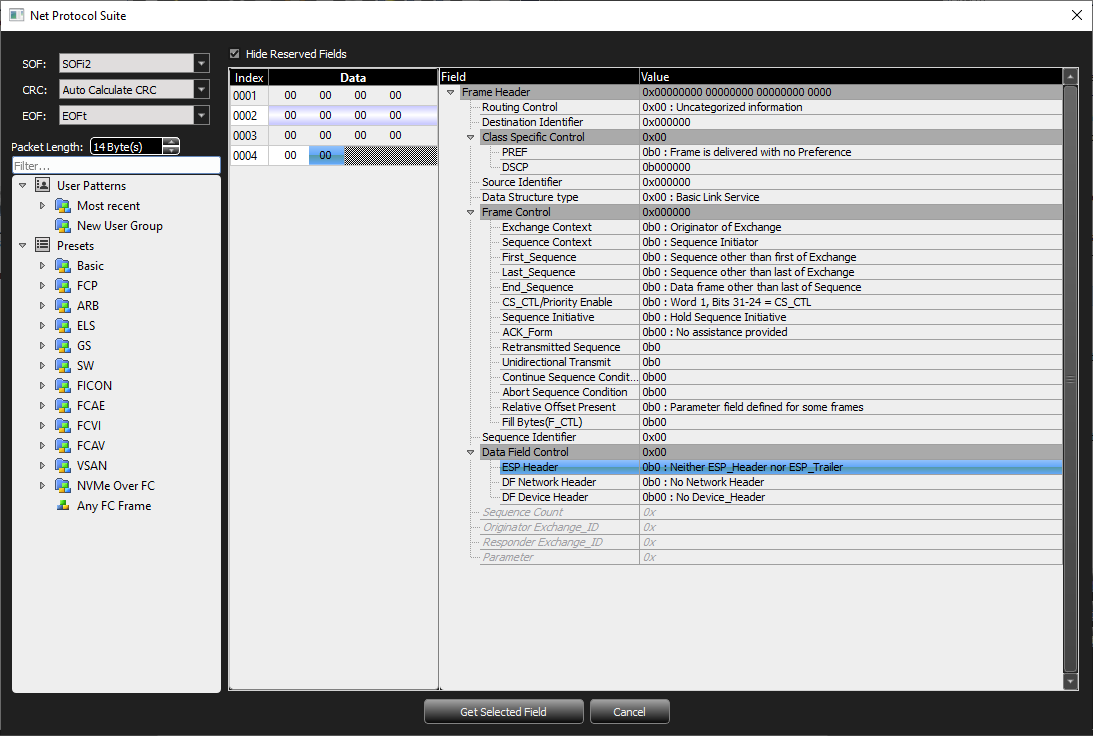
-
Select any field to get the value from LRF. When you choose the Get Selected field, the following is added to the LRF position:
LRF[Start bit offset: End bit offset] #Field Name (Commented)
Therefore, for the above example it will be:
@OpCode= LRF[40:48] # Operation Code
Note: LRF needs a left side variable to be assigned, otherwise it will generate compile error.
Hint: To find the start bit and end bit of a field, you can use LRF or SendFrame dialogues by typing them into the script (anywhere); then right-click and choose the insert frame option for the SendFrame keyword, or GetField for the LRF keyword; then choose the intended field or update its value with a none-zero value (e.g., with FFFFFF).
Rearrange Byte Order
When a Word value is received from LRF that you wish to use, the byte order is reversed; therefore, it must be rotated manually. Because the Word value cannot be used directly in the defined frame_template, it needs to be swapped.
Two other functions also can be used to reverse byte order of identifiers. ReverseByteOrder32 can be used for 32-bit values and ReverseByteOrder64 for 64-bit values.
Reverse Byte Order
To get the value from the Last Received Frame in a reversed byte order, LRF_BYTE_REV can be used:
LRF_BYTE_REV[Start bit offset: End bit offset] #Field Name (Commented)
Note: LRF_BYTE_REV can only be used when the field size (end_bit_offset - start_bit_offset + 1) is dividable by 8 (8, 16, 24 or 32 for 32-bit variables).
Reversing byte order can also be performed later using the ReverseByteOrder command as shown in the following example:
Var32 @OrEx_id = LRF[128:143]# Originator Exchange_ID ReverseByteOrder(@Rx_id, 16)
In the ReverseByteOrder function, the first parameter is the variable needed to reverse the bytes, and the second parameter is the size of data inside variable in bits (16 bits here). If the size is 32 bits, a second parameter is not needed:
Var32 @OrEx_id = LRF[128:143]# Originator Exchange_ID ReverseByteOrder(@Rx_id)
So, the following expressions are the same:
@OrEx_id = LRF[128:143] << 16# Originator Exchange_ID ReverseByteOrder(@OrEx_id)
@rx_OrEx_id = LRF[144:159] << 16 # Responder Exchange_ID
ReverseByteOrder(@rx_OrEx_id)
@OrEx_id = LRF_BYTE_REV[128:143]# Originator Exchange_ID
@rx_OrEx_id = LRF_BYTE_REV[144:159] # Responder Exchange_ID
@OrEx_id = LRF[128:143]# Originator Exchange_ID
ReverseByteOrder(@OrEx_id, 16) # = 32 - length
@rx_OrEx_id = LRF[144:159] # Responder Exchange_ID
ReverseByteOrder(@rx_OrEx_id, 16)
ReverseByteOrder32
Call this function to reverse the byte order of a 32-bit identifier.
param32 = 0x11223344
call ReverseByteOrder32(param32) # param would be 0x44332211 after this call.
ReverseByteOrder64
Call this function to reverse the byte order of a 64-bit identifier.
param64 = 0x1122334455667788
call ReverseByteOrder64(param64) # param would be 0x8877665544332211 after this call.
Note: Constants cannot be used in ReverseByteOrder32 and ReverseByteOrder64 functions.
-
The “generation/include/utilities.inc” file needs to be included to use
ReverseByteOrder32andReverseByteOrder64functions:
%include “generation/include/utilities.inc”
Copy/Paste Frame
FC Exerciser script supports copy-paste frame feature by copying a frame from trace view and right-click anywhere in the script and choose the “Paste Frame” option to add a SendFrame snippet based on the values of the copied frame.
This feature can make filling required values for a specific frame much easier as user can copy a similar frame from a trace and paste it inside the script and only update the required values.