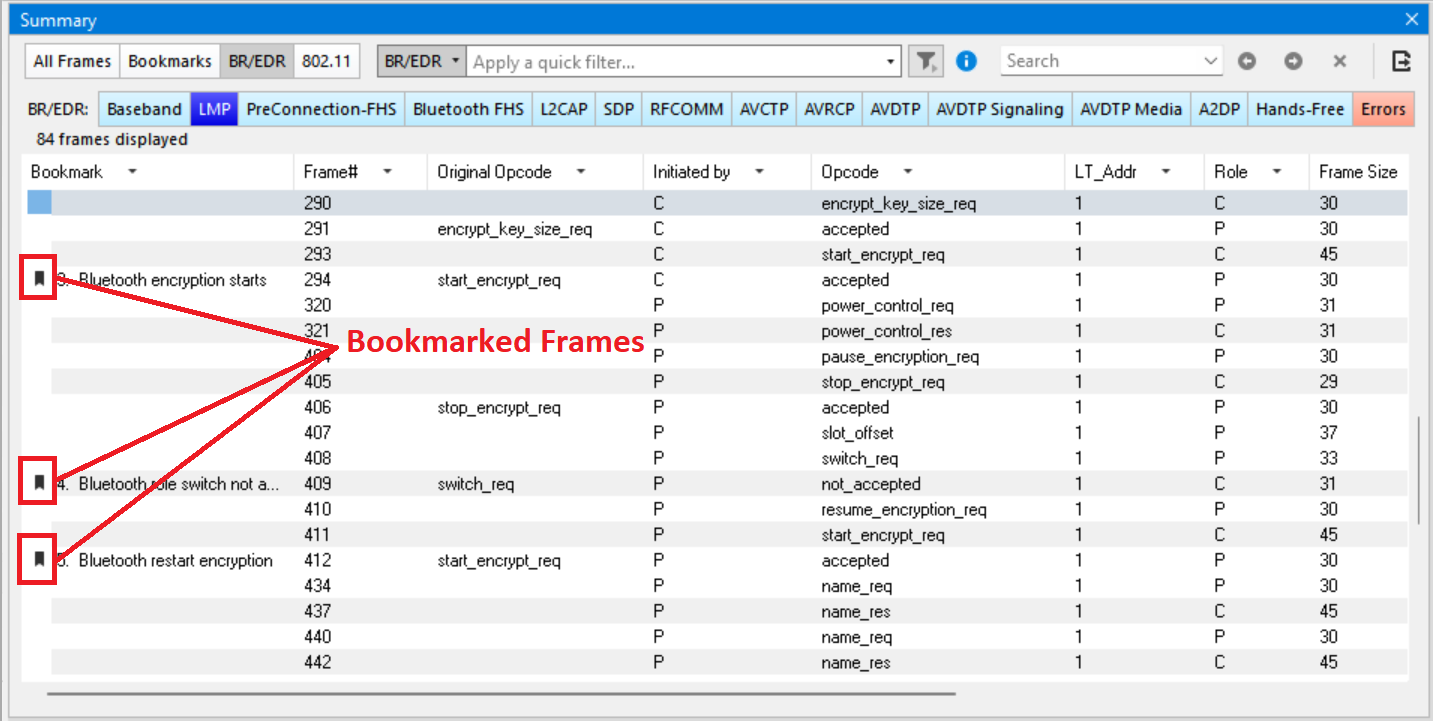
Bookmarks are electronic sticky notes that you attach to frames of interest (fame bookmark) or the timestamp of the interest (time bookmark) so they can be easily found later. In the Summary pane, bookmarked frames appear with a bookmark icon next to them.
When you create a bookmark, it will be saved with the rest of the data in the .cfa file. When you open a .cfa file that has been bookmarked, the bookmarks are available to you.
Once you have created a packet bookmark, you can use the Bookmark tab to locate and move among them. The time bookmark navigation is available through the Go To dialog.
Adding a Bookmark
You can add bookmarks from the Summary Pane and Timing Analysis view.
There are three ways to add a Packet Bookmark.
-
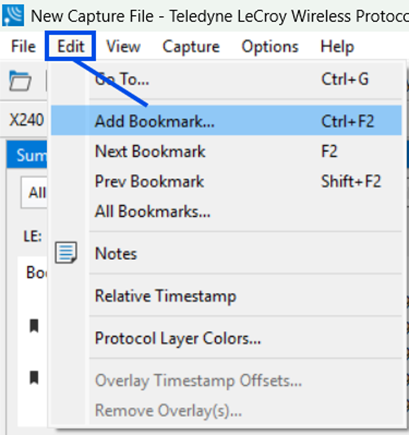
Select Edit > Add Bookmark from the Main windows toolbar as shown below.
-
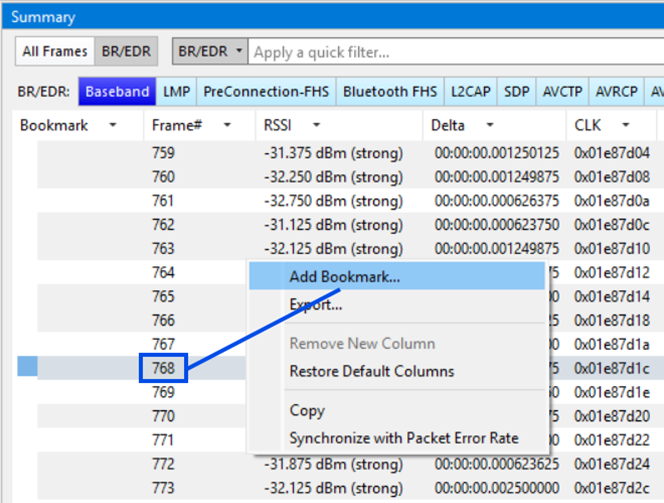
Select a frame and right-click on it. The Add Bookmark dialog will pop up. See the figure below.
-
Right-click on the packet in the Timing Analysis view and the context menu will appear. Click on “Add Bookmark for packet …”
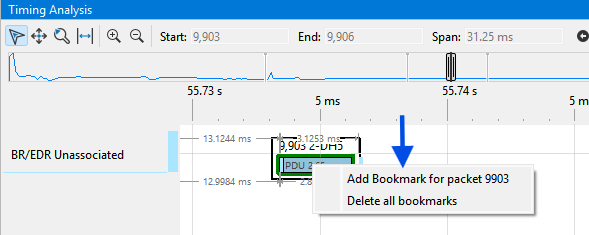
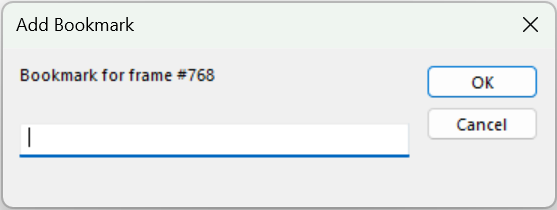
With these methods, the Add a Bookmark pop up dialog appears.
You can add a Time Bookmark in the Timing Analysis view using a right-click in the line coming out of the packet. The context menu will appear. Click on “Add Time Bookmark”.
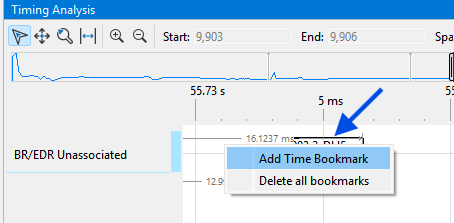
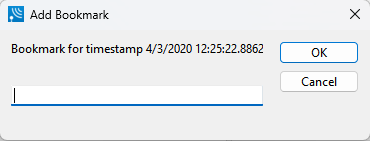
With this method, the Add Bookmark pop-up dialog appears.
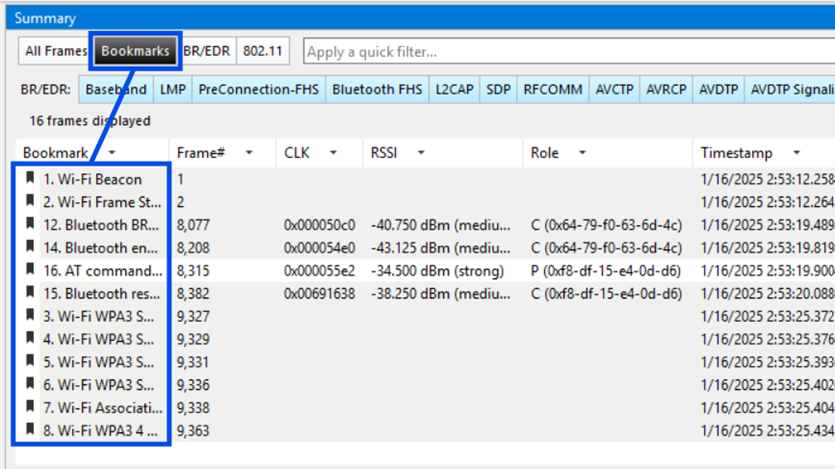
After you have generated several bookmarks, you can select to see only the Bookmarked Frames by clicking on the Bookmark tab. See the figure below.
Showing Bookmarks on Views
Packet Bookmarks appear on the Viewport and the Navigation Bars of LE/Classic Timelines, Coexistence, Throughput and Timing Analysis views. Also, Packet Bookmarks appear on the Navigation bar of Stats view and Packet Error Rate view. If a packet is bookmarked, the bookmark shows up at the beginning of the packet. See the figure below for Packet Bookmarks on Coexistence view, Timeline, Packet Error Rate and Stats view. See the second figure below for Packet Bookmarks on Timing Analysis and Throughput view.
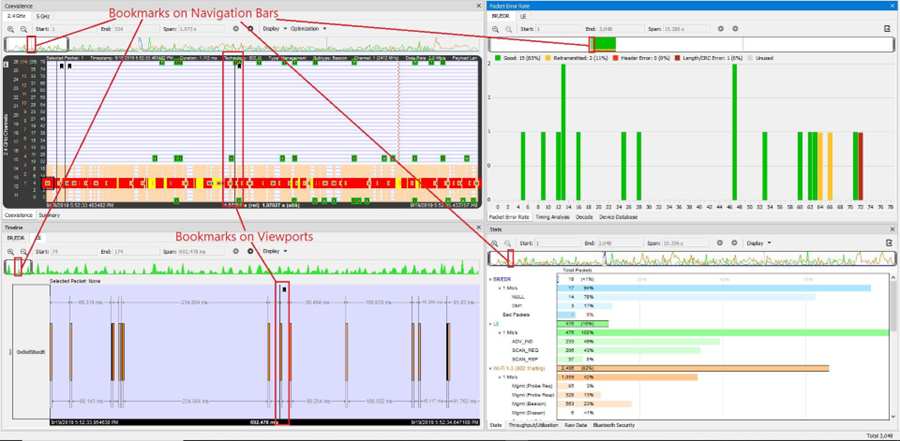
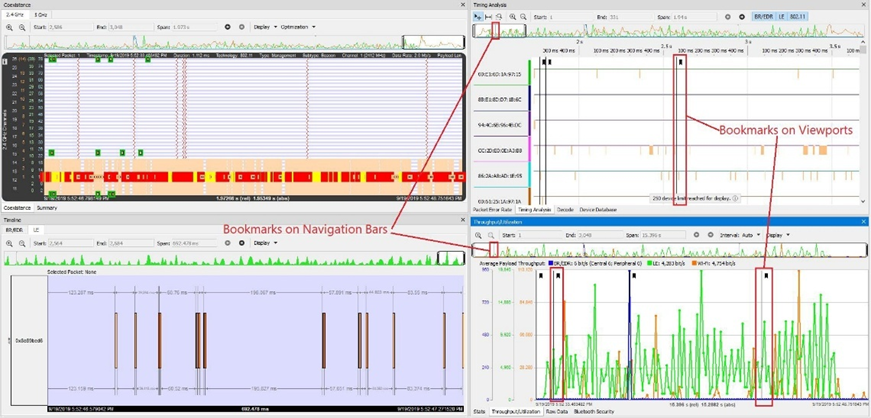
The Classic and LE Timelines show bookmarks for that specific technology. All other views show bookmarks for all technologies.
The tooltip with general information about the bookmark (Bookmark name and the packet number the tooltip is assigned to) is displayed by hovering on the tooltip sign on viewport as shown below.
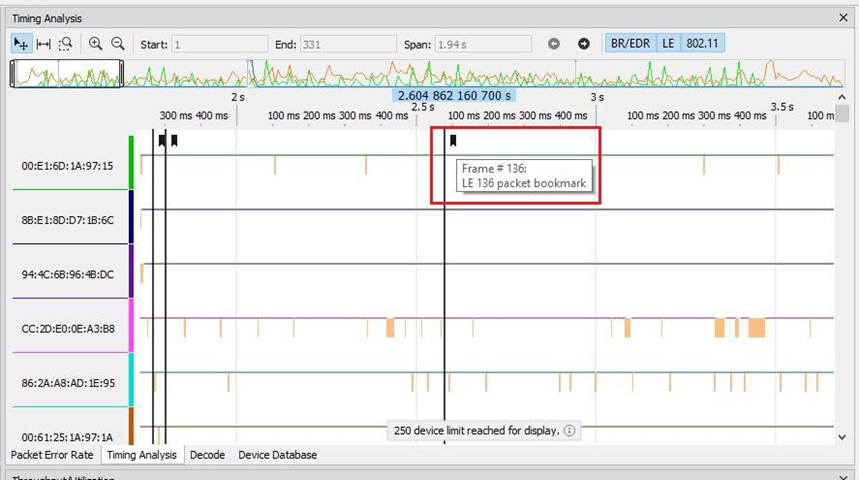
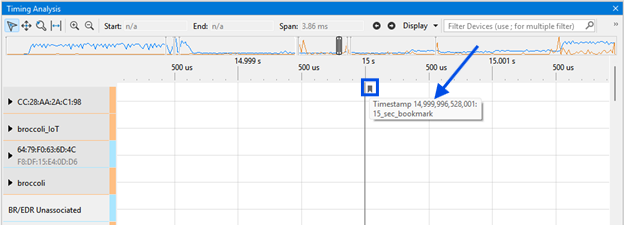
Time Bookmarks appear on the Viewport and the Navigation Bar Timing Analysis view. See the figure below for Time Bookmarks on Timing Analysis view. The tooltip with general information about the bookmark (bookmark name and the time the tooltip is assigned to) is displayed by hovering on the tooltip sign on the viewport, as shown.
Editing a Bookmark
You can edit Packet Bookmarks from the Main menu, Summary pane, Go To/Bookmarks dialog, and Timing Analysis view. For Time Bookmarks, you can edit them using the Go To/Bookmarks dialog and Timing Analysis view.
There are four ways to Edit a Bookmark.
-
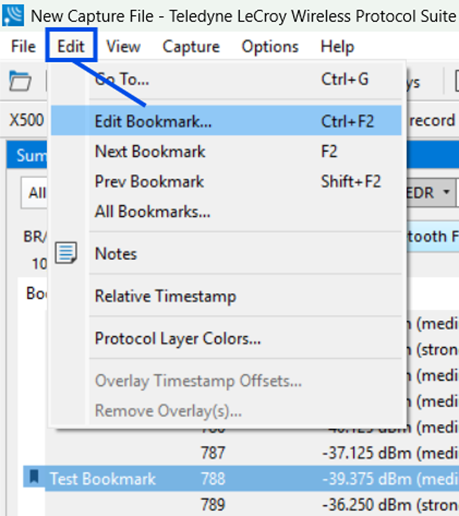
When the packet with the bookmark is selected, select Edit > Edit Bookmark from the Main window toolbar, as shown below.
-
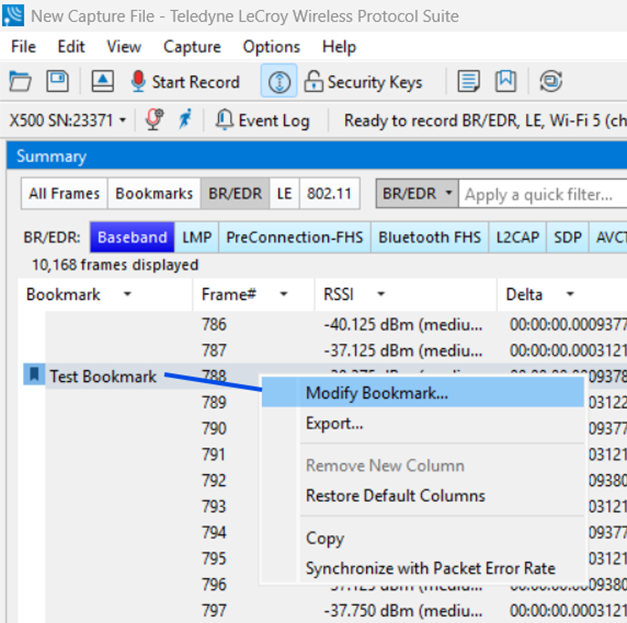
Select a frame and right click on the mouse. The same Edit Bookmark dialog will pop up. See the figure below.
-
Right-click on the packet in the Timing Analysis view for Packet Bookmarks. The context menu will appear:
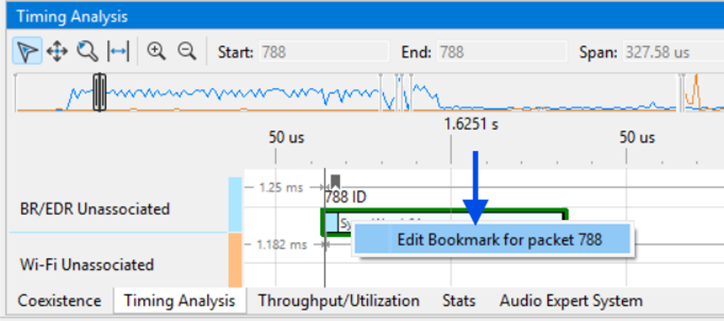
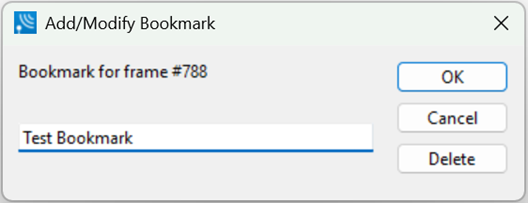
Either way will get you to Add/Modify Bookmark pop up dialog.
-
Left-click on the marker for Time Bookmark in the Timing Analysis view. The Add/Modify Bookmark pop-up dialog will display:
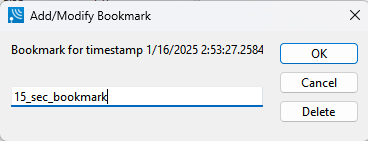
This dialog also allows you to delete the bookmark.
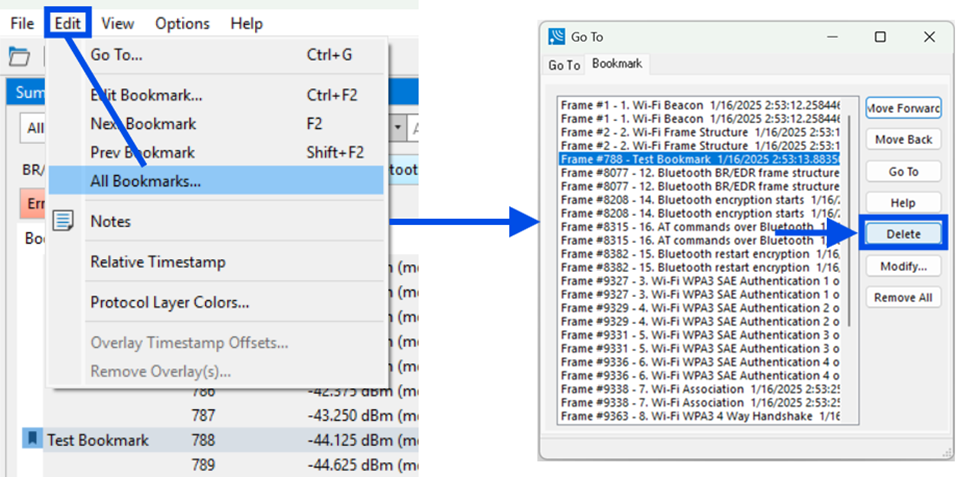
Another way to delete the bookmark is by selecting Edit > All Bookmarks. Select the bookmark to remove and select Delete.