
The Status Bar is located at the bottom of the main display window.

Depending on the current activity, the right side of the bar has segments that indicate the status, size, activity, and buffer.

The left side of the bar has segments that indicate port and link status.

Recording Progress
When you begin recording, the Status Bar displays an indicator. As recording progresses, the indicator changes to reflect the recording progress graphically: A black vertical line illustrates the location of the Trigger Position that you selected in Recording Options.
-
Pre-Trigger progress is in the field to the left of the Trigger Position in the before-trigger color specified in the Display Options.
-
When the Trigger Position is reached, the indicator wiggles as it waits for the trigger.
-
After the trigger occurs, the field to the right of the Trigger Position fills with the after-trigger color specified in the Display Options.
-
When recording is complete, the upper half of the progress indicator fills with white, indicating the progress of the data upload to the host machine.
You should be aware of two exceptional conditions:
-
If a Trigger Event occurs during the before-trigger recording, the before-trigger color changes to the after-trigger color to indicate that not all the expected data was recorded pre-trigger.
-
When you click Stop before or after a Trigger Event, the Status Bar adjusts accordingly to begin uploading the most recently recorded data.
The indicator fills with color in proportion to the specified size and actual rate at which the hardware is writing and reading the recording memory. However, the indicator is normalized to fill the space within the Status Bar.
Recording Status
During recording, the current Recording Status is in a segment. When you activate the Record function, this segment flashes a message depending on the selected Recording Options, such as Waiting for Trigger, Uploading or Rec/Uploading.
The status bar displays Waiting for Trigger while waiting for trigger to occur based on the settings defined in the Recording Options.

The status bar displays Uploading when recording is complete and is being uploaded.

The status bar displays Rec/Uploading when recording and uploading is done simultaneously.

The status bar displays Triggered when the trigger condition has occurred, but uploading has not commenced yet.

The traffic data copies to disk (overwriting any previous version of this file) using the default file name data.usb. You can also create a file name by specifying one in the Recording Options dialog box.
To abort the upload process, press Esc on the keyboard, or again click 
NOTE: While uploading is in progress, clicking the Stop button again opens a dialog that allows you to do a partial upload, flush the current file, keep what has uploaded at this point, or to continue uploading.
The Partial Upload button enables when you have partially uploaded data. When you click Partial Upload, a dialog box displays options on what portion of data you want to upload again.
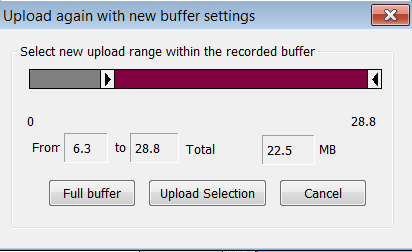
When the data is saved, the Recorded Data file appears in the main display window, and the Recording Status window clears.
-
If the recording resulted from a Trigger Event, the first packet following the trigger (or the packet that caused the trigger) is initially positioned second from the top of the display.
-
If the recording did not result from a Trigger Event, the display begins with the first packet in the traffic file.
Recording Activity
During recording, a segment of the Status Bar displays recording activity as a series of vertical bars.
The more vertical bars that display, the greater the amount of activity recording. If there are no vertical bars, there is no recording activity.
During uploading, the percent of the completed upload displays.
NOTE: If packets are filtered from the recording, or data are truncated, recording activity reduces.
Cable Status
Type-C Cable Status
Type-C analyzers have cable status LEDs on the front panel.
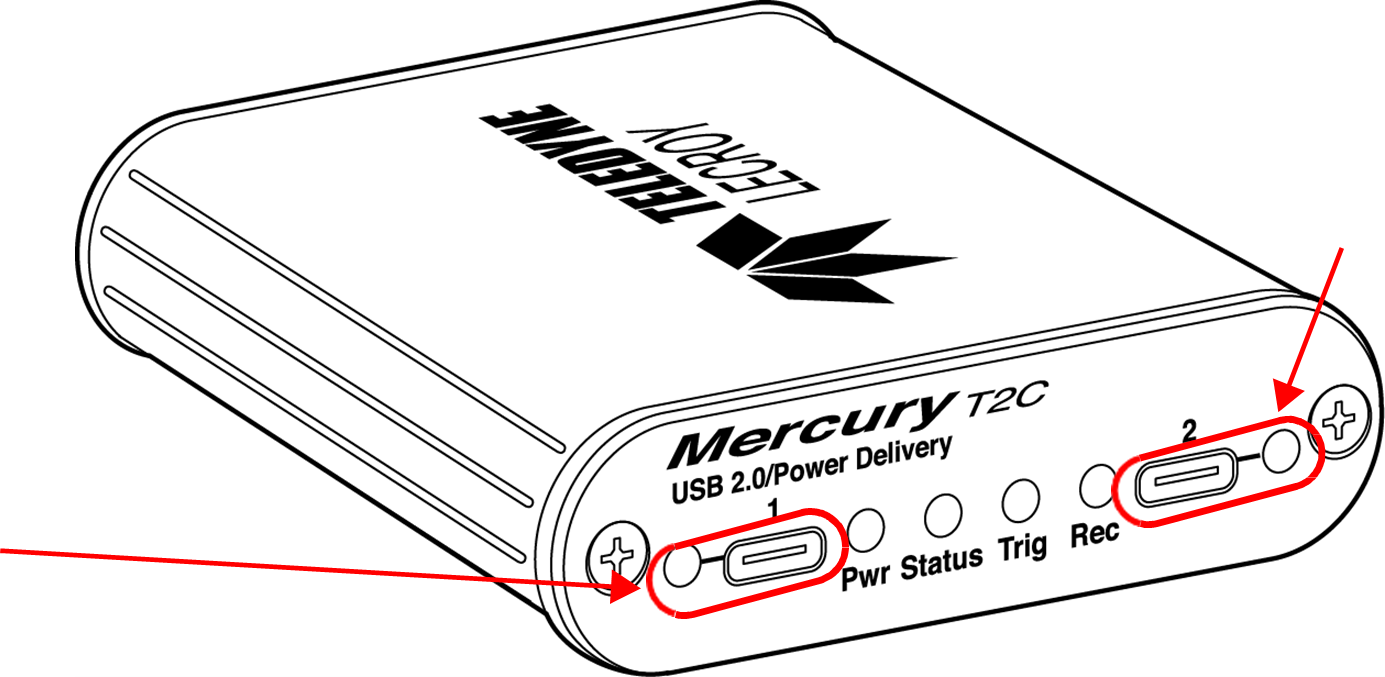
The “C” cable can be inserted into Connectors 1 or 2 on the front panel right-side up (correctly) or upside down (incorrectly). If they are inserted incorrectly (upside down) the LED will glow RED. If they are inserted correctly (right-side up) the LED will glow GREEN.
NOTE: If the cable is inserted incorrectly, unplug it, turn it over and reconnect it.
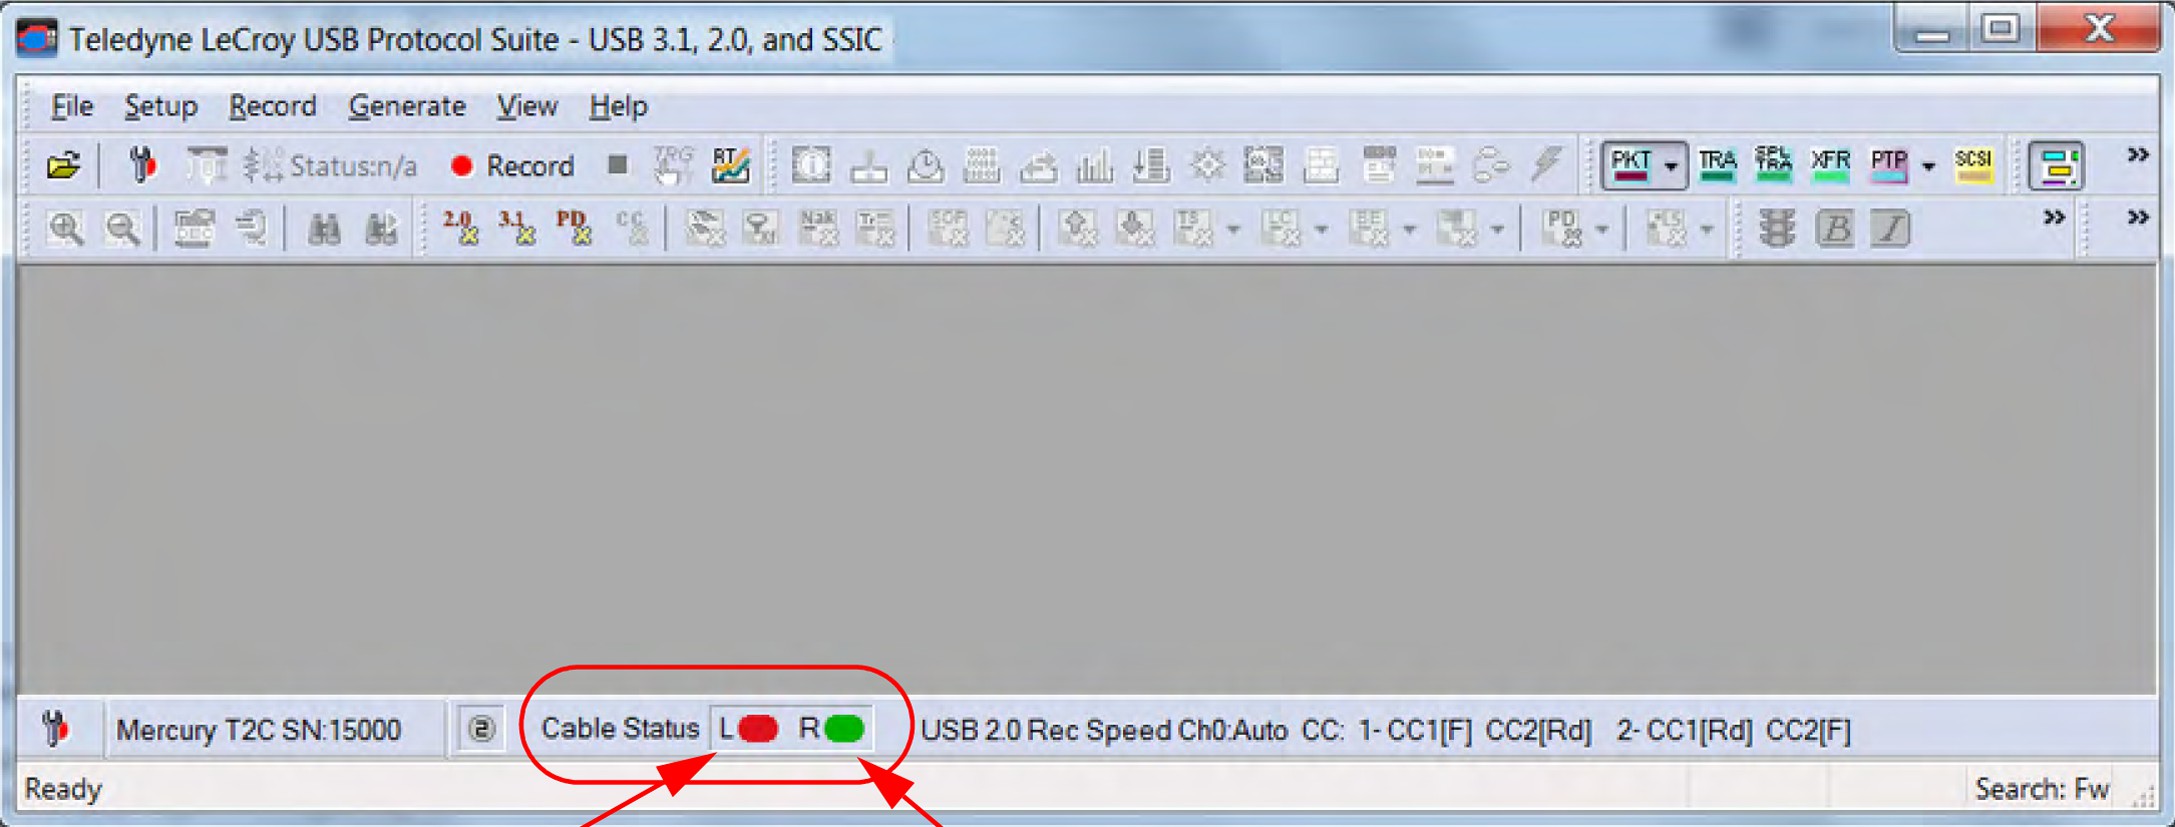
The status of the LEDs is mimicked by the Teledyne LeCroy USB Protocol Suite software display, in the status field at the bottom of the display as shown in Figure 4.50, below.
Search Status
