
When connected to a network, the analyzer can communicate with the DHCP server in order to obtain its IP address configuration. The client needs to send a request to the DHCP server to obtain an IP. The server sends only one reply. The server does not necessarily send the available IP address.
The Voyager products use the following ports:
-
TCP Ports: 3999 – 4003
-
UDP Ports: 4018 – 4020
Note: If your PC and the analyzer are not on the same subnet, you might have to set appropriate subnet and gateway settings. Also, it is best if TCP ports 4000 to 4003 and UDP ports 4018 to 4020 are available on the network, but even if they are not you might be able to force a connection by selecting the “Force add/connect attempt” box.
To set up an analyzer using an Ethernet connection:
-
Download the most current software for your analyzer from: https://teledynelecroy.com/sw/usb/.
-
Connect your host machine to the analyzer using either a Static IP Address or a Dynamic IP address if you are on a network.
Note: Using a Static IP Address is helpful if you are planning to attach the analyzer to your local PC and want to use the Ethernet connection.
The steps for each method are described in the following section.
Using a Static IP Address
In some cases, you might find it desirable to use a direct Ethernet connection from you analyzer PC to the USB analyzer. One reason might be that you want them separated by more than 1 meter, which is the typical USB cable length. Or you might not have a USB 3.2 (5Gbps) port on your Host PC, so Ethernet would be faster than USB 2.0 transfers.
To make this connection, it is required that you set the Static IP Address on you PC, then use a USB cable (temporarily) to set a Static IP address on your USB analyzer. After this is done, you can do a direct Ethernet connection from your PC to the analyzer.
Setting a Static IP Address on your PC
To use a Static IP address, first set your computer’s IP address to a Static IP Address:
-
Open the Control Panel: Start > Windows System > Control Panel.
-
Select Network and Sharing Center. The Network and Sharing Center Menu appears.
-
From the Network and Sharing Center menu, select Change adapter settings. The Local Area Connection option appears in the Network Connections window.
-
Click Local Area Connection. The Local Area Connection Properties window opens.
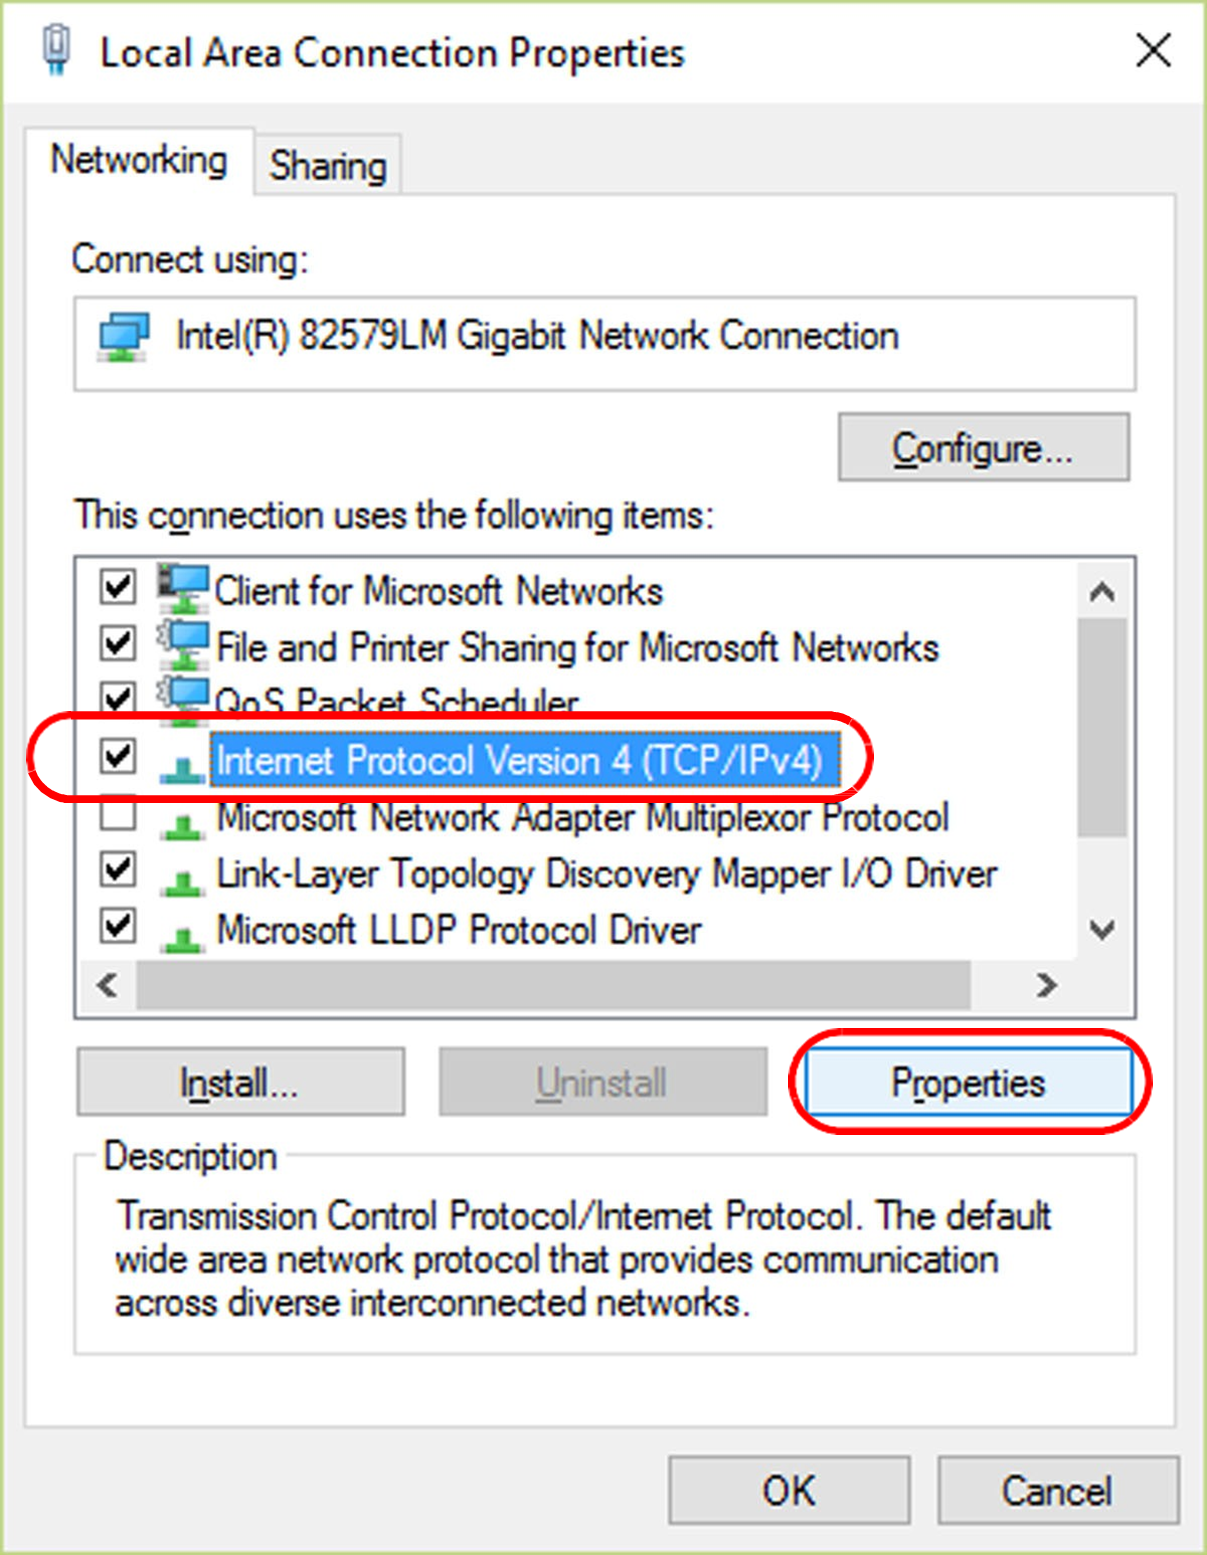
Local Area Connection Properties -
Highlight Internet Protocol Version 4 (TCP/IPv4), then click Properties. The dialog box for TCP/IPv4 properties opens.
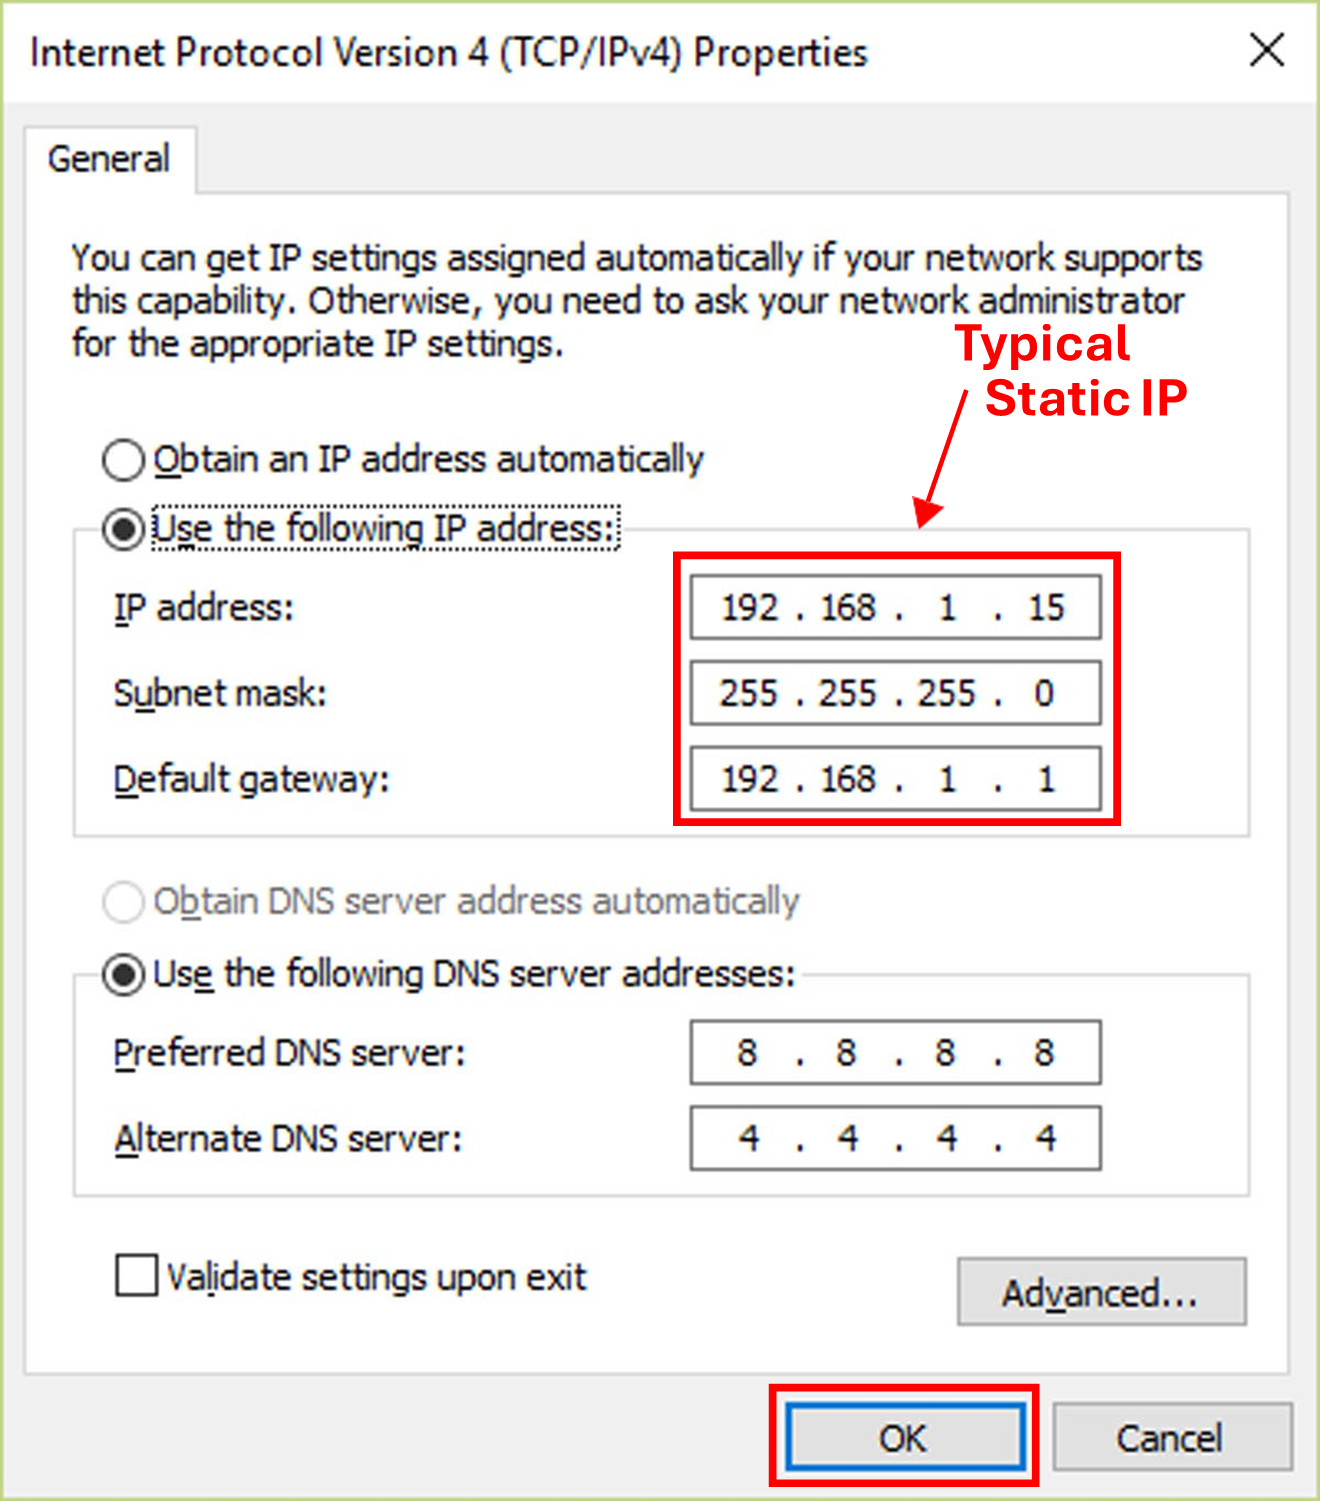
IPv4 Properties -
Enter your local static IP settings in the appropriate fields, then click OK. These are the settings that will be used by the host computer.
-
To verify that your IP address has been changed, open a Command Prompt window.
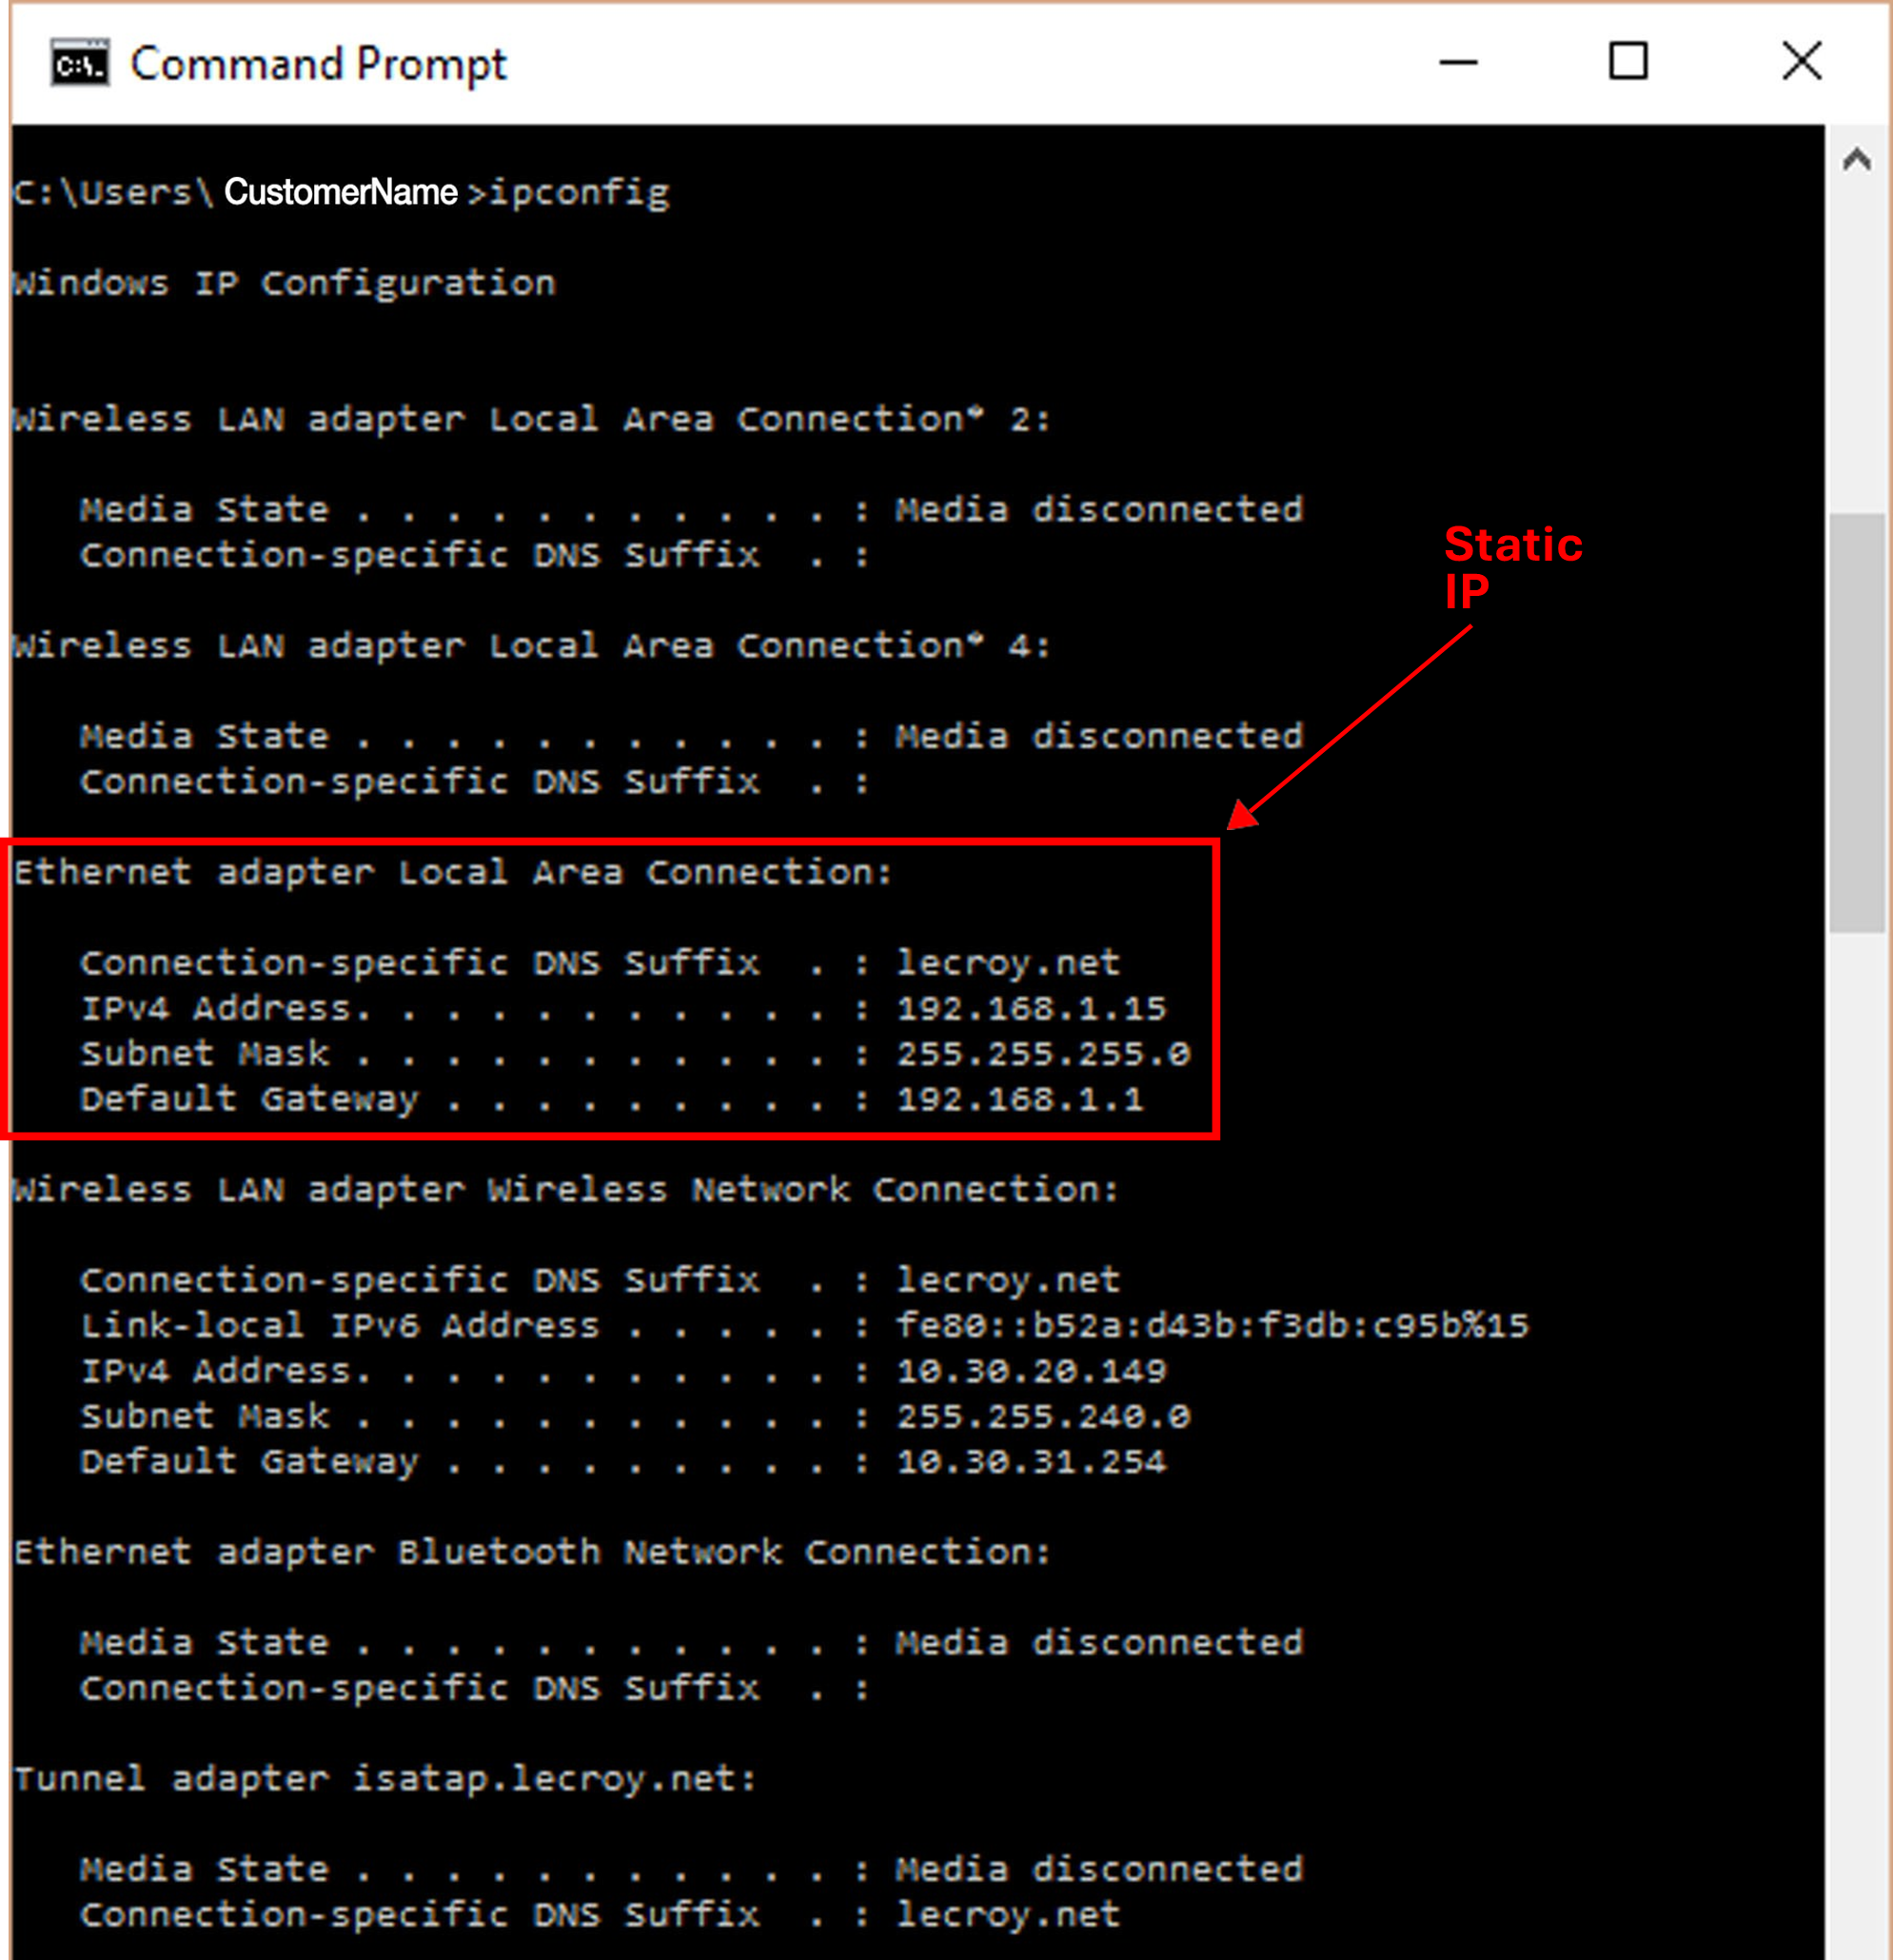
Setting a Static IP Address on Your USB analyzer
-
Connect your PC to the analyzer with a USB cable.
-
Power on your analyzer (with the USB cable attached).
-
After the analyzer has initialized, launch the USB Protocol Suite software and select Setup > All Connected Devices.
-
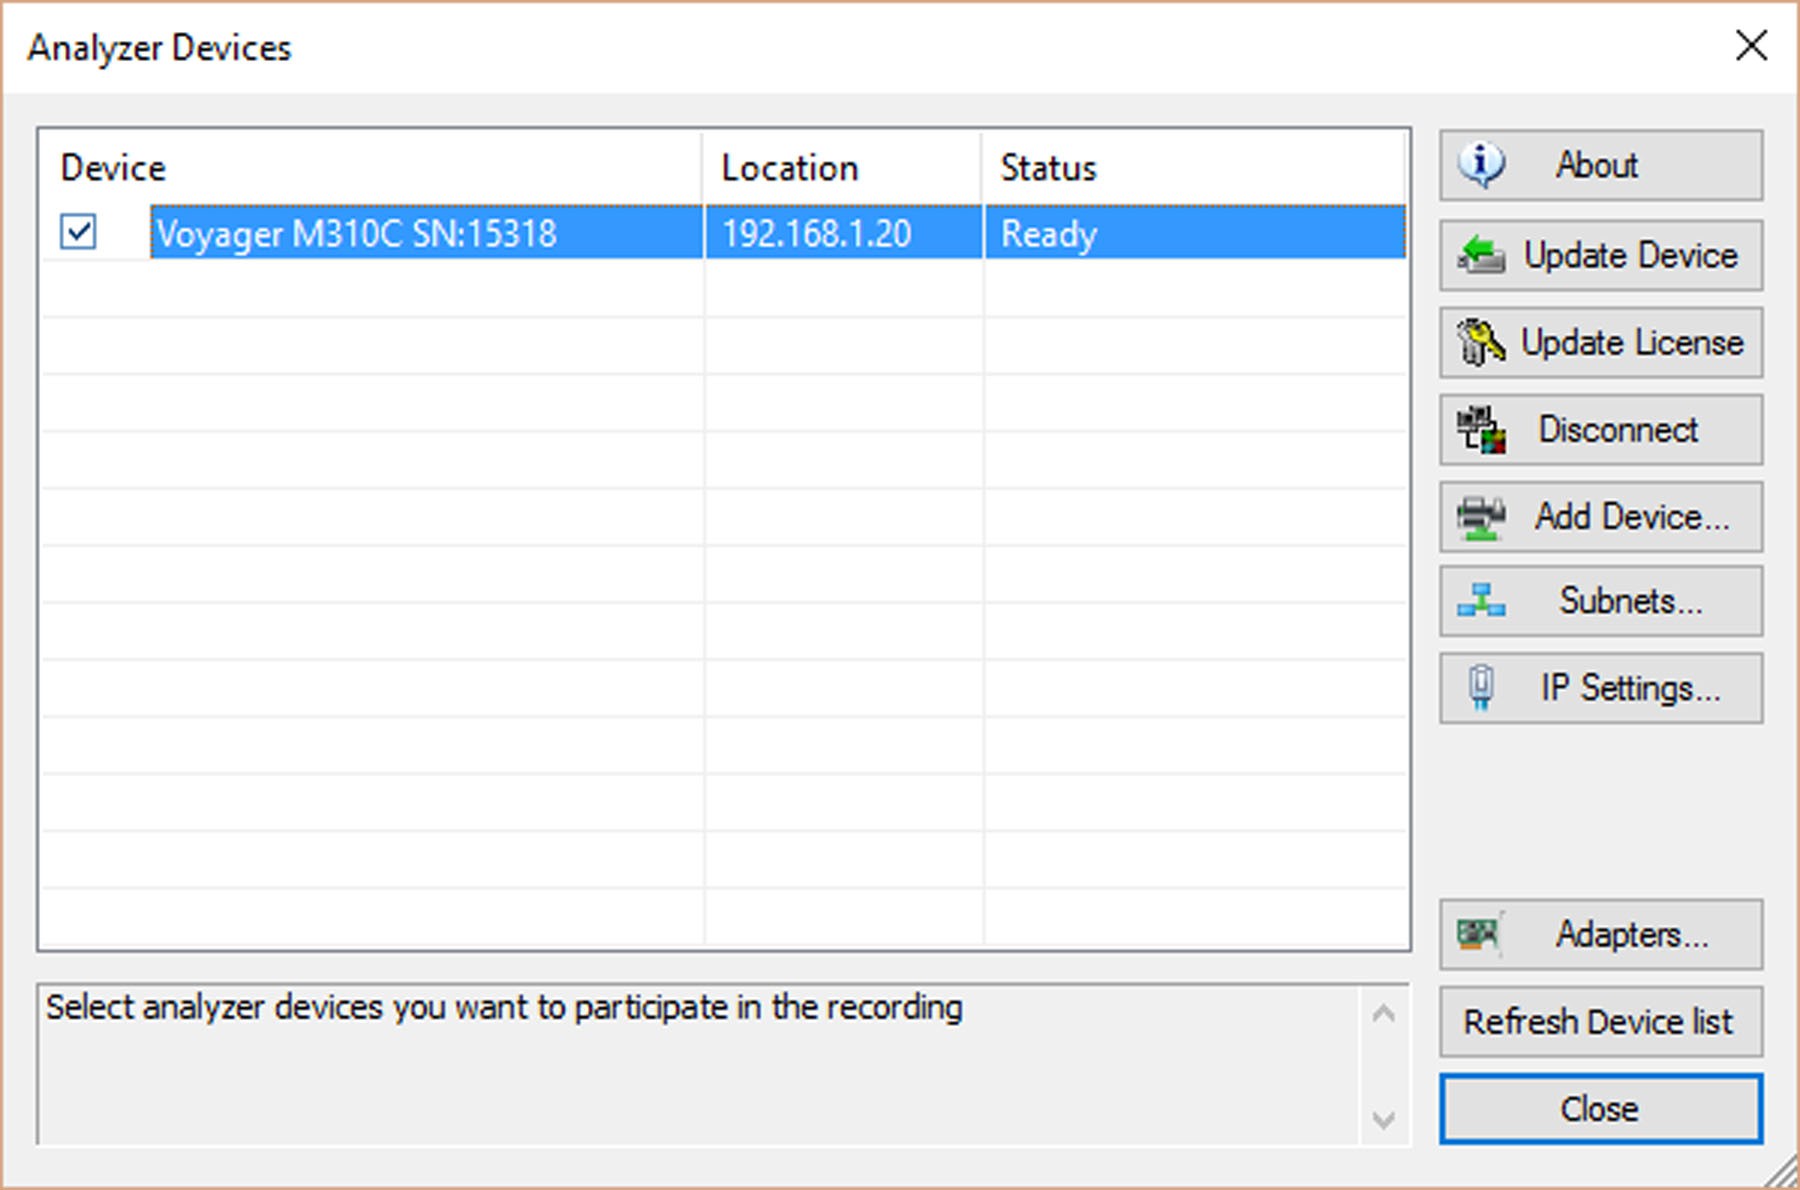
The Analyzer Devices window opens and shows any connected USB analyzers and their statuses.
-
To configure the analyzer with an appropriate IP address, select the IP Settings tab.
In this example, the same subnet settings as the host PC are used, but the LSBs of the IP Address are set to “20” so that the analyzer won’t interfere with the host PC (which has an IP address of 192.168.1.15).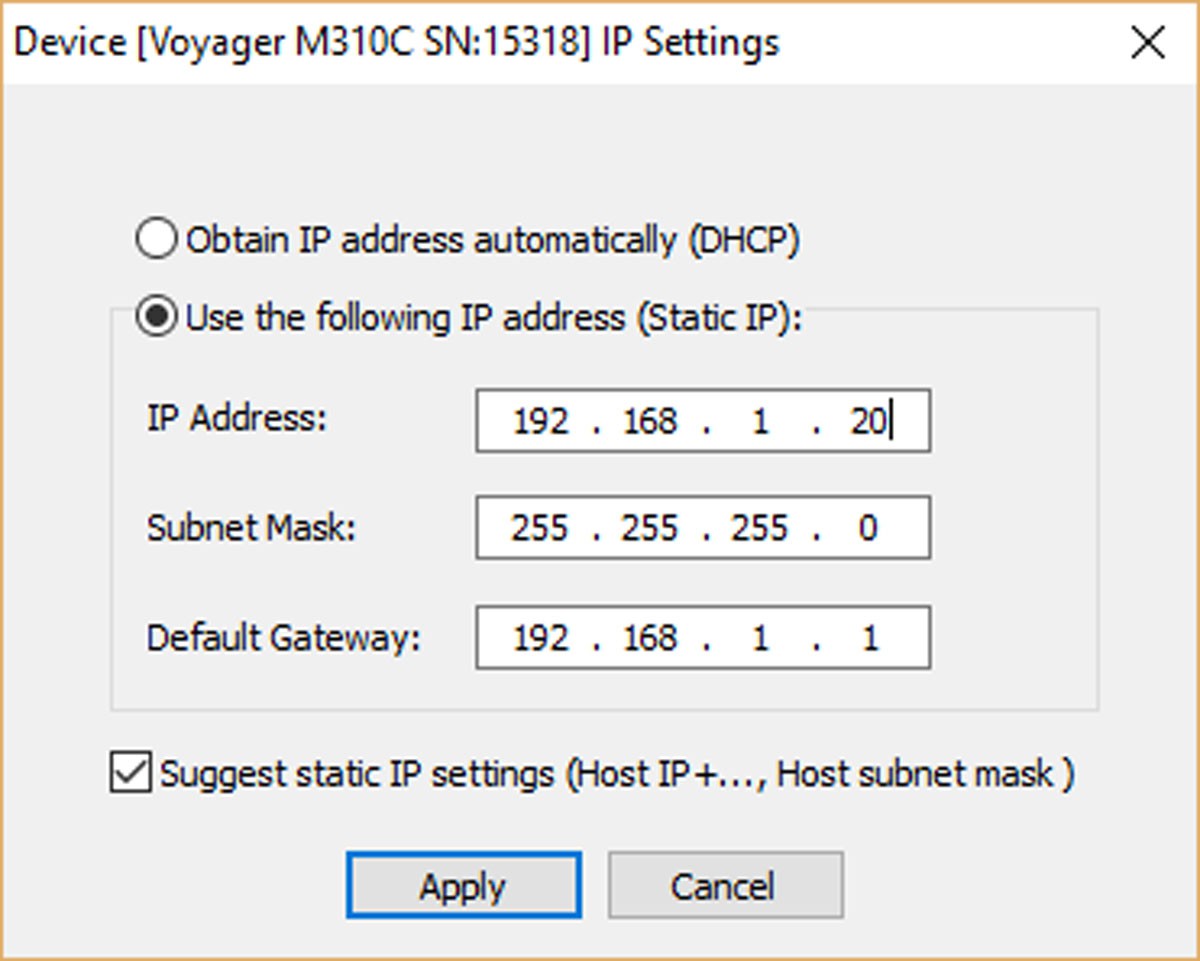
Set the Static IP Address for the analyzer -
Click Apply. A confirmation message appears telling you that the new IP Settings have been applied.
Ethernet Direct Connection
-
Ensure the USB cable is NOT attached the USB analyzer, then attach an Ethernet cable from the host PC to the analyzer.
-
Power cycle the analyzer.
-
Wait for the analyzer to initialize (the blue LED comes on after initialization), then start the USB Protocol Suite software.
-
Select Setup > All Connected Devices, then select the analyzer you want to connect. The Connect button will be active.
The Analyzer Devices window shows the analyzer has connected. -
Close the window and begin recording.
Using a Dynamic IP (DHCP) Address
-
To use a DHCP network, make sure that the host machine connects to a DHCP network, then connect the Ethernet port on the analyzer to the DHCP network.
Note: If the DHCP network uses a firewall, you must set the firewall to allow the analyzer device on the network. See Allow USB Protocol Suite Through Local Firewall.
Direct connection from the Ethernet port on the host machine to the Ethernet port on the analyzer is supported in this release. See IP Settings (Voyager only).
-
Turn on the analyzer.
Note: At power-on, the analyzer initializes itself in approximately ten seconds and performs a self-diagnostic that can last a few minutes. If the diagnostics fail, call Teledyne LeCroy.
-
Complete the analyzer setup described in Application Startup.
WARNING: Do not change from USB to Ethernet, or back, without cycling the analyzer’s power.
Note: Disconnecting USB or Ethernet during capture or uploading of trace data is not supported, and might cause the software to malfunction or crash.
Firewall Exceptions
-
The installer provides the option to set Windows Firewall exceptions to enable full communication between USB Protocol Suite and network-attached analyzers.
-
The installer only sets such exceptions for Private and Domain networks. For security reasons, the installer will not modify firewall settings for Public networks.
-
If the network you use is Public, then either set it as Private or Domain, or manually add a firewall exception to allow USB Protocol Suite to access all TCP/ UDP ports. You may need to contact your network administrator for help with configuring the Firewall.
-
The installer does not set exceptions for any 3rd-party firewalls. Contact your network administrator for help with setting exceptions that allow USB Protocol Suite to access all TCP/UDP ports.