
You can daisy-chain two analyzers if they both have a CATC SYNC port. Voyager M3x, M310, M310C, M310P/M310e, M4x, M480x, M4120, and Advisor T3 have built-in CATC SYNC ports and only require a cross-connect or octopus cable accessory kit.
After the analyzers are connected, recording starts simultaneously and triggers occur simultaneously, with synchronized timestamps. This feature can be “soft” disconnected by modifying the CATC Sync options on the Recording Options General tab.
You must select both analyzers in the Device List (see Analyzer Devices).
WARNING: If you are using other types of analyzers (NOT USB!) in your daisy- chain (including PCIe, DDR, SAS, SAS, FC, net) and do not want to use the daisy-chaining feature of synchronized recordings, you must UNPLUG the cable. If you do not unplug, the electrical signal prevents recording on all analyzers.
NOTE: In this software version, daisy-chained recording only works if you use two Voyagers OR two Advisor T3s. You cannot use one of each.
Capturing USB 2.0 traffic with CATC Sync or Cross Sync
When using Cross Sync or CATC Sync and capturing USB 2.0 traffic, attach the USB 2.0 capturing analyzer device at the OUT connector at the beginning of the CATC SYNC chain. Otherwise, the timestamps will not be synchronized.
The USB 2.0 clock, for any downstream Voyager or Advisor T3s, will not be synchronized with the upstream CATC-Sync devices, unless there is also 3.2 traffic on the downstream analyzer(s). In cases of CATC-Syncing with USB analyzers capturing 3.2 traffic, all boxes will have the correct synchronized timestamps.
Removing Expansion Cards
You can remove expansion cards using two tools:
-
Standard (flat blade) 3/16” screwdriver
-
Teledyne LeCroy Extraction Tool (part number 230-0160-00)
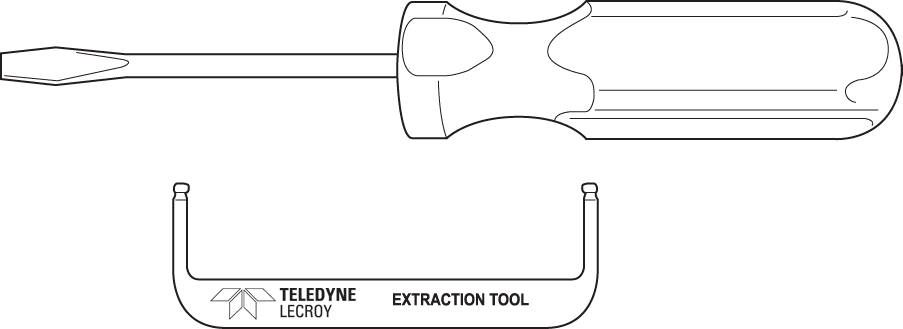
To remove an expansion card, follow these steps:
-
Unplug the system from AC power and turn the system so the expansion port is facing you.
Note the two retaining screws and the holes for the extraction tool, which are located on the panel of the expansion card.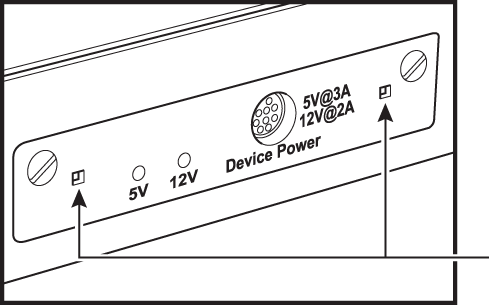
Retaining Screws and Holes for Extraction Tool
NOTE: The example shows a different expansion card, but the removal method is the same.
-
Insert the prongs of the extraction tool into the holes in the expansion card panel.
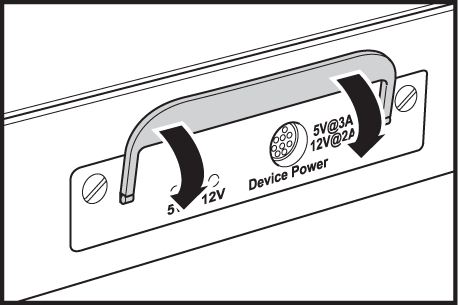
Insert Extraction Tool
NOTE: If the prongs do not slip easily into the holes, use a small nail file or similar device to remove paint from the prongs.
-
Rotate the extraction tool to a horizontal position to lock the prongs into place.
-
Using the screwdiver, turn both retaining screws counter-clockwise approximately two full turns, until you feel a slight resistance.
DO NOT FORCE THE RETAINING SCREWS after two turns.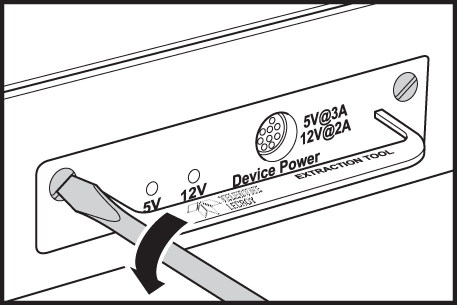
Turn Screws Counter-Clockwise -
Using the extraction tool as a handle, gently wriggle the expansion card forward about 1/8”.
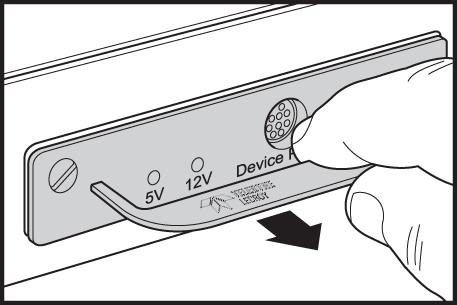
Gently Wriggle Handle Forward -
Repeat steps 4 and 5 approximately three times, until the card is free from the retaining screws and you can remove the card from the system.
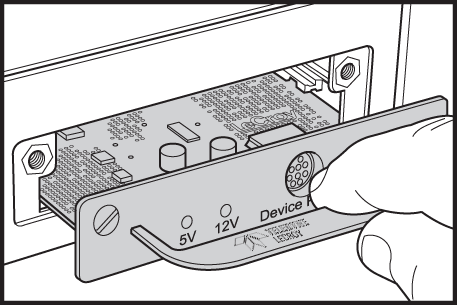
Remove Card