
You create Batch Scenarios on a host machine running the Net Protocol Suite application. You then specify the Batch Scenarios for execution on a SierraNet platform.
The Net protocol Suite application provides a user friendly interface for building Batch Scenarios. The interface prompts you for simple decisions and choices using buttons and has a drag and drop interface. As you make your selections, the script takes shape automatically in the Batch Scenario window.
Click the Add State button, then drag and drop Commands and Events in the new State panels that get created. If invalid actions are assigned, then a red Invalid Session message displays in the Batch Log panel.
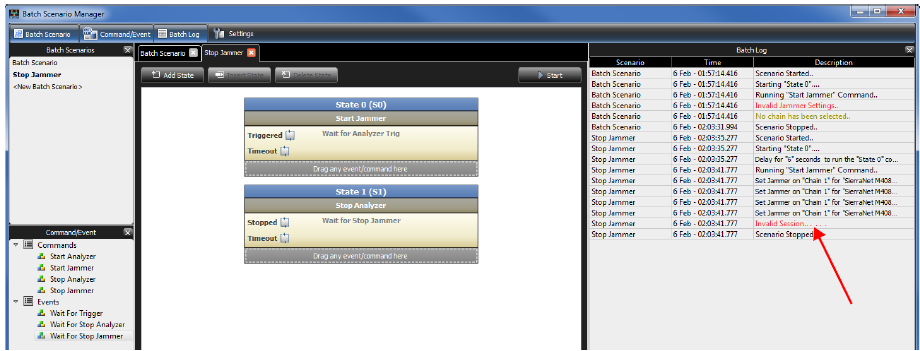
Adding Commands
Four types of commands are available:
Start Analyzer
Drag and drop the Start Analyzer command to display the Analyzer properties window.
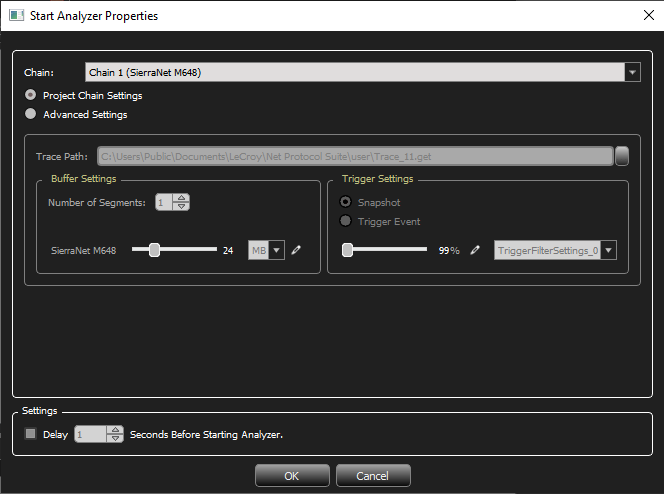
Chain: Select a Chain from the drop-down list.
Project Chain Settings: Select Project Chain Settings.
Advanced Settings: Select Project Chain Settings to activate the settings below:
Trace Path: Click the ellipsis to display the Select Trace File Name dialog to save the trace file.
Buffer Settings: Set the number of segments and the buffer size.
Trigger Settings: Select Snapshot or Trigger Event. Select the Trigger Filter Settings from the drop-down list and move the slider to the desired percentage.
Start Jammer
-
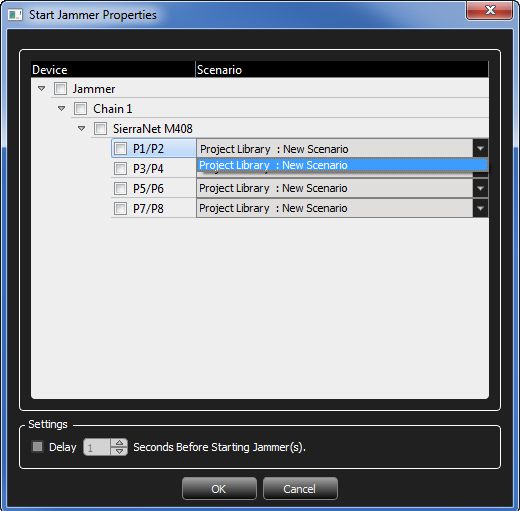
Drag and drop the Start Jammer command to display the Start Jammer Properties window.
-
Select the Jammer check box to select all four port pairs, or select individual port pairs.
-
If a delay is needed after the command is executed, select the Delay check box and set the time in seconds.
Start Exerciser
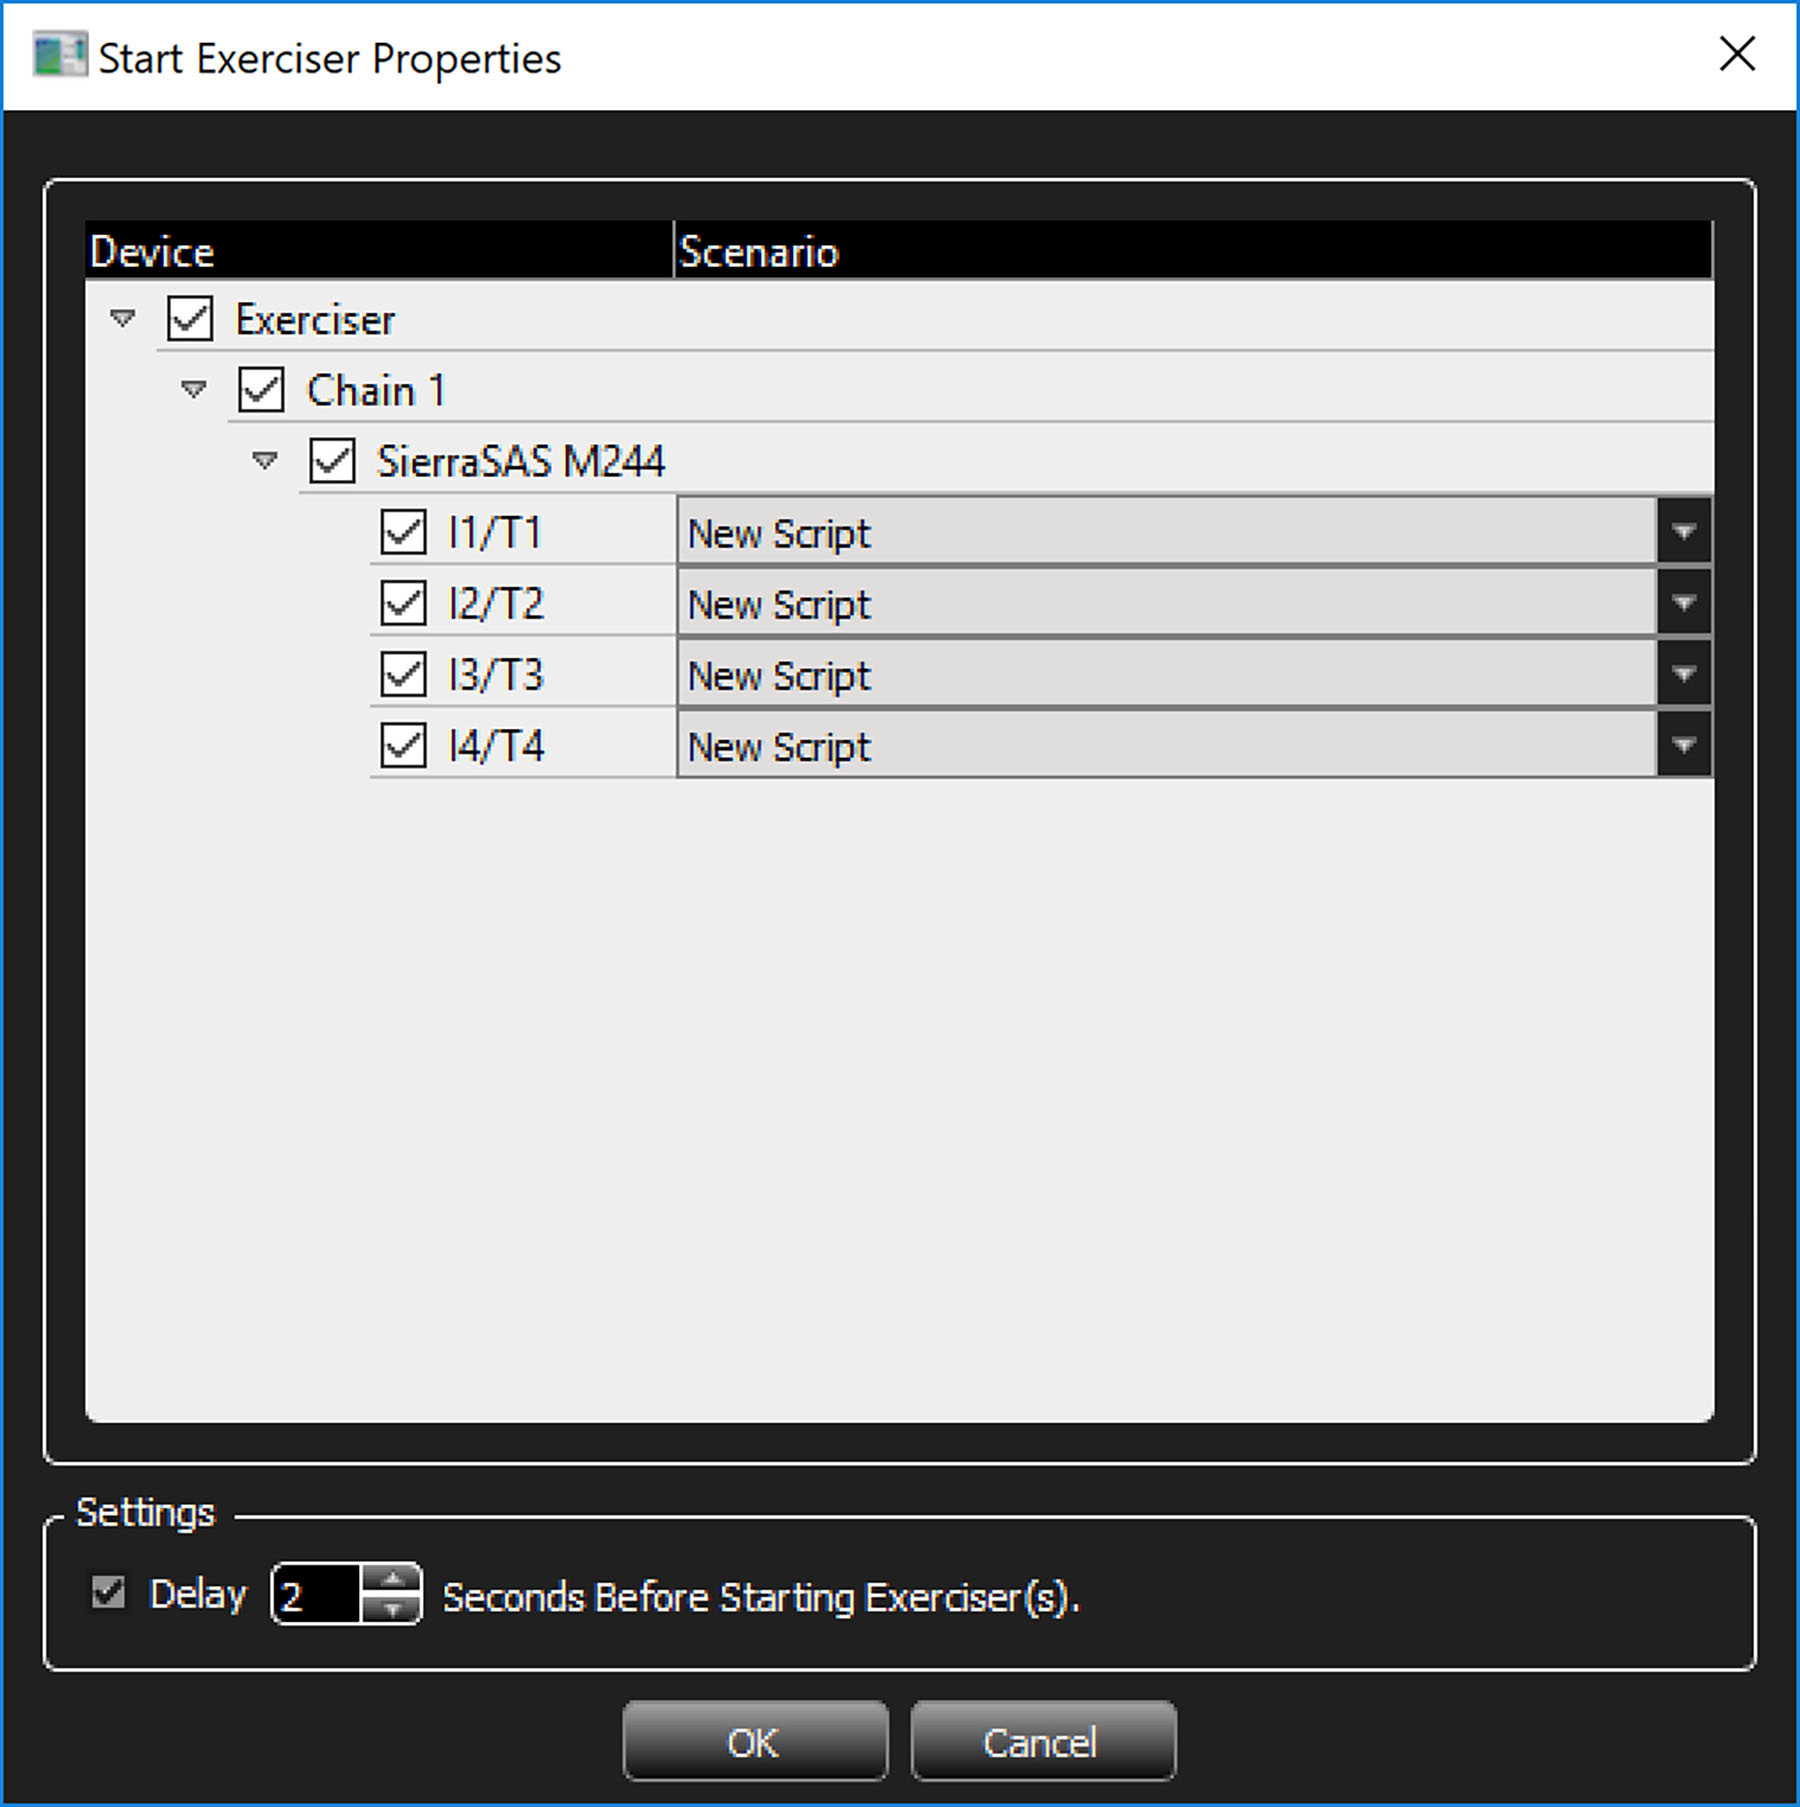
Drag and drop the Start Exerciser command over the State Command tab to display the Start Exerciser Properties dialog.
Stop Analyzer
-
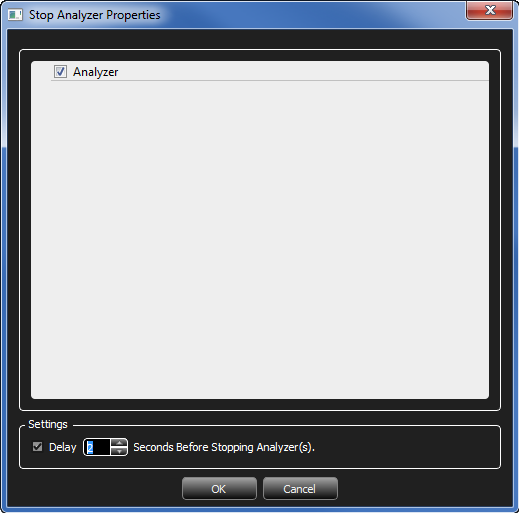
Drag and drop the Stop Analyzer command to display the Stop Analyzer Properties window.
-
Select the Analyzer checkbox. If a delay is needed after the command is executed, select the Delay checkbox and set the time in seconds.
Stop Jammer
-
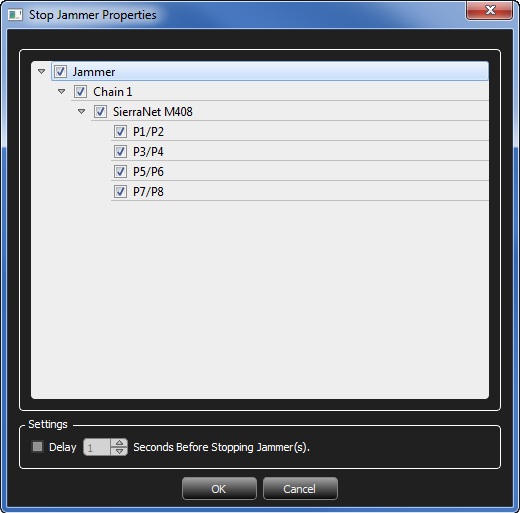
Drag and drop the Stop Jammer command to display the Stop Jammer Properties window.
-
Select the Jammer check box to select all four port pairs or select individual port pairs.
-
If a delay is needed after the command is executed, select the Delay check box and set the time in seconds.
Stop Exerciser
-
Drag and drop the Stop Exerciser command to open the Stop Analyzer Properties window.
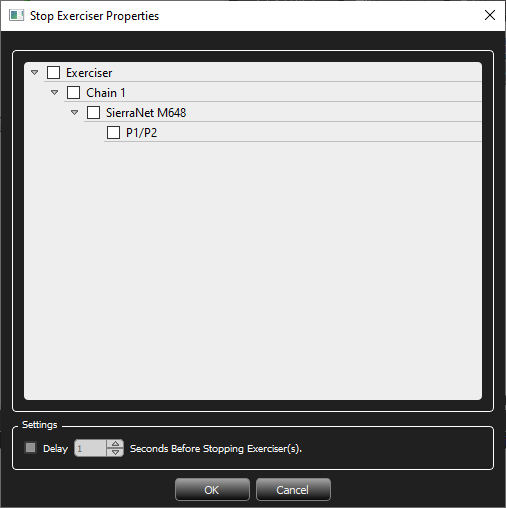
Stop Exerciser Properties -
Click in the Exerciser check box to select all available port pairs or select individual port pairs.
-
If a delay is needed after the command is executed, select the Delay check box and set the time in seconds.
Adding Events
The four types of available events are described in this section:
Wait for Trigger
-
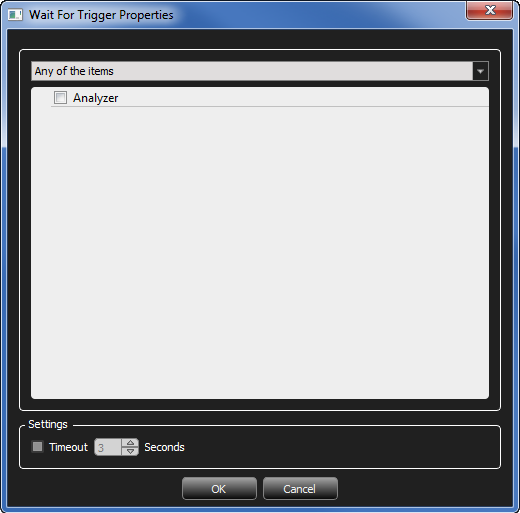
Drag and drop the Wait For Trigger event to display the Wait For Trigger Properties window.
-
Select an option from the drop-down list.
-
To prevent an infinite Wait, you can select the Timeout check box and set the time in seconds.
Wait For Stop Analyzer
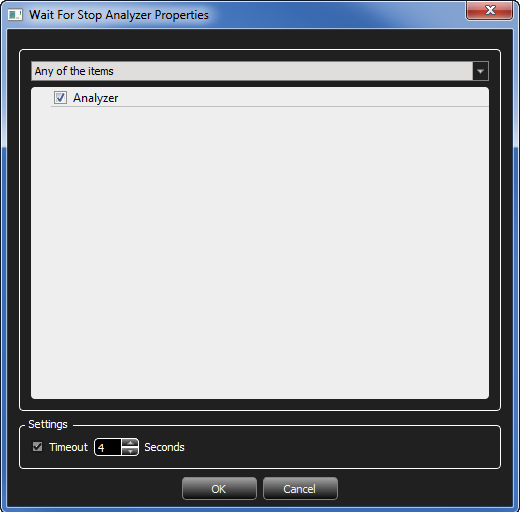
Drag and drop the Wait For Stop Analyzer event to display the Wait For Stop Analyzer Properties window.
Wait For Stop Jammer
-
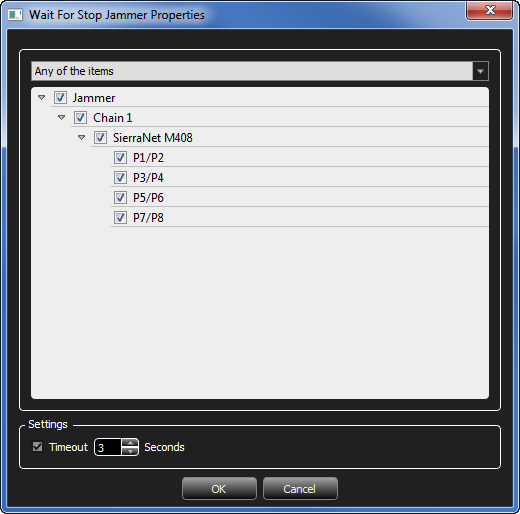
Drag and drop the Wait For Stop Jammer event to display the Wait For Stop Jammer Properties window.
-
Select the Jammer check box to select all four port pairs or select individual port pairs.
-
To prevent an infinite Wait, you can select the Timeout check box and set the time in seconds.
Wait for Stop Exerciser
-
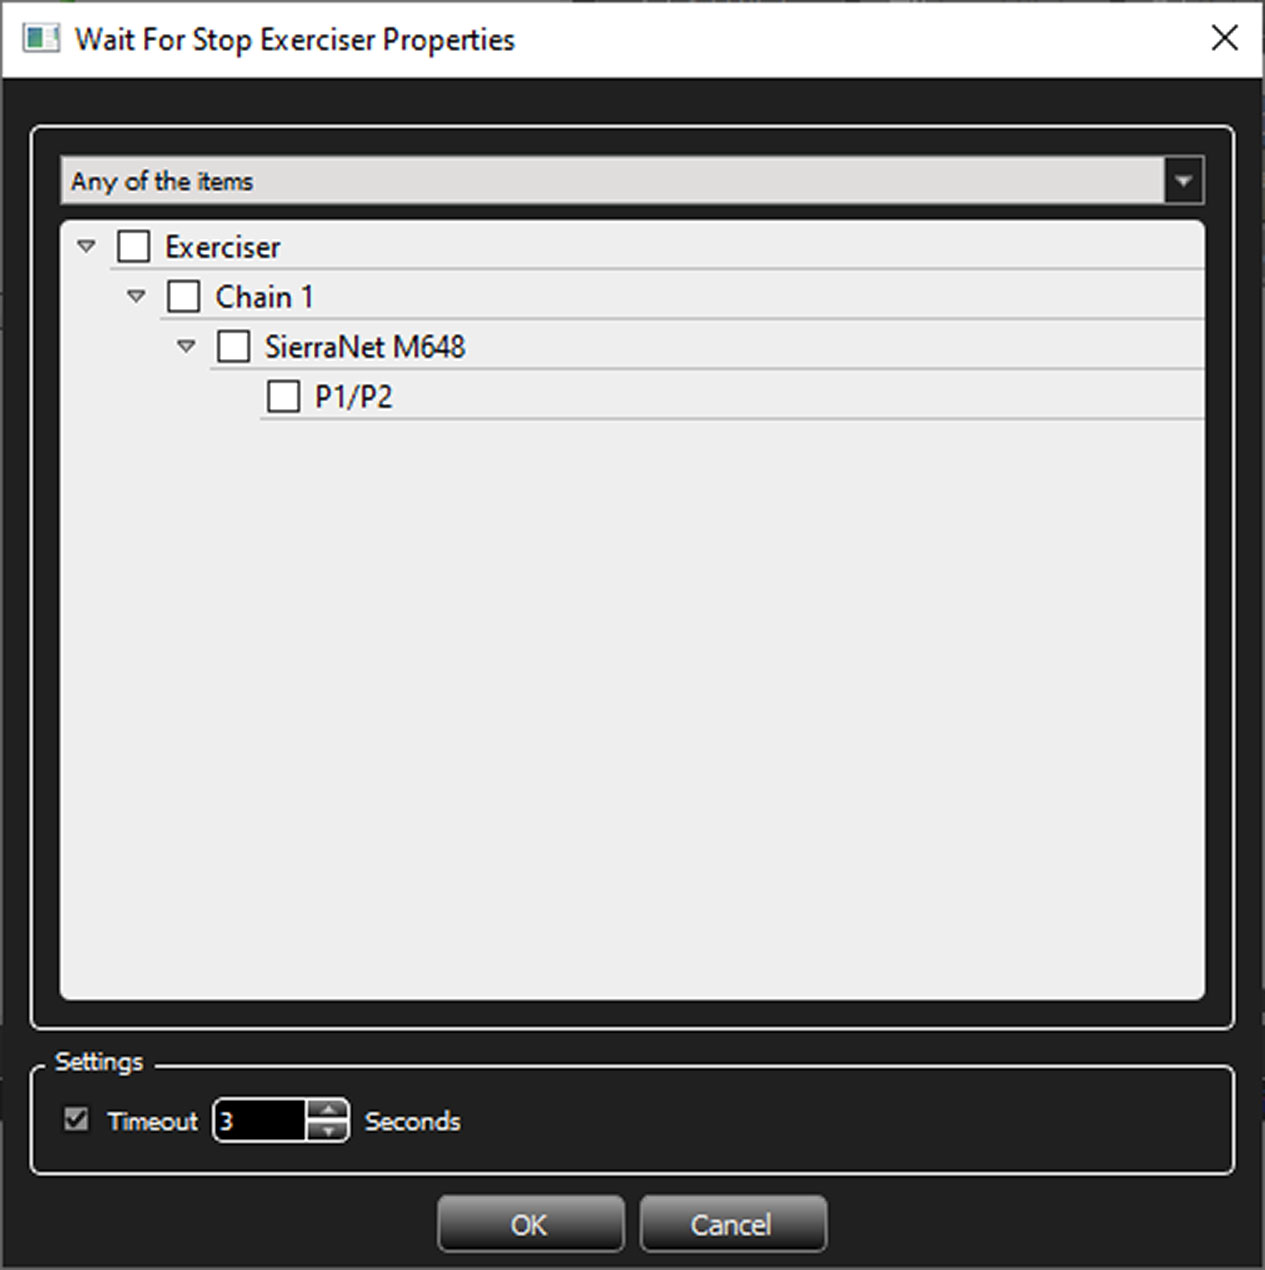
Drag and drop the Wait For Stop Exerciser event to display the Wait For Stop Exerciser Properties dialog.
-
Click in the Exerciser check box to select all available port pairs or select individual port pairs.
-
To prevent an infinite Wait, select the Timeout check box and set the time in seconds.
State Transition
-
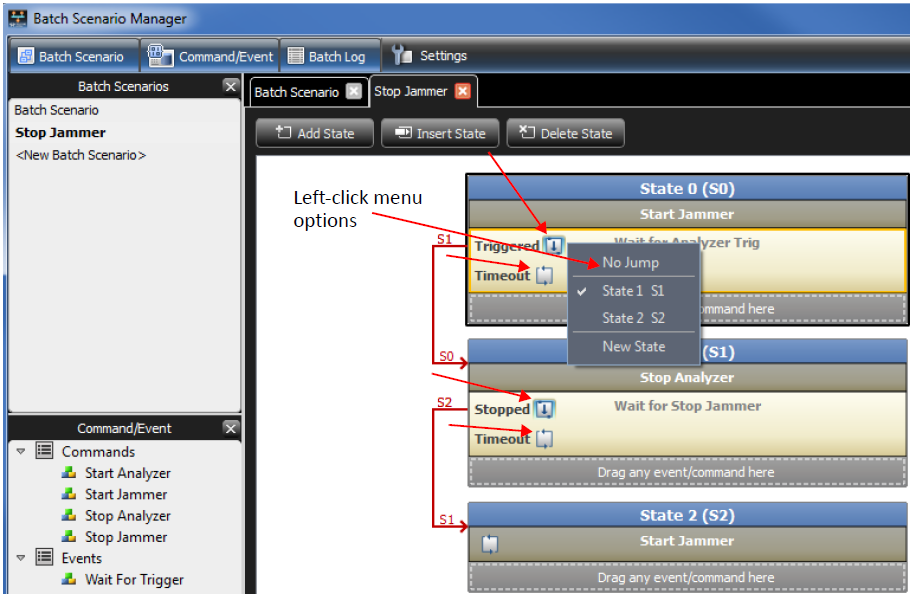
Click the State Transition

-
Click the menu options to display as shown below and select the state to transition to.
-
To remove the state transition, select No Jump.
Global Variables
Each batch scenario contains a list of global variables that allows you to set data for specific fields of frame events, or trigger setting patterns without editing them one by one. Global variables are automatically applied to all the trigger setting patterns that are selected in the Start Analyzer command immediately before you run the command.
If you select Use Project Chain Settings with the Start Analyzer command, global variables are applied to the current trigger settings.
This also works for the Jammer. Global variables are applied automatically to all frame events of a Jammer scenario that are selected in the Start Jammer command, immediately before you run the command.
Global variables have no effect on any trigger settings or Jammer scenarios that are not used in the batch scenario.
Global variables provide dynamically changing event fields in runtime. You can add as many fields as you need to the global variable list and specify the value for them. When running batch mode, the software replaces the value in the specified field for any event in which that field is used. The software looks in all events for that field and replaces the value.
Global Variables Dialog Window
-
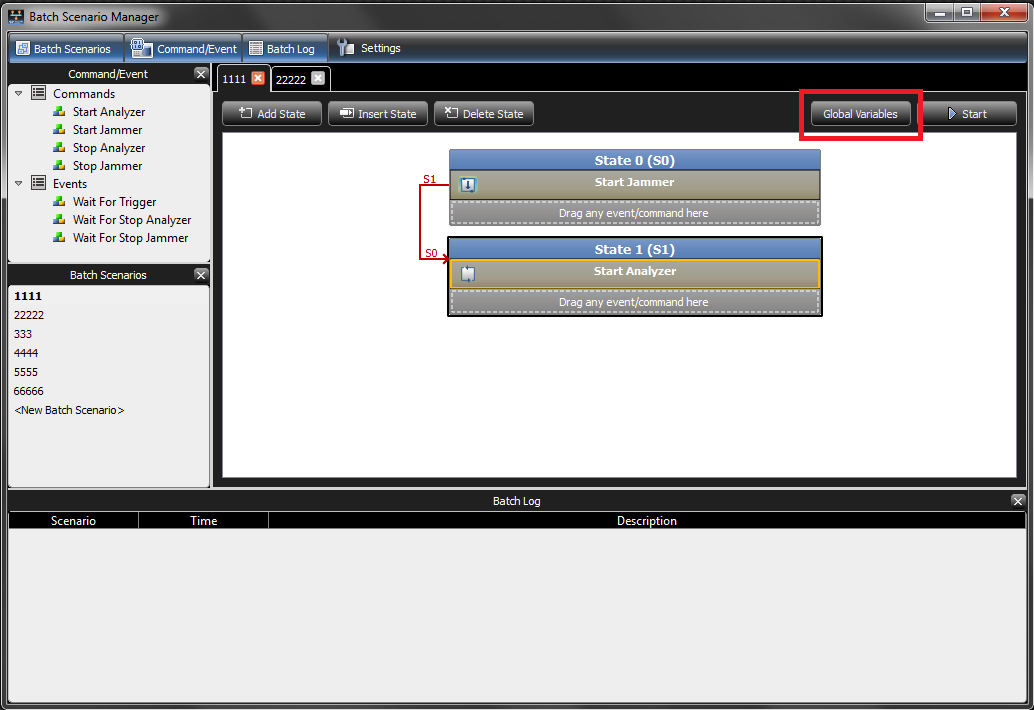
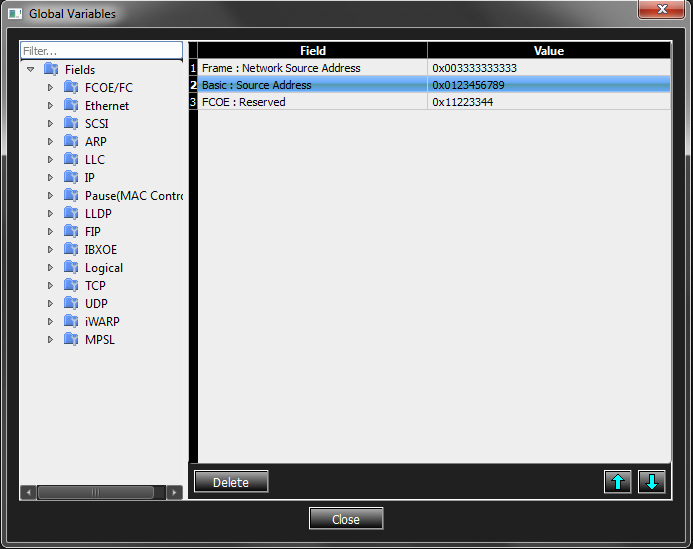
To change the definition of selected global variables, go to Batch Scenario Manager and click the Global Variables button. The Global Variables dialog window opens.
This window consists of two panes: on the left, a tree of all available fields. On the right is a table of fields that can be selected.
-
To add a global variable to the table, drag a field from the tree on the left and drop it into the table on the right. This adds the field to the table with an empty value.
-
To edit the value, double-click on the value cell.
-
A red H appears at the left of the value cell. This shows, by default, that the value is to be in hexadecimal format.
-
You can switch between binary and hexadecimal by clicking on the red H; it changes to a red B for binary.
-


-
There is no length limit for the value, but it may trimmed according to field length when it is applied to a frame pattern or event.
-
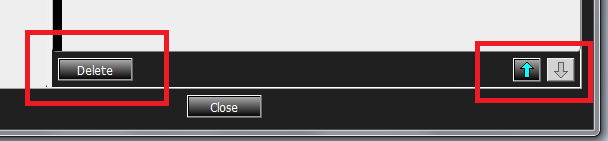
To remove a global variable, select it on the table, then click Delete. The variable is removed from the right pane of the dialog.
The Up and Down arrows let you rearrange the order of variable values that you wish to change, before Net Protocol Suite runs a scenario. For most fields, the order does not matter. However, for the fields that do change the format of events, this order becomes important.
Example
Suppose you want to change the value of the field Opcode in a SCSI command, then change one of the other fields in that SCSI command:
-
When you set Opcode fields, the event fields change automatically; therefore, you must move the Opcode field to the top of the list. You can then change the value of another field.
-
On the other hand, if you want to set the value of a field (e.g., Originator S_ID), changing its value has no effect on the format of other fields in an event. Therefore, you do not need to specify the order in which these fields are accessed.
Note: Replacing any value in a frame pattern or event may cause other fields values to reset. To avoid this, make sure you select the correct order of global variables.
Example
Assume there is a batch scenario with one “Start Jammer” command and global variables as shown in the following two figures.
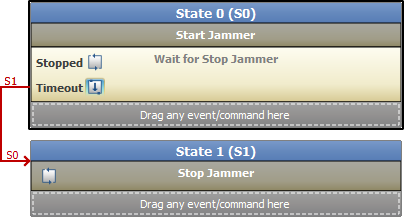
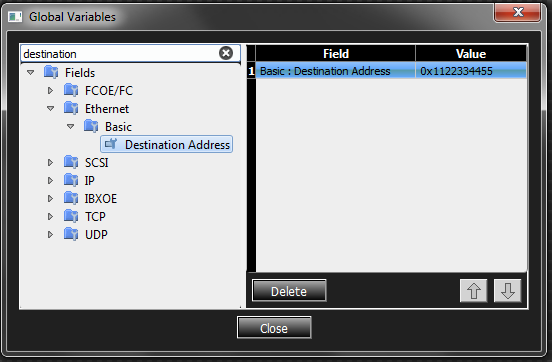
A batch scenario such as this can run a Jammer scenario with a Frame Event. An example is shown below.
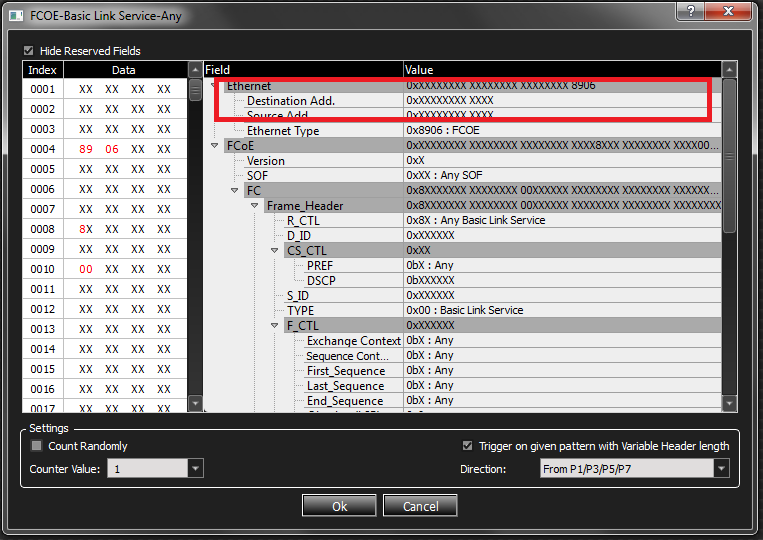
The Destination Address field is 0xXXXXXXXX XXXX. After starting the batch scenario, the expected behavior is for the Destination Address field to be replaced with the value 0x1122334455 from the defined global variable.
If you check the same Jammer Frame event after running the batch, the result is as seen below, which is the expected behavior.
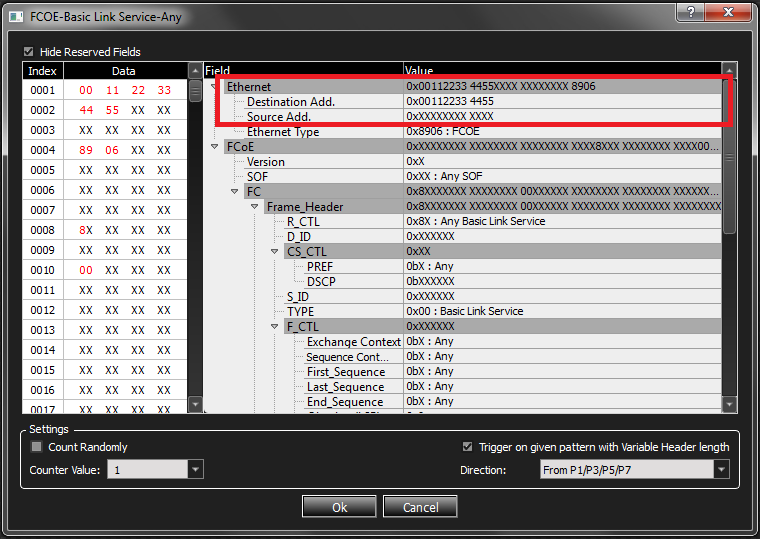
Note: This function makes changes in the actual frame pattern/event which result in changes in your project.