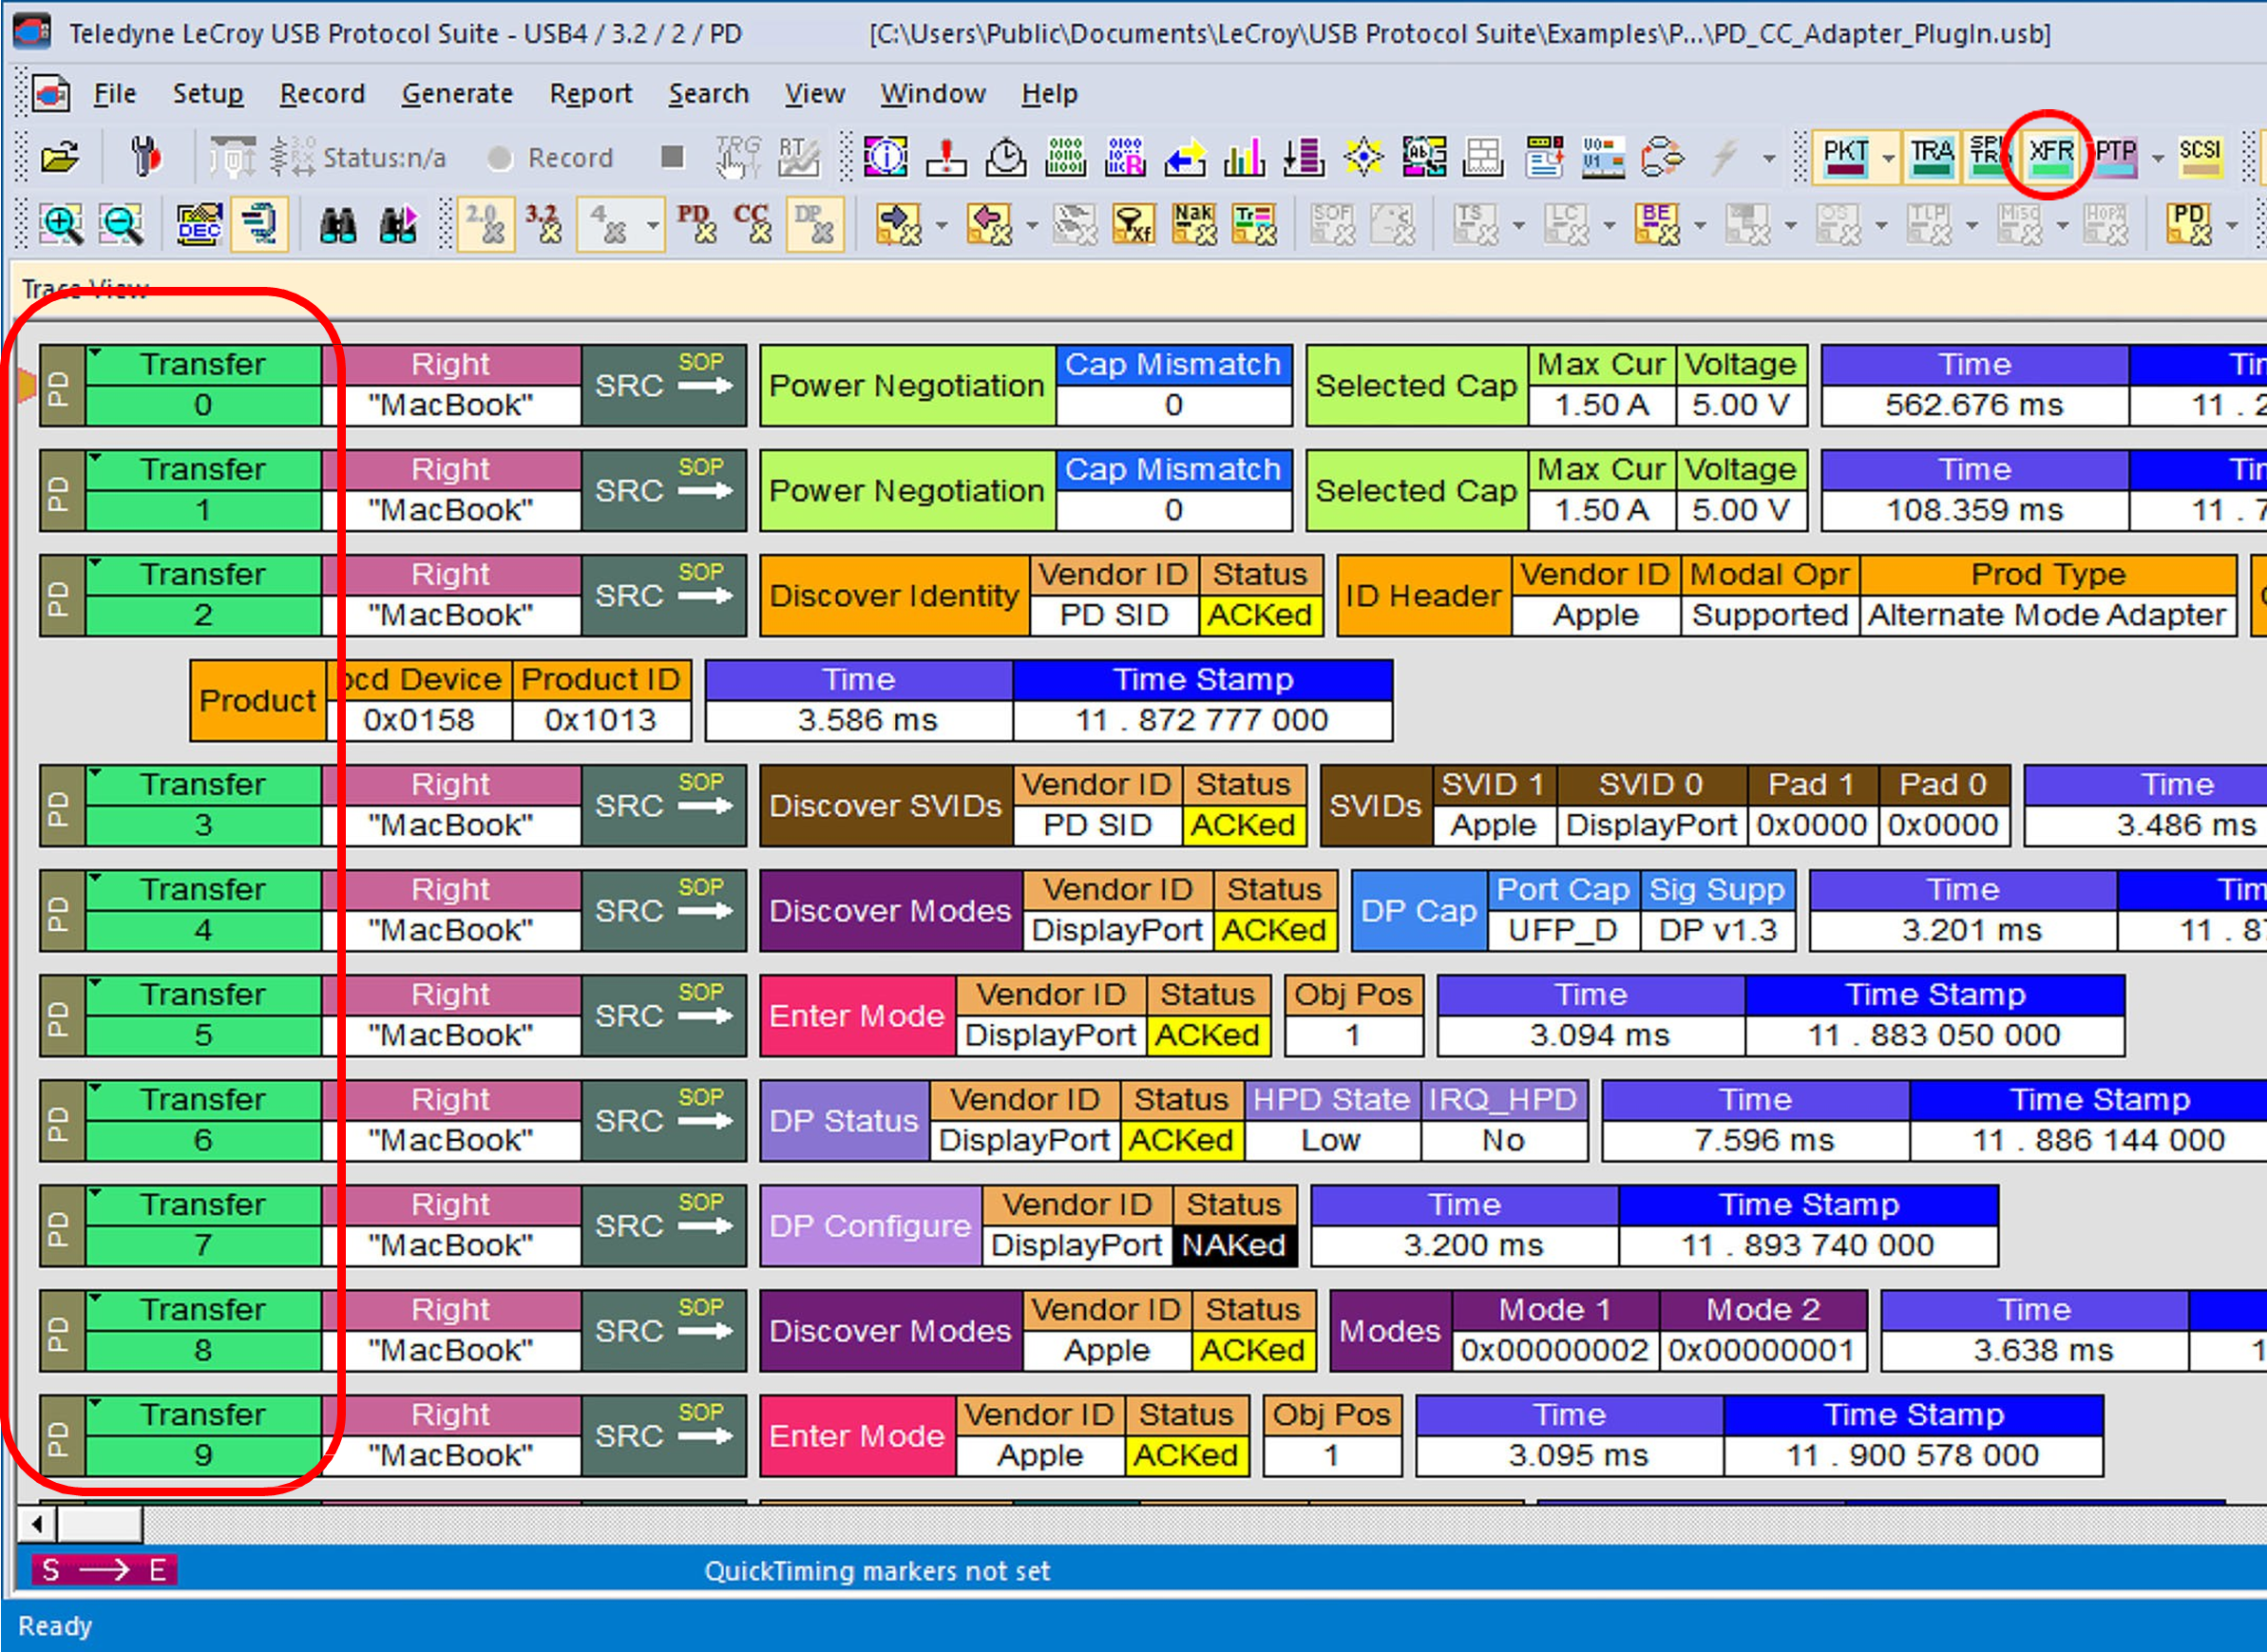
A Transfer is defined in the USB specification as one or more transactions between a software client and its function. USB transfers can be one of four kinds:
-
Control
-
Interrupt
-
Bulk
-
Isochronous
The system can display all four types. The default display mode is Packet View. Before you can view decoded transfers, you must switch from Packet View (or Transaction View) to Transfer View.
To select Transfer View:
Click 
NOTE: Selecting Transfer Level adds a check next to this menu item. If you want to return to Packet View, open the menu and reselect Transfer Level. This action removes the check and returns the display to Packet View.
You can also switch to Transfer View from the Menu Bar:
-
Select Display Options under Setup to display the Display Options General window:
-
Check Transfer.
-
Click OK.
View Decoded Transfers
After you set Display Options, the Trace View screen is re-drawn to display decoded transfers in the colors and format you selected.
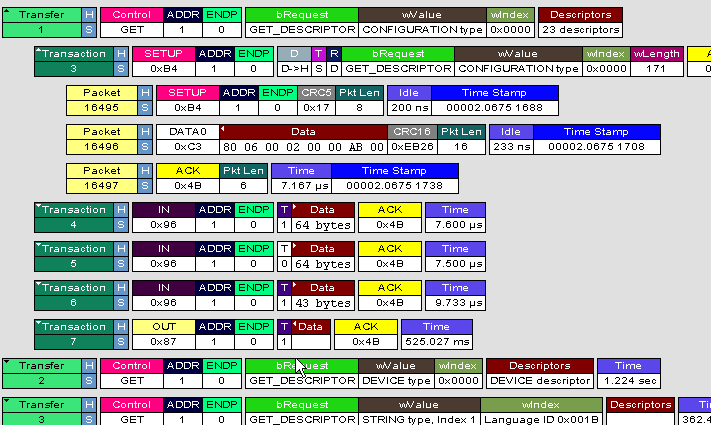
When you instruct the analyzer to display USB transfers, the components of each transfer are collected from the current recording and are grouped below each decoded transfer. Each transfer row shows a transfer with a unique numeration, a label, and color-coded decoding of important data.
NOTE: If CRC errors are found in a DATAx (2.0) packet or a DP (3.2) packet, the data in that packet will not be promoted to the Transaction, Transfer, and so on, levels above, since it is assumed that the data will be re-sent. The data count will show as 0 Bytes.
Expanded and Collapsed Transfers
You can expand a specific transfer to view its parts, which are grouped and indented below the transfer.
To expand a transfer:
Right-click the transfer number you wish to view to display the Expand Transfer menu:
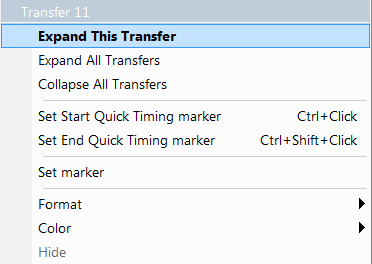
Select Expand This USB Transfer to display the selected transfer in expanded format.
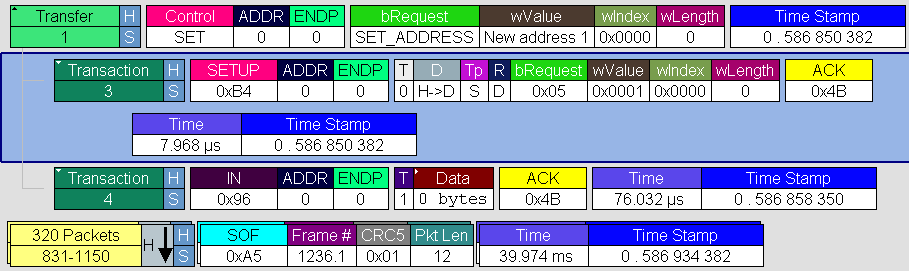
NOTE: The Expand/Collapse transfer feature operates as a toggle: when one format is active, the other appears as an option on the Expand/Collapse drop-down menu.
To collapse a transfer, perform the same operation and select Collapse This USB Transfer. Note that you can choose to expand or collapse:
-
Only the selected Transfer
OR
-
All Transfers
It is not necessary to use the Expand/Collapse Transfers menu to shift between expanded and collapsed views of a transfers. You can double-click the Transfer number field to toggle back and forth between collapsed and expanded views.
Decoding Protocol-Specific Fields in Transactions and Transfers
When transfers or transactions are displayed, the fields in setup transactions and in control, interrupt, and Bulk transfers do not get decoded (by default) and are shown in hexadecimal values. The exceptions are setup transactions and control transfers for standard USB device requests, which are always decoded.
To show specific decoding for class- and vendor-specific device requests and endpoints, you must use the decoding association mechanism described in Decode Requests. Once you perform the association, the protocol-specific fields of transfers and decoded transactions appear in the trace view.
USB4 Transfer View
USB4 transfer view combines configuration layer request/responses as a new layer and provides decoding of data transferred.
To be able to see USB4 transfers, click the 
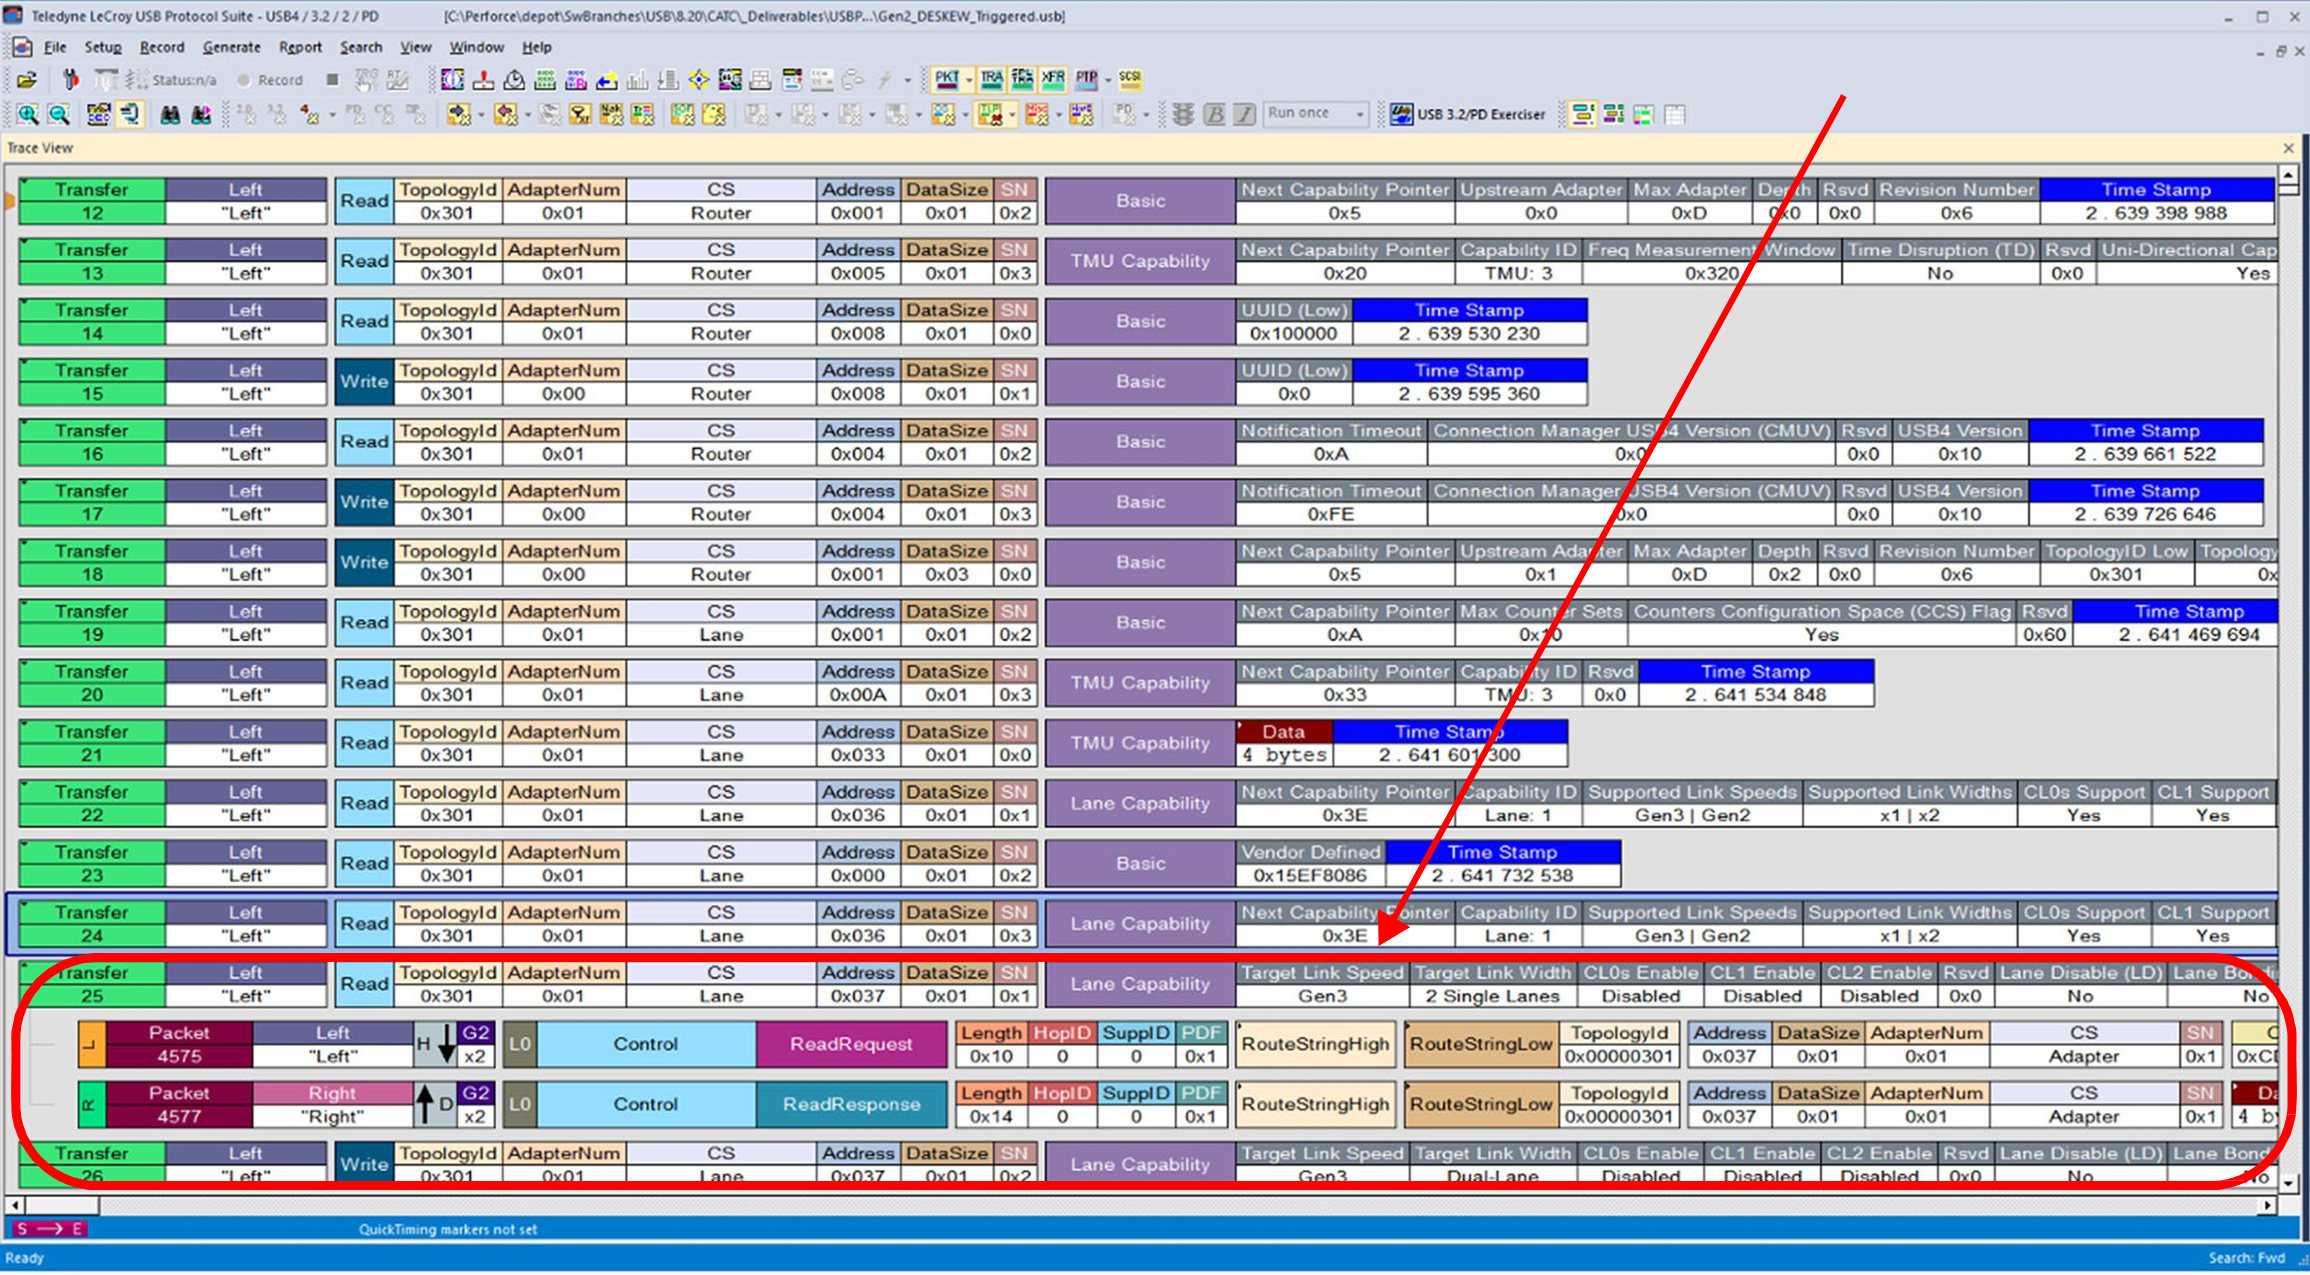
Transfer level decoding shows transfer target configuration space including “Router”, “Adapter”, “Path” and “counters”, and decode register fields in space based on CS type and address.
See the figure below, which shows how a USB4 packet was collected and the transfer layer decoding has been provided.
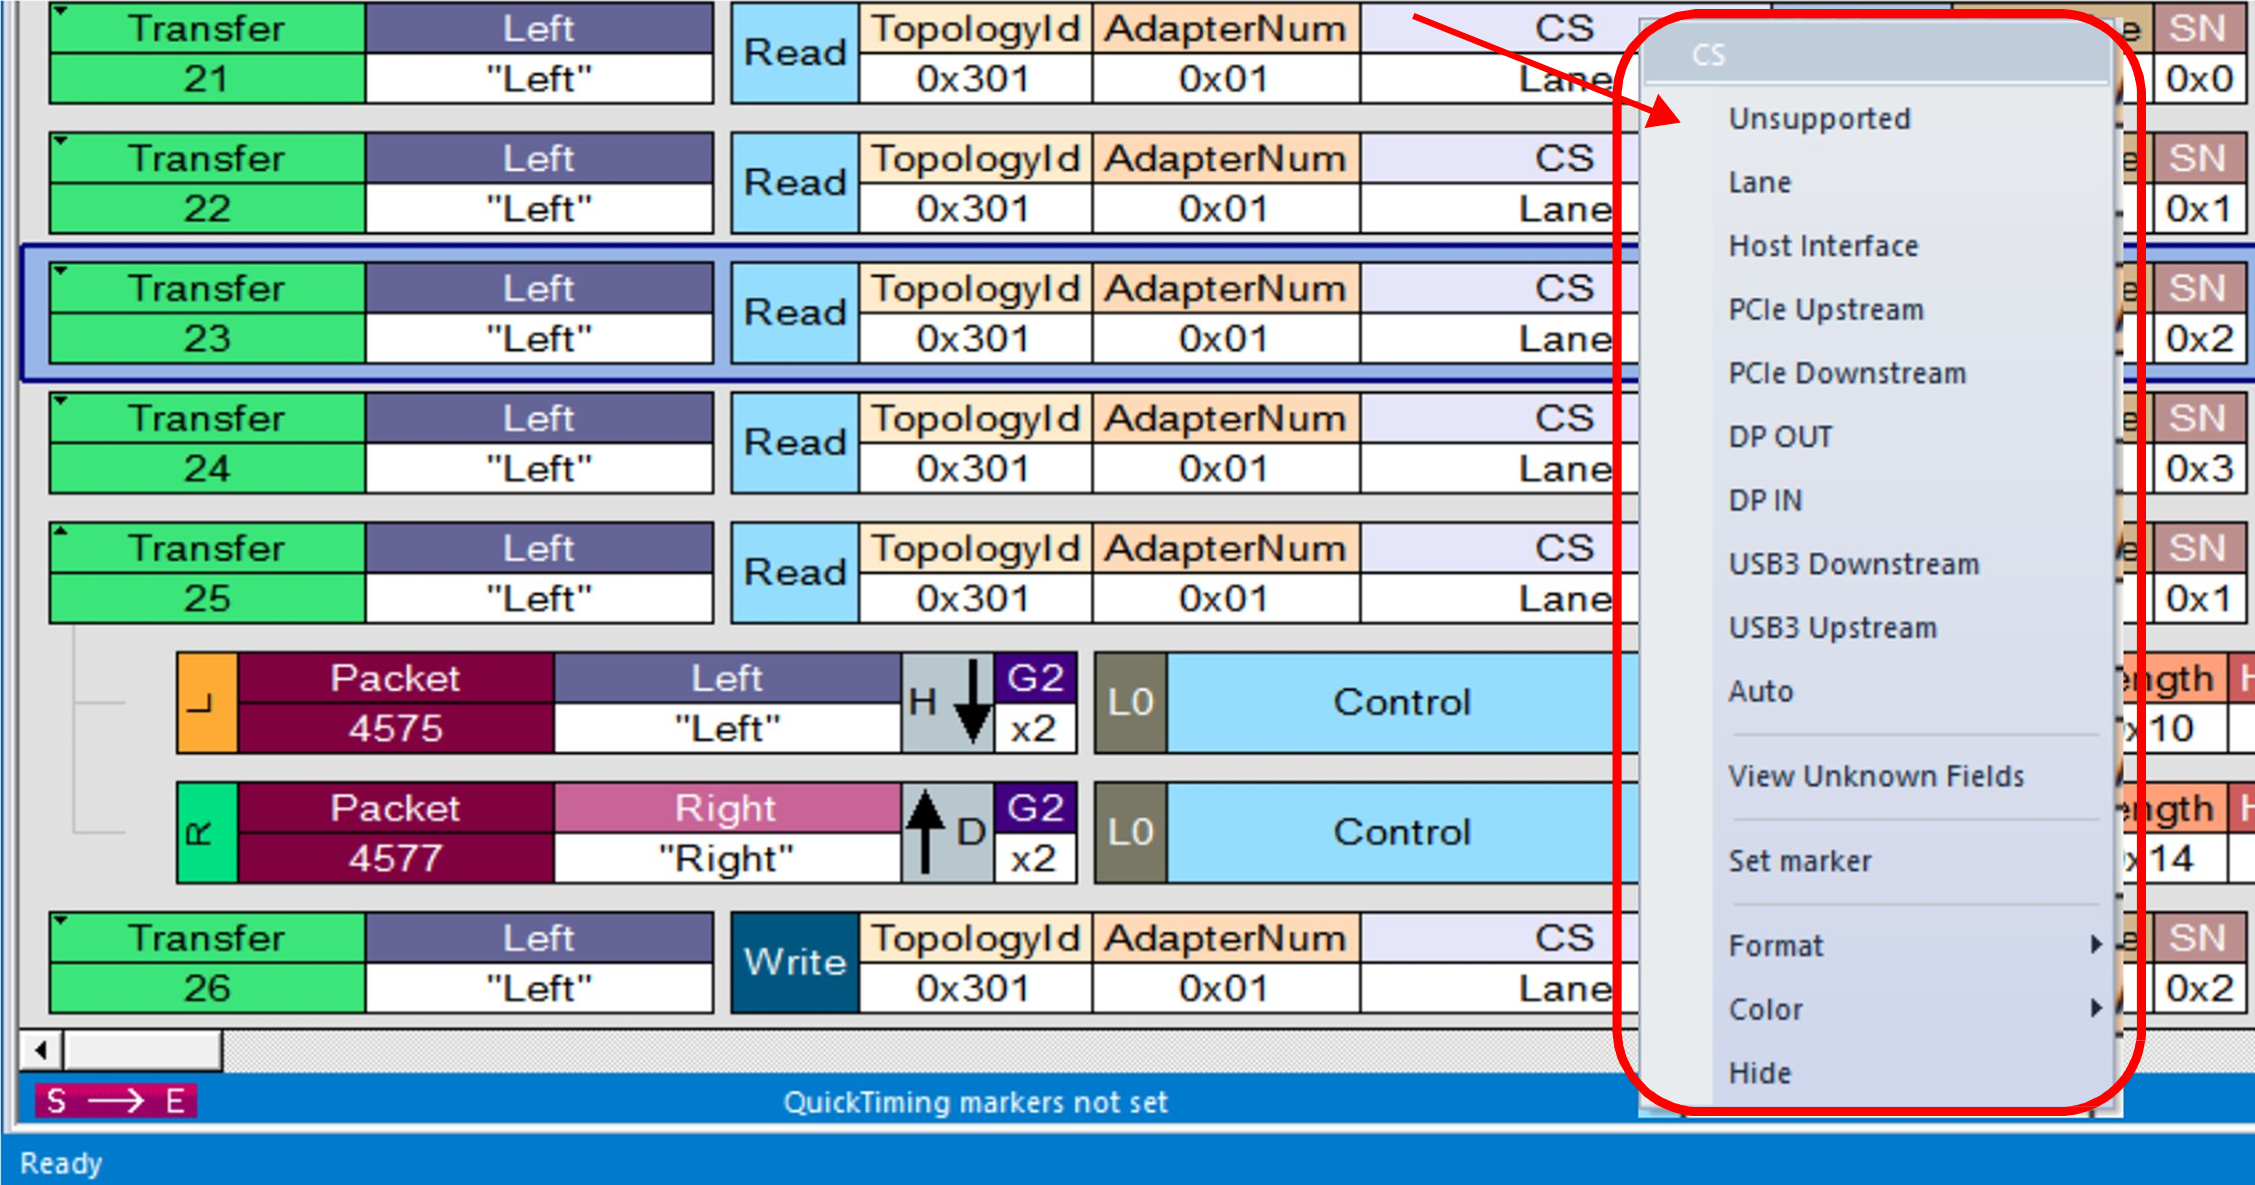
USB Protocol Suite software is able to automatically assign correct configuration space type of transfers, however if required information for this is not available, software will provide a feature that user can assign CS type to transfer to see fields decoded base on assigned type.
See the figure below, which shows available options for assigning CS Type.
Decoding Power Delivery Transfers
You can also use the Transfer