
.CSV files can be created as exports from the contents of 2.0 CATC Trace Packet and Transaction Views, 3.2 CATC Trace Packet views, and any Spreadsheet view. The output is limited to 1 million rows.
NOTE: The format of Export files is NOT compatible with that of files to be used for Import functions. The Import .csv file is based on symbol streams at the 10 bit symbol level. The exports are based on decoded delimited packet bytes.
Export Packets to .CSV
When viewing 2.0 or 3.2 Packets in either the CATC Trace view or the CATC Trace Compressed view, selecting Export > Packets to .CSV exports the packets to a .csv file in a pre-configured format. The first row of that .csv file shows what each column represents.
NOTE: Packet exports include an Additional Fields column when decoded fields do not map to one of the predefined .CSV columns. Unmapped decoded fields are appended to this column as FieldName(Value). If a field value is empty or the same as the field name, only FieldName is shown. Multiple entries are separated by |.
Export Transactions to .CSV
When viewing 2.0 Packets in either the CATC Trace view or the CATC Trace Compressed view, selecting Export > Transactions to .CSV exports the 2.0 transactions to a .csv file in a pre- configured format. The first row of that .csv file shows what each column represents.
Export Spreadsheet View to .CSV
When viewing 2.0 Packets in either the Black and White or Colored Spreadsheet Views Trace view, selecting Export > Spreadsheet to .CSV exports the contents of the spreadsheet to a .csv file in a pre-configured format. The columns match the columns as you have defined them in your Spreadsheet view.
Exporting Packets to USB 2.0 Host Traffic Generator Text File (.utg files)
Before exporting to a .utg file, first make sure the .usb file contains traffic for only one device:
-
Hide all other device addresses in the trace, leaving only the address of your device and the Address 0 (the default enumeration address).
-
Click the Hide Devices

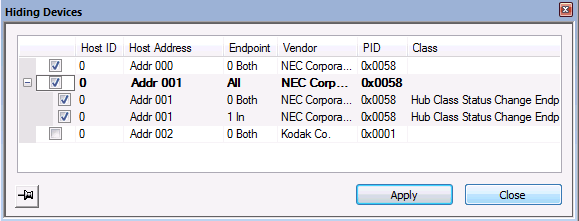
Hiding Devices Dialog Box -
Save to a new file with All and Do not save hidden Packets/Transactions/Transfers selected.
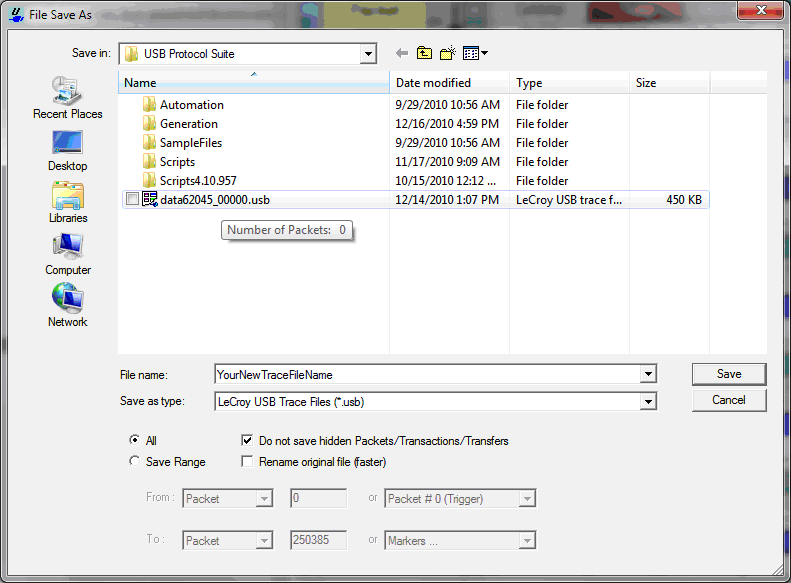
Save to New File dialog -
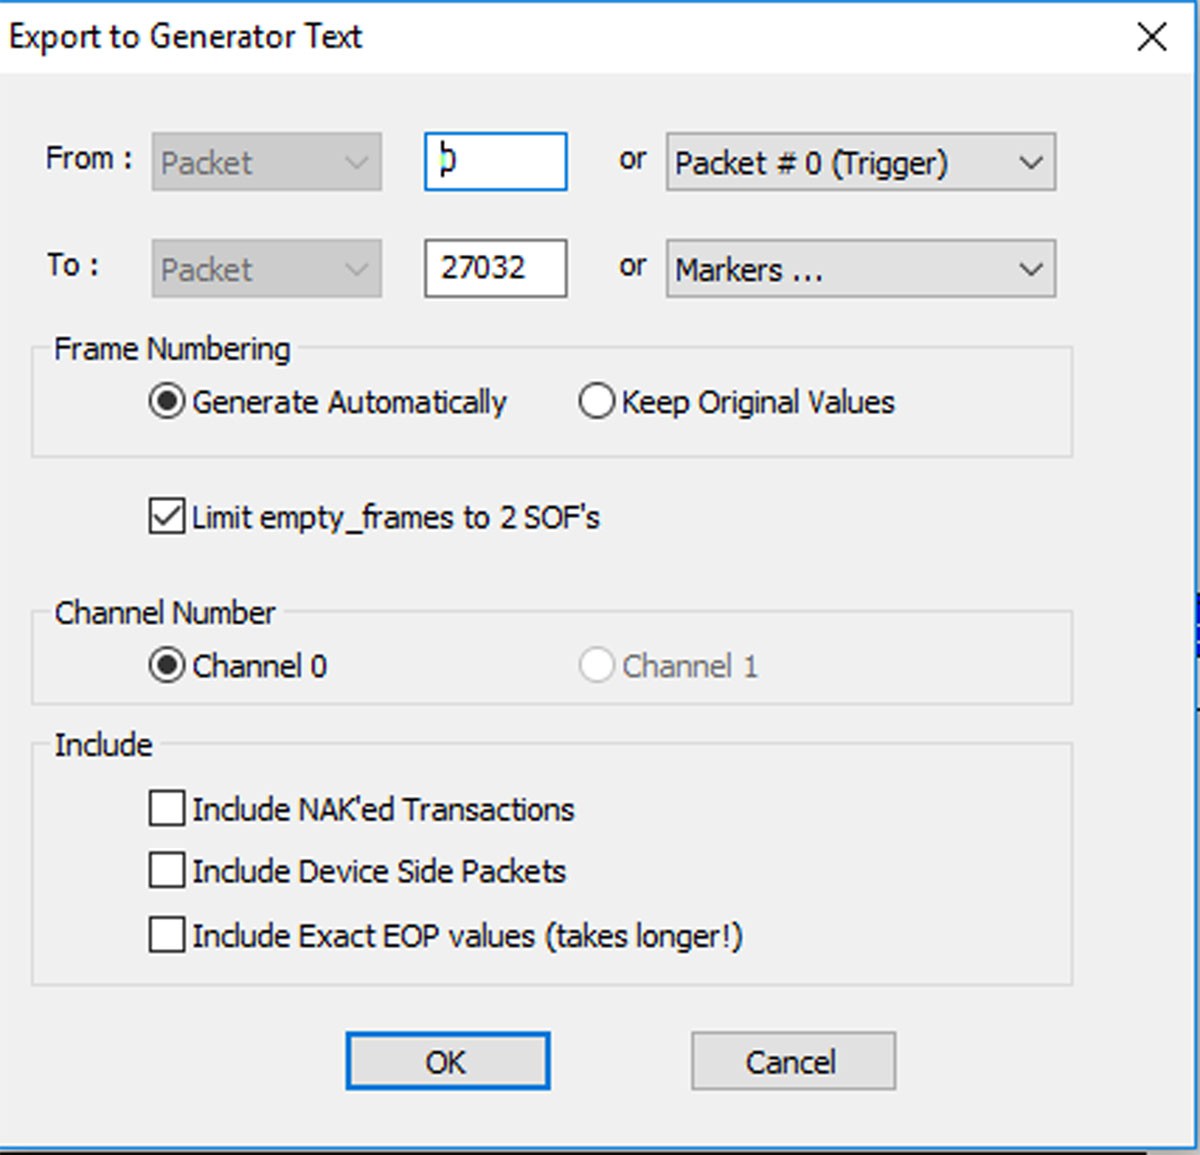
On the new file, you can now click File > Export and select Packets to USB 2.0 Host Traffic Generator Text File (.utg)... The following dialog appears:
If the captured file was Hi Speed and was recorded in Auto-Speed Detect mode, you must add a chirp = here statement before the first SOF packets in the .utg file. This is required because when the capture is made in Auto-Speed Detect mode, the first “Chirp” sequence is not captured in the trace file.
Export USB4 Tunneled PCIe Traffic to PCIe Protocol Suite Trace File
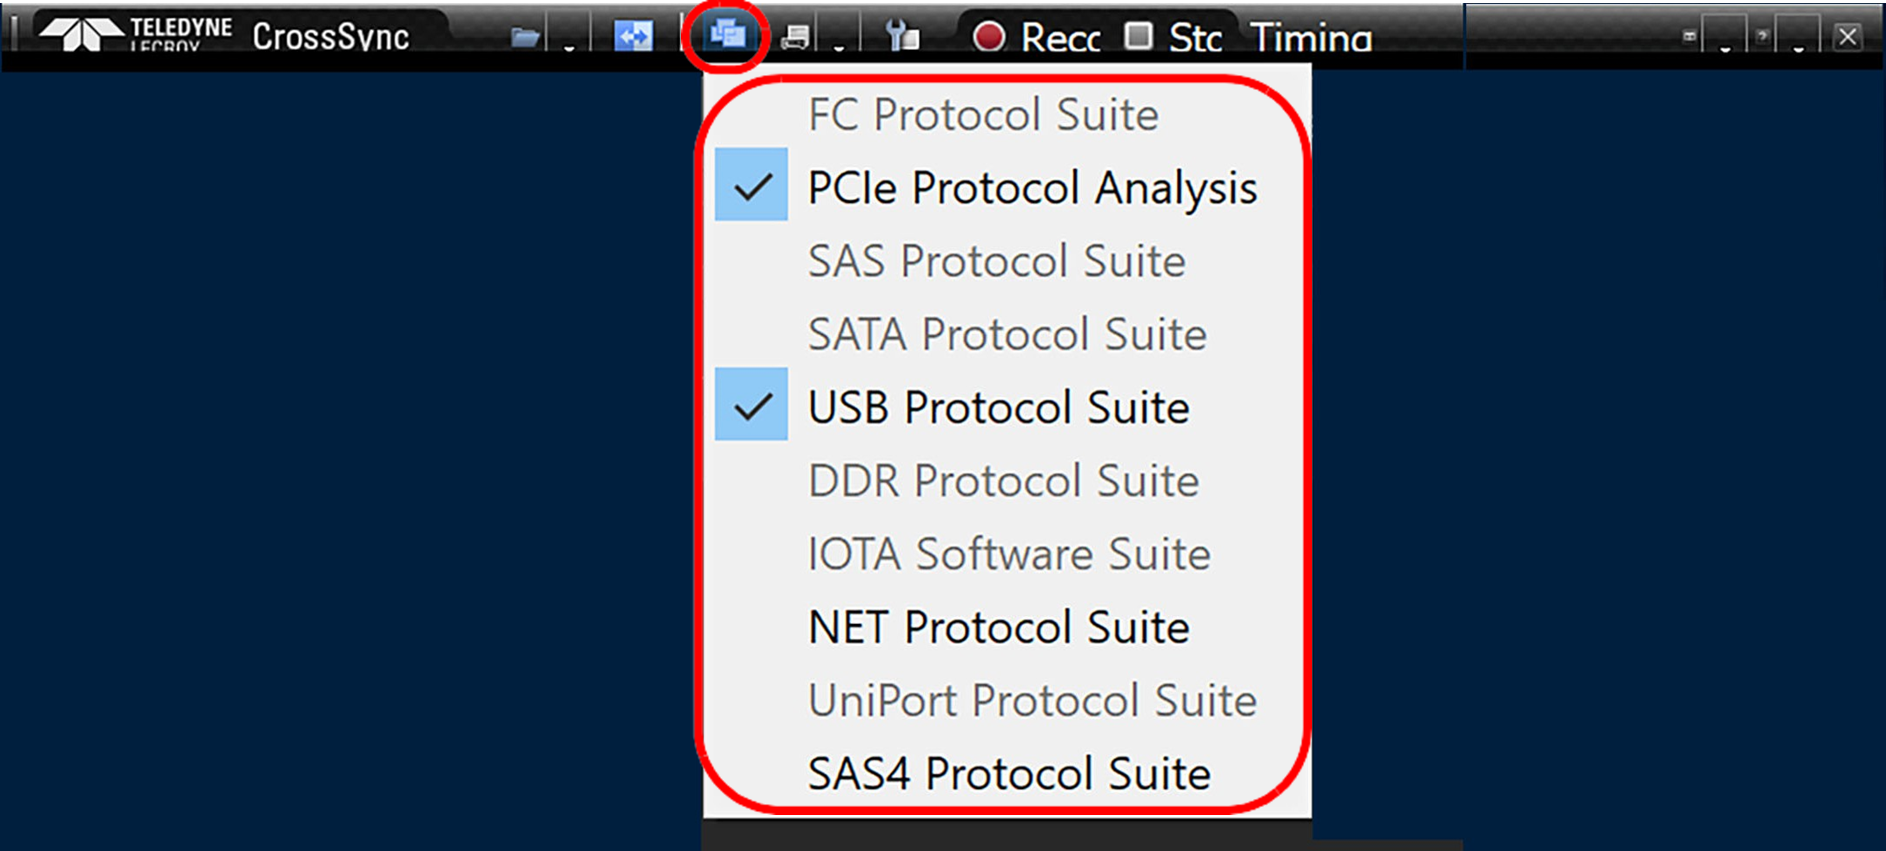
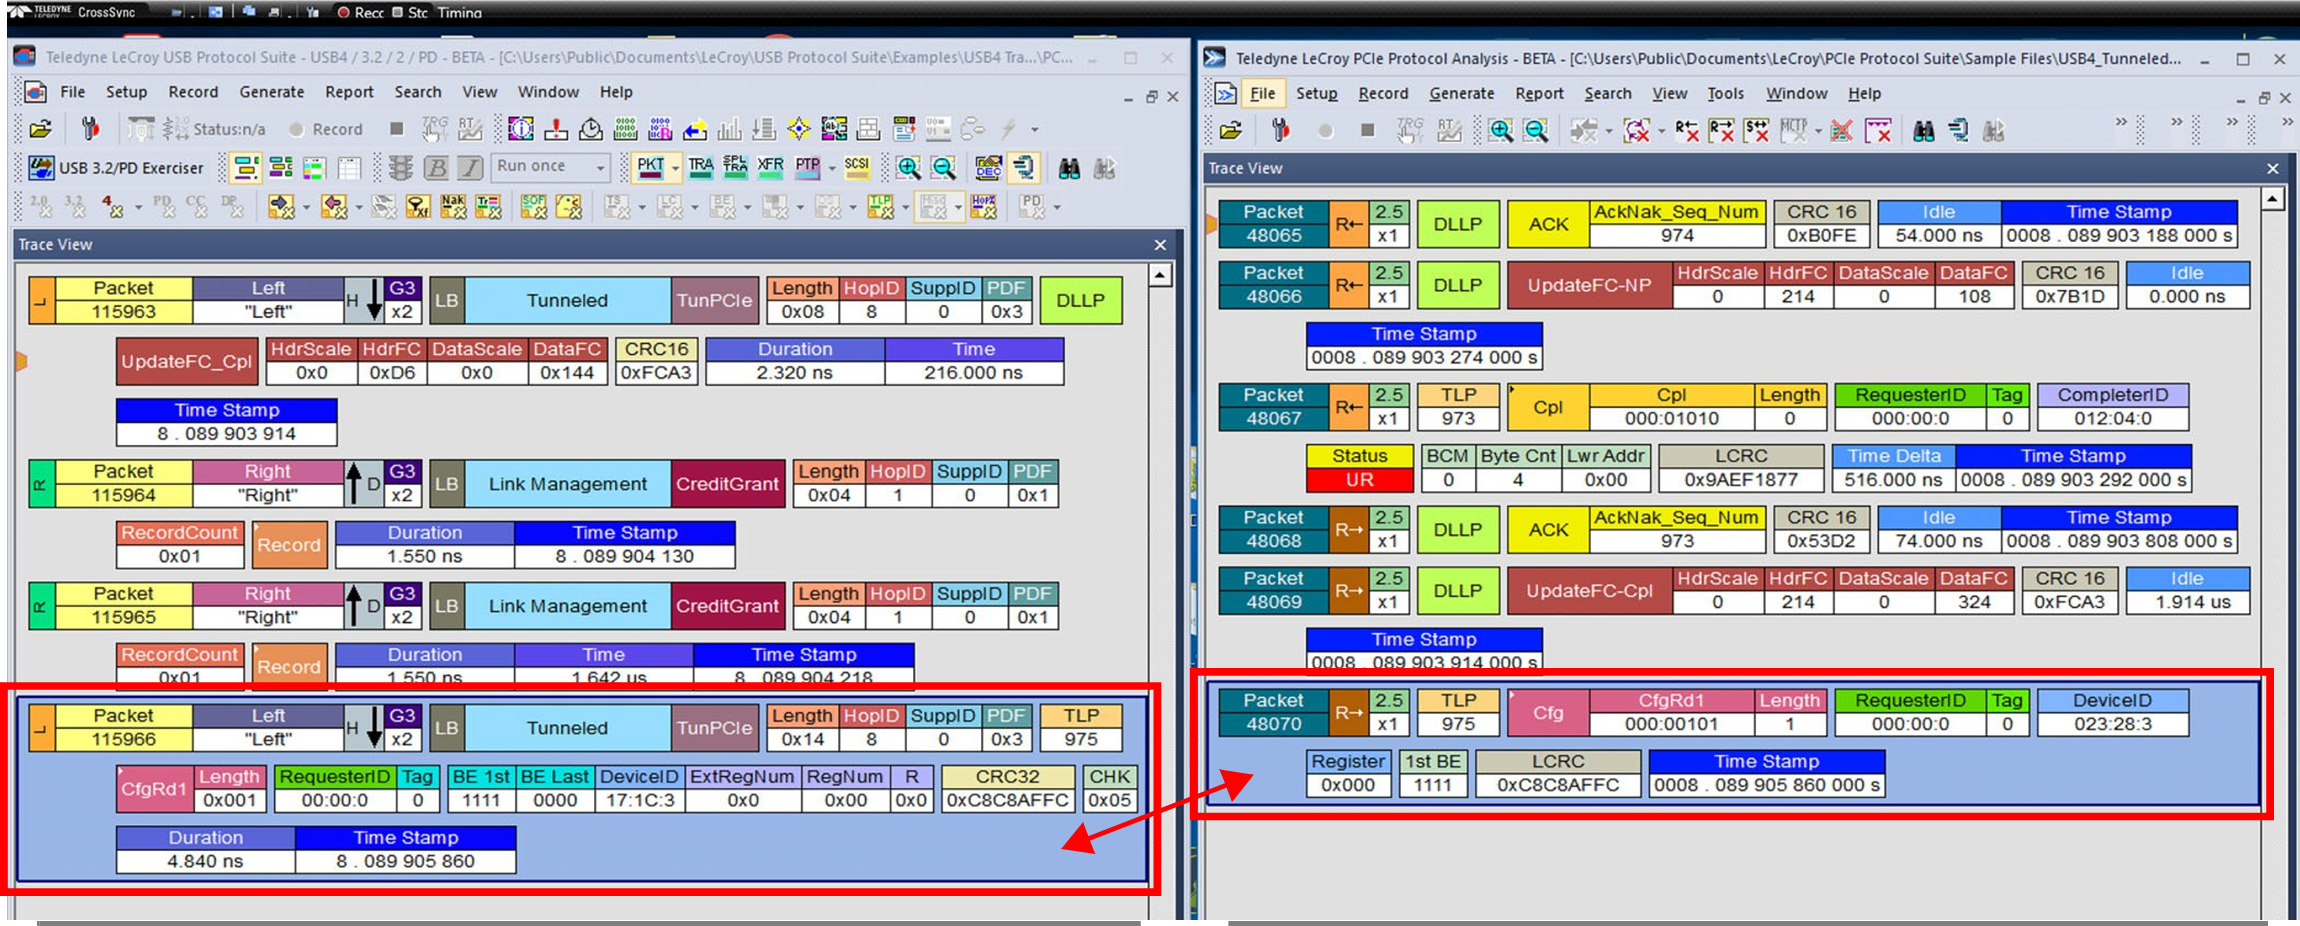
If you load a USB4 trace with “Tunneled” PCIe traffic, you can Export only the PCIe tunneled traffic to a new PCIe “.pex” trace. If you open the CrossSync tool, you can see both the Tunneled PCIe traffic in the USB4 “.usb” trace and the PCIe traffic in the PCIe Protocol Analysis software.
For more information about the CrossSync tool, see the CrossSync User Manual.
-
Accept all default selections—unless you have good reason not to do so. This will create the simplest, fastest file:
-
Frame Numbering: Letting the frame numbers be generated by the hard- ware will enable you to edit the .utg file without having to modify all the frame numbers.
-
Limit empty_frames to 2 SOFs: This reduces the size of the generator file image in the hardware memory, allowing the most efficient use of that space. If you need the value to be some number other than 2, you can use a text editor to do a global search & Replace. This might be necessary if you are try- ing to preserve the number of frames between interrupt or isochronous packets. In that case, it might be better to export without this item checked, and then pare down the size of the file through hand editing the file to reduce large values of “empty_frames”.
-
Include NAK Transactions: This uses extra generation memory to repeat the original NAK behavior. This can cause the scenario to fail if the device does not behave EXACTLY the same each run.
-
Include Device Side Packets: Used to create a generation file that runs without a device. It just re-creates the original scenario and requires a termi- nation plug for the analyzer.
-
Include exact EOP values (LS&FS): This recreates the same EOP values for the packets as they were seen in the original trace file. This takes much lon- ger to export, and there is little to be gained from it.
USB4 Traffic with Tunneled PCIe Traffic: Shown in CrossSync Tool
-
-
To ensure the traces are time synchronized, select the Traces synced icon in the CrossSync Toolbar.

Select Traces Synced from Toolbar
The Trace with USB4 tunneled PCIe traffic will be time-synchronized with the Exported trace with PCIe traffic.
Export USB4 Tunneled USB Traffic to USB 3.2 Native Trace
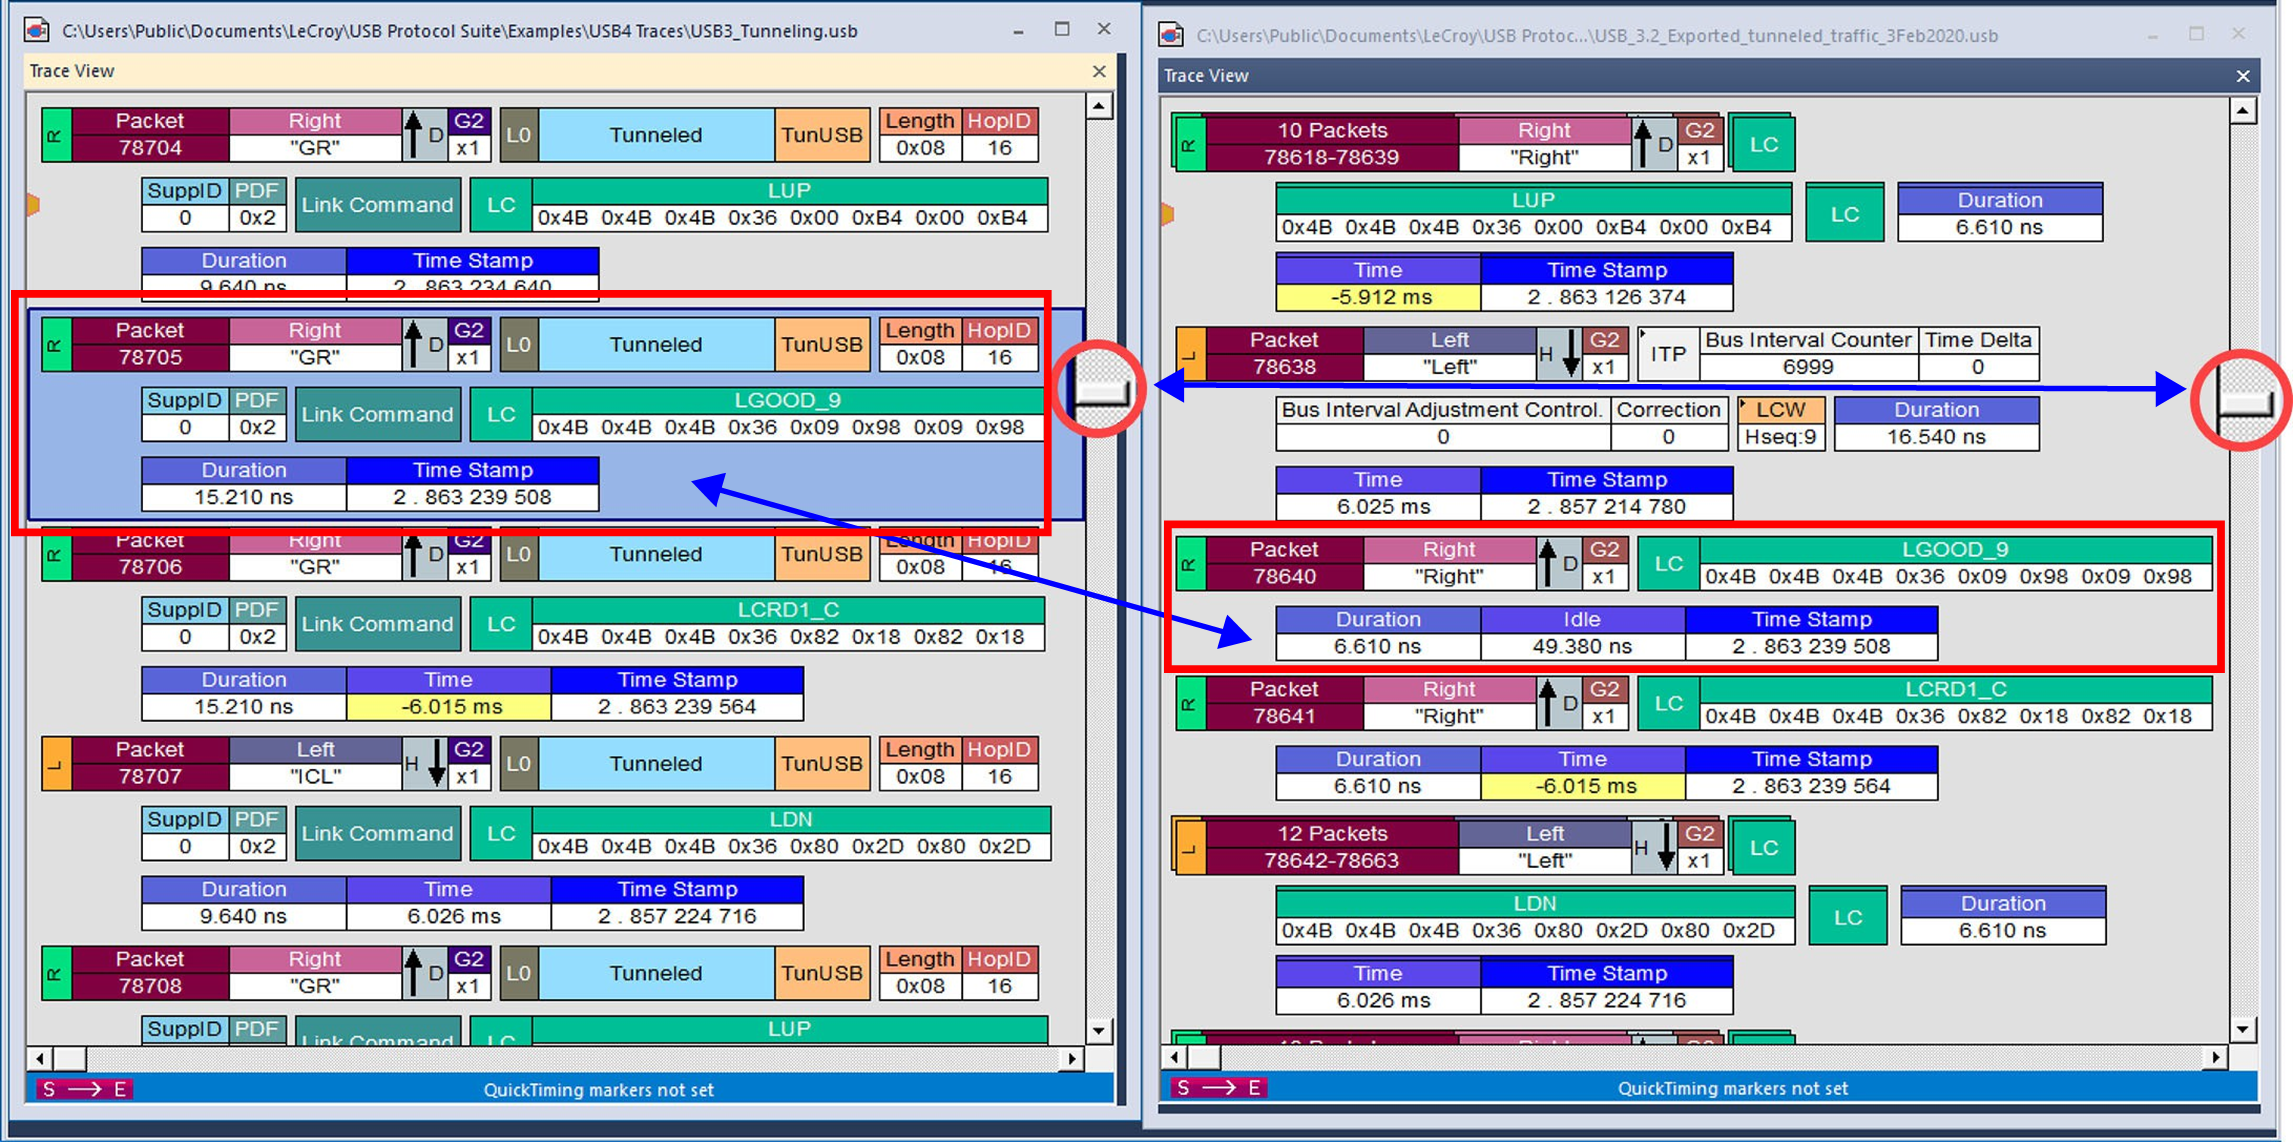
If you load a USB4 trace with “Tunneled” USB3.2 traffic, you can Export only the USB 3.2 tunneled traffic to a new trace.
The figure below shows two traces: the original USB4 traffic with tunneled USB3.2 traffic (left), and the USB 3.2 Native traffic only (right side).
You can also select View > 
Export USB4 Tunneled DP Traffic to DP Native Trace
If you have captured Data Port (DP) traffic in a USB4 trace, you can export the USB4 tunneled DP traffic to a DP Native Trace using the Export function in the USB Protocol Suite.
-
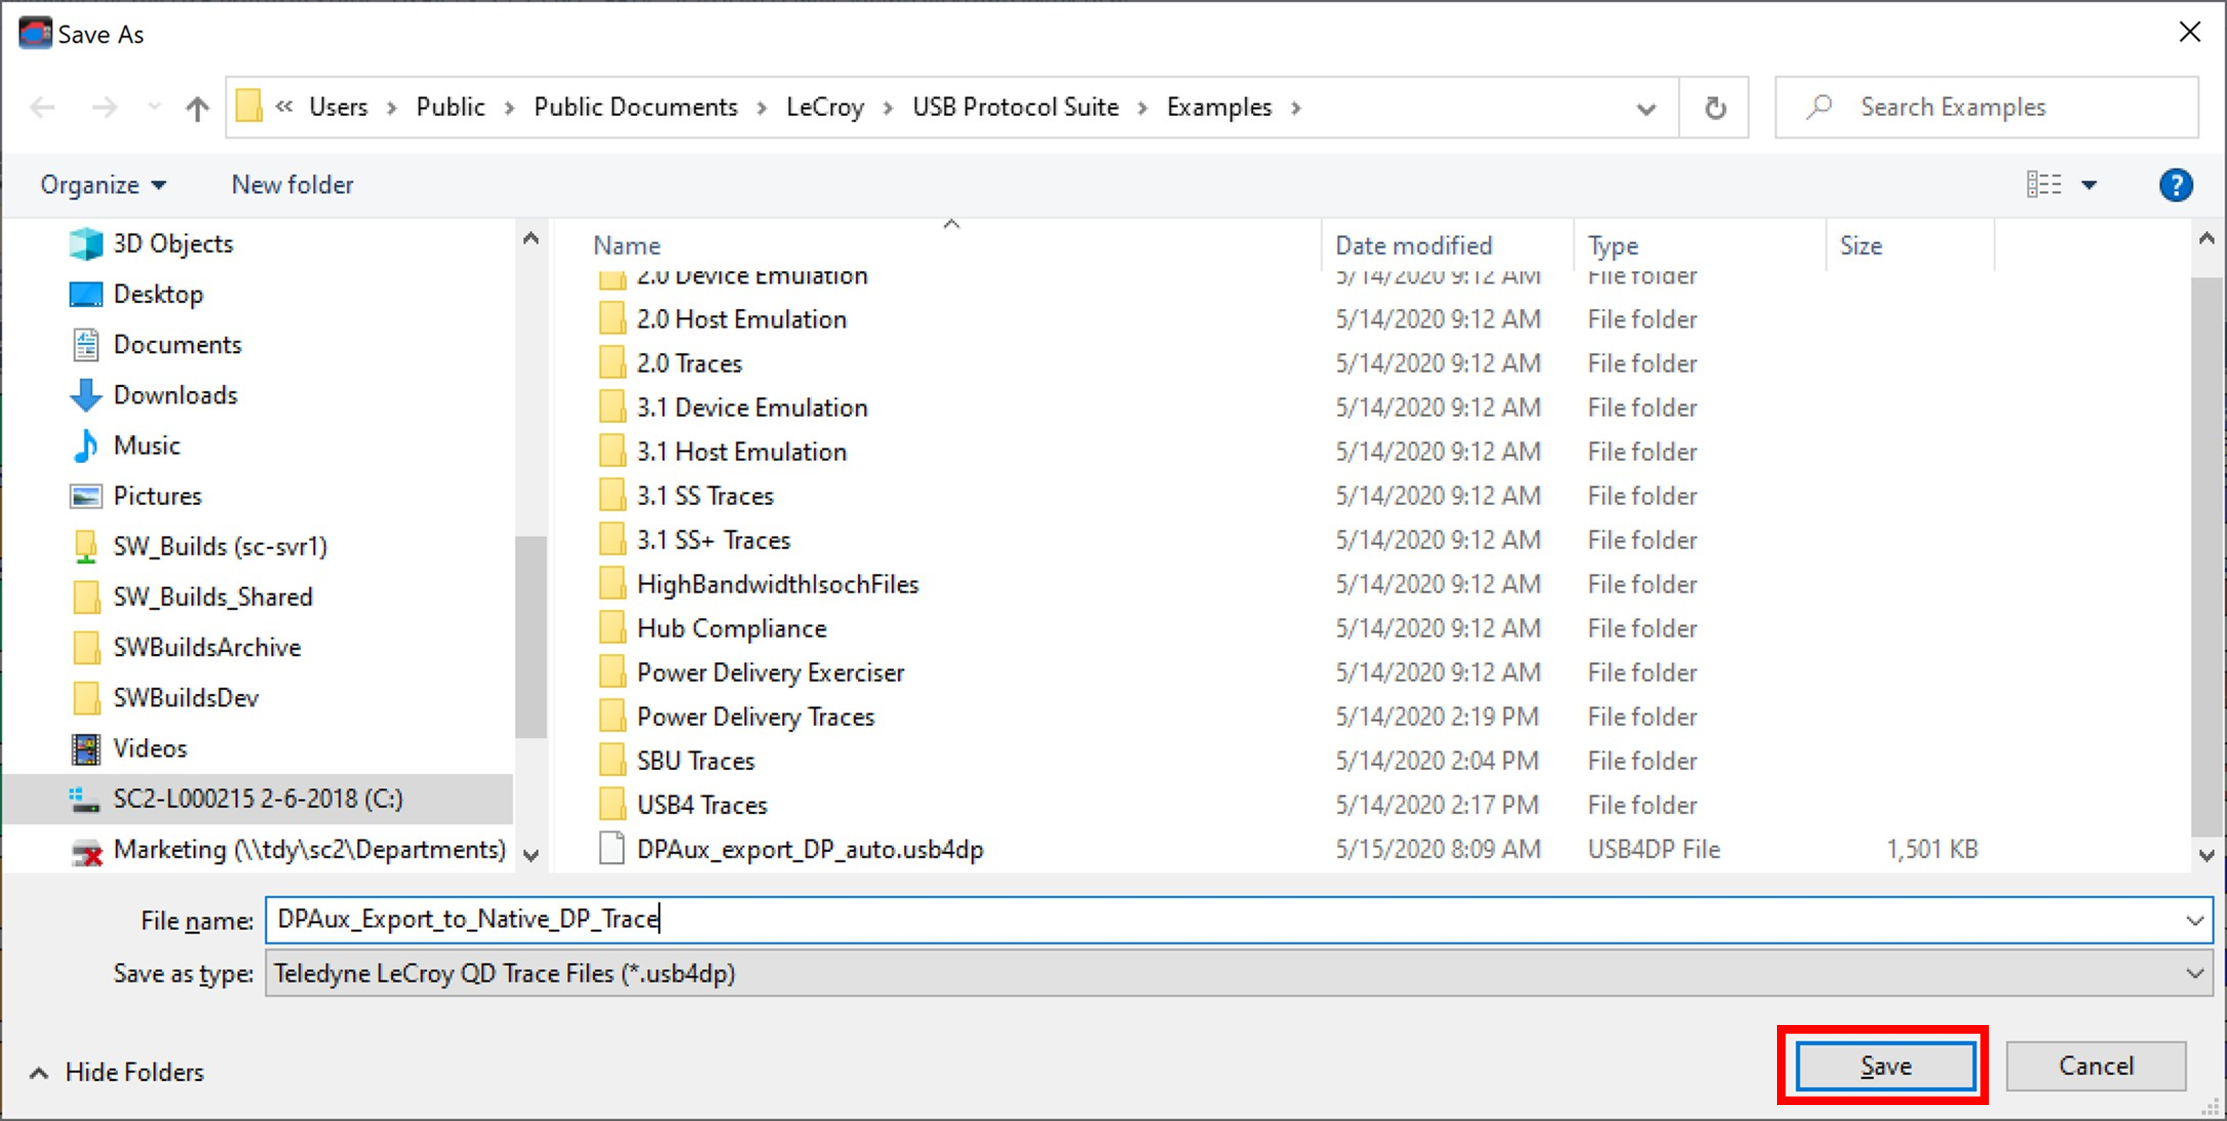
Go to Export > USB4 Tunneled DP Traffic to DP Native Trace File. A window pops up showing the path to the exported trace file.
Enter a Trace File Name and Save -
Enter a name for the trace file.
-
Click Save to store the newly name DP Trace file.
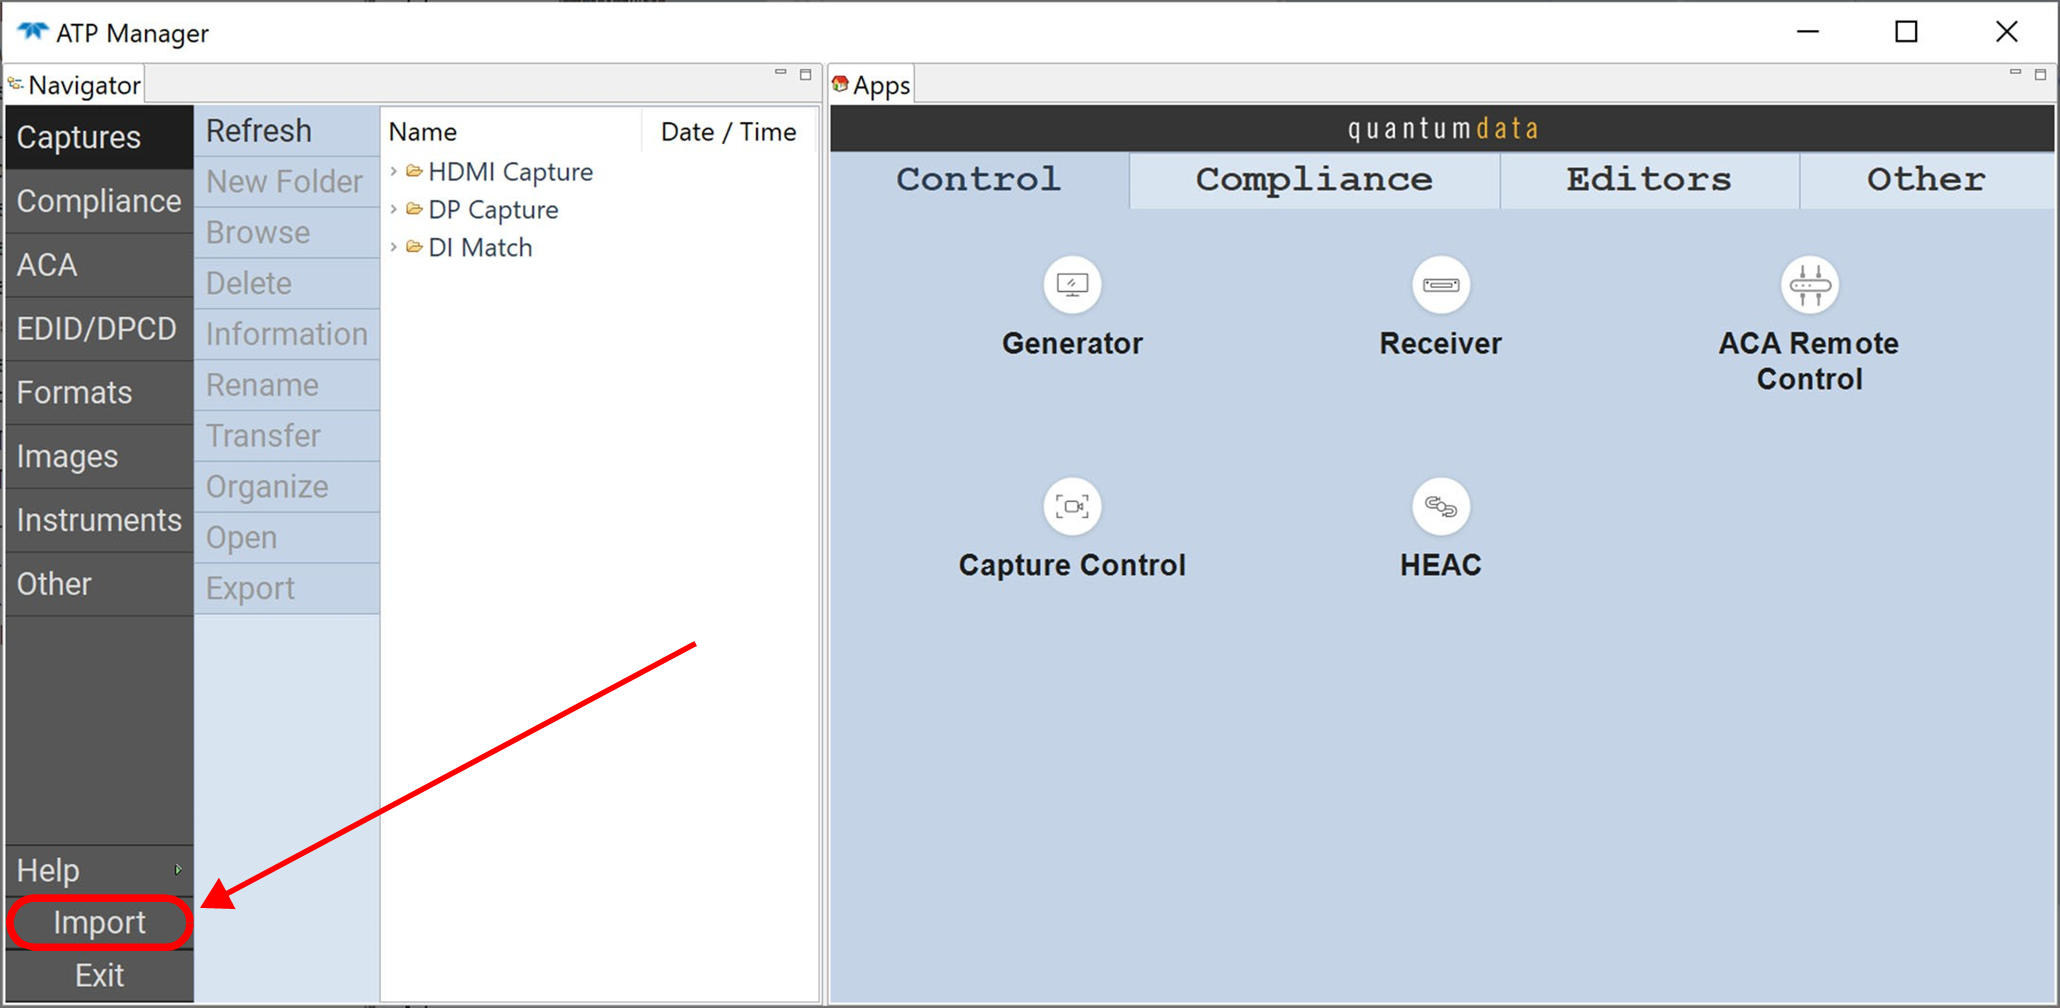
You now can open the DP Trace file using the quantumdata ATP Manager.
NOTE: This tool must be downloaded and installed separately.
Open Trace in ATP Manager
-
Select the Import function from the lower left side of the window.
quantamdata ATP Manager -
Select the trace you just stored and select Open. The quantumdata Import Tunneled DP Trace dialog box appears.
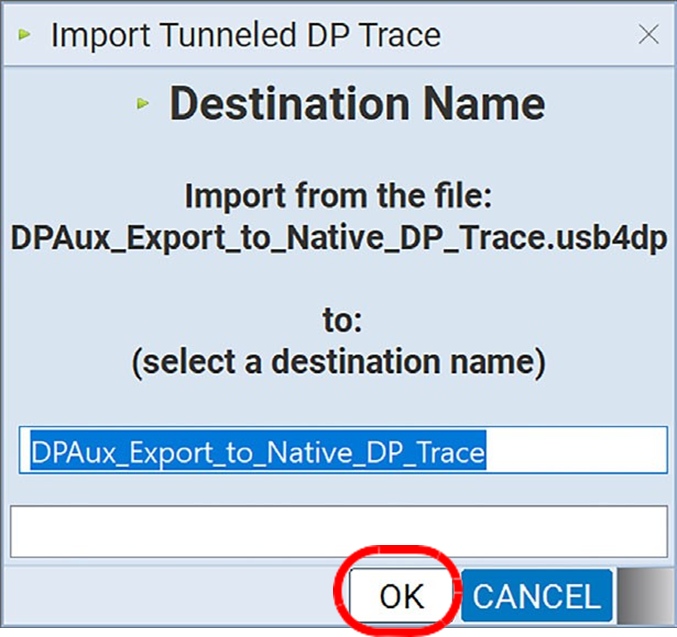
quantumdata Import Tunneled DP Trace Dialog Box -
Click OK. The quantumdata USB4 DP Import Status window displays the Processing Events as the trace is imported.
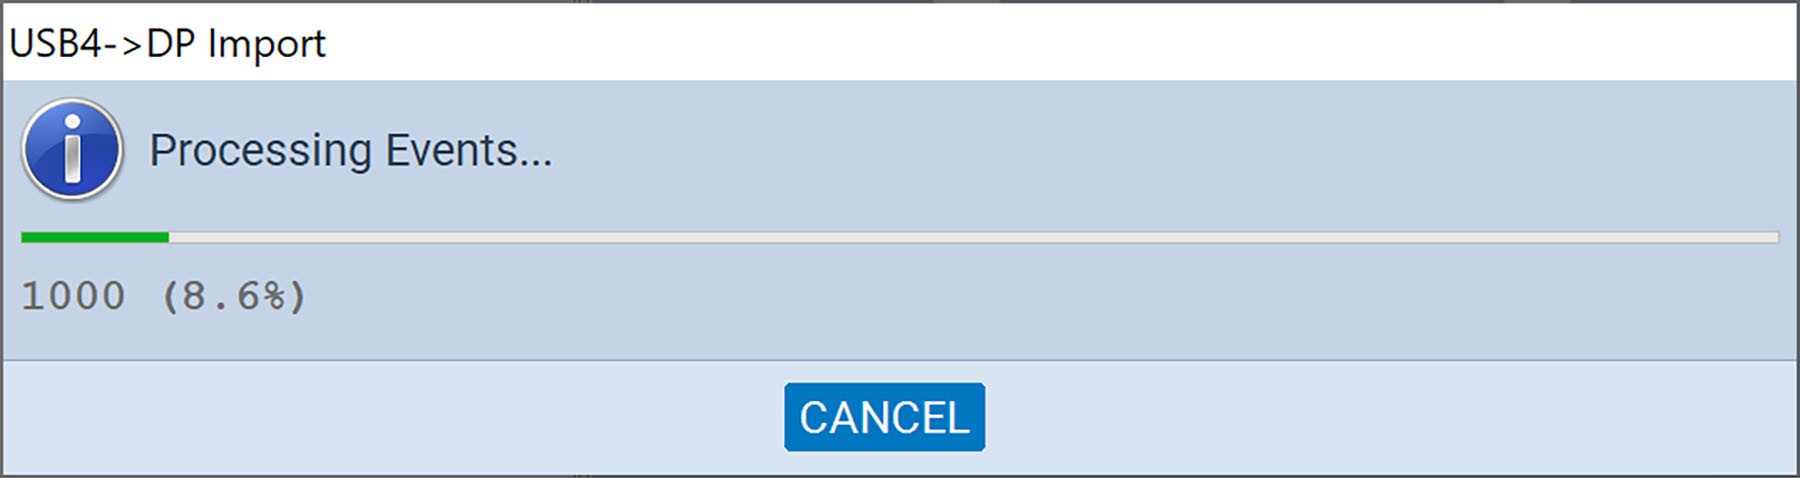
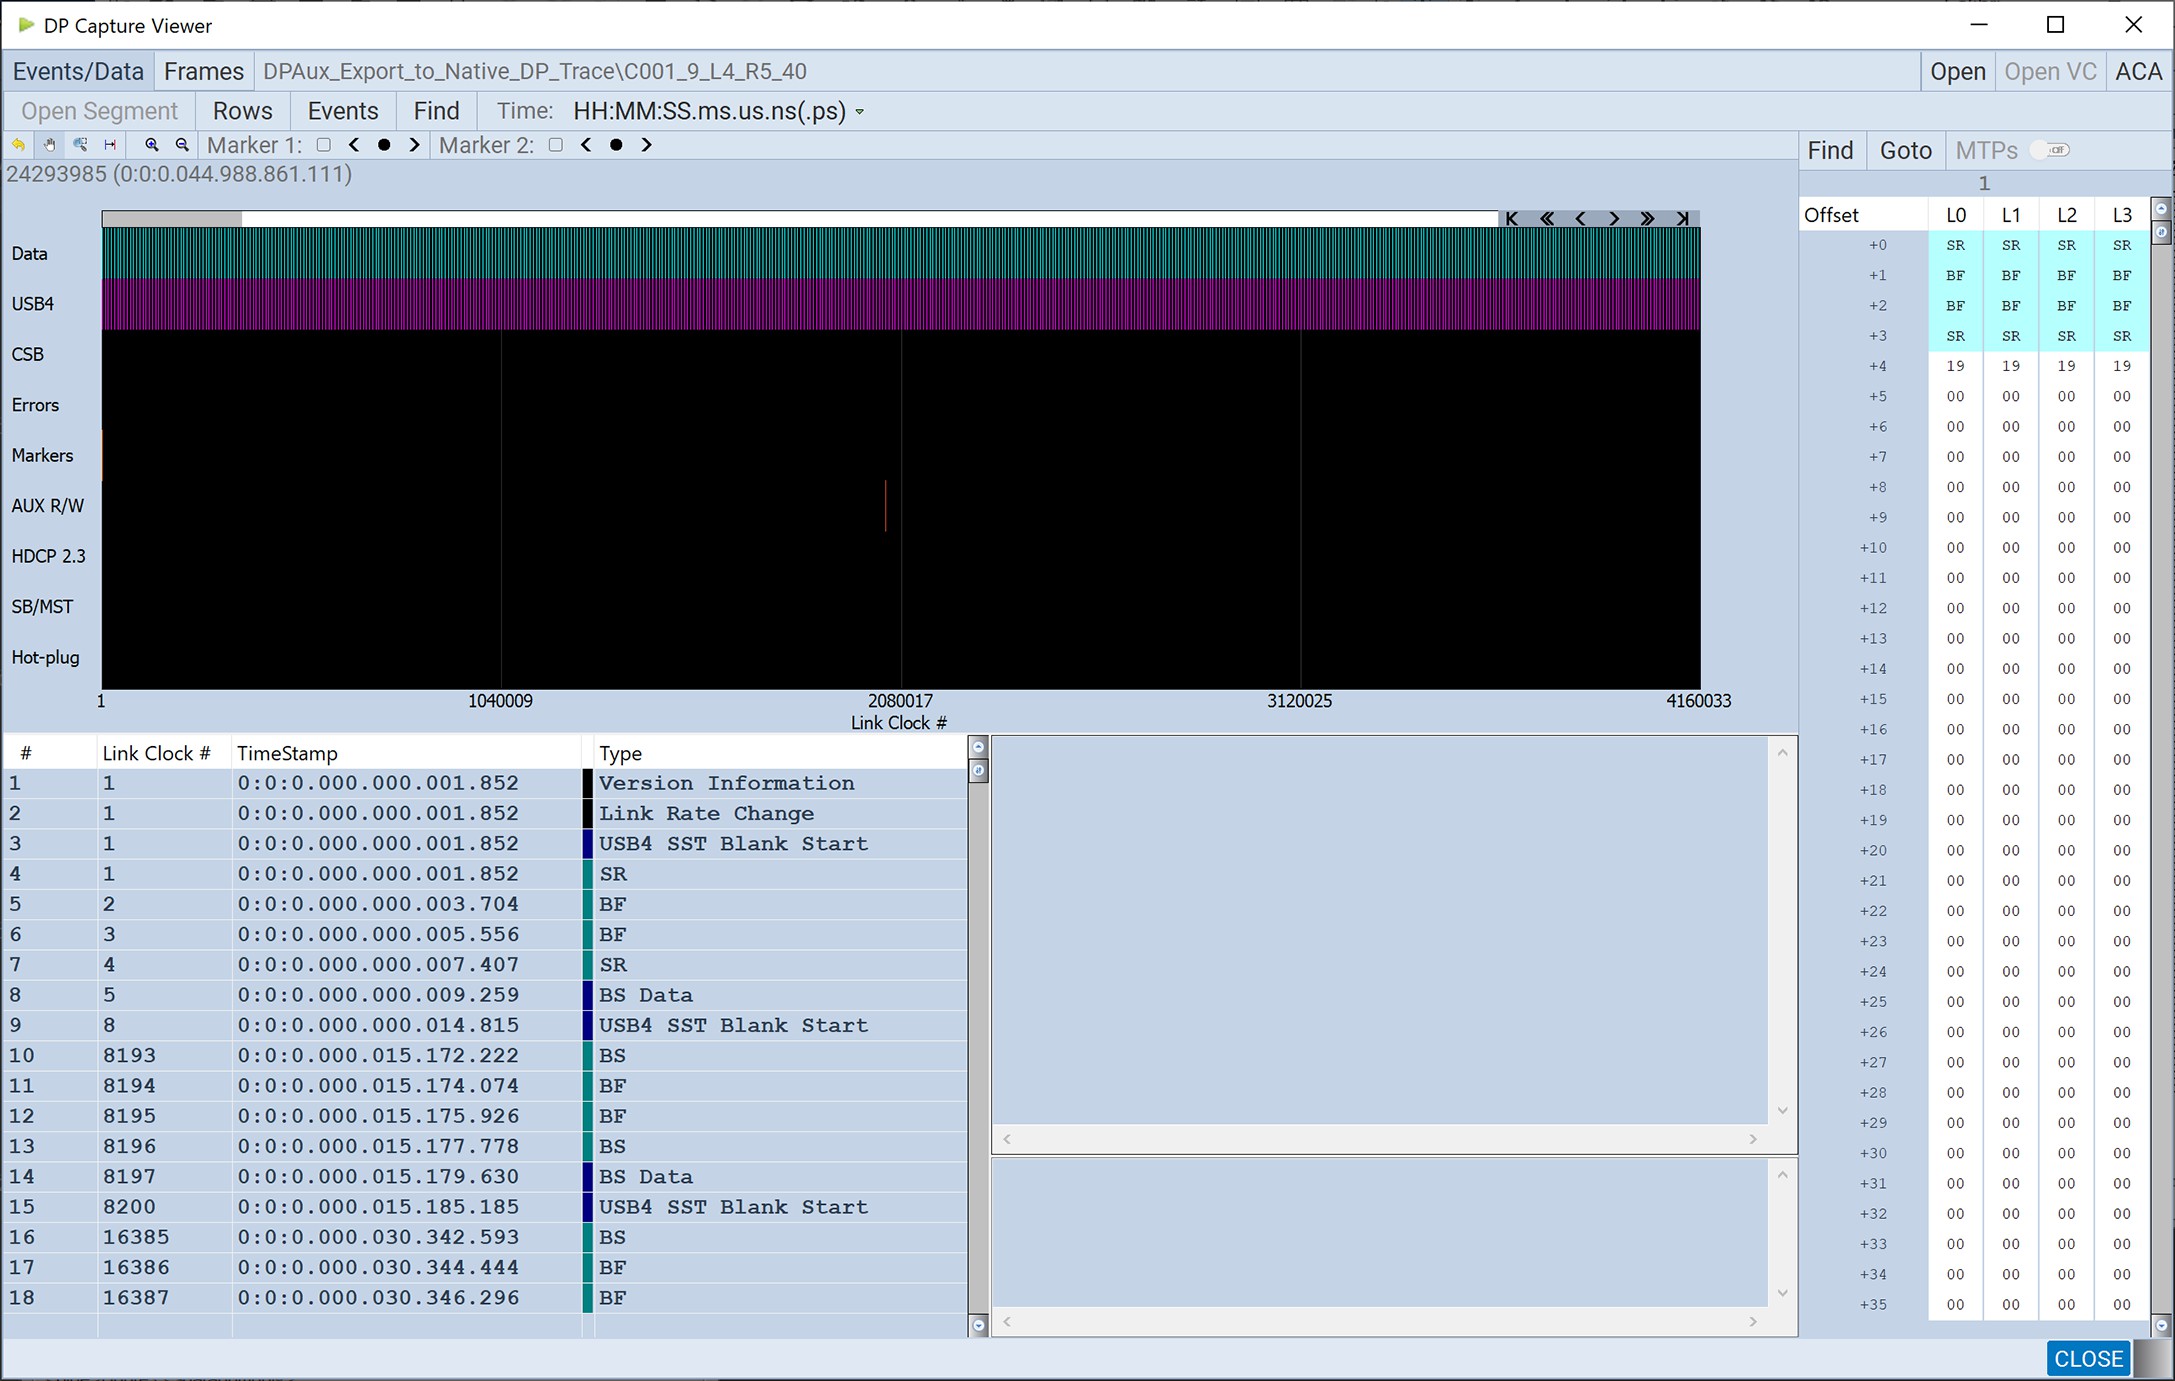
When the Trace Import has finished, the DP Capture Viewer pops up as shown below.
For more details about quantumdata products, visit: https://www.quantumdata.com