
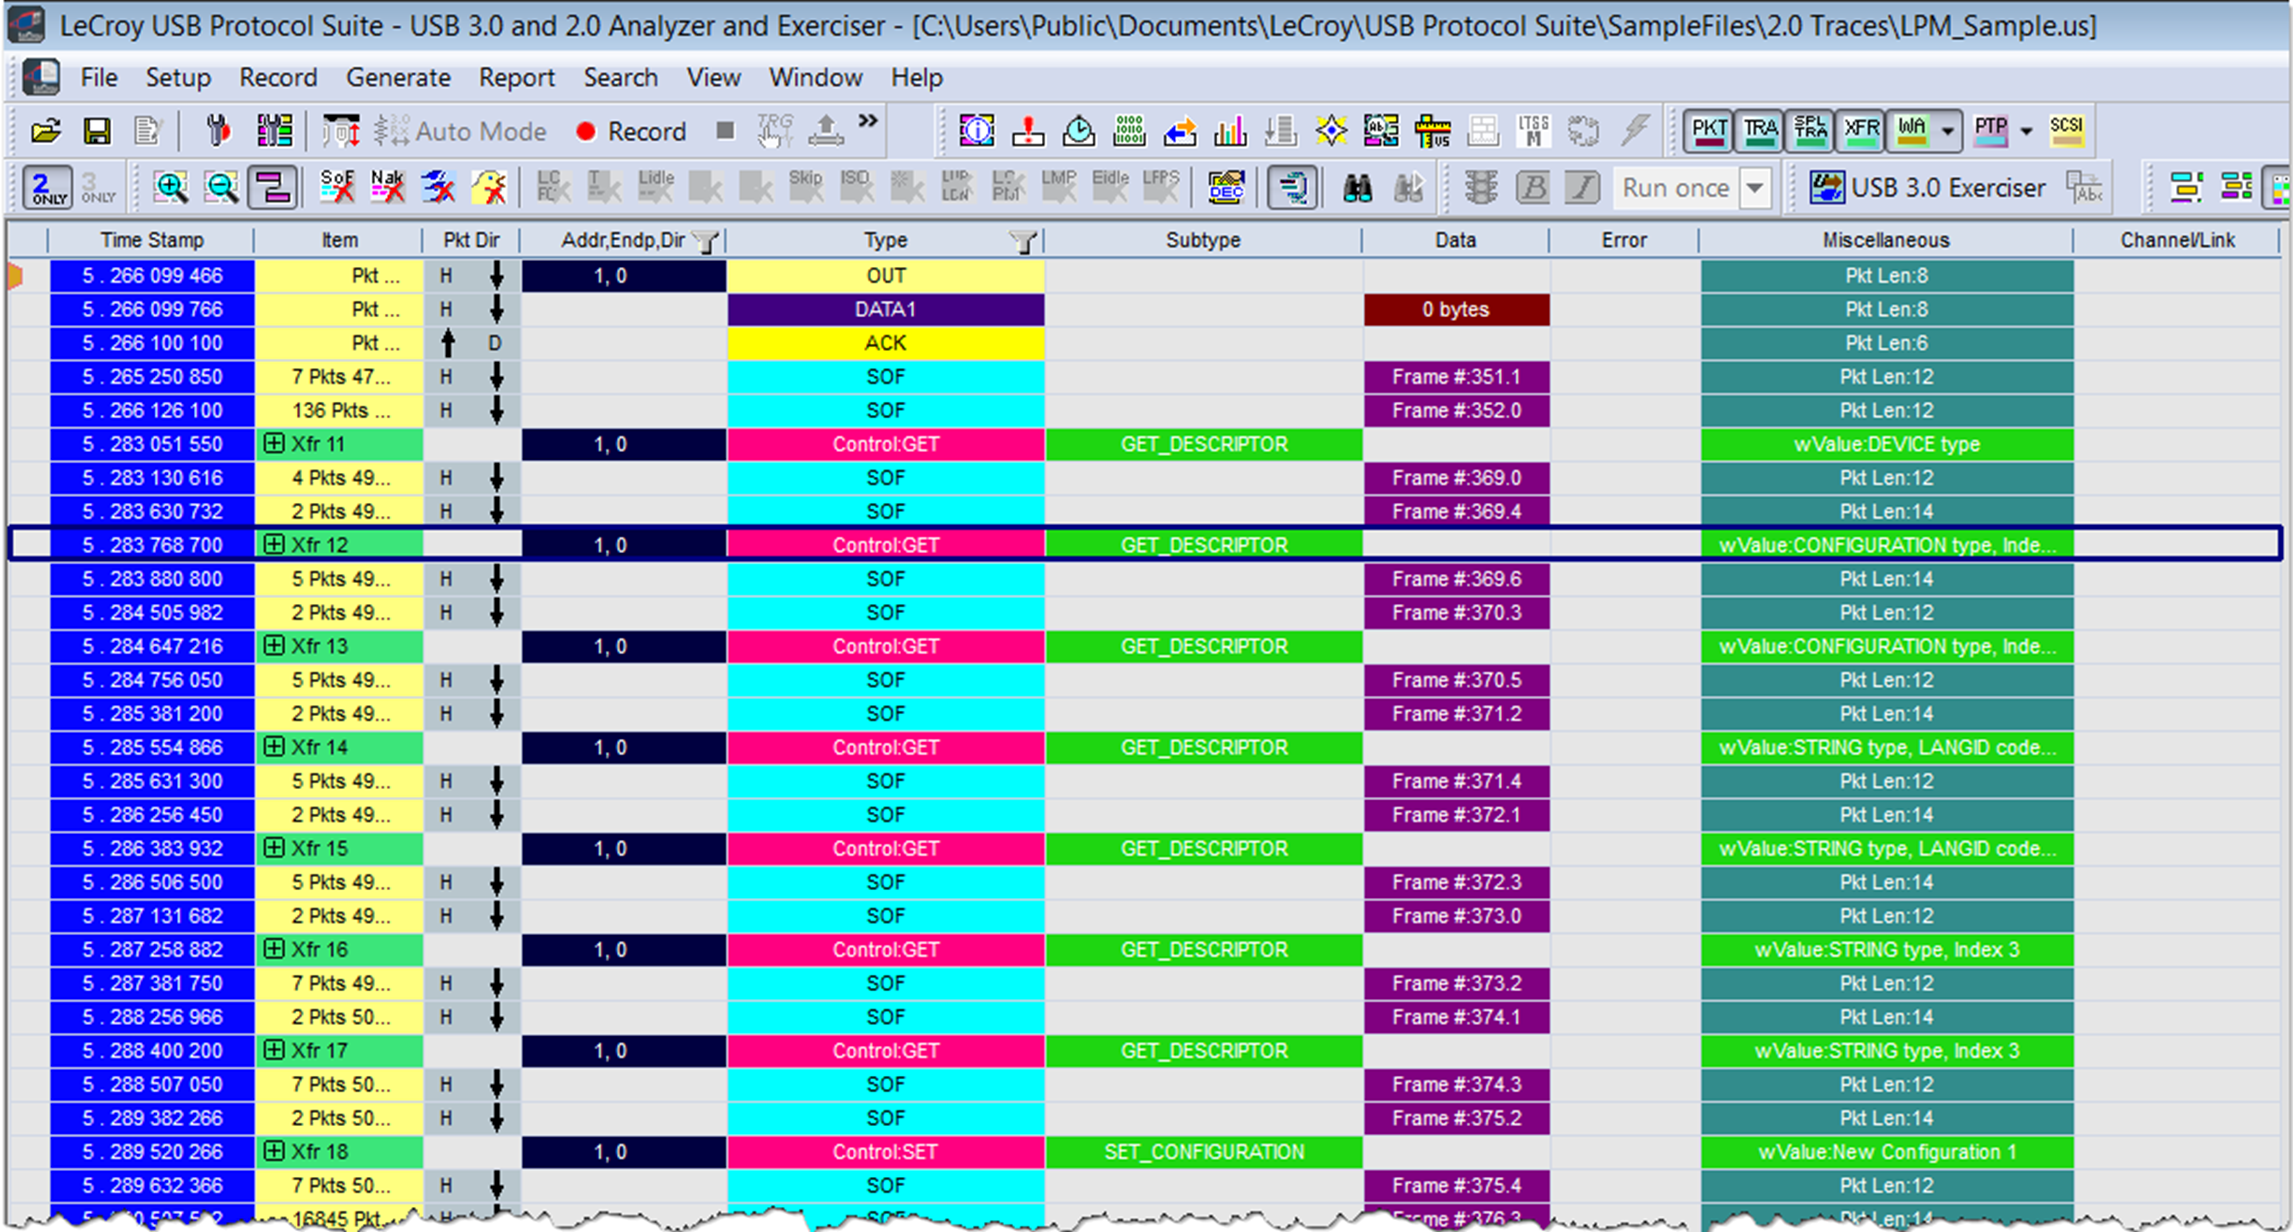
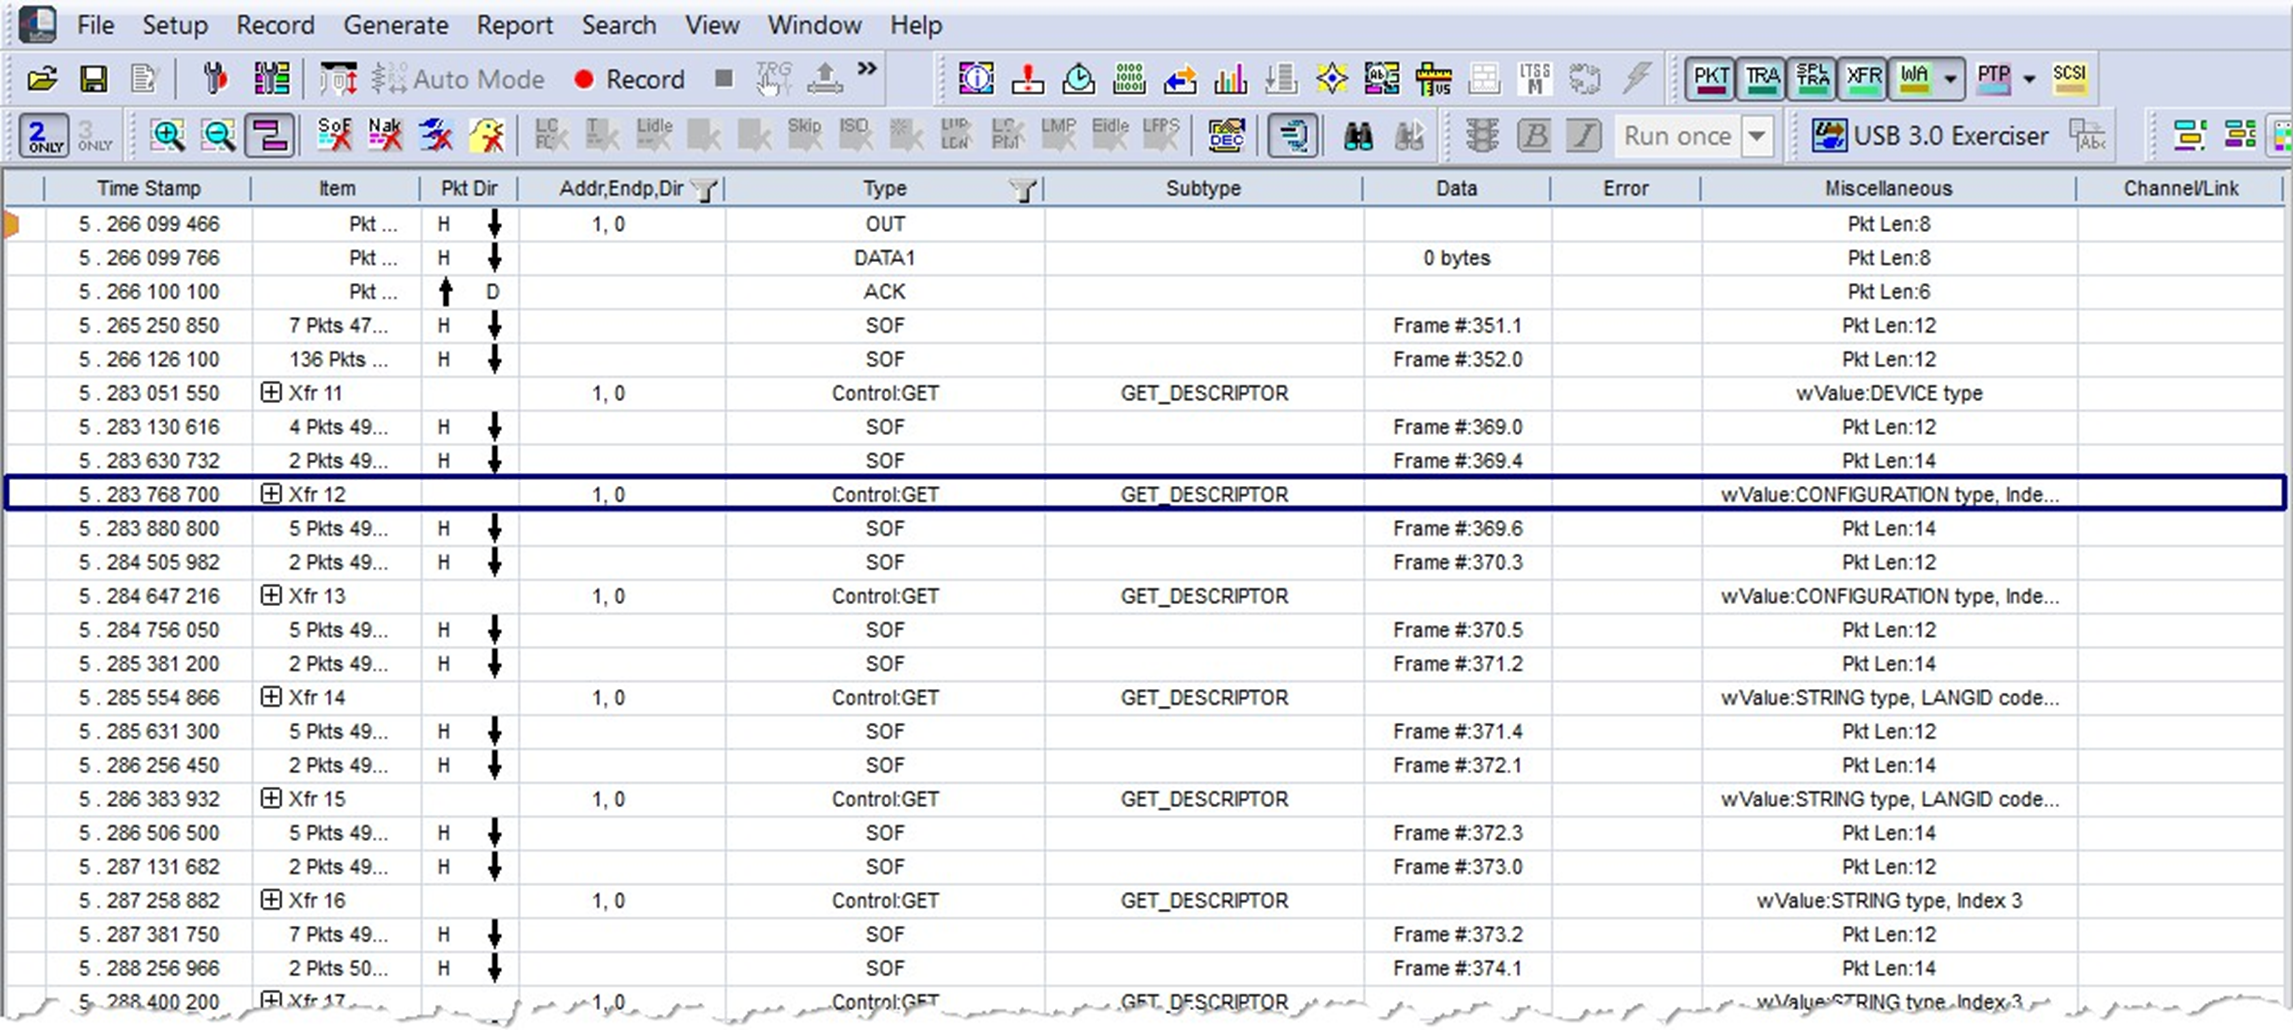
You can view the CATC Trace as a spreadsheet in color (first image below) or black and white (second image below).
For color: Click 
OR
Go to View > Trace Views > Spreadsheet (Color).
For Black and White: Click 
OR
Go to View > Trace Views > Spreadsheet (B/W).
Columns
There are several options for customizing the columns displayed in Spreadsheet View.
Basic Column Adjustments
These adjustments can be made by right-clicking on a column header and choosing a menu option.
-
To add a single column, right-click a column header, select Add Standard Column, and then select the type of column to add. This option provides a list of commonly used columns.
-
To add a column that’s more specific to a row of data in your trace, high- light the row that you want to focus on, then right-click a column header and go to Add Column Specific to Current Row. The list of column type options will vary depending on the contents of the row you’ve selected.
-
To delete a single column, right-click a column header and select Remove Column.
-
To reposition a single column, select the column header and drag it to the new position.
-
To resize columns, select the column divider and drag the divider to the right or left.
-
To return to the default layout, right-click a column header and select Restore Default Columns.
Column Configuration Window
To add, remove, or move multiple columns at a time, select Column Configuration. The Column Configuration window opens (see below).
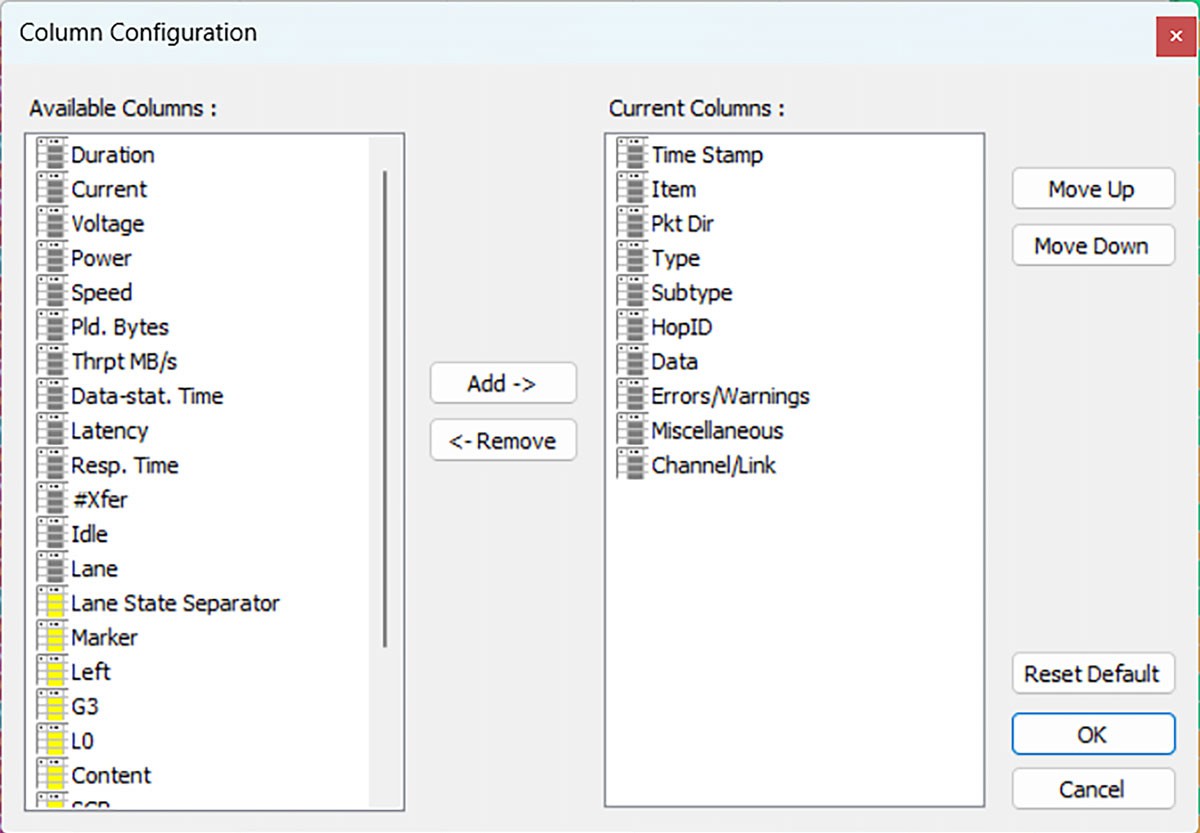
The Available Columns list shows all the available columns. Columns marked in gray are Standard Columns, while those marked in yellow are more specific. The Current Columns list displays the columns that are in use in Spreadsheet View.
In this window, you can Add or Remove columns. You can also rearrange the order of the Current Columns list using the Move Up and Move Down buttons. The option to Restore Default is also available in this window.
Rows
To manipulate rows, right-click the left-most column gray area to display the following commands:
|
Option |
Description |
|
Display Options |
Opens the Display Options menu (see Display Options). |
|
CATC Walk |
See and manage playlists (see CATC Walk Playlist). |
|
Real-time Statistics |
Allows you to view traffic statistics as they occur (see Real-Time Monitoring). |
|
Trace Views |
Displays CATC Trace, Compressed CATC Trace, Spreadsheet (Color), or Spreadsheet (B/W). |
|
Unhide fields |
Unhide previously hidden Traffic, VBUS Power, PD Preamble, CC1 Left Power, CC2 Left Power, CC1 Right Power, CC2 Right Power, USB4 SB CRC, USB4 Reserved, USB4 CRC or Unhide All. |
|
Zoom In |
Increases the size of the displayed elements. |
|
Zoom Out |
Decreases the size of the displayed elements. |
|
Wrap |
Wraps displayed packets within the window. |
|
Synchronize Trace View with Other Views |
Synchronizes the Trace view with other views |
|
Hide All USB 2.0 Traffic |
Hides all the USB 2.0 traffic (low speed, full speed, and high speed). |
|
Hide All USB 3.2 Traffic |
Hides all the SuperSpeed and SuperSpeed+ traffic. |
|
Hide All USB PD Traffic |
Hides all the USB power delivery traffic. |
|
Hide All CC Traffic |
Hides all Type-C CC1 and CC2 Event Traffic (Configuration Channel) |
|
Hide All DP Traffic |
Hides All Data Port Traffic |
|
Hiding All Traffic from Left and Right Directions |
Hides All Transfers from Left DUT or DUT (Exerciser) when system is in Analyzer Mode |
|
Hides All Transfers from Right DUT or Voyager (Exerciser) when system is in Exerciser Mode |
|
|
Hiding Traffic from Left DUT/DUT [Exerciser] by Lane |
Hide L0, Hide L1, Hide LB, Hide PD/USB4 SB |
|
Hiding Traffic from Right DUT/Voyager [Exerciser] by Lane |
Hide L0, Hide L1, Hide LB, Hide PD/USB4 SB |
|
Hiding USB 2.0 Traffic |
Hides: SOFs: Start of Frames Chirps: Chirp-K and Chirp-J Bus conditions (these are recorded only) |
|
Hiding USB 3.2 Traffic |
Hides: Training Sequence Packets: TSEQ, TS1/TS2 Hide Link Commands: LUP/LDN, Flow Control, Power Management, GenT NOP, GenT Link Keep-Alive Bus Event: Hide LFPS Packets, Hide Electrical Idles, Hide Terminations Miscellaneous: Hide LMP Packets, Hide ISO Time Stamp Packets, Hide Inter-Packet Symbols, Hide Skip Sequences, Hide Logical Idle Packets, Hide Loopback Packets (BCNT, BRST, BERC), Hide Compliance Packets Hide LTSSM Transition Indicators |
|
Hiding USB4 (or TBT3) Traffic |
Hides a variety of USB4 packets and events. |
|
Hiding Power Delivery Traffic |
Hide Unknown Packets Hide Ping Packets Hide GoodCRC Packets |
|
Hide Devices (Addr/Endp) |
Opens the Hiding Devices dialog displaying packets belonging to speci- fied devices by address and endpoint |
|
Hide All Except Transfers |
Hide All Except Transfer Packets |
|
Hide USB2 NAKs/USB3 Failed |
Shows/Hides USB2 NAK’d Transactions and USB3 Failed Transactions |
|
Hide Non-Data Transaction |
Shows/Hides all Non-Data Traffic |
|
View Layers Mode |
Display All Layers, Application Layers, or Lower USB Layers. |
|
Stacking View |
Puts a group of packets in one row, to shorten display (see Stacking). |
|
Decoding Settings |
Decoding scripts set the values of the display and recording options for optimum views of trace information from specific vendors or classes of data. This menu option allows you to select the vendor or class of data for the request recipients and endpoints listed in the Request Recipients and Endpoints menu. You can keep the settings across recordings. See Decode Requests. |
|
Enable Sync Traces |
Synchronizes views between synced traces (see Enable Sync Traces). |
|
Level Viewing |
Displays Packet Level Displays PHY Transaction Level Displays Transaction Level Displays Split Transaction Level Displays Transfer Level PTP Group PTP Transaction Level displays PTP Transactions PTP Object Transfer Level displays PTP Objects PTP Session Level displays PTP Sessions Displays SCSI Operation Level |
|
Refresh Decoding |
Forces the software to re-decode transactions and transfers. Useful if you have applied a decoding mapping which helps fully decode a sequence of transfers, as is the case with Mass Storage decoding. |
|
Restore views to default positions |
If the windows/views end up in a Layout that is not desired, you can select this item to put them into the default state preferred by the application. |
Detail View and Spreadsheet View
To display the Detail View, from the Spreadsheet View:
-
Double-click a packet, transaction, or transfer.
OR
-
Choose a field and select Report > Detail View or click


on the toolbar.
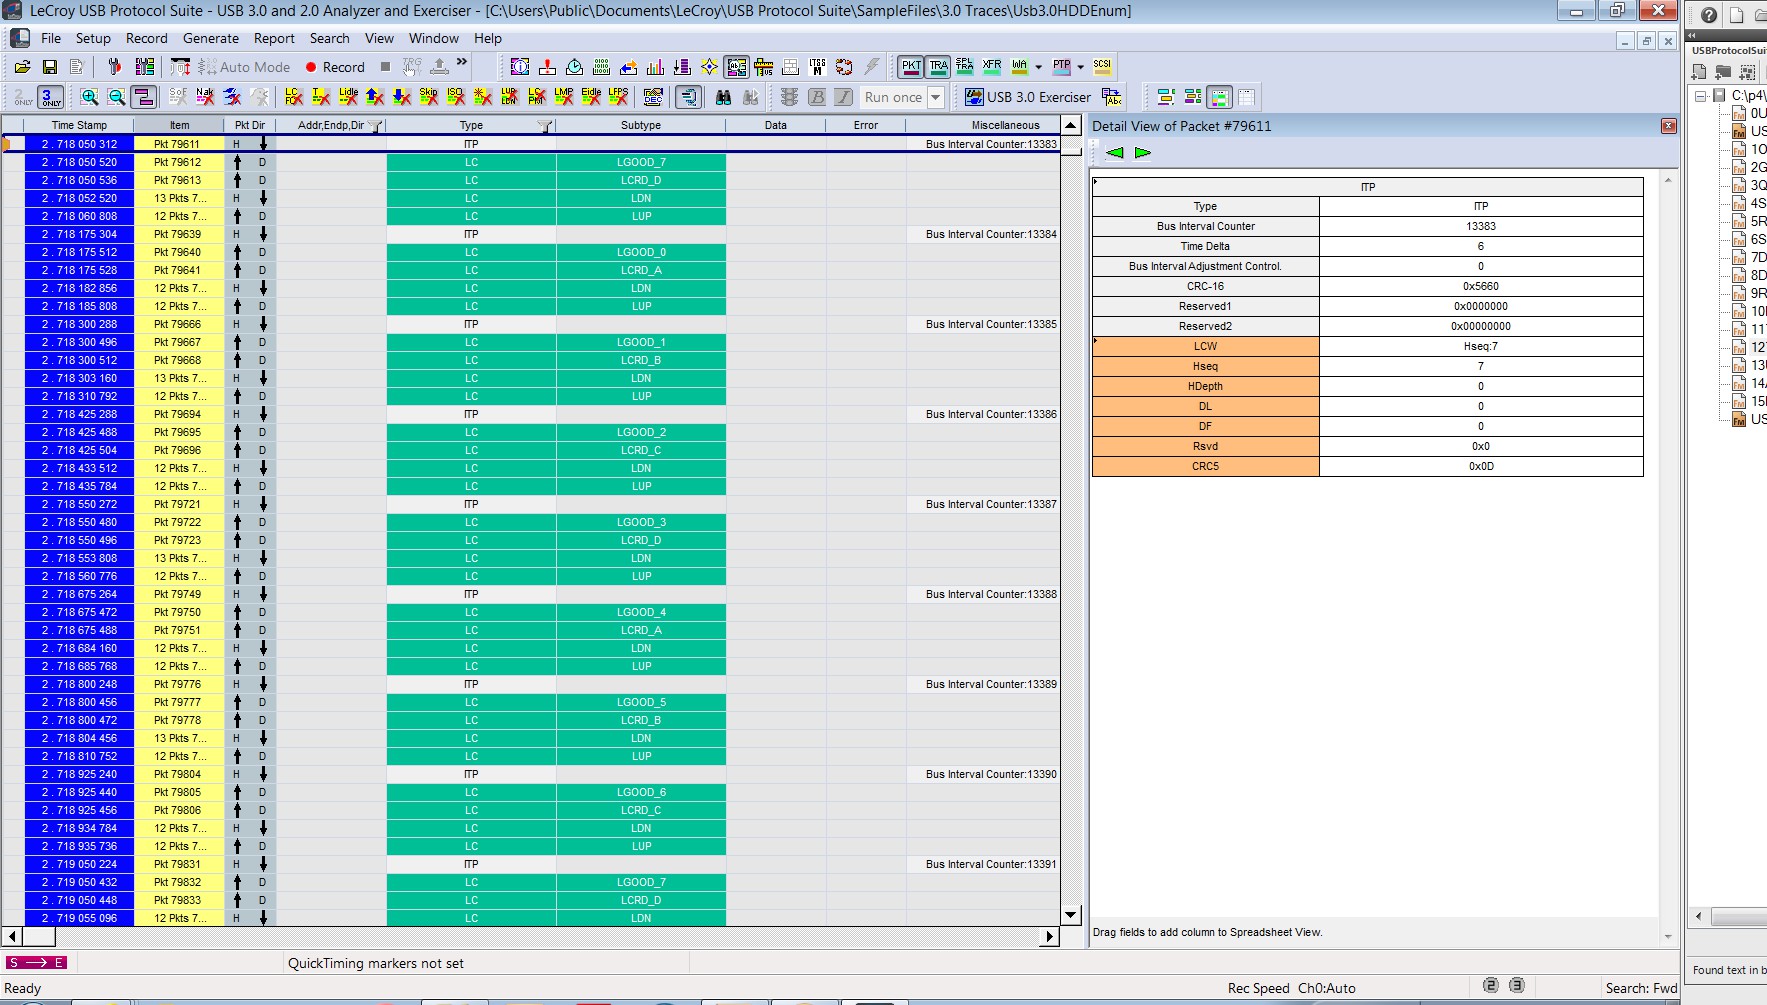
To put a Detail View header in the Spreadsheet View, drag the header to a column divider in the Spreadsheet View.