The software automatically assigns decoders based on the enumeration sequence in a recorded file. If the enumeration sequence is not captured, or if software assigns an incorrect decoder, you may manually select a decoder.
You can permanently assign a class or vendor decoding for an address and/or endpoint or interface in a trace file. Once assigned, the decoding occurs automatically when you display transactions.
Mapping Request Recipient to Class/Vendor Decoding
To assign a decoding group to a request recipient:
To display the USB Device Request menu, do one of the following:
-
Click the Decoding Settings button on the Toolbar.
-
Press Ctrl+Shift+Y.
-
Right click in the Control Transfer field.
Select Map Request Recipients to Class/Vendor Decoding to display the Request Recipients and Endpoints dialog box (shown below).
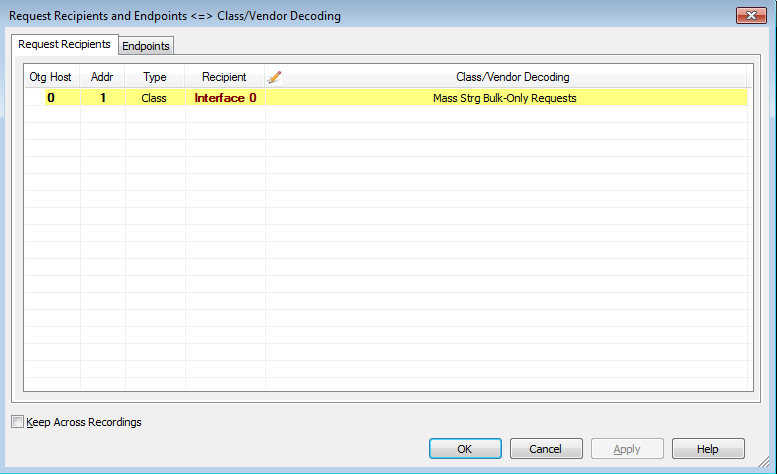
The Recipient field shows all Class and Vendor Request Recipients found in the trace file.
The display shows the Host, Address, and Type (Class or Vendor) for the recipient. On the right are the names of Class/Vendor Decoding groups currently assigned to recipients.
If blank, no decoding is assigned for a recipient.
-
Select a recipient.
-
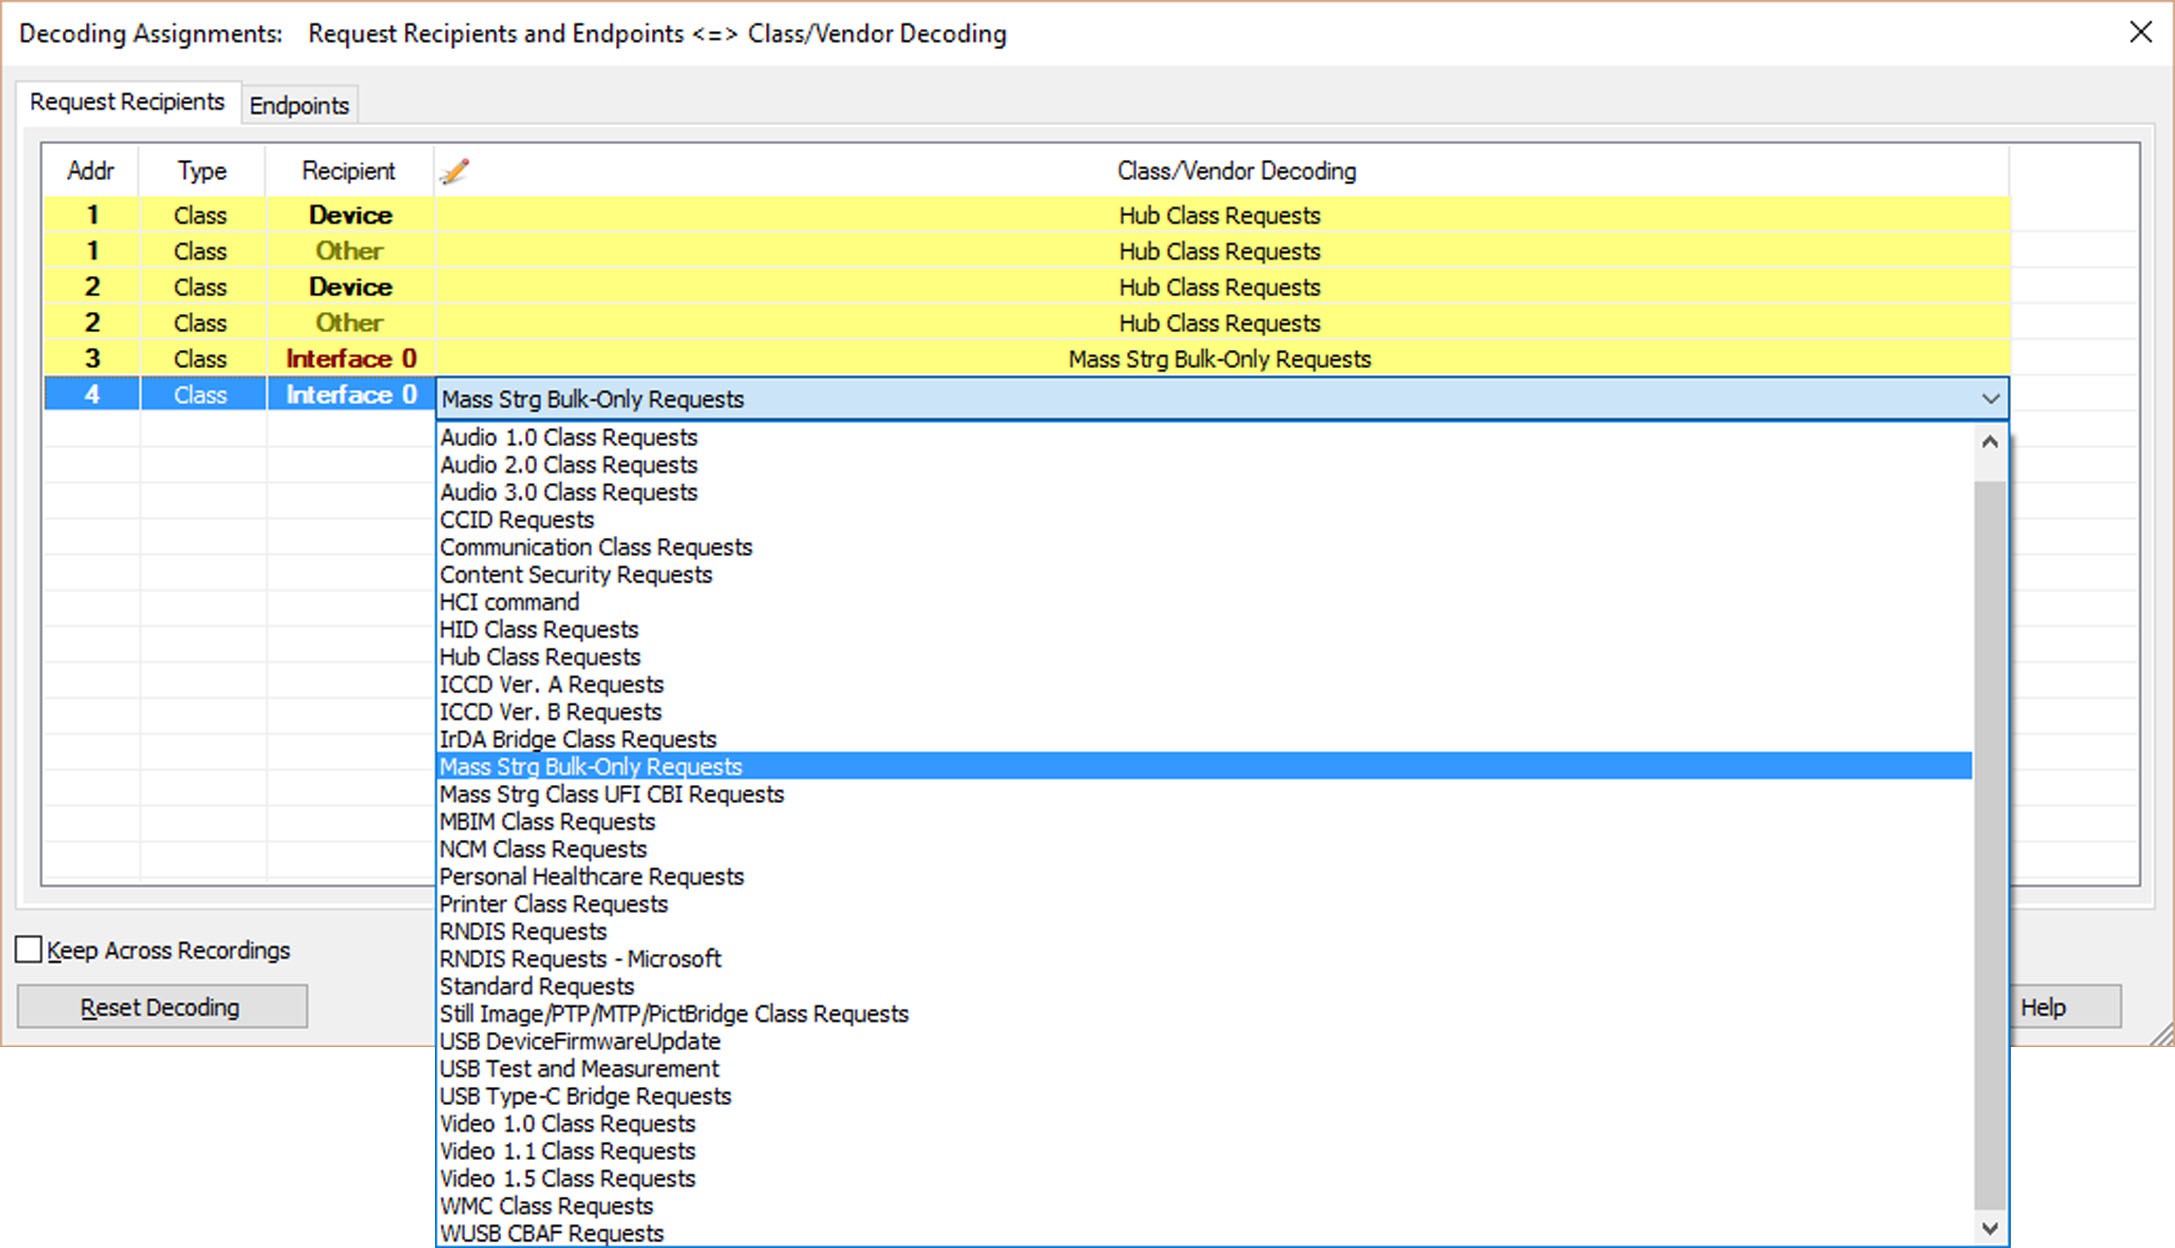
Expand the Class/Vendor Decoding Groups drop-down menu.
The drop-down menu lists the defined Class/Vendor request decoding groups:
-
No Decoding
-
Audio 1.0 Class Requests
-
Audio 2.0 Class Requests
-
Audio 3.0 Class Requests
-
CCID Requests
-
Communication Class Requests
-
Content Security Requests
-
HCI Command
-
HID Class Requests
-
Hub Class Requests
-
ICCD Ver. A Requests
-
ICCD Ver. B Requests
-
IrDA Bridge Class Requests
-
Mass Strg Bulk-Only Requests
-
Mass Strg Class UFI CBI Requests
-
MBIM Class Requests
-
NCM Class Requests
-
Personal Healthcare Requests
-
Printer Class Requests
-
RNDIS Requests
-
RNDIS Requests – Microsoft
-
Standard Requests
-
Still Image/PTP/MTP/PictBridge Class Requests
-
USB DeviceFirmwareUpdate
-
USB Test and Measurement
-
USB Type-C Bridge Requests
-
Video 1.0 Class Requests
-
Video 1.1 Class Requests
-
Video 1.5 Class Requests
-
WMC Class Requests
-
WUSB CBAF Requests
-
Select a decoding group, OR No Decoding if you do not want any specific decoding.
-
Repeat the previous steps for additional recipients.
-
To retain a mapping from trace to trace DURING an application session, select the Keep Across Recordings checkbox.
-
Click OK.
Mapping Endpoint to Class/Vendor Decoding
To assign a Class/Vendor Endpoint decoding, do one of the following:
Click the Decoding Settings 
OR
Press Ctrl+Shift+Y.
OR
Right click the Bulk/Int Transfer field to display the USB Device Request menu.
Select Map Endpoint to Class/Vendor Decoding to display the Request Recipients and Endpoints dialog box.
Click the Endpoints tab to display the Endpoints dialog box.
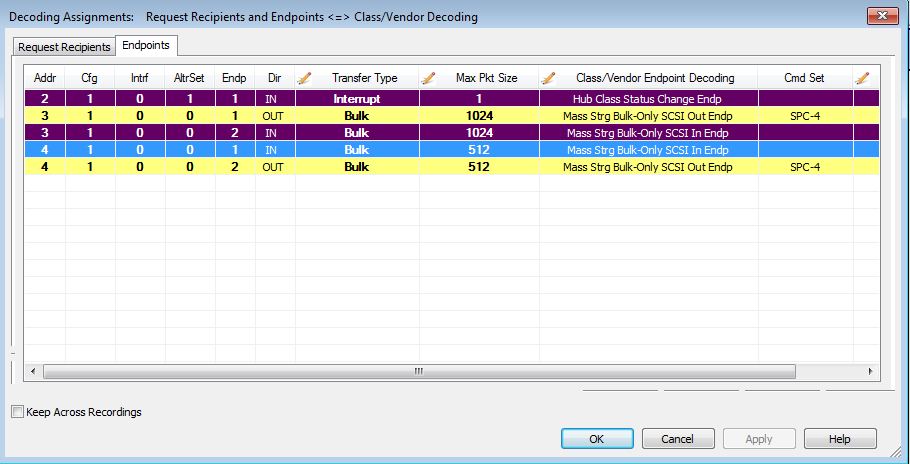
The Endpoint field (Endp) shows all Endpoints found in the trace file.
The display shows the Host, Address, and Direction for the recipient. On the right are the names of Class/Vendor Endpoint Decoding groups currently assigned to endpoints.
If blank, no decoding is assigned for a recipient.
The Transfer Type field shows all transfer types found in the trace file.
Display the Transfer Type drop-down menu.
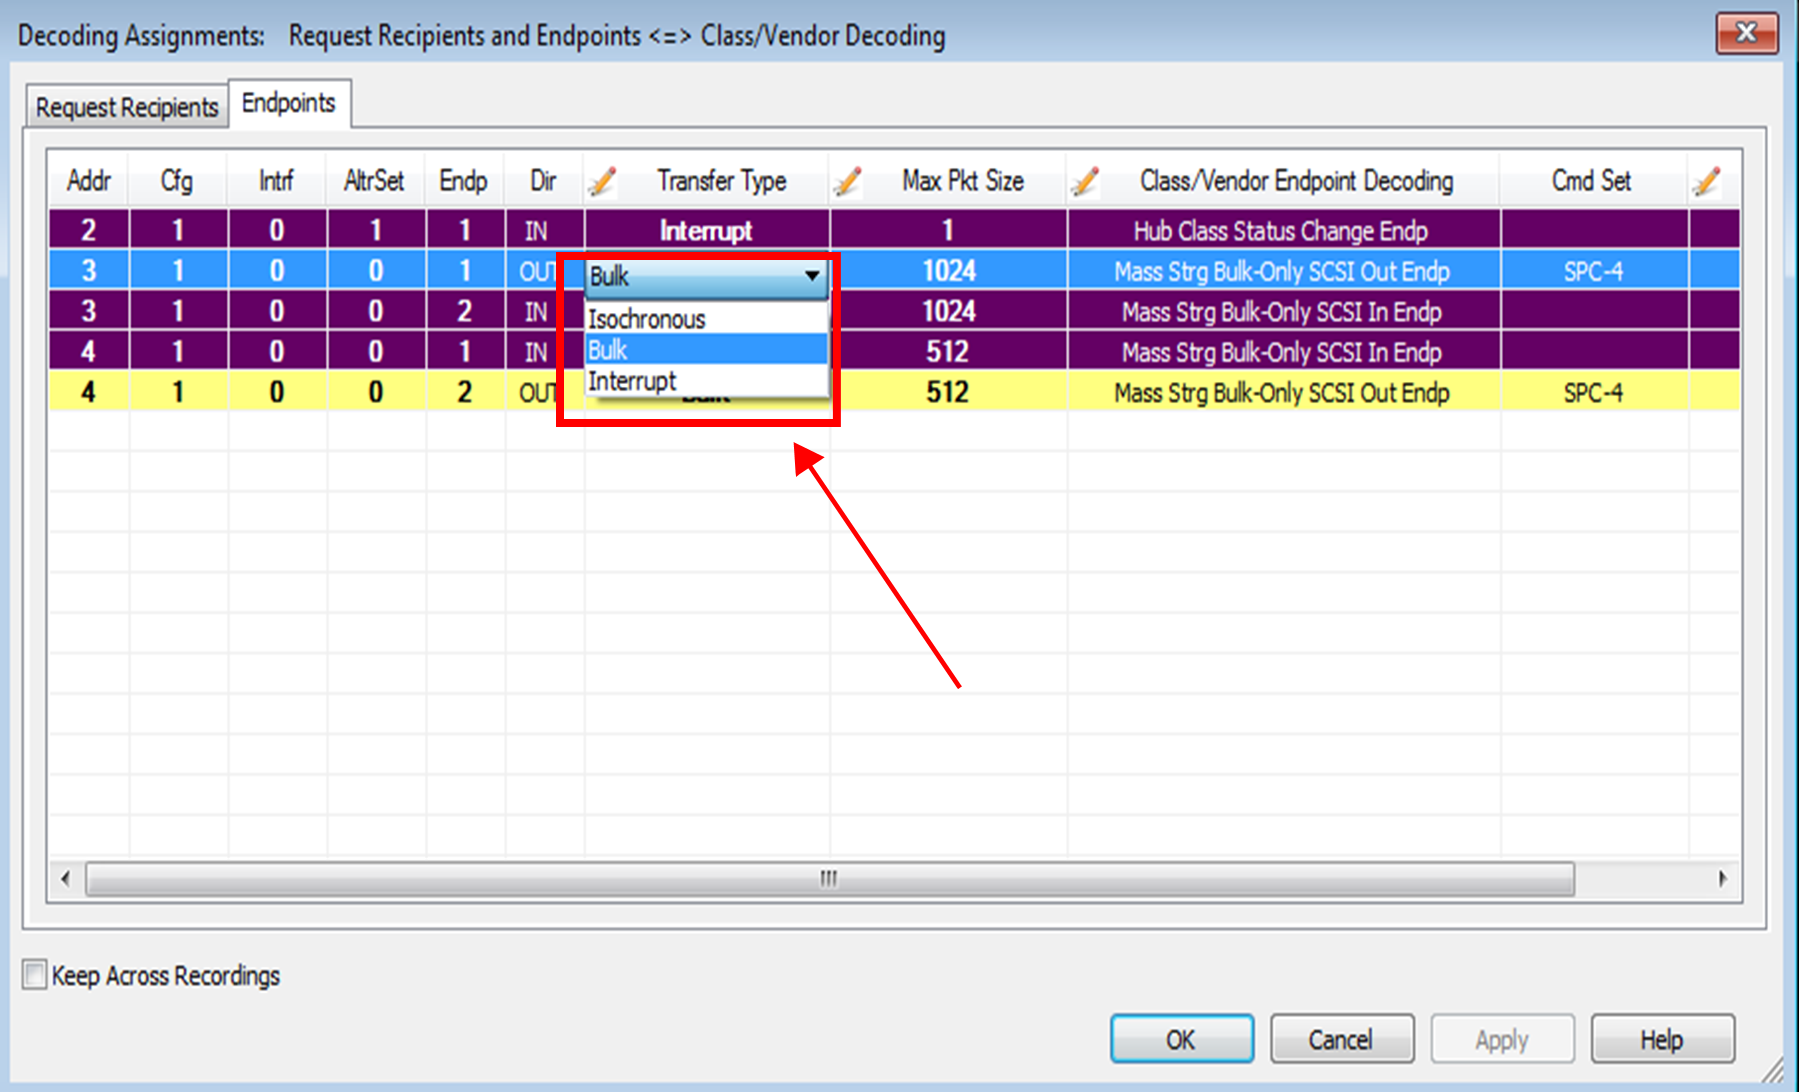
The Transfer Type options for both IN and OUT endpoint are:
-
Isochronous
-
Bulk
-
Interrupt
NOTE: Choosing 1 Tran 1 Xfer speeds up decoding.
Select the transfer Type.
The selections displayed in the Class/Vendor Endpoint Decoding drop-down menu depend on the transfer Type selected.
Enter the size in the Max Pkt. Size field.
Select an endpoint.
Display the Class/Vendor Endpoint Decoding drop-down menu for Isochronous IN or OUT Transfers.
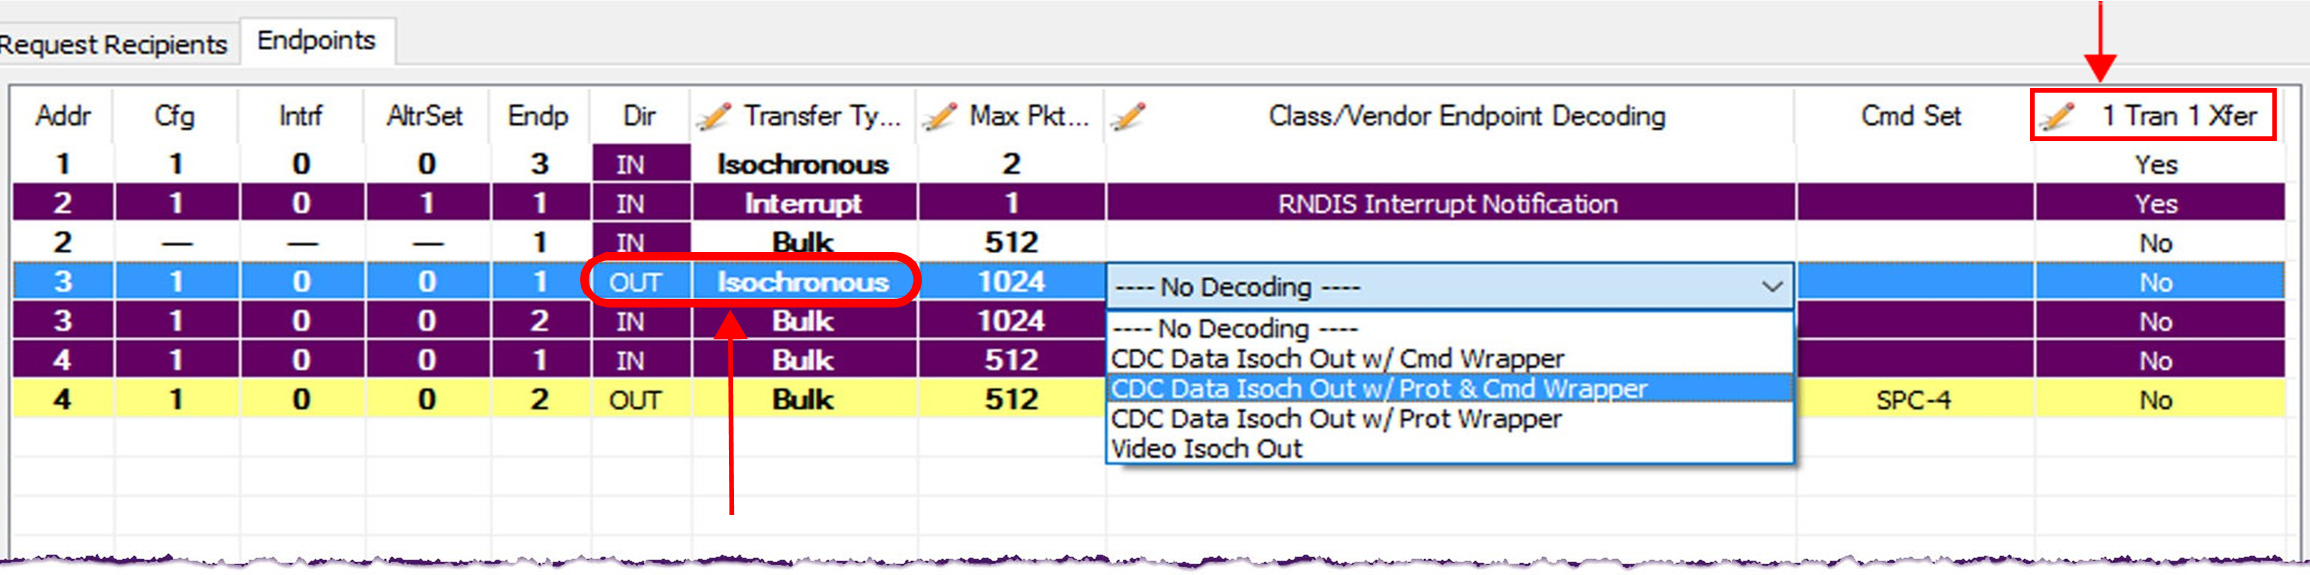
The Isochronous Transfer Type Class/Vendor Endpoint Decoding options for an IN or OUT transfer are:
-
No Decoding
-
CDC Data Isoch Out w/CMD Wrapper
-
CDC Data Isoch Out w/Prot & CMD Wrapper
-
CDC Data Isoch Out w/Prot Wrapper
-
Video Isoch Out
Display the Class/Vendor Endpoint Decoding drop-down menu for Bulk IN or OUT transfers.
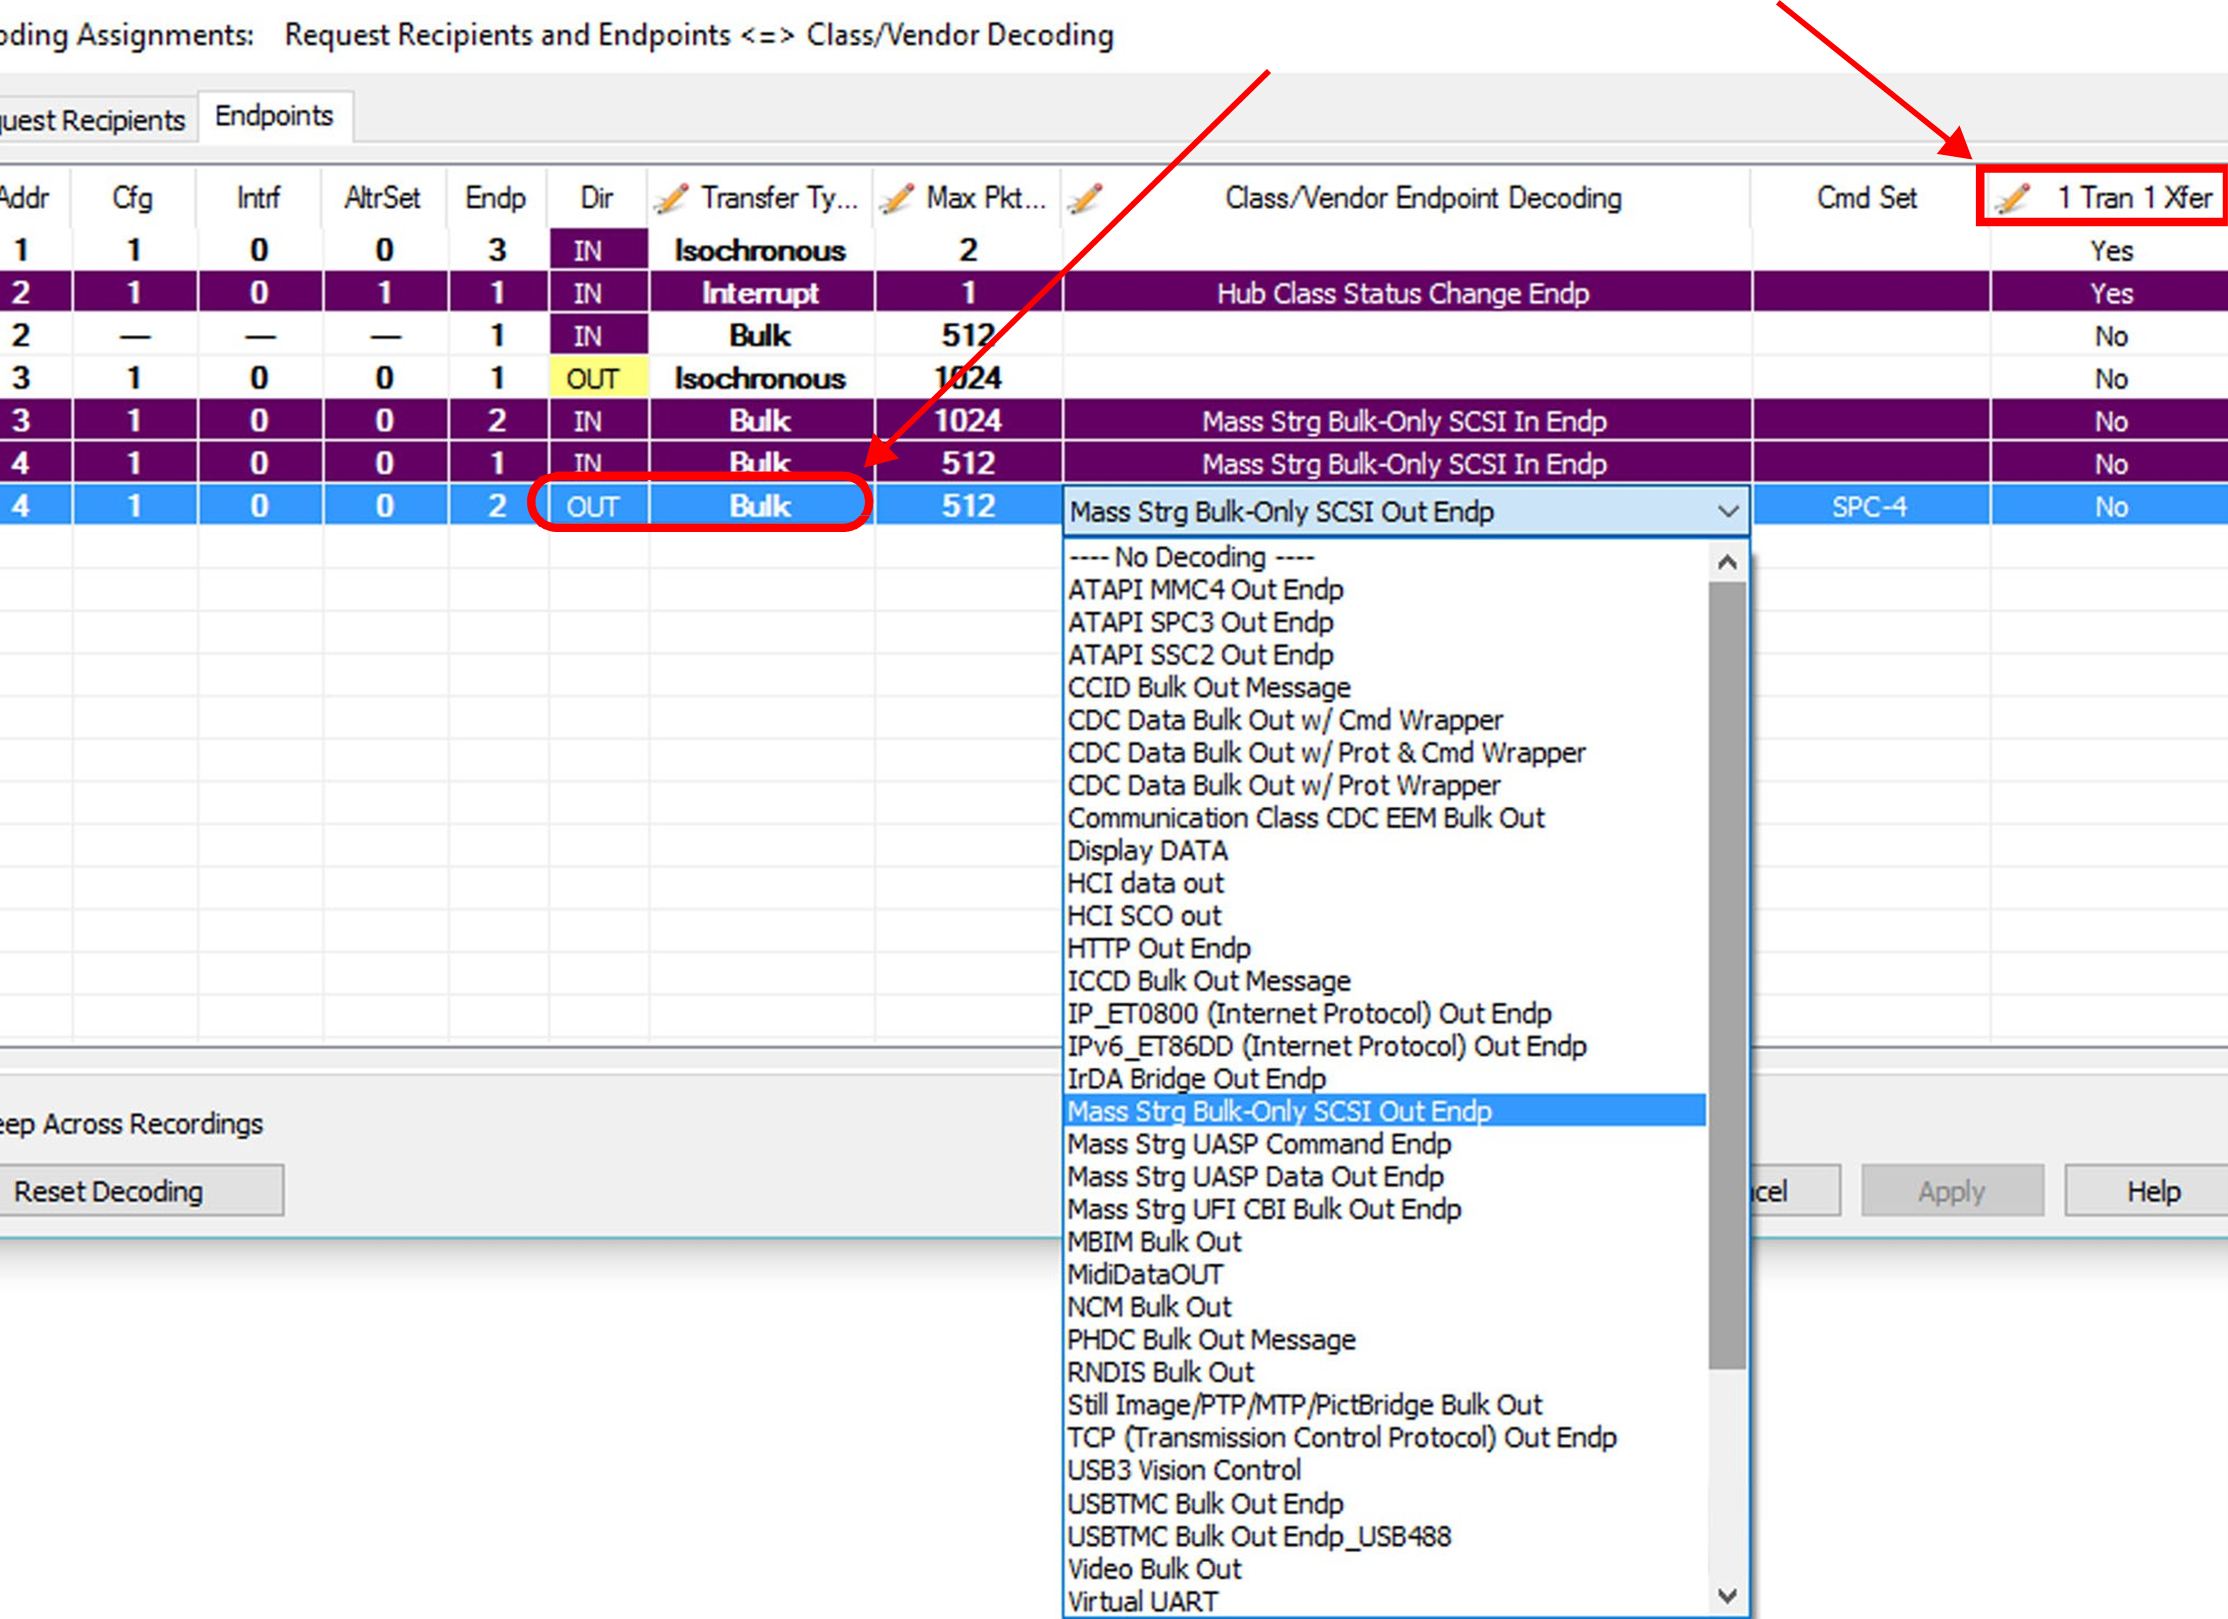
The Class/Vendor Endpoint Decoding options for an IN or OUT transfer for Bulk Transfer Type (as shown above) are:
-
No Decoding
-
ATAPI MMC4 Out Endp
-
ATAPI SPC3 Out Endp
-
ATAPI SSC2 Out Endp
-
CCID Bulk Out Message
-
CDC* Data Bulk Out w/ Cmd Wrapper
-
CDC* Data Bulk Out w/ Prot & Cmd Wrapper
-
CDC* Data Bulk Out w/ Prot Wrapper
-
Communication Class CDC* EEM Bulk Out
-
Display DATA
-
HCI data out
-
HCI SCO out
-
HID Interrupt out Endp
-
HTTP Out Endp
-
ICCD Bulk Out Message
-
IP_ET0800 (Internet Protocol) Out Endp
-
IPv6_ET86DD (Internet Protocol) Out Endp
-
IrDA Bridge Out Endp
-
Mass Strg Bulk-Only SCSI Out Endp
-
Mass Strg UASP Command Endp
-
Mass Strg UASP Data Out Endp
-
Mass Strg UFI CBI Bulk Out Endp
-
MBIM Bulk Out
-
MidiDataOUT
-
NCM Bulk Out
-
PHDC Bulk Out Message
-
RNDIS Bulk Out
-
Still Image/PTP/MTP/PictBridge Bulk Out
-
TCP (Transmission Control Protocol) Out Endp
-
USB3 Vision Control
-
USBTMC Bulk Out Endp
-
USBTMC Bulk Out Endp_USB488
-
Video Bulk Out
-
Virtual UART
*The CDC Decoder includes the ECM class decoding.
The Cmd Set options for an OUT endpoint for Bulk Transfer Type are:
-
SPC-4
-
SBC-3
-
SMC-3
-
SSC-4
-
MMC-6
-
SSC-2
-
SES-2
-
SAT-3
NOTE: The Cmd Set options are only available for the Mass Strg Bulk- Only SCSI Out Endp selection in Class/Vendor Endpoint Decoding.
Display the Class/Vendor Endpoint Decoding drop-down menu for Interrupt IN transfers.
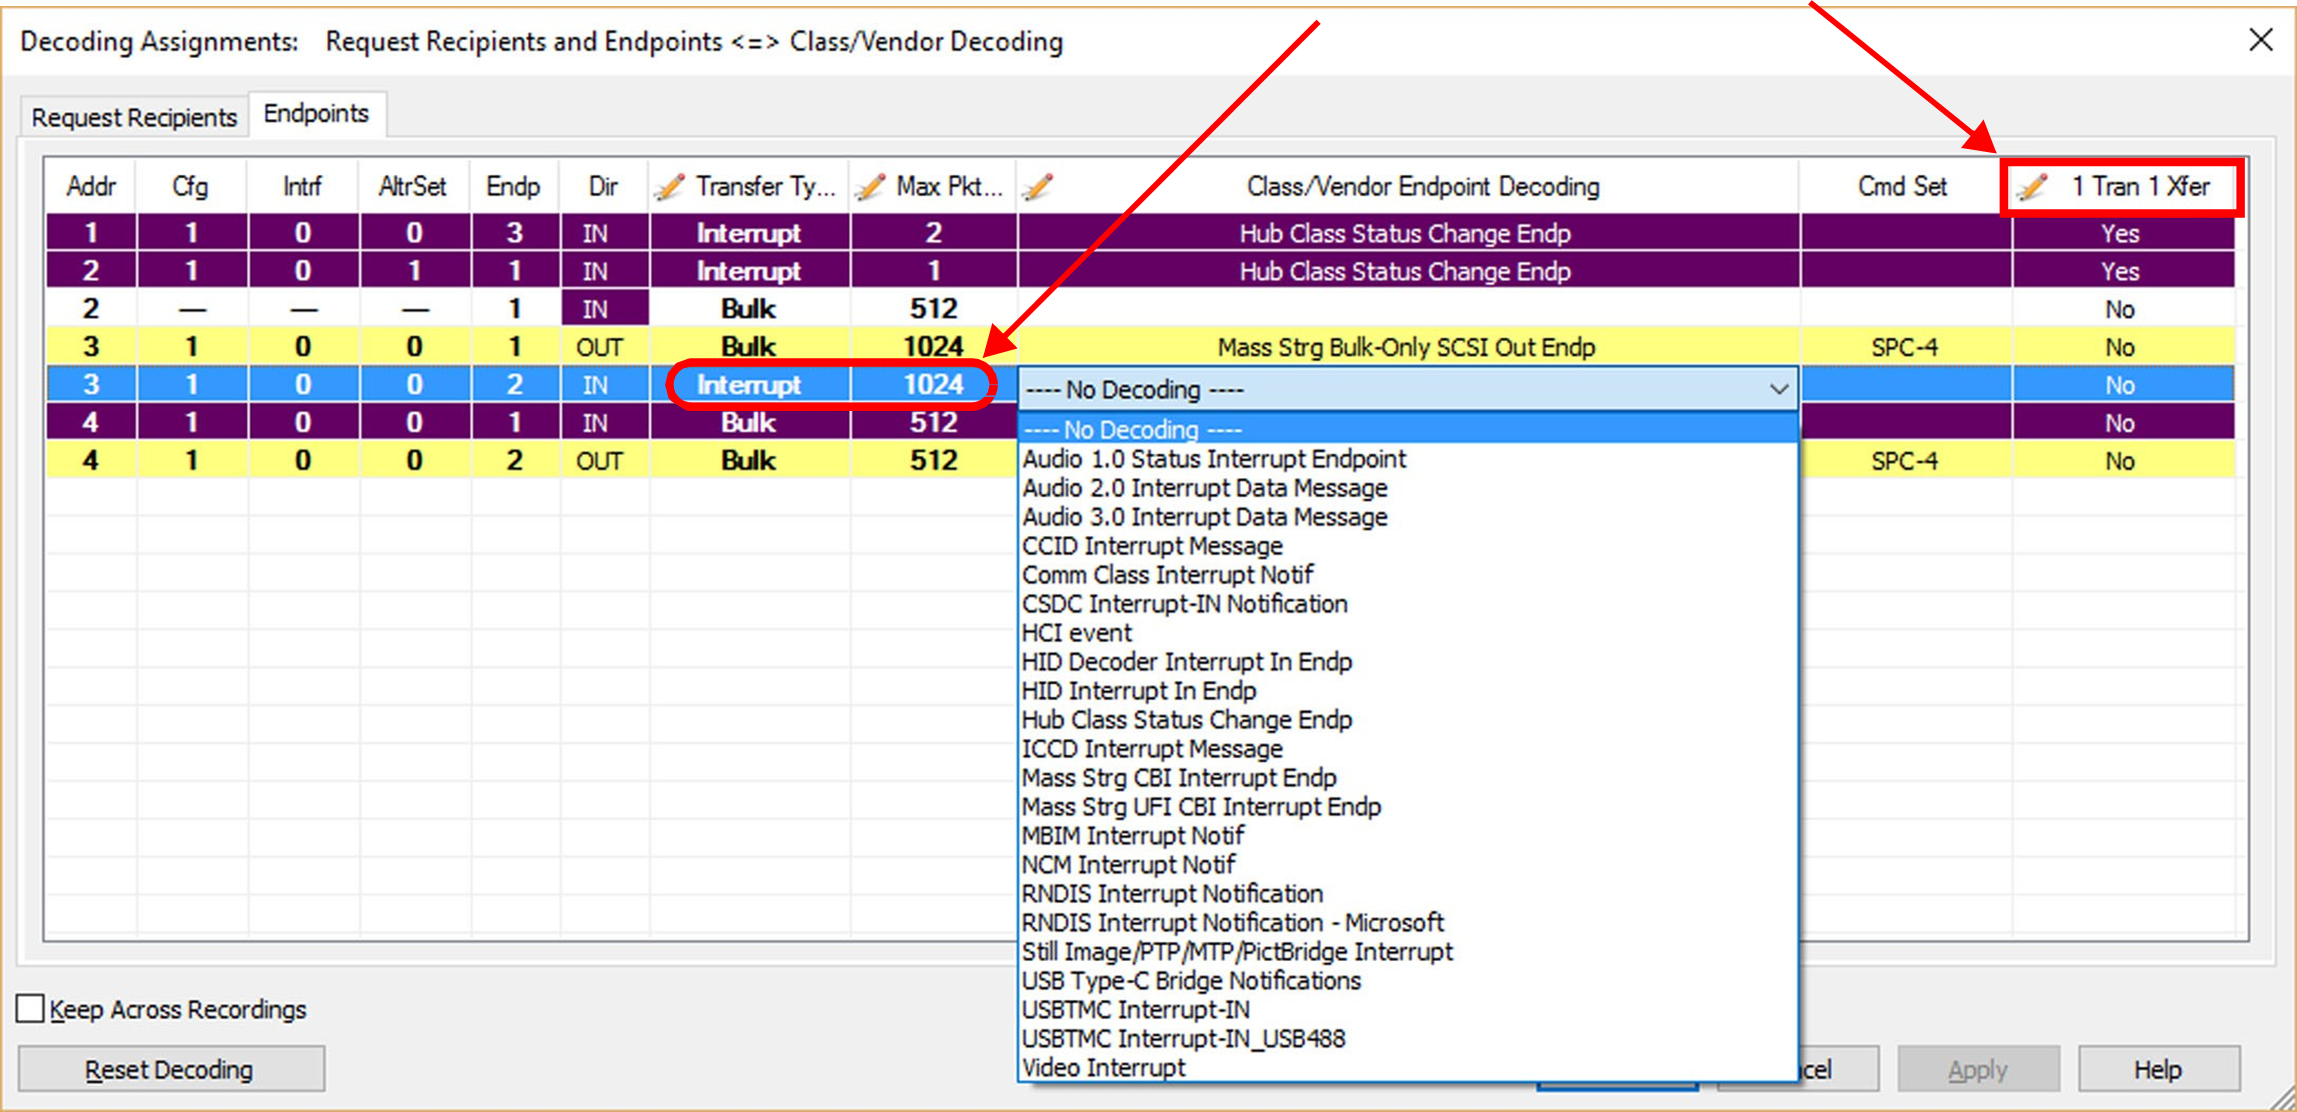
The IN Interrupt Transfer Type options for a Class/Vendor Endpoint Decoding (as shown above) are:
-
No Decoding
-
Audio 1.0 Status Interrupt Endpoint
-
Audio 2.0 Interrupt Data Message
-
Audio 3.0 Interrupt Data Message
-
CCID Interrupt Message
-
Comm Class Interrupt Notif
-
CSDC Interrupt-IN Notification
-
HCI event
-
HID Decoder Interrupt in Endp
-
HID Interrupt in Endp
-
Hub Class Status Change Endp
-
ICCD Interrupt Message
-
Mass Strg CBI Interrupt Endp
-
Mass Strg UFI CBI Interrupt Endp
-
MBIM Interrupt Notif
-
NCM Interrupt Notif
-
RNDIS Interrupt Notification
-
RNDIS Interrupt Notification - Microsoft
-
Still Image/PTP/MTP/PictBridge Interrupt
-
USB Type-C Bridge Notifications
-
USBTMC Interrupt-IN
-
USBTMC Interrupt-IN_USB488
-
Video Interrupt
Display the Class/Vendor Endpoint Decoding drop-down menu for Interrupt OUT Transfers.
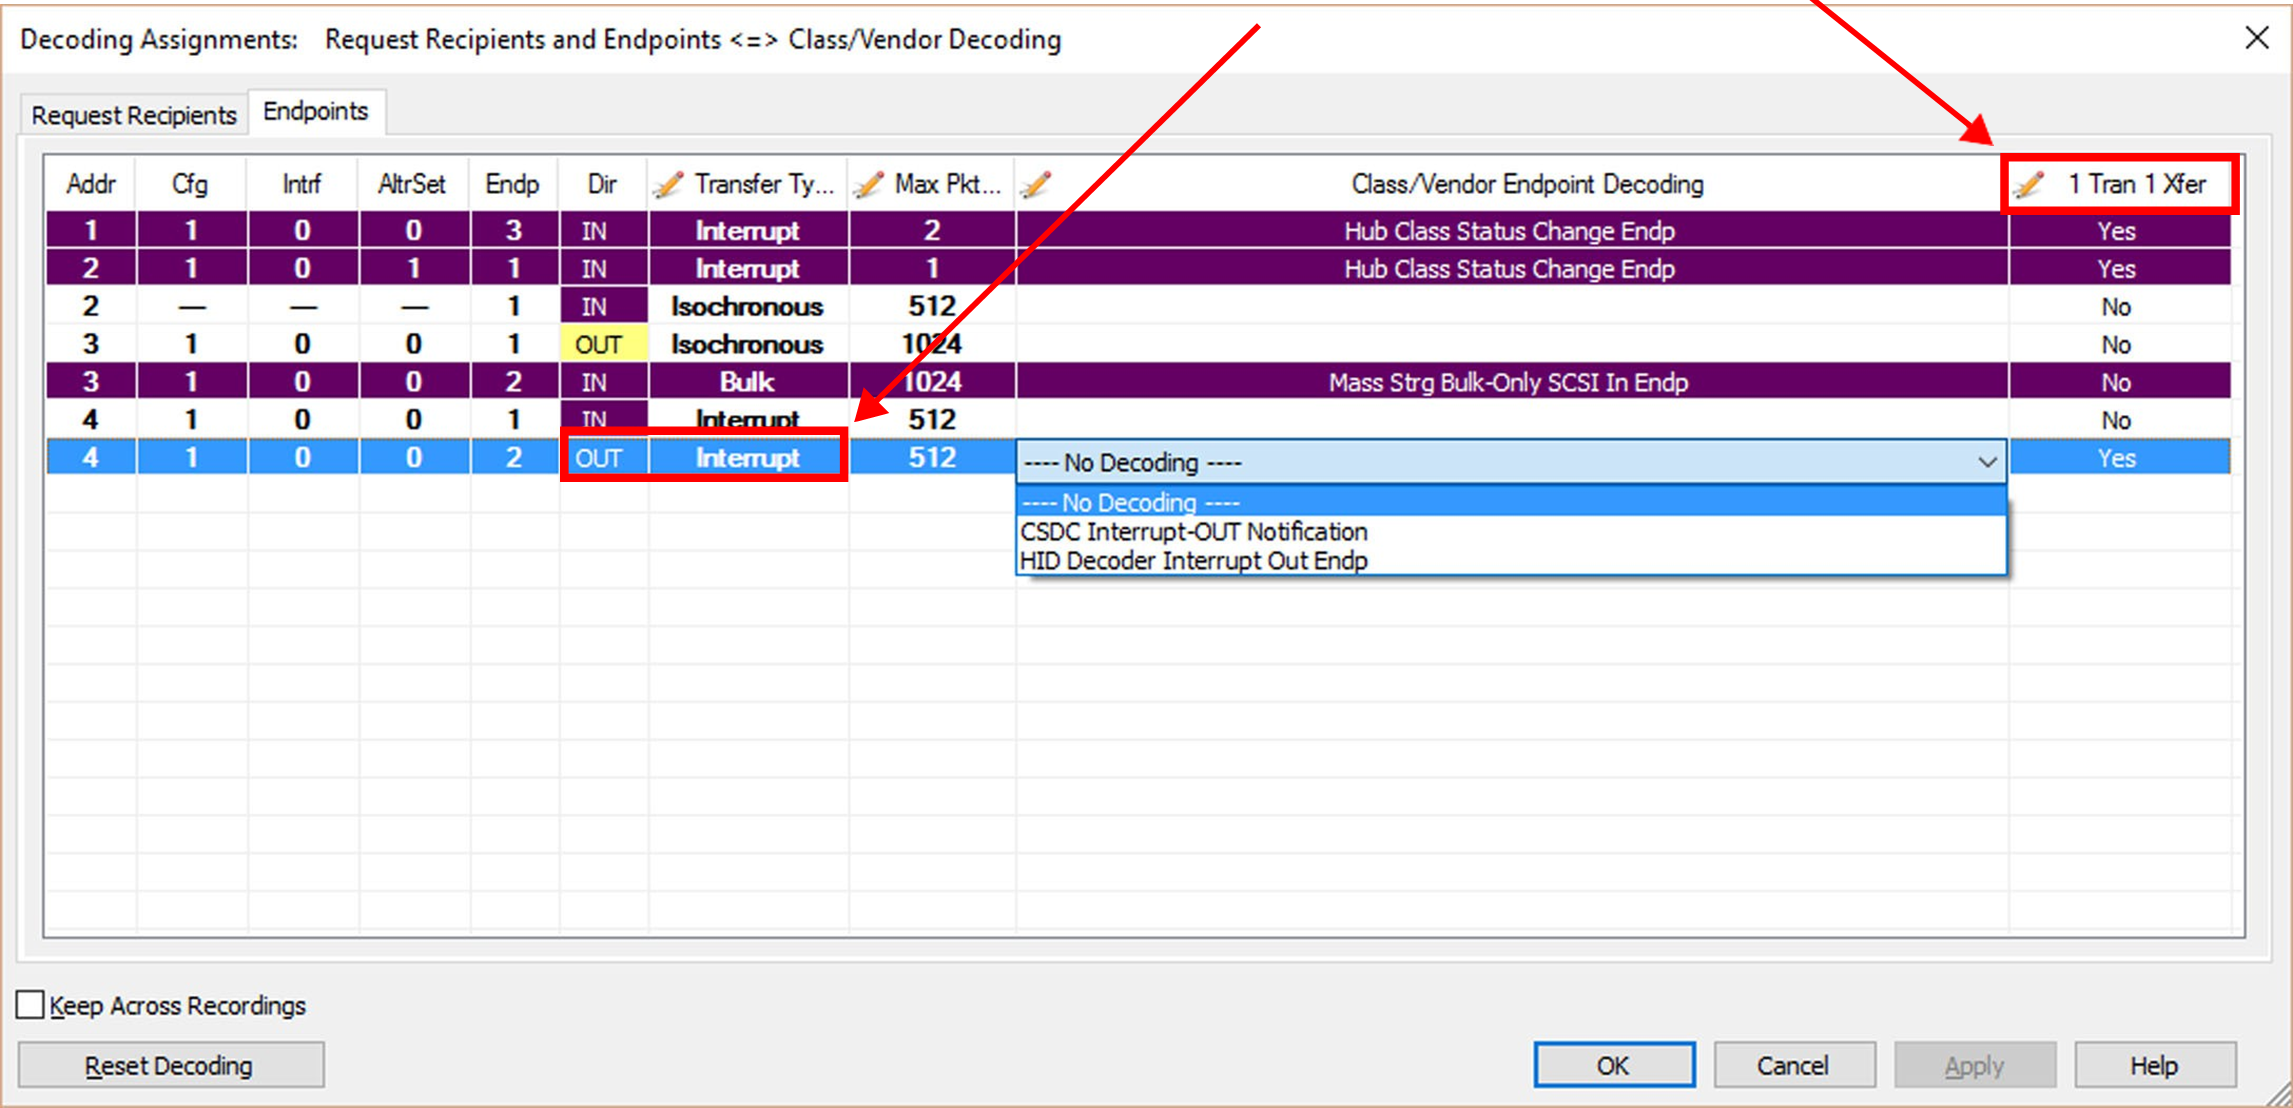
The OUT Interrupt Transfer Type options for a Class/Vendor Endpoint Decoding (as shown above) are:
-
No Decoding
-
CSDC Interrupt-OUT Notification
-
HID Decoder Interrupt Out Endp
For Decoding, do one of the following:
-
Select the type of Decoding.
OR
-
Select No Decoding, if you do not want any specific Decoding.
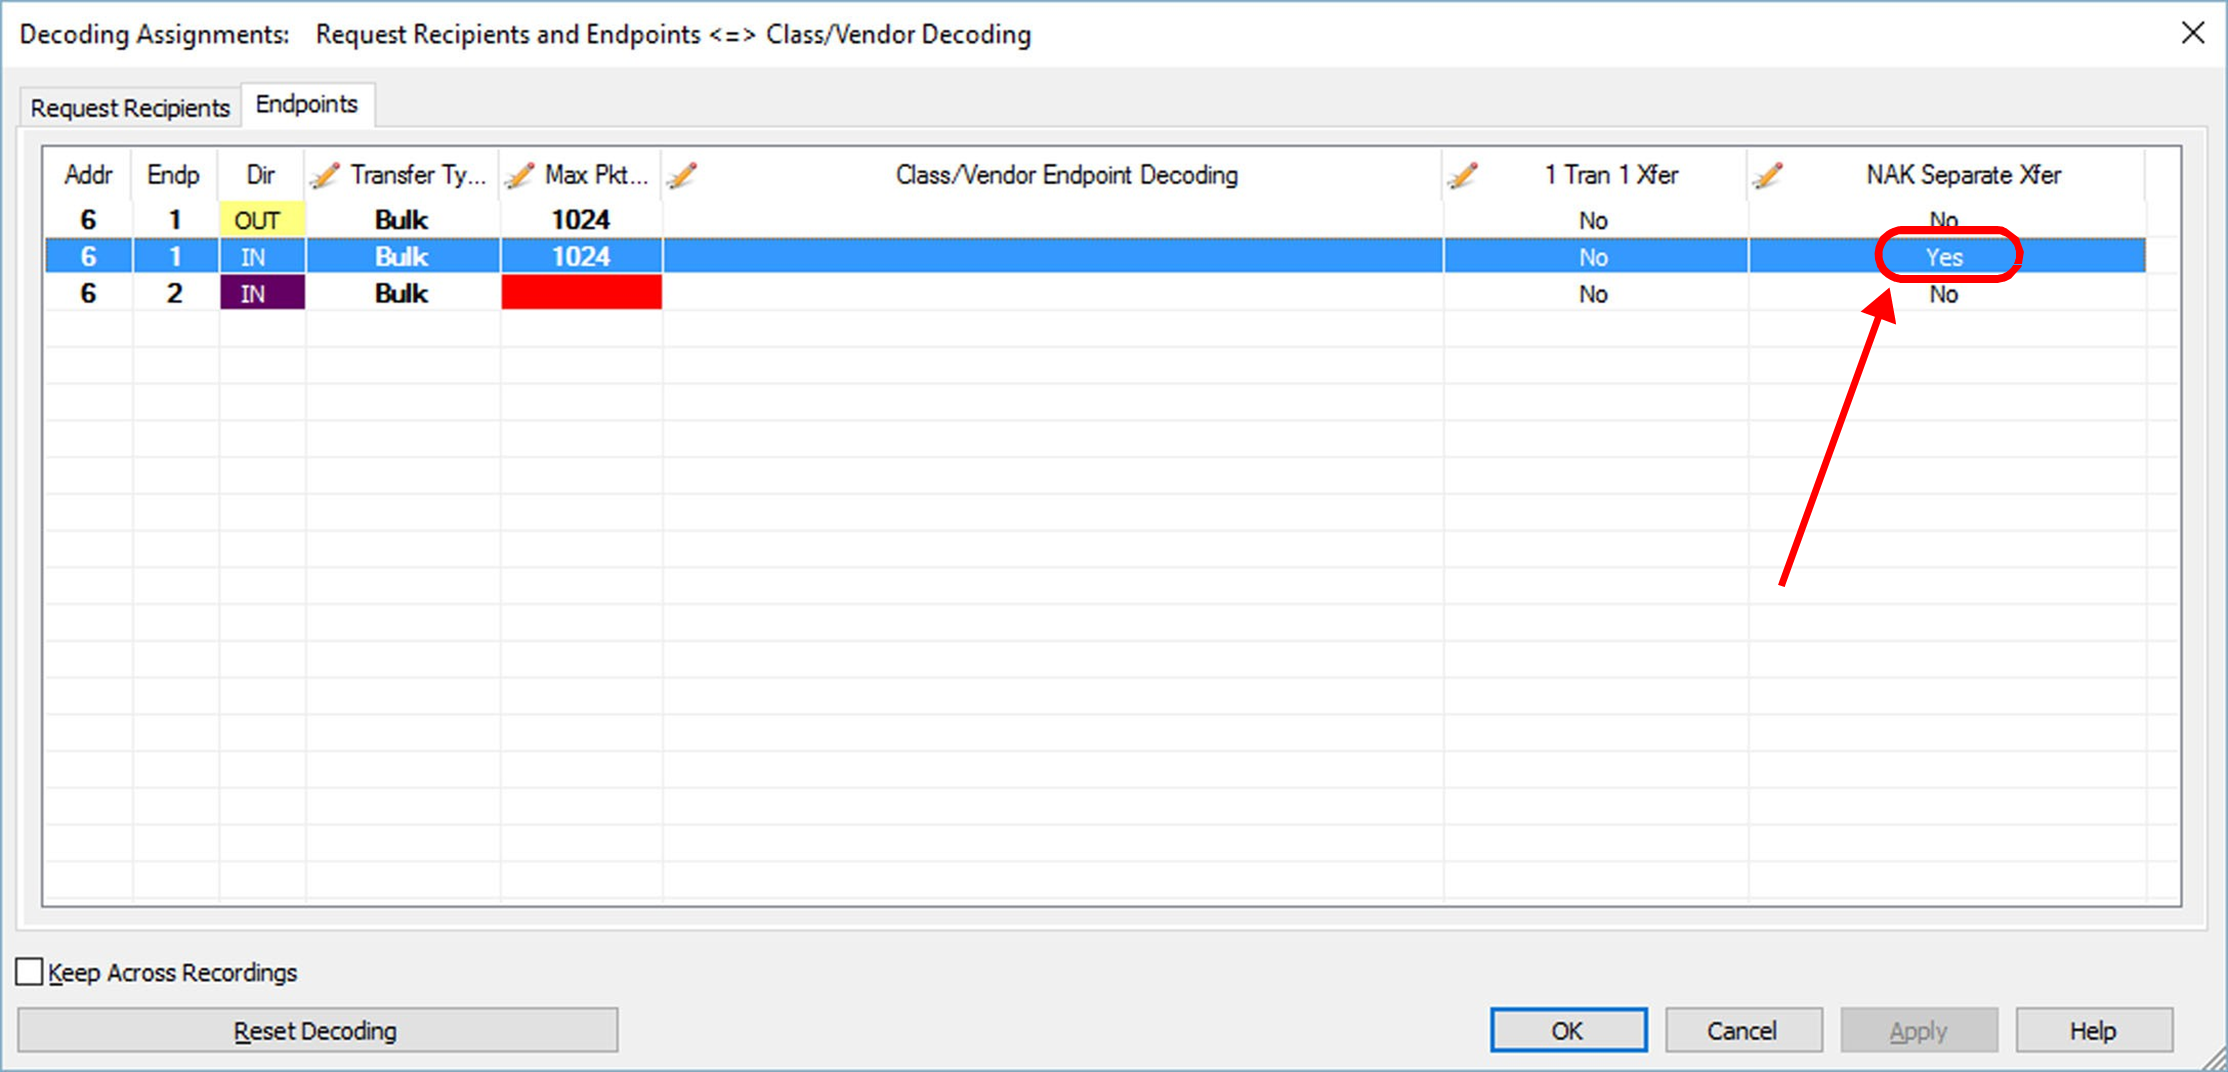
The USB Protocol Suite decoding engine uses different rules like “Short Packet” (packets with length less than Max packet size), “Transferring required data by endpoint” to collect transactions under transfers. However, in some cases (like Interrupt or Isochronous transfers), transfer collection uses a simple rule of “1 transaction, 1 transfer”.
When this option is set as “yes”, any transaction at the selected endpoint will make a transfer level packet that could be decoded by transfer level scripts. In particular, streams of Isochronous data can be decoded much more quickly if this rule is selected.
To select this model of transfer, use the 1 Tran 1 Xfer column to select it.
Repeat the previous steps for any additional endpoints you would like to map.
To retain a mapping from Trace to Trace during an application session, check the box for Keep Across Recordings.
Click OK.
Selecting the Number of Transactions per Transfer
From the Decoding Settings window:
-
Select the Endpoints tab.
-
Select one of the following:
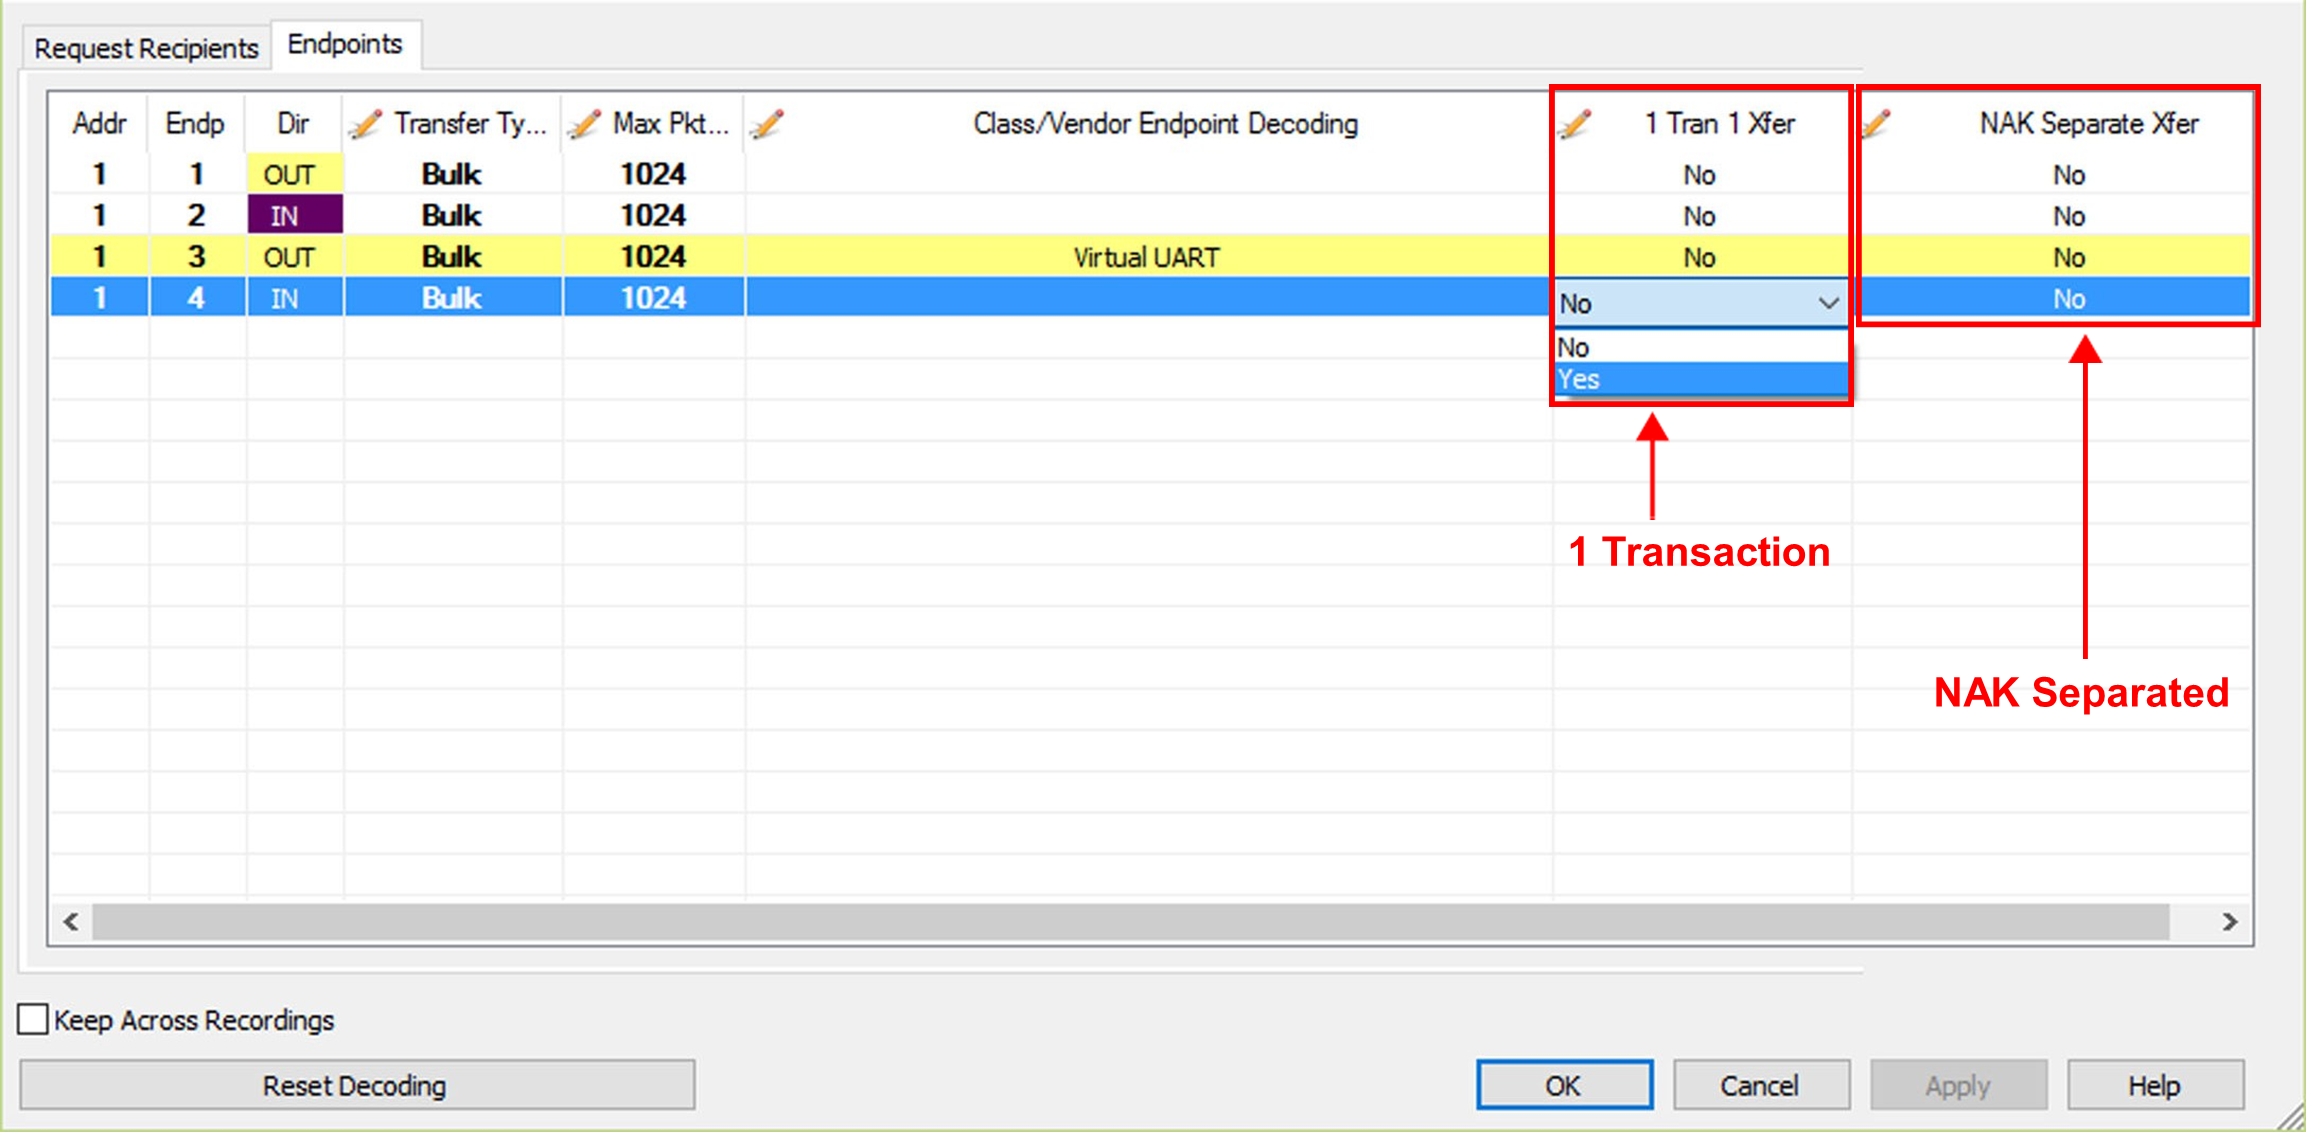
Single Transaction per Transfer
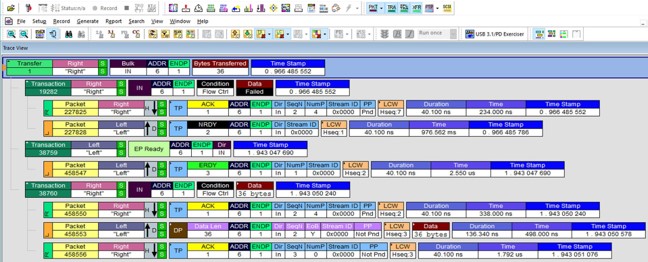
If you select 1 Transaction per 1 Transfer, the data traffic in the Trace View will change from several transactions per transfer to one transaction per transfer.
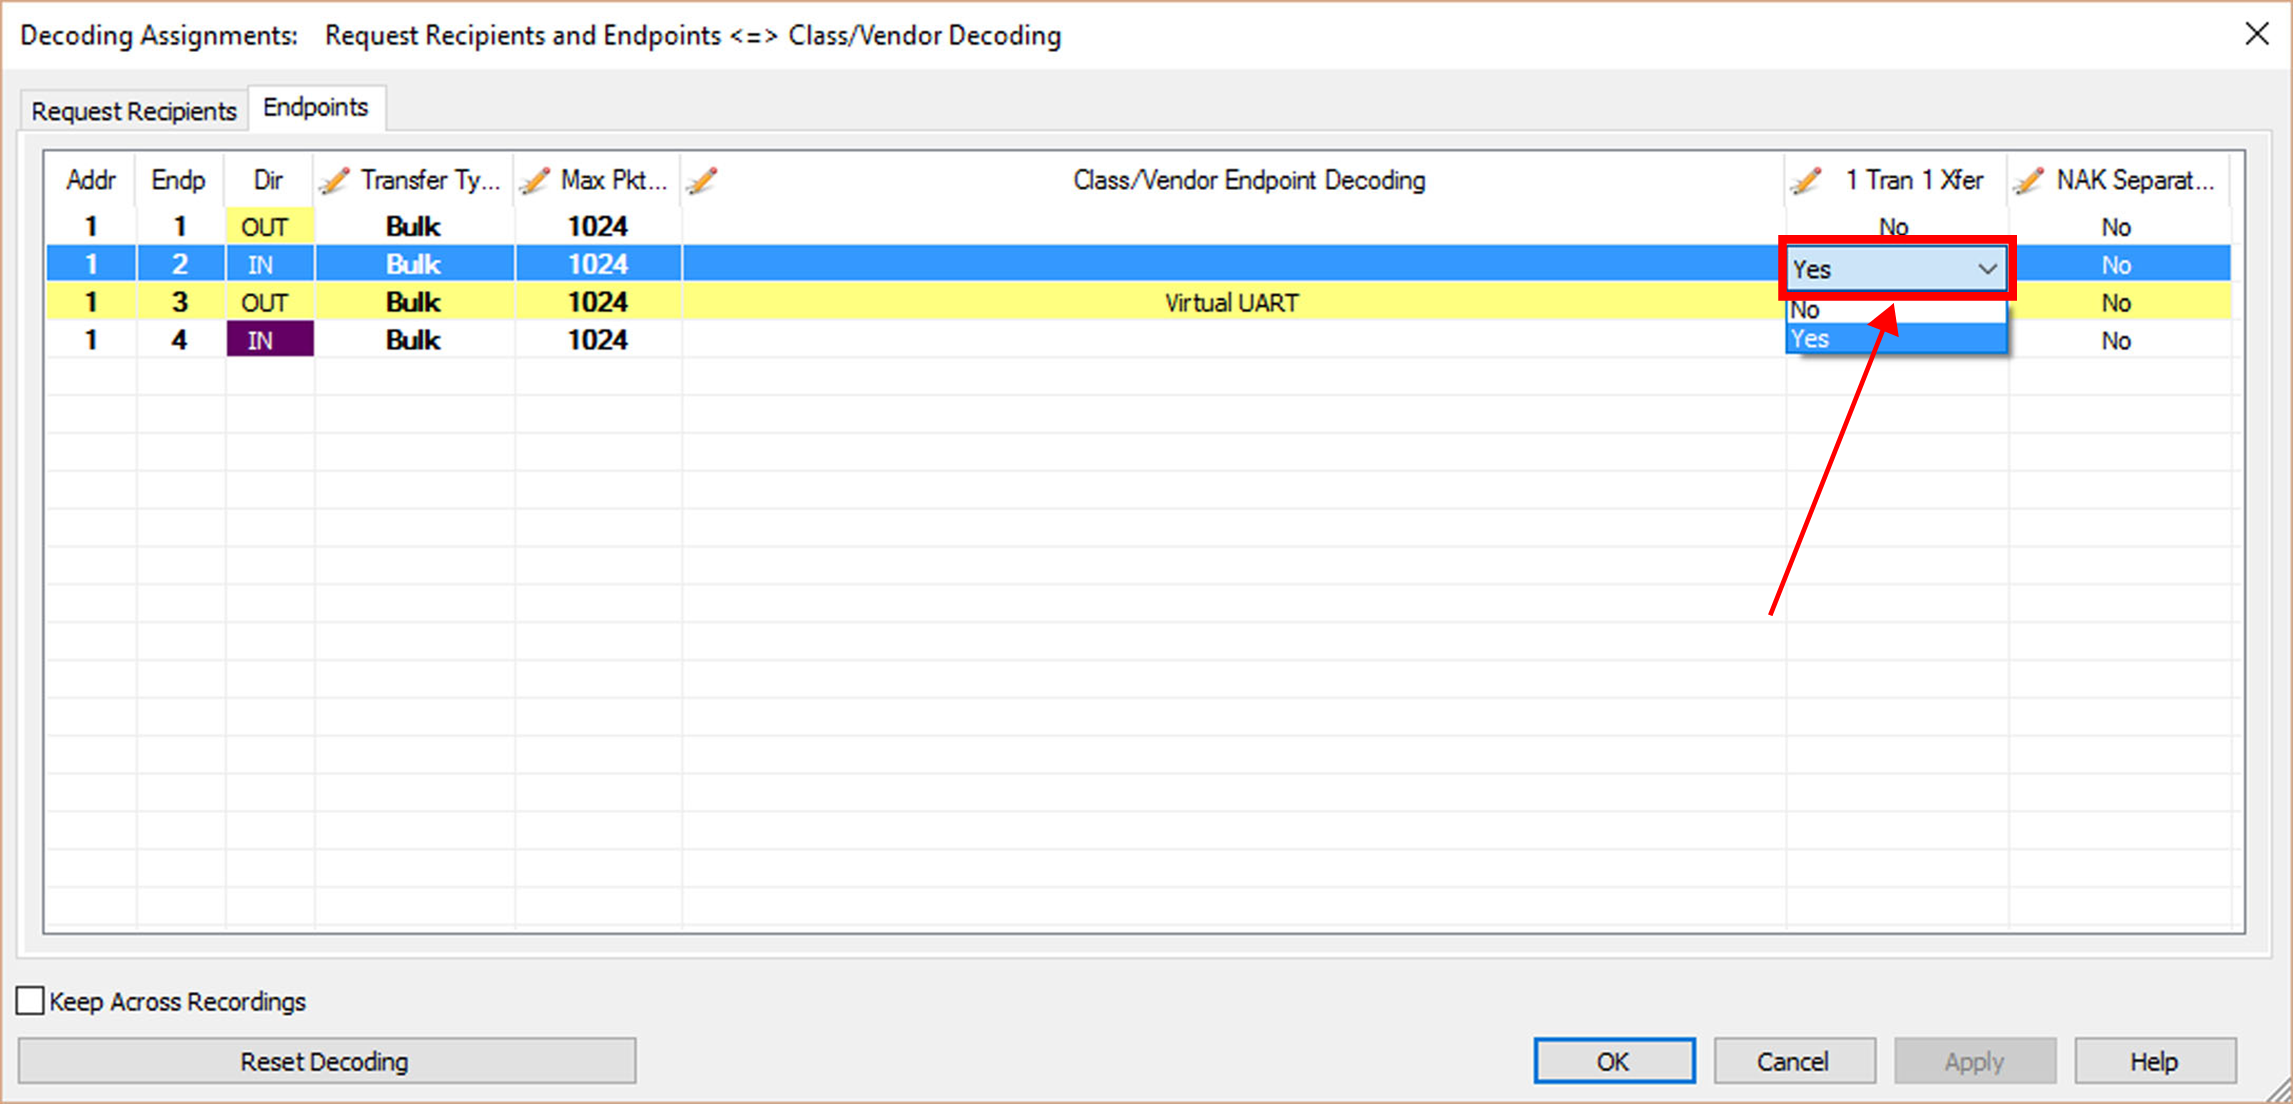
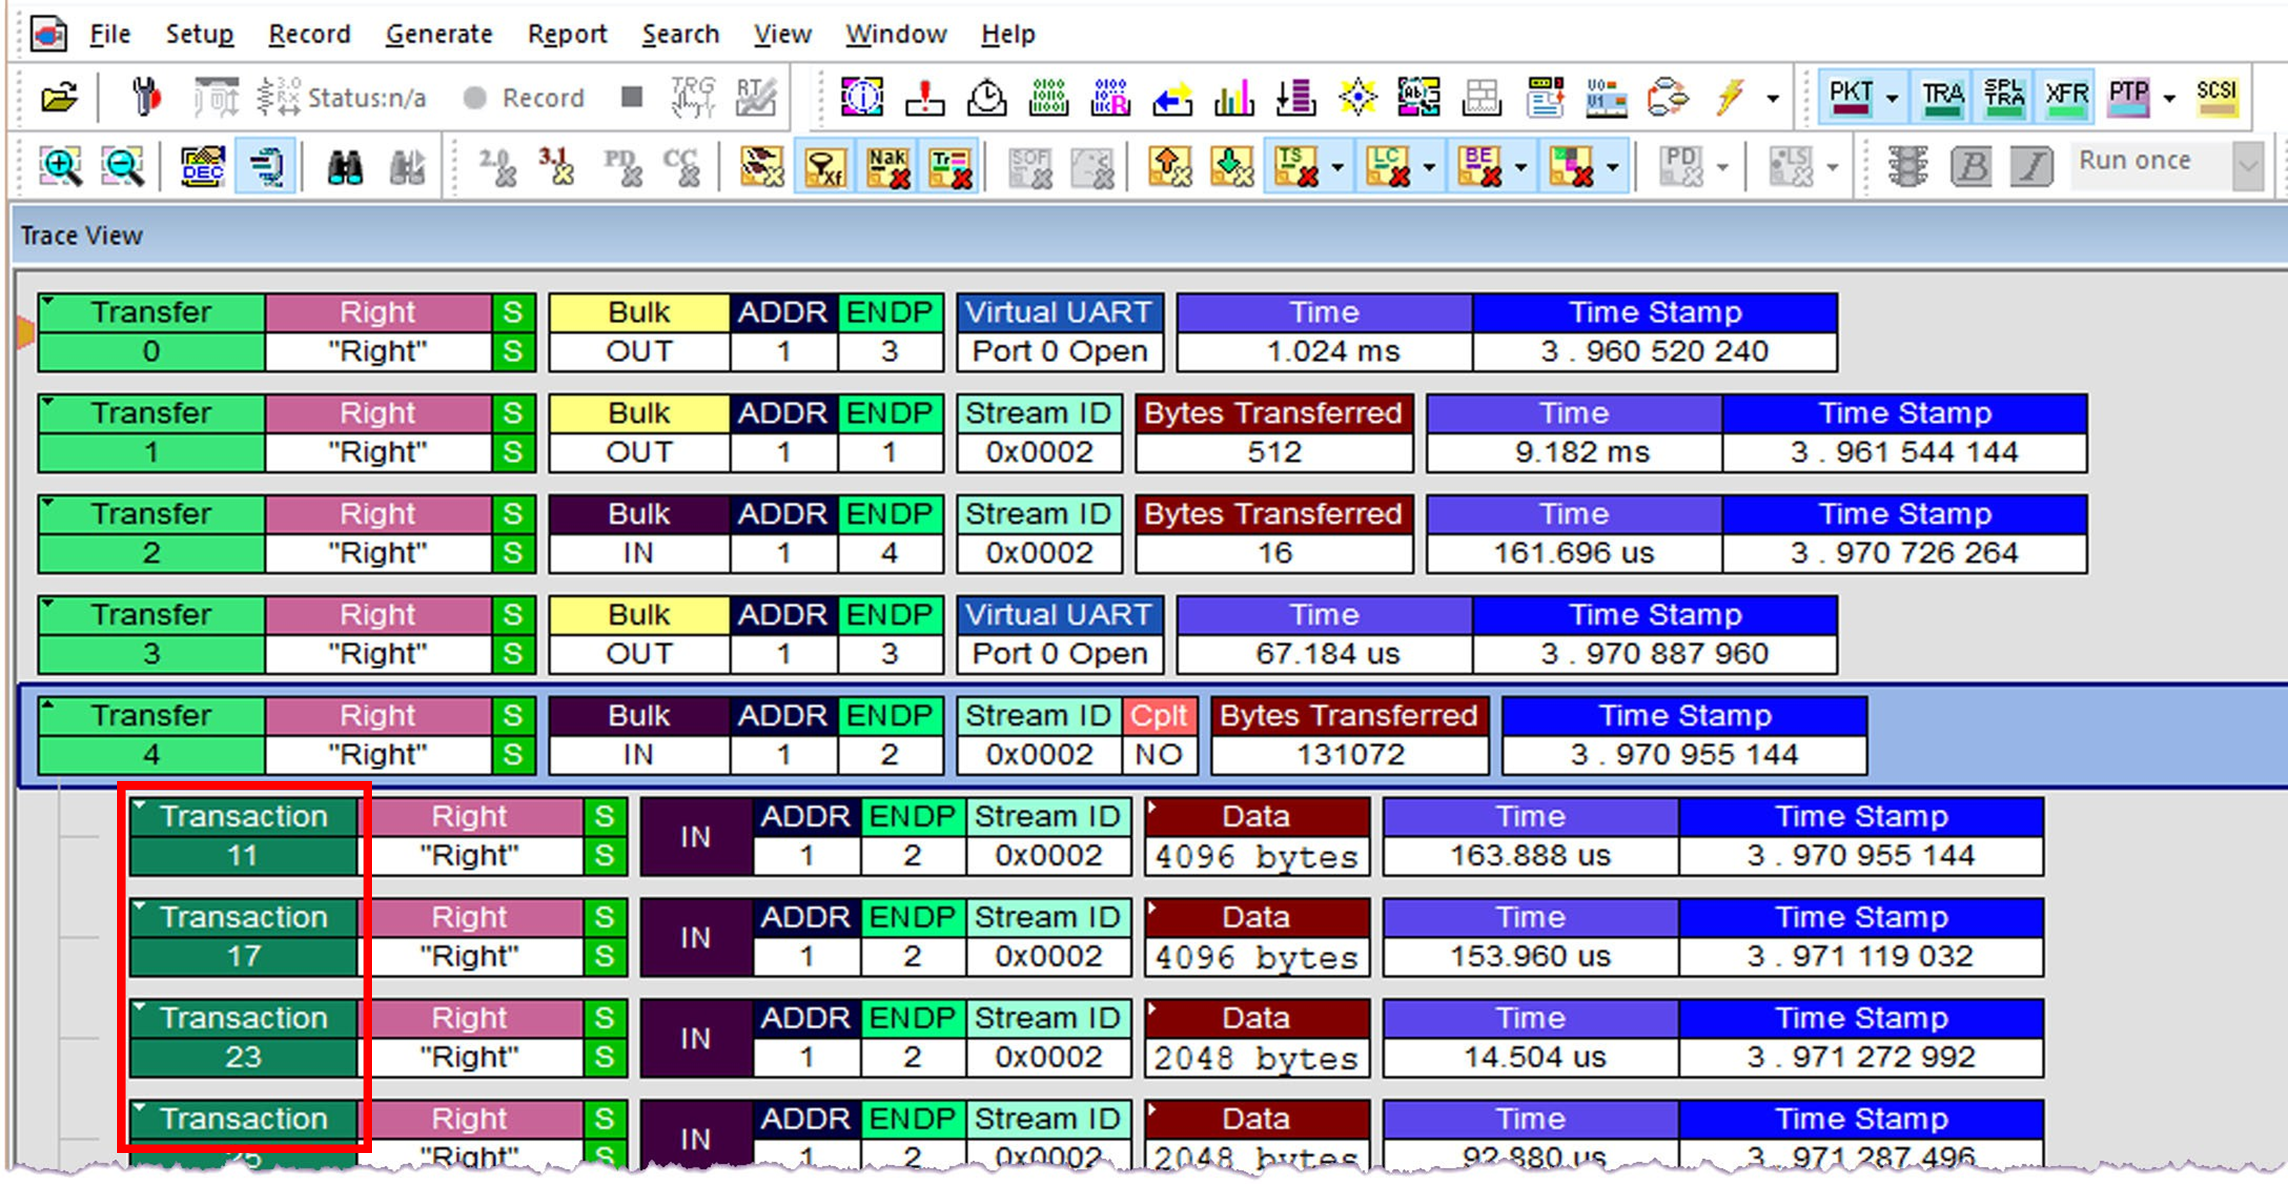
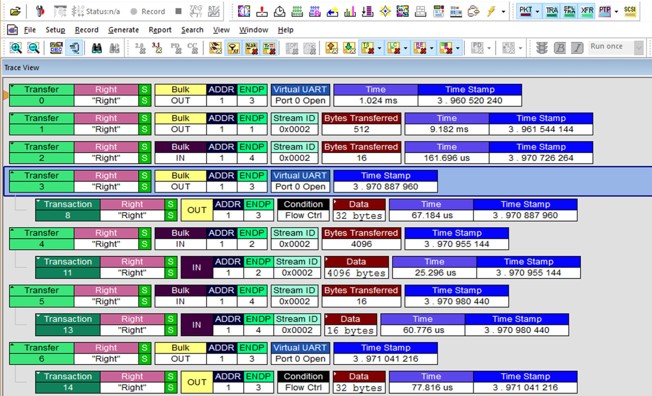
NAK Separated Transfer
If you select NAK Separate Transfer, the Trace Data Traffic will be converted from several (e.g., 3) Transactions per Transfer to NAK Separate Transfer.